Proxmox Replication Configuration Beginners Guide
Highlights
- In the event the source virtual host goes down for whatever reason, the replication task has created the virtual machine or container on the second node and you can start up the virtual resource on the second node.
- As you can see below, you can also set a rate limit on the replication task in addition to the other configuration options to minimize impact on the public network.
- Replication has long been a helpful element of a successful disaster recovery strategy since it duplicates your virtual disks from a source host to a target.
Proxmox has some really great disaster recovery tools built into the solution, without any add-ons needed or licensing. For instance, it includes a replication feature that allows you to replicate VMs stored on local ZFS storage, to another target node, without shared storage. Let’s look at Proxmox replication and see what it is and how it is configured.
Table of contents
What is Proxmox Replication?
Proxmox replication facilitates the duplication of VM data across multiple nodes within a cluster. This process is integral to maintaining data integrity and ensuring that services remain available even in the event of a node failure.
Why is replication helpful?
Replication has long been a helpful element of a successful disaster recovery strategy since it duplicates your virtual disks from a source host to a target. In the event the source virtual host goes down for whatever reason, the replication task has created the virtual machine or container on the second node and you can start up the virtual resource on the second node.
Advantages of Proxmox replication
It also provides the following advantages for system administrators building their virtualization solution on top of Proxmox:
- Data Security: It bolsters data protection by creating additional copies of critical VM data across multiple nodes.
- High Availability: It helps to make sure in the event of a hardware failure, other nodes can immediately take over critical workloads for system uptime
- Scalability: Facilitates easy scaling of services and data across additional nodes without significant downtime.
Prerequisites for Proxmox Replication task
Proxmox replication is configured based on several key prerequisites:
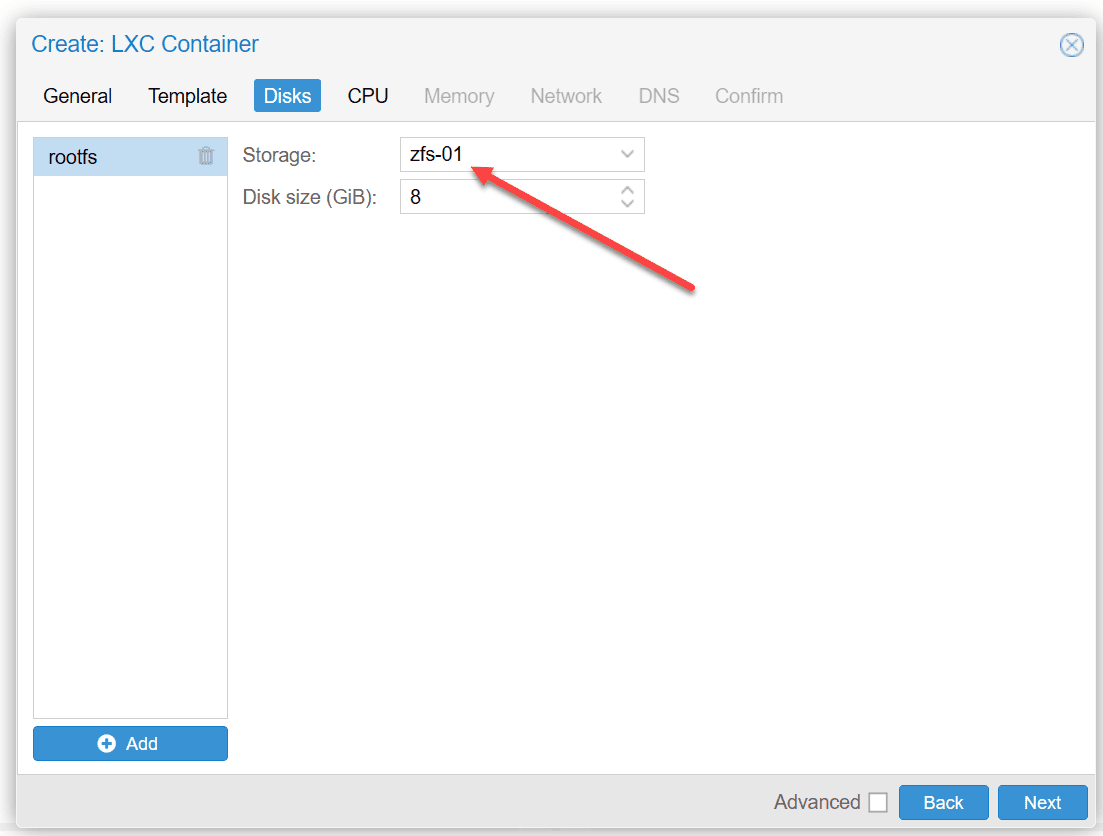
ZFS Storage
ZFS storage is known for the built-in data protection capabilities that you can take advantage of, nicluding block-level data replication, which is more frequent and accurate than file-level replication, ensuring that all replicated data remains consistent and up-to-date across different storage media.
Two Proxmox VE Servers
You can’t replicate your Proxmox VMs to the same node. You need at least two Proxmox nodes when you go to configure the Proxmox replication task. The replication task will replicate the underlying VM storage from the source node to a different node.
You also can’t choose the same storage. You need to have a different storage location you can target with the replication task.
Access to the command line or Proxmox web interface
To set up a replication task in Proxmox, administrators can use the command line tool to specify the source VM, target node, and replication schedule. They can also use the web interface as we will demonstrate below.
Configuring Proxmox Replication
Note the following overview of steps to create a Proxmox replication task:
Step-by-Step Configuration
- Select Virtual Machines: Choose which VMs need replication. You choose the VM based on the ID of the virtual machine.
- Determine the Target Node: Assign a secondary node where the VM data will be replicated. This node will be the backup in case the primary node fails.
- Define Replication Schedules: Using the following command, schedule how often the VM data should replicate to ensure minimal data loss:
replicate --vmid --target-node --schedule. - Monitor and Adjust: Continuously monitor the replication process to ensure optimal performance. Adjust the replication parameters as needed based on system load and network capacity.
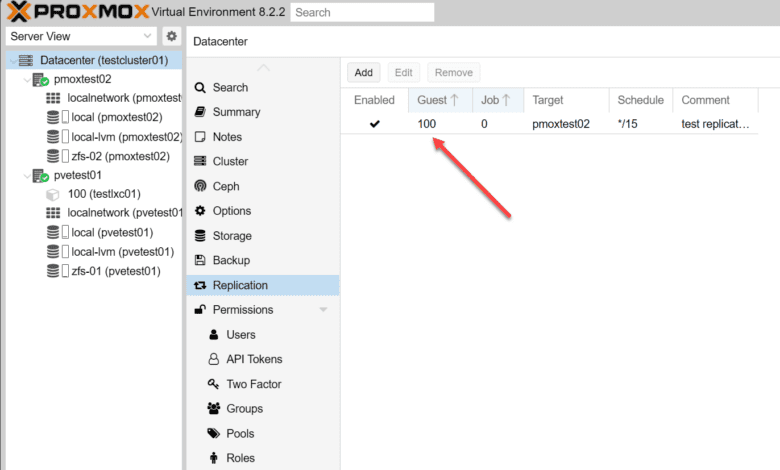
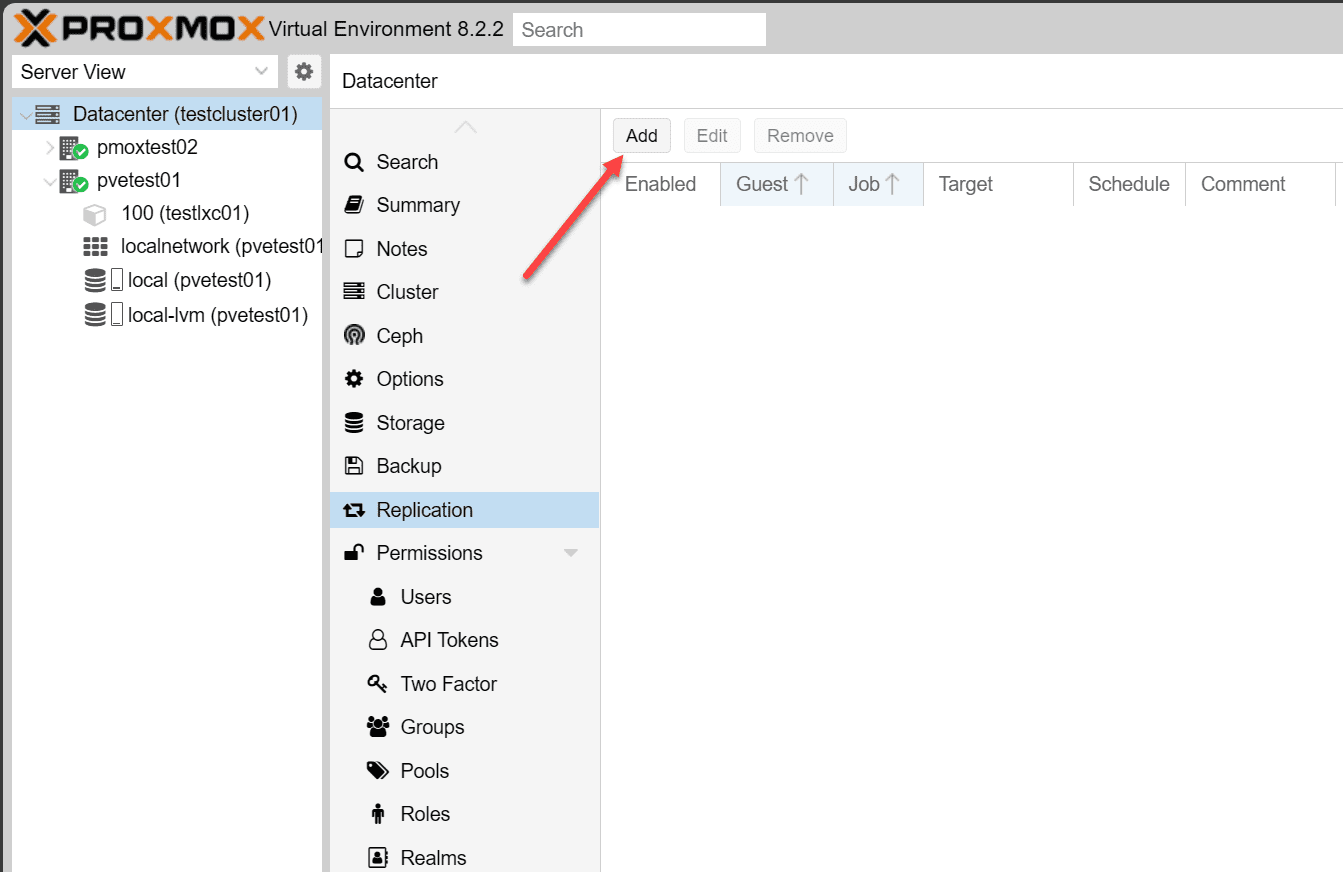
To begin adding the replication task in Proxmox, navigate to Datacenter > Replication > Add.
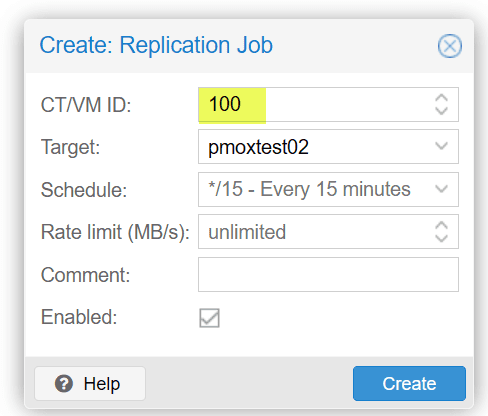
Select the virtual machine or LXC container ID you want to replicate:
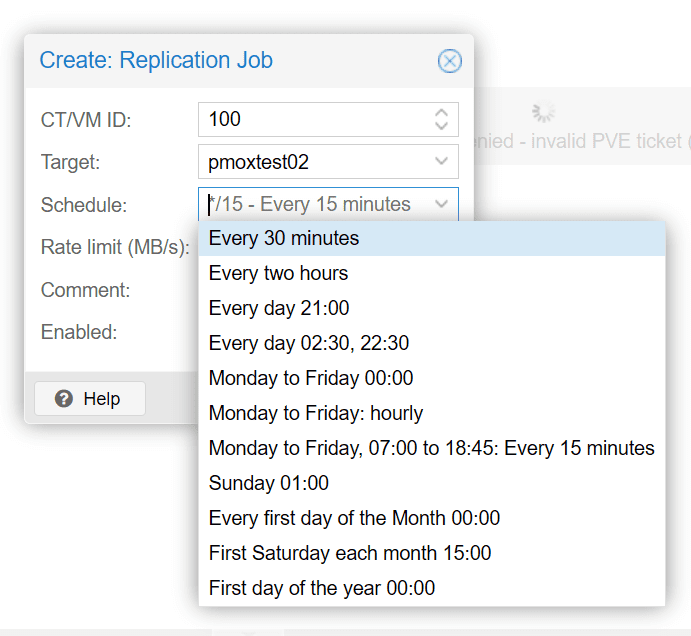
Under the schedule drop down list, you will see the various options you can choose for scheduling the replication task to start automatically.
As you can see below, you can also set a rate limit on the replication task in addition to the other configuration options to minimize impact on the public network.
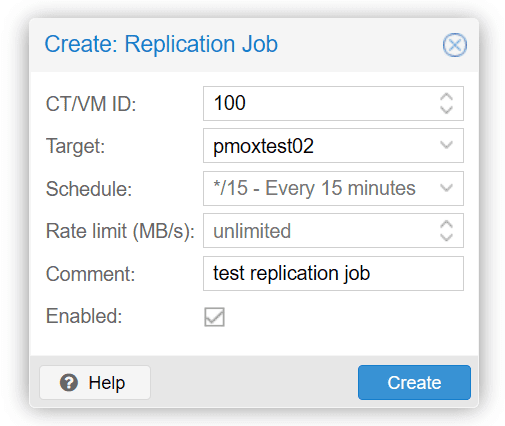
A replication job is identified by a cluster-wide unique ID. This ID is composed of the VMID in addition to a job number. This ID must only be specified manually if the CLI tool is used.

Troubleshooting the Proxmox Replication task
While Proxmox replication is powerful, you may run into the need to troubleshoot when it doesn’t work as expected
- Managing Network Load: Network resources are saturated. The Proxmox replication task requires a lot of bandwidth for replication. If the network becomes saturated due to Proxmox replication, setting rate limits and scheduling replications during low-traffic periods can help minimize the impact.
- At least two nodes required: If you get an error about at least two nodes being needed for Proxmox replication, you most likely don’t have more than one node added to your Proxmox data center.
- Optimizing Storage Usage: Continuous replication can lead to using up available storage. Regular audits and alerting are necessary to manage storage capacity effectively.
- VM storage is not enabled for replication: You may get an error similar to the “VM storage is not enabled” for replication. This type of error generally points to an issue with ZFS not being provisioned or the VM storage resides on local LVM storage, instead of ZFS.
Next steps
The next steps when you want to get a feel for Proxmox replication is to first make sure you have the prerequisites met:
- Make sure you have ZFS storage provisioned and you have at least two Proxmox nodes
- Make sure you have good network connectivity between your source Proxmox host and the target Proxmox host for replication.
- Verify you have the VM ID or LXC container ID ready for creating the Proxmox replication task.
- Name the replication task intuitively in the description
- Test your replication task. Make sure to test your Proxmox replication task before you need to rely on it for disaster recovery.
Download my free e-book for home lab using Promxox here: Proxmox e-book.
Wrapping up Proxmox replication
Replication in general is a great way to bolster your disaster recovery strategy. it helps to satisfy the needs of the 3-2-1 backup best practice methodology as it helps to create multiple copies of your data with at least one copy of the data offsite, if you are replicating to a different data center.
It is great that Proxmox includes the tools in the box with Proxmox VE Server and you don’t have to have a subscription license to take advantage of Proxmox replication. Just keep the prerequisites in mind, including the need to have your VMs stored on ZFS storage and make sure you have more than one Proxmox VE Server added to your Proxmox data center.