Proxmox Install Beginners Guide
Highlights
- After getting the ISO image in a position to install from, we can mount the ISO and boot from the ISO, either on bare metal or in a virtual machine.
- After you select the Proxmox VE menu option for installation, the server will boot and grab a DHCP address if DHCP is available, and then it will move forward to the next phase of the installation.
- The ISO image is the installation medium we will use to install Proxmox VE server virtualization on our bare metal or VM instance.
Most IT admins are at least familiar with VMware vSphere and Microsoft Hyper-V in the enterprise. These have been staples in the enterprise data center for years now. Many are giving attention to KVM-based hypervisors like Proxmox due to the shakeup of VMware pricing with the Broadcom buyout. Let’s take a look at the Proxmox install for beginners and see how you can get one of the most popular KVM-based hypervisors configured for running virtual machines.
Table of contents
Proxmox installation
Like most other hypervisors, Proxmox virtual environment is easily installed by simply downloading the ISO file, “burning” this to a USB key or uploading it to your datastore (nested virtualization). This is the method we will look at for the purposes of this beginner guide.
Requirements
Note the following requirements for installing Proxmox VE Server:
- Intel EMT64 or AMD64 CPU with Intel VT or AMD-V support.
- Memory Requirements: Minimum of 2 GB for Proxmox VE and its core services. Additional memory is necessary for guest systems. For setups using Ceph or ZFS, allocate roughly 1GB of memory per terabyte of utilized storage.
- For optimal performance, use fast and redundant storage solutions, with SSDs providing the best results.
- OS Storage Recommendations: You can choose hardware RAID with a battery-protected write cache (BBU) or use ZFS without RAID, optionally enhancing it with an SSD for the ZIL.
VM Storage Solutions:
- For local setups, select between a hardware RAID with a battery-backed write cache (BBU) or a non-RAID configuration suitable for ZFS and Ceph. Note that ZFS and Ceph are not compatible with traditional hardware RAID controllers.
- Shared and distributed storage configurations are feasible.
- For performance, SSDs with Power-Loss-Protection (PLP) are advised, while consumer-grade SSDs are not recommended.
- Ensure redundancy with multiple Gigabit NICs, scaled according to your storage technology and cluster requirements.
- CPU compatibility with VT-d/AMD-d is essential for PCI(e) passthrough.
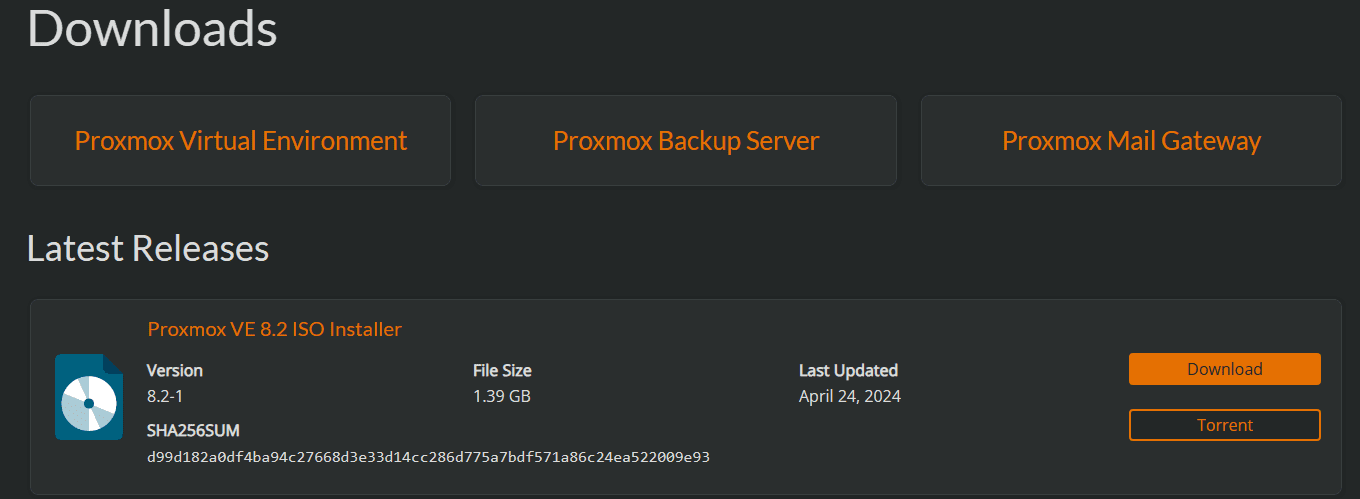
Download the Proxmox ISO
You can download the Proxmox ISO image at the following official link from Proxmox: Download Proxmox software, datasheets, agreements. Download the Proxmox VE <version> ISO Installer. The ISO image is the installation medium we will use to install Proxmox VE server virtualization on our bare metal or VM instance.
Burn Proxmox to a USB drive
You can “burn” the ISO image you download for the Proxmox server installation to a USB flash drive. To do this, use a tool like Rufus or Ventoy, to place the ISO image on the USB drive.
Installing Proxmox VE Server
After getting the ISO image in a position to install from, we can mount the ISO and boot from the ISO, either on bare metal or in a virtual machine. When booting, select the correct usb device and it will boot into the Proxmox VE iso image.
When you boot from the Proxmox ISO image, you will be taken to the Proxmox GUI installer. You have three options here:
- Install Proxmox VE (Graphical)
- Install Proxmox VE (Terminal UI)
- Advanced Options
For a normal installation, we will select install Proxmox VE (Graphical) option.
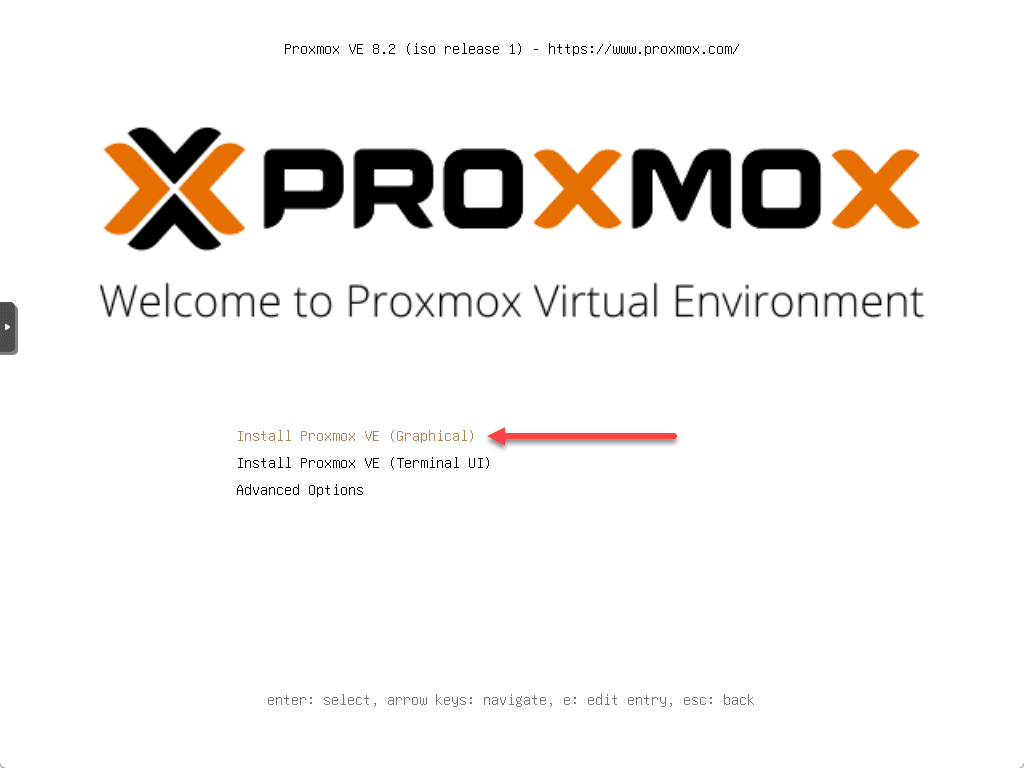
After you select the Proxmox VE menu option for installation, the server will boot and grab a DHCP address if DHCP is available, and then it will move forward to the next phase of the installation.

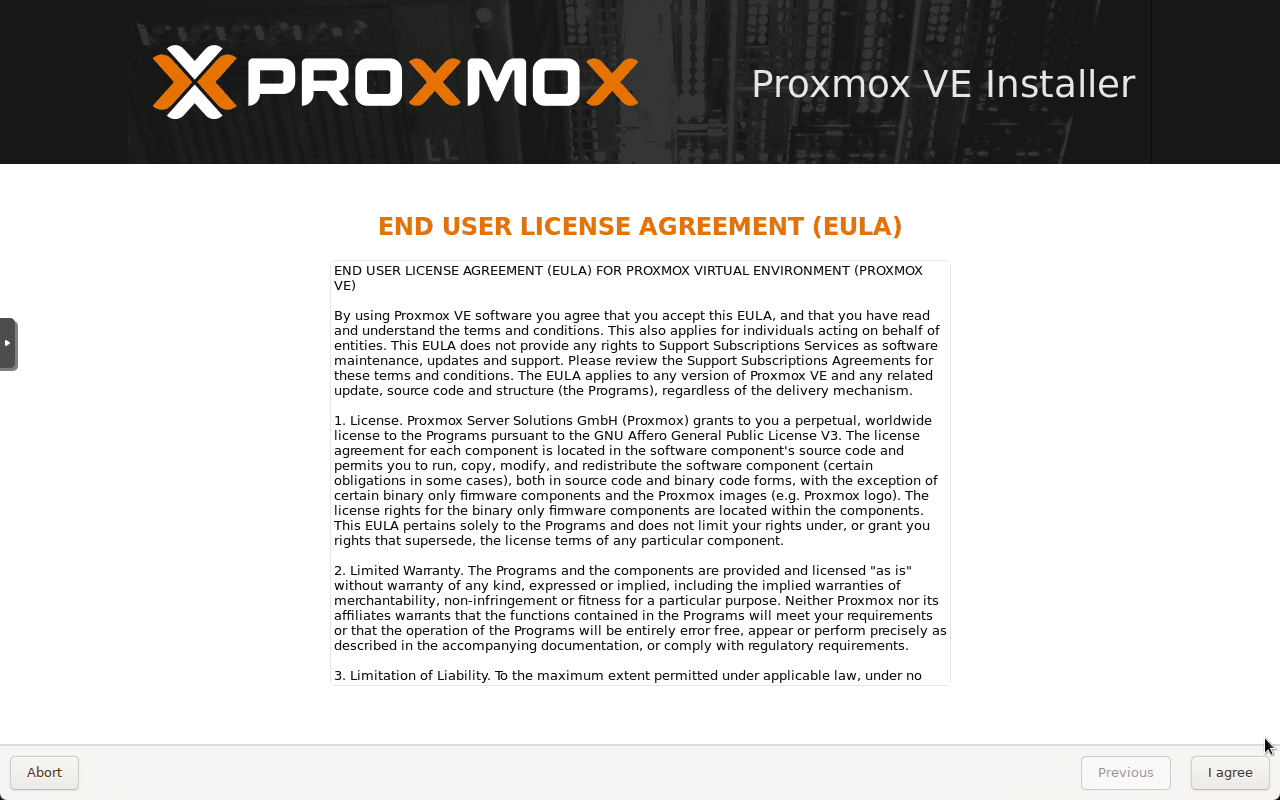
The next step of the Proxmox installation is accepting the end user license agreement (EULA) in the Proxmox installation wizard. Click the I agree button in the lower right corner of the screen.
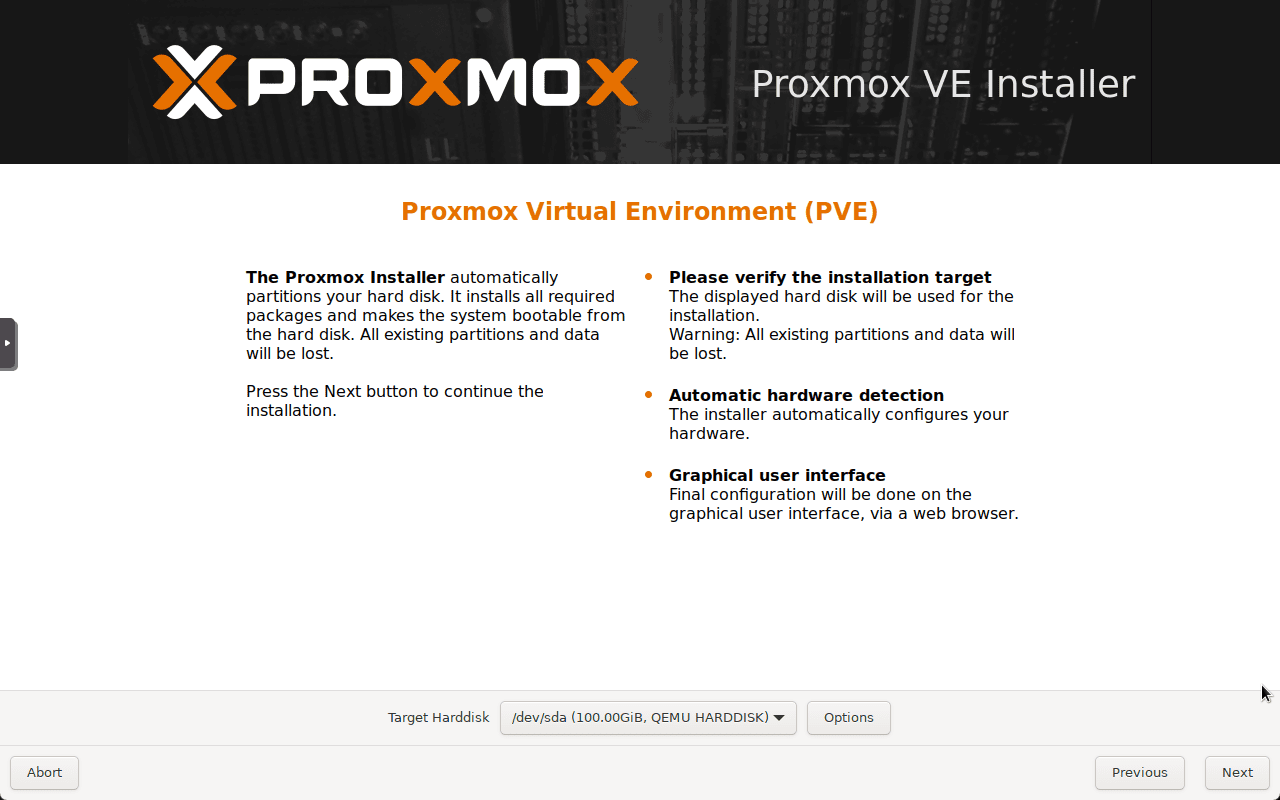
Select the storage target where you want to install the Proxmox installation.
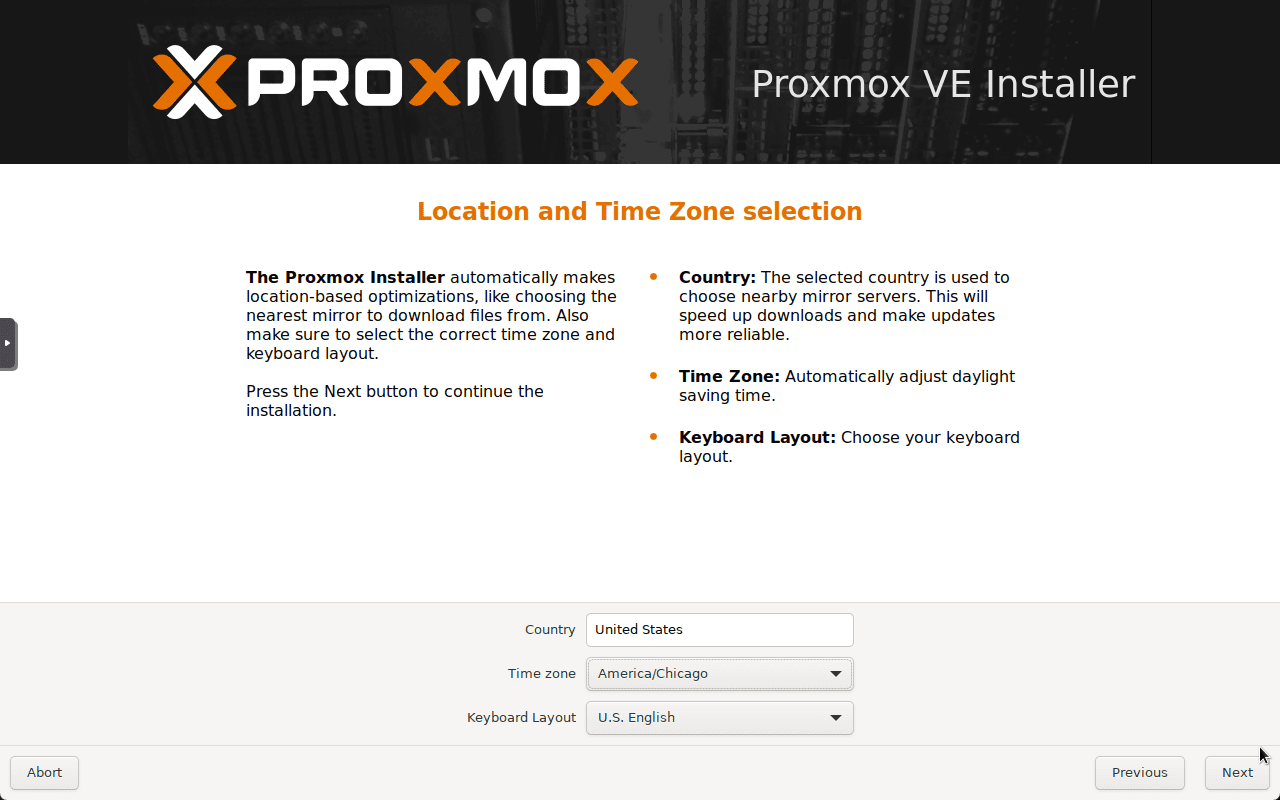
Next, the Proxmox installer will have you configure the location and language settings. This includes the following:
- Country
- Time zone
- Keyboard layout
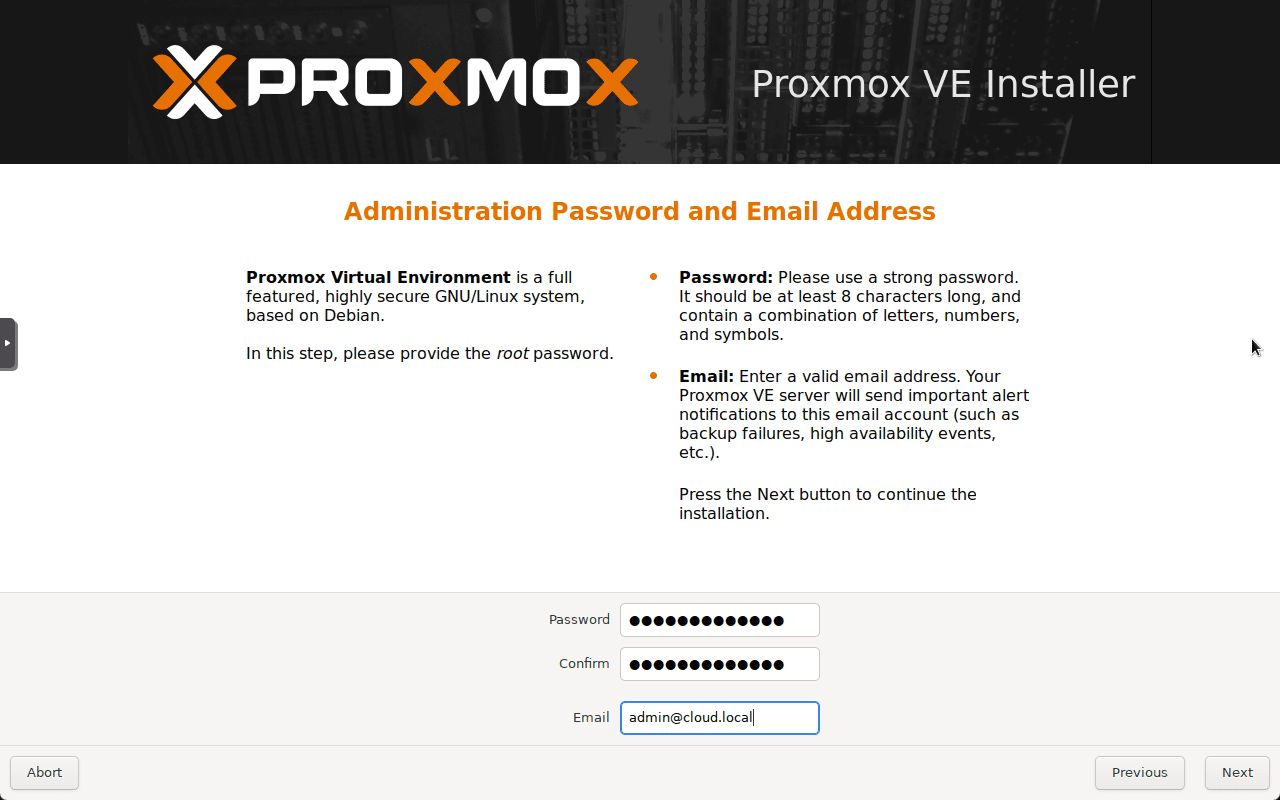
Configure the administration password and email address. This step will configure the root account password and email address associated with the account for your Proxmox VE server.
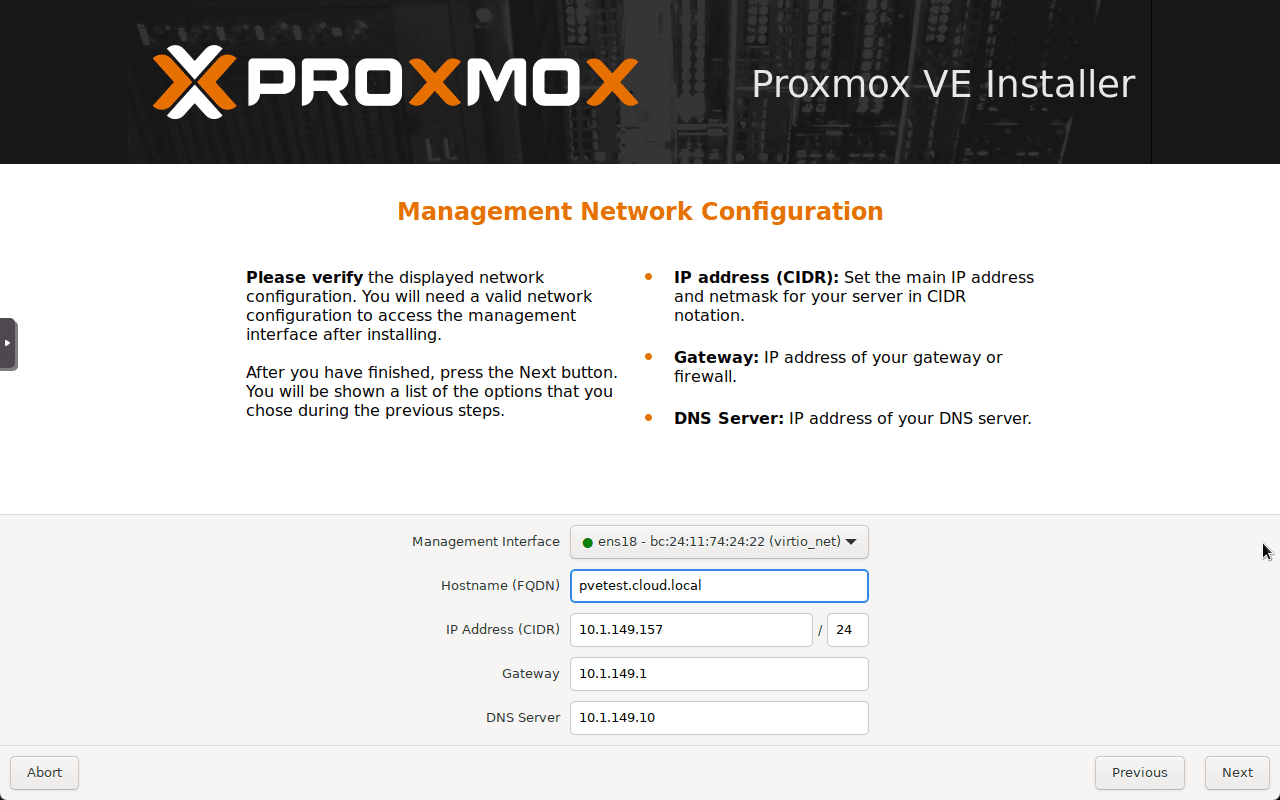
Next, we configure the management network configuration, including the hostname, IP address, subnet (CIDR format), gateway, and DNS configuration.
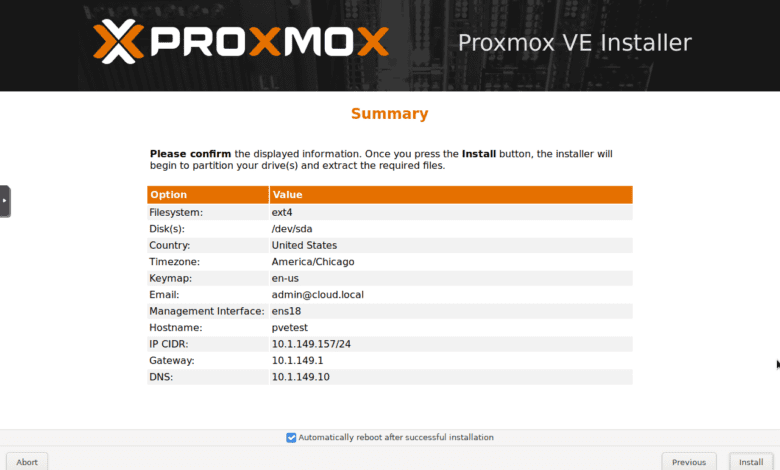
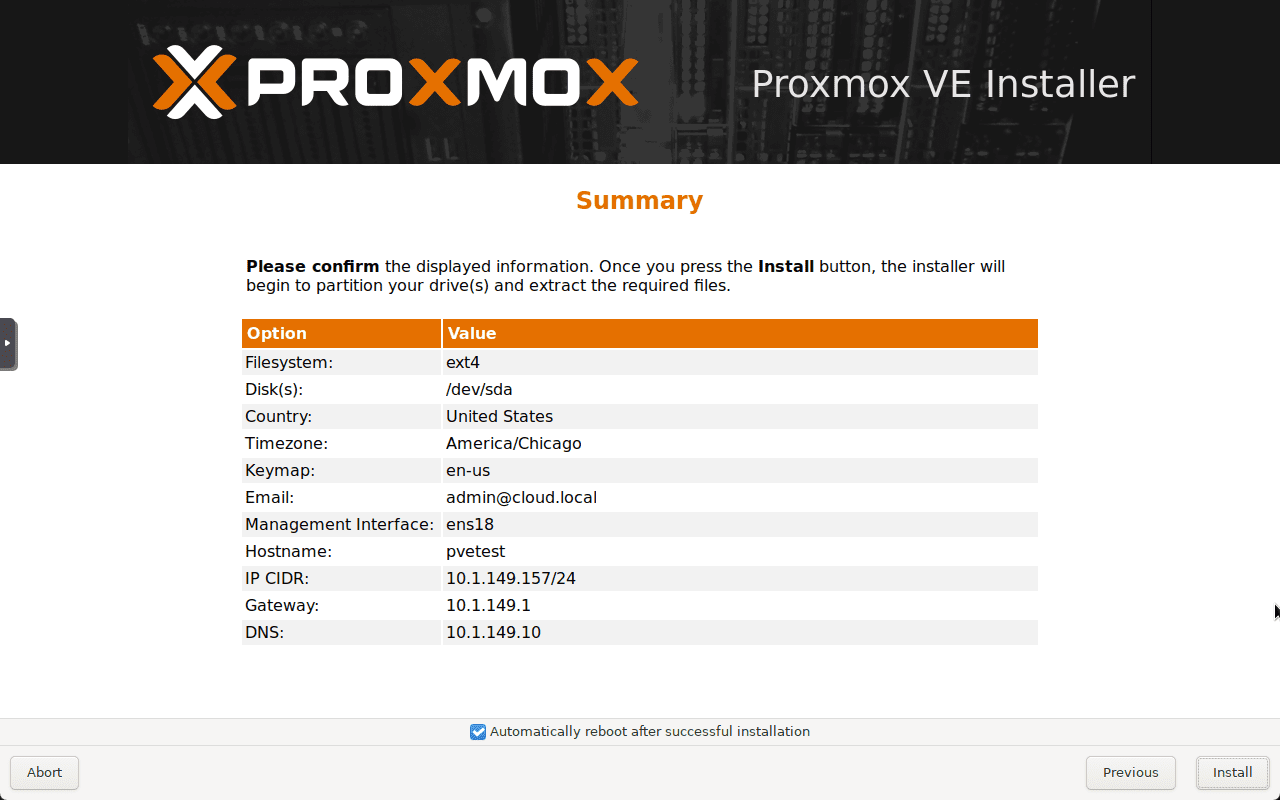
Finally, we make it to the summary screen. Here, we want to review the configuration settings and make sure all the settings are configured correctly. By default, the checkbox “Automatically reboot after successful installation” is checked.
Click the Install button in the lower right corner of the installation screen.
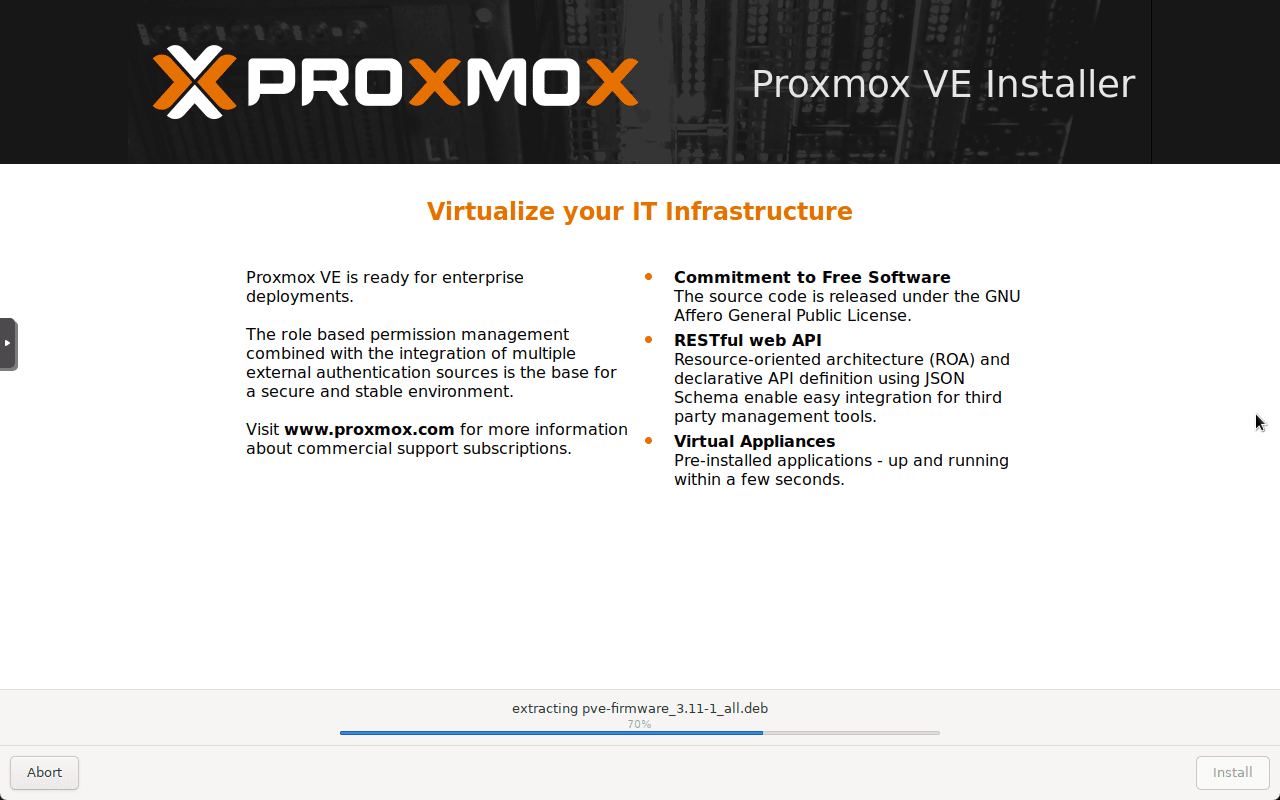
The installation process begins.
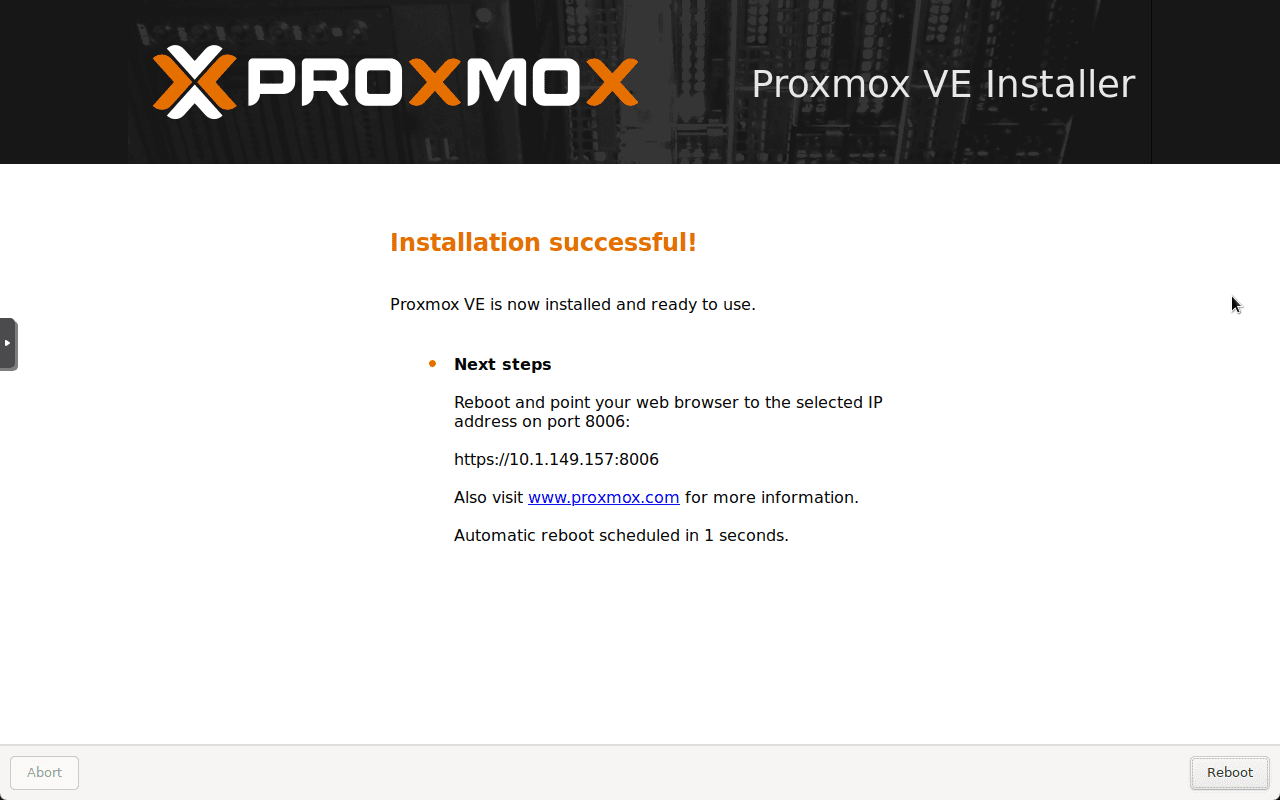
The installation completes successfully. Before the server reboots, the informational screen will be displayed below, including the web address and port configuration for accessing the web GUI.
First boot of Proxmox and Login
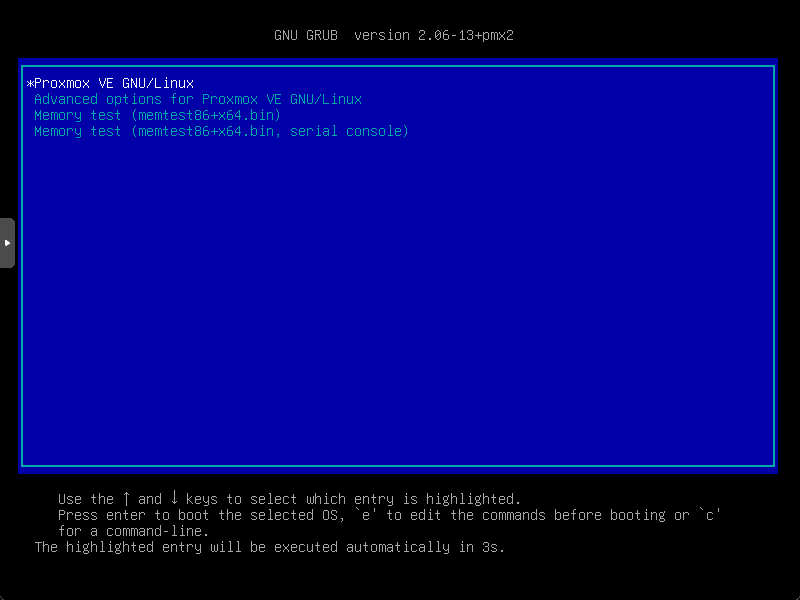
After the Proxmox VE Server reboots, it will display the GRUB startup screen below, giving you to the option to boot into diagnostics modes or boot normally.
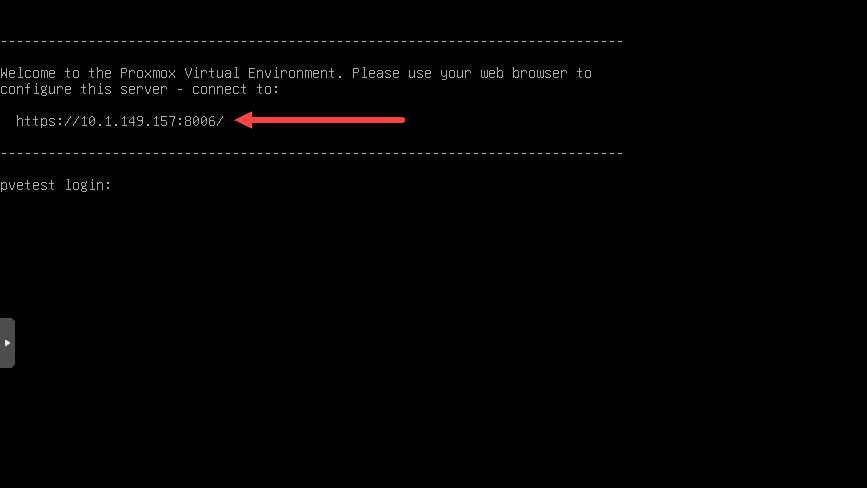
Once the server boots, it will boot to the terminal console displayed below. The terminal console will display the URL for accessing the web GUI. Note the special port that Proxmox VE Server uses for the web admin console, port 8006.
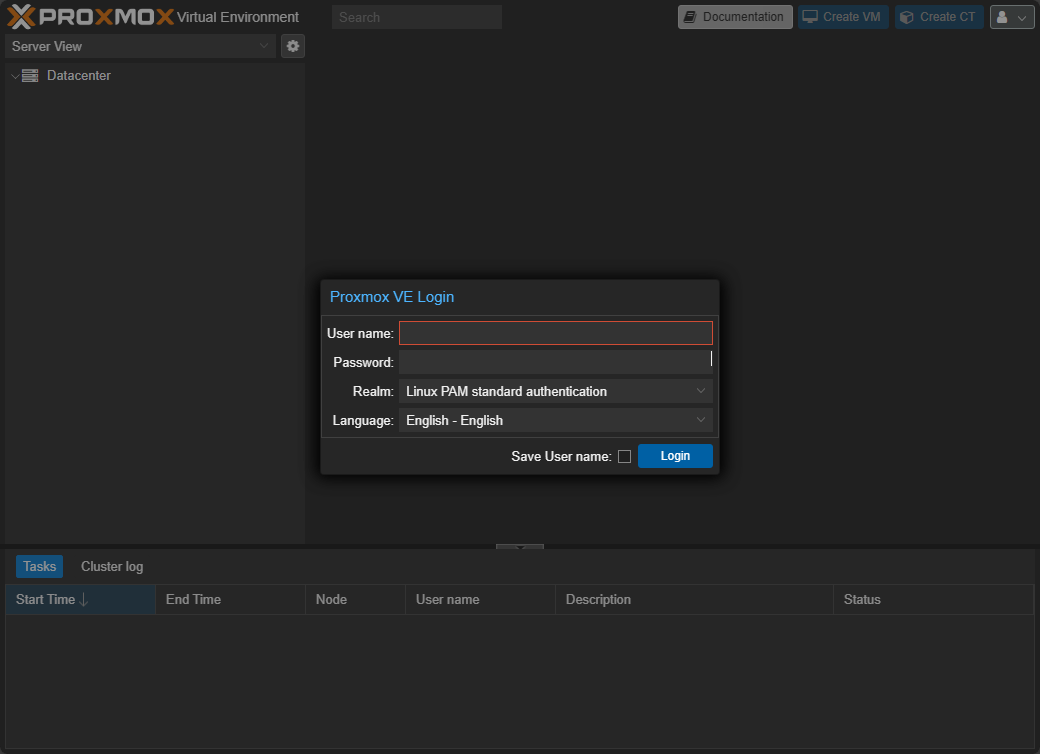
After you launch a browser and browse to the URL displayed in the terminal console, you will be promoted to log into the Proxmox VE Server. Here, you will use root and the password you configured during the installation of Proxmox VE Server.
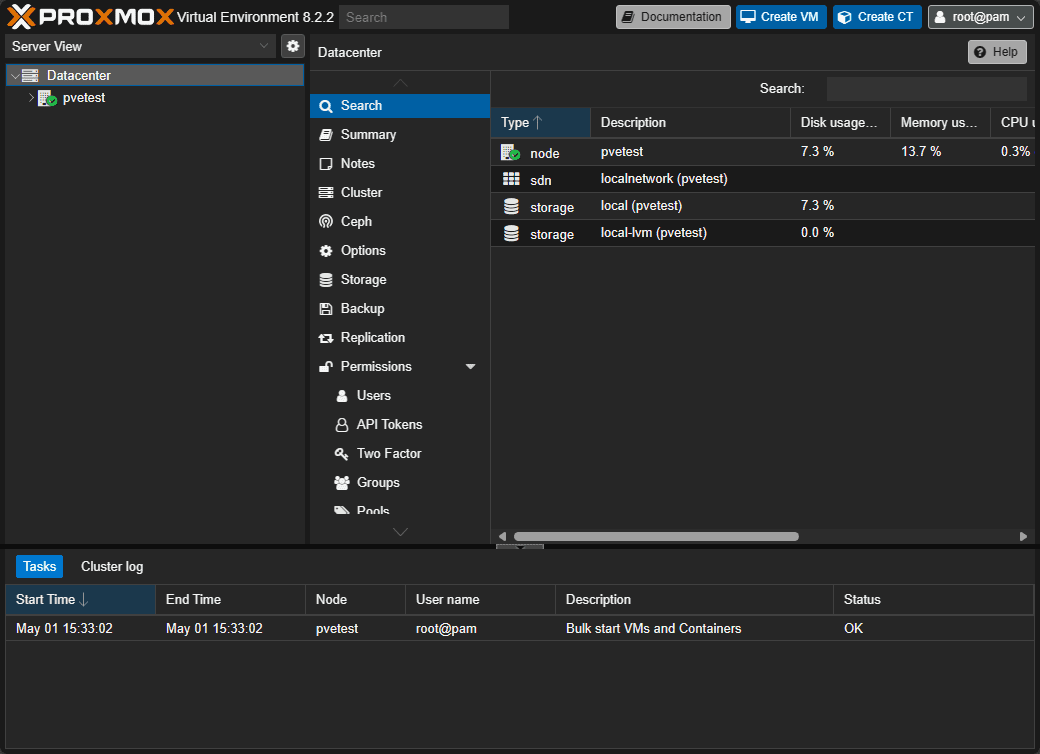
Once you log in to the Proxmox VE web interface, you will see the default dashboard displayed for Proxmox. You will see your node listed under the Datacenter node. From the main dashboard, you will see various menus that will display relative to the context of where you have clicked in the left-hand pane.
Troubleshooting
Note the following troubleshooting tips during a Proxmox VE Server installation.
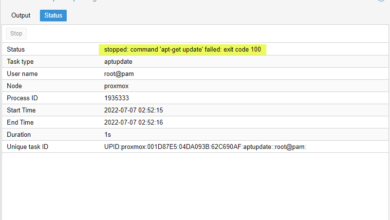
- Problem: The installation fails.
- Note the specific error displayed in the console. View the low-level logs on the Proxmox VE Server host and any other output. Also, make sure your hardware meets the minimum requirements for installing Proxmox VE Server. Make sure you have met the installation requirements for installing Proxmox.
Other general troubleshooting steps with installation issues:
- Check BIOS/UEFI Settings: Ensure Intel VT-x/AMD-V is enabled for virtualization support
- Verify Installation Media: Test the Proxmox VE installation ISO for corruption and confirm its integrity.
- Review Hardware Compatibility: Make sure the server’s hardware is compatible with Proxmox VE requirements
- Inspect Disk Health: Check for any disk errors or failures that could impede installation.
- Analyze Installation Logs: Look at the logs generated during installation to identify any specific errors or warnings.
- Test Network Connectivity: Make sure you have a stable and active network connections necessary for downloading installation updates and packages
- Update Server Firmware: Keep the BIOS/UEFI and other firmware up to date to avoid compatibility issues
- Disable Unnecessary Hardware: Temporarily turn off unneeded hardware for the installation process and rule out conflicts
- Consult Proxmox Forums: Use the Proxmox community forums for guidance specific to your installation issues
Wrapping up
Proxmox is a powerful KVM-based hypervisor that many use in the home lab and production environments. The installation process is straightforward. Pay attention to the installation requirements, BIOS settings, and any output messages received. Using the troubleshooting steps listed, you can generally get to the bottom of any issues during the installation process.