
I wanted to share a quick guide on mounting an NFS share in fstab on Proxmox. This set of steps will make sure you have an NFS share that is mounted when your server is rebooted and that your persistent storage is available in Proxmox VE server.
Step 1: Install NFS Client
Before we get started, a good first step is to make sure you have the NFS client utiltiies installed in Proxmox. You can do that with the following:
apt update && apt install -y nfs-common
Step 2: Create a Mount Point
Next, create a directory where you want to mount the NFS share:
You can change /mnt/nfs-share to any directory that makes sense.
Step 3: Edit the fstab File
Now, open the /etc/fstab file in a text editor:
As a template for adding the configuration to your fstab file, it will look like the following configuration
If your NFS server that you are adding to Proxomox has an IP of 192.168.1.100 and the NFS shared directory is /exports/proxmox, the fstab entry would look something like the following:
Step 4: Apply and Test the Mount
Save the file and exit from editing /etc/fstab. Then run the command below to mount the added configuration:
Check if the NFS share is properly mounted using:
or
Troubleshooting
-
If the mount of your NFS share fails, you can check the syslog or journalctl for errors:
-
Make sure the NFS server is running and can be connected to from another machine if the connection fails from Proxmox
-
Make sure you have the export permissions on the NFS server set to allow access from your Proxmox node.
Added step: Add the NFS Share in Proxmox Storage
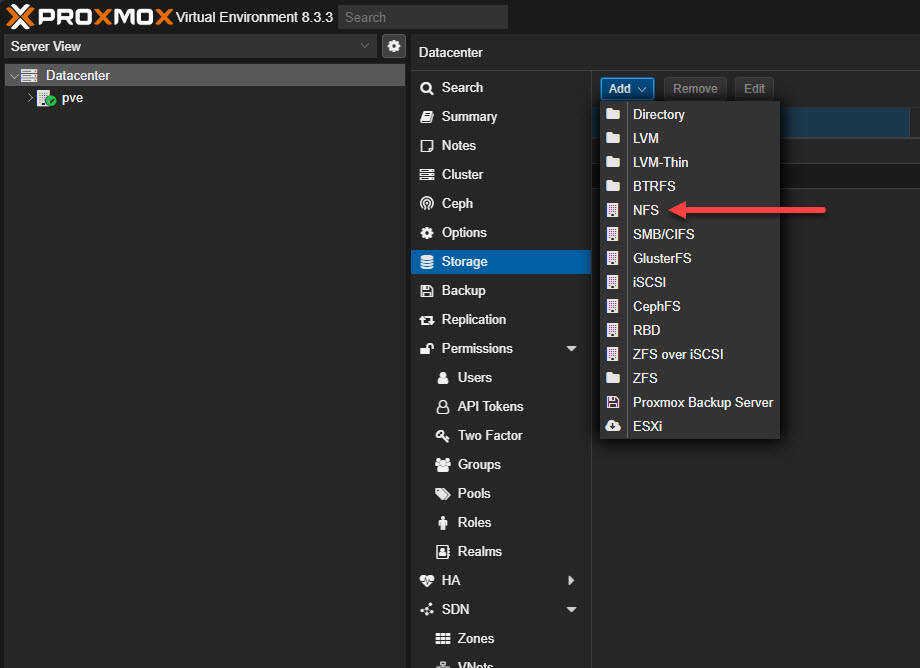
If you want to add the NFS share as a storage backend in Proxmox, go to:
Datacenter → Storage → Add → NFS
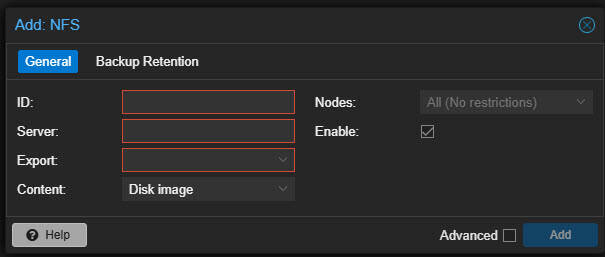
Enter the NFS server IP or FQDN, configure the exported path, and define the content type (e.g., ISO, Backup, etc.). Click Add, and it should add the storage and make it available in Proxmox.