With the recent changes at Docker regarding the new limits placed on pulls from the official Docker registry, it is a great idea to add authentication to your pipelines as the new limits will likely hinder even very low traffic CI/CD solutions. What are those limits?
Starting April 1, Docker will enforce the following pull rate limits according to the GitLab KB here: Prepare now: Docker Hub rate limits will impact GitLab CI/CD
| User type | Pull rate limit per hour | Number of public repositories | Number of private repositories |
|---|---|---|---|
| Business, Team, Pro (authenticated) | Unlimited (fair use) | Unlimited | Unlimited |
| Personal (authenticated) | 200 per 6-hour window | Unlimited | Up to 1 |
| Unauthenticated users | 100 per 6-hour window per IPv4 address or IPv6 /64 subnet | Not applicable | Not applicable |
To avoid this, you need to add authentication to your CI/CD pipelines, no matter which solution you are using. However, how do we do this with GitLab?
We can add the authentication using a special DOCKER_AUTH_CONFIG parameter in your config.toml. This is the configuration file for your runner and the contents get created when you pair a runner with your GitLab instance using the gitlab-runner register command.
Generating the Docker Hub authentication token
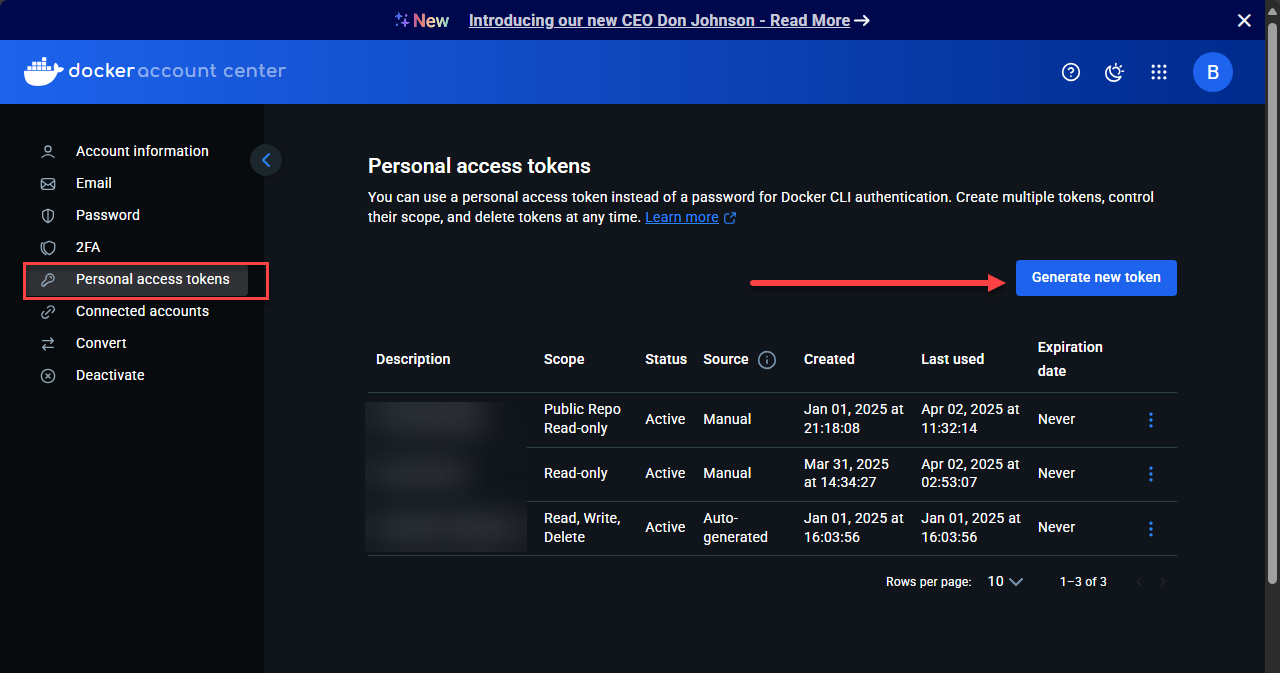
First, we need to sign up for Docker Hub and generate a personal token. You can do this after you have a free Docker account, navigate to Account Settings > Personal access tokens.

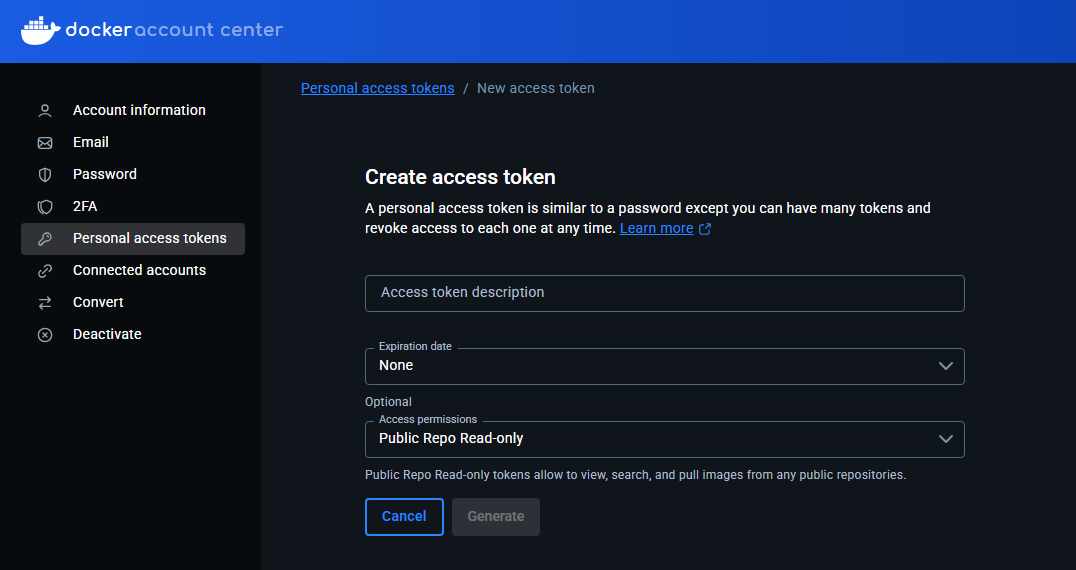
After you click to generate new token, you will see this screen. You can add a description, choose or just leave None for the expiration date, and set the permissions for the token. For what we are trying to accomplish pulling images from the online public repo, you can just leave it set to Public Repo Read-only.

Once we have the token file, we need to create a BASE64 version of our authentication information that combines our username and the token together. On a Linux machine, you can do this using the command, note, below is not literal, you will replace dockeruser and the tokentexttokentexttokentext with your real token that you create in the Personal access tokens area above.
echo -n "dockeruser:tokentexttokentexttokentext" | base64
When you run this command from a Linux terminal, you will get the BASE64 encoded token that we can use in the next step.

Updating the config.toml file
in the special config.toml file, we can use the environment parameter to configure the authentication like in the below example. Note the following:
- environment parameter
- URL is https://index.docker.io/v1
- Then enter your generated token that you get from using the process above where you see REDACTED_DOCKER_AUTH in the environment string below
concurrent = 1
check_interval = 0
connection_max_age = "15m0s"
shutdown_timeout = 0

[session_server]
  session_timeout = 1800

[[runners]]
  name = "my-runner"
  url = "https://gitlab.example.com"
  id = 0
  token = "REDACTED_TOKEN"
  token_obtained_at = 2024-10-21T00:31:49Z
  token_expires_at = 0001-01-01T00:00:00Z
  executor = "docker"
  environment = [
    "DOCKER_AUTH_CONFIG={\"auths\":{\"https://index.docker.io/v1\":{\"auth\":\"REDACTED_DOCKER_AUTH\"}}}",
    "GIT_HTTP_USERNAME=root",
    "GIT_HTTP_PASSWORD=REDACTED_GIT_PASSWORD"
  ]
  clone_url = "https://gitlab.example.com"
  [runners.custom_build_dir]
  [runners.cache]
    MaxUploadedArchiveSize = 0
    [runners.cache.s3]
    [runners.cache.gcs]
    [runners.cache.azure]
  [runners.docker]
    tls_verify = false
    image = "rocker/verse:latest"
    dns = ["10.1.1.1"]
    privileged = false
    disable_entrypoint_overwrite = false
    oom_kill_disable = false
    disable_cache = false
    volumes = ["/cache"]
    extra_hosts = ["gitlab.example.com:10.1.1.2"]
    shm_size = 0
    network_mtu = 0
Confirming your pipeline is authenticating to Docker Hub
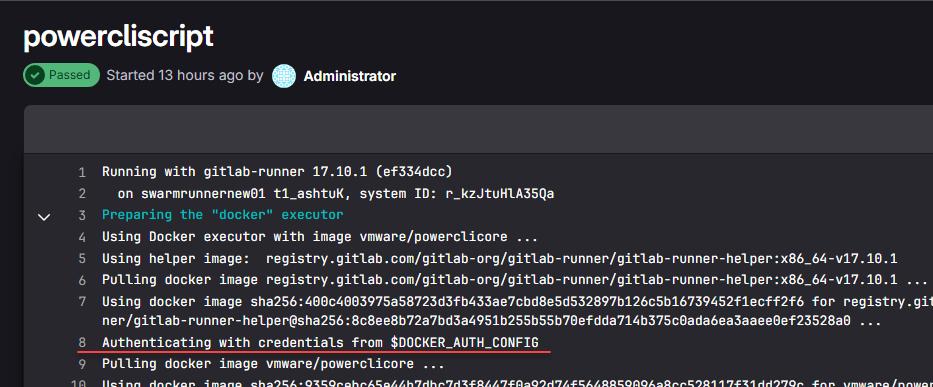
Now that we have everything in place, we just need to run the pipeline once again and make sure it shows that it is now authenticating using the special $DOCKER_AUTH_CONFIG parameter.


