Free Up Disk Space in your Kubernetes Cluster
If you run Docker container hosts either standalone or in a Docker Swarm cluster, you are probably familiar with the built-in command docker system prune -a -f. Using this command you can easily get rid of unused space taken up by images and powered off containers. However, the other day I had a similar situation with my Kubernetes cluster in the lab with images and such that were taking up tons of space and started to get warnings from Ceph about the disk space used. I want to show you a tool and command that you may not know about that can be used to free up potentially lots of space on your Kubernetes cluster.
Table of contents
- The docker system prune -a -f cleanup command
- Orphaned images in Kubernetes
- The CRI Tool for Kubernetes nodes
- Installing crictl on Kubernetes Nodes
- Before and after pics
- Automating Image Cleanup Across All Nodes
- Remove Completed Pods
- Did you know that Kubernetes has a built-in garbage collector?
- Docker vs Kubernetes Disk Cleanup
- Wrapping up
The docker system prune -a -f cleanup command
Just as a review, the command for cleanup in Docker is the docker system prune -a -f command. What does this command do? Note the following:
- It deletes all stopped containers
- It removes all unused networks
- It deletes all dangling images (and with
-a, all unused images) - Then it cleans up build cache and volumes (if
--volumesis included)
This command is great, but it only applies to Docker and single-node environments. So how do we achieve the same cleanup in Kubernetes?
Orphaned images in Kubernetes
Kubernetes hosts run pods across multiple nodes, using various runtimes, like Docker, containerd, or CRI-O. Like Docker, over time, these nodes can accumulate a lot of used disk space with container images. This happens because of the following:
- Pod deployments and terminations
- Image pulls
- CI/CD pipeline rollouts
- Testing workloads
But, unlike Docker, where you manage images on a single host, Kubernetes spreads these resources across nodes.
The CRI Tool for Kubernetes nodes
The crictl tool is a command-line interface for container runtimes that implement the Container Runtime Interface (CRI), like:
- containerd
- CRI-O
- cri-dockerd (for legacy Docker socket support)
This tool allows you to interact directly with the runtime and inspect containers, images, and do things like cleaning up resources. To remove unused container images—just like docker system prune -a -f—the key command is:
crictl rmi --pruneThis instructs the runtime to remove unused images, helping free up disk space without affecting running workloads.
What crictl rmi --prune Does (and Doesn’t Do)
When you run crictl rmi --prune, it:
- Removes images that are not used by any container
- Cleans up dangling or outdated images
- Helps reduce disk consumption on that specific node
But it does not:
- Remove completed or failed pods (you do this via
kubectl delete pod) - Clean up unused volumes or persistent data
- Work across all nodes simultaneously—you must run it per-node
You can think of it as the image-cleaning part of docker system prune -a -f.
Installing crictl on Kubernetes Nodes
For the most part, most Kubernetes distros do not install the tool by default. If you don’t have it installed already, you can install it manually using the commands here:
curl -LO https://github.com/kubernetes-sigs/cri-tools/releases/download/<version>/crictl-<version>-linux-amd64.tar.gz

sudo tar -C /usr/local/bin -xzf crictl-${VERSION}-linux-amd64.tar.gz
rm crictl-${VERSION}-linux-amd64.tar.gz
To find the latest version of the tool, you can look at the releases page found here to plug in the version you need above:
Below, I am downloading the tool:
Next, we untar the file and then remove the downloaded package:
Then verify that you can run the tool with the command:
crictl --versionConfiguring crictl
Out of the box, crictl is not configured to talk to your container runtime, you will need to configure this. If it isn’t configured correctly, you will see an error that looks something like this:
validate service connection: rpc error: code = Unavailable desc = connection errorTo fix this, you need to configure the runtime socket path. Most Kubernetes nodes use containerd with the following socket:
/run/containerd/containerd.sockCreate a configuration file:
sudo nano /etc/crictl.yamlAdd:
runtime-endpoint: unix:///run/containerd/containerd.sock
image-endpoint: unix:///run/containerd/containerd.sock
timeout: 10
debug: false
Save and test:
crictl infoAs a note, if you are using Microk8s, this file needs to have the following:
runtime-endpoint: unix:///var/snap/microk8s/common/run/containerd.sockRunning crictl rmi --prune Safely
Once you have crictl configured, run the prune command:
sudo crictl rmi --pruneYou’ll see an output of something like the following:
Deleted image: sha256:abc123...
Deleted image: sha256:def456...This command is safe to run on production nodes because it does not touch images currently in use by running containers. But as always, test this in a lab environment first.
It’s also a good idea to run this during low-load windows or as part of routine maintenance, especially on clusters with aggressive CI/CD pipelines.
Before and after pics
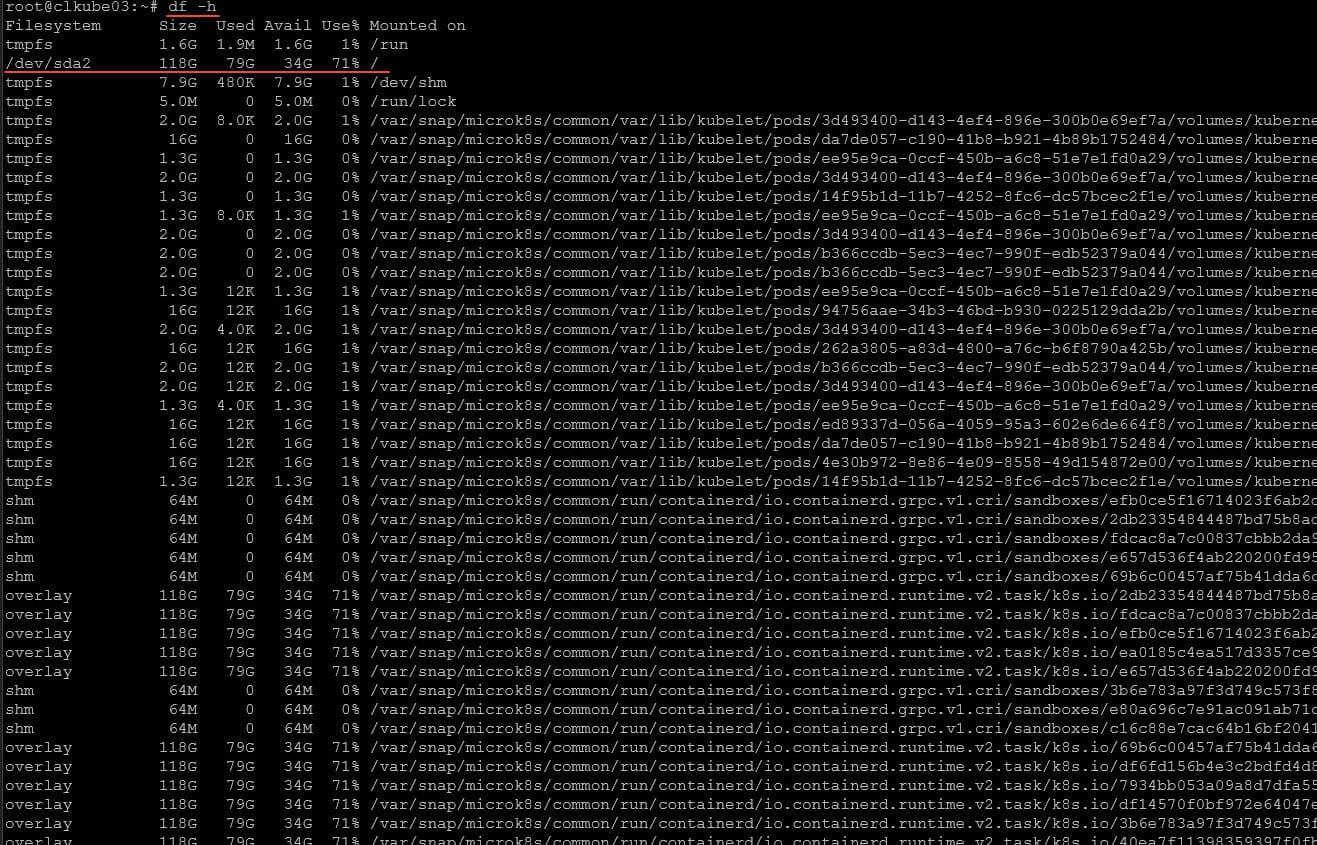
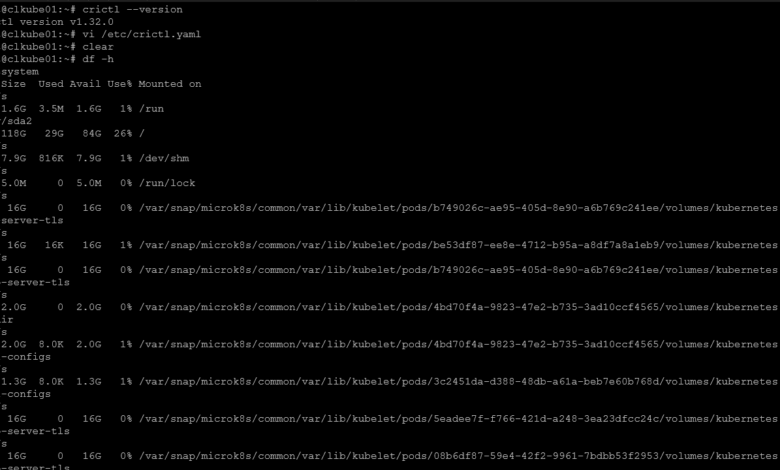
Below is before I ran the crictl prune command. You can see I have 71% of the disk space in use.
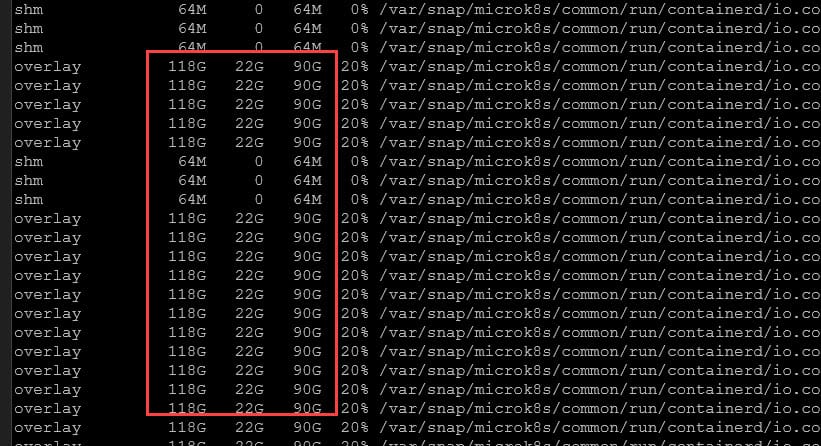
After running the command, you can see we have reclaimed a lot of space. Now down to 20% of the Ceph volume being used.
Automating Image Cleanup Across All Nodes
Because Kubernetes workloads run on multiple nodes, you’ll want to automate this process across your fleet.
Option 1: SSH Loop (for small clusters)
for node in $(kubectl get nodes -o name | cut -d'/' -f2); do
  echo "Cleaning up on $node"
  ssh $node "sudo crictl rmi --prune"
done
Option 2: DaemonSet Job
You can run a temporary DaemonSet that executes the prune command on every node. Example:
apiVersion: apps/v1
kind: DaemonSet
metadata:
  name: crictl-prune
  namespace: kube-system
spec:
  selector:
    matchLabels:
      name: crictl-prune
  template:
    metadata:
      labels:
        name: crictl-prune
    spec:
      hostPID: true
      containers:
      - name: prune
        image: busybox
        command: ["/bin/sh", "-c", "chroot /host crictl rmi --prune"]
        volumeMounts:
        - name: host
          mountPath: /host
      volumes:
      - name: host
        hostPath:
          path: /
      restartPolicy: OnFailure
Apply the YAML, wait for the job to complete, then delete the DaemonSet.
Remove Completed Pods
While crictl handles unused images, Kubernetes itself holds onto pods even after they finish.
Clean them with:
kubectl delete pod --field-selector=status.phase==Succeeded --all-namespaces
kubectl delete pod --field-selector=status.phase==Failed --all-namespaces
This helps reduce metadata clutter in your cluster.
Did you know that Kubernetes has a built-in garbage collector?
The kubelet automatically removes unused images when disk usage passes a certain threshold that is configurable. You can configure this by editing the kubelet config:
imageGCHighThresholdPercent: 85
imageGCLowThresholdPercent: 80
This controls when Kubernetes will start garbage collection and how aggressively it will prune.
Docker vs Kubernetes Disk Cleanup
| Function | Docker (Standalone) | Kubernetes (Node-based) |
|---|---|---|
| Remove unused images | docker system prune -a -f | crictl rmi --prune (per node) |
| Remove stopped containers | docker system prune | kubectl delete pod |
| Remove unused volumes/networks | docker volume/network prune | Manually remove unused PVCs (if safe) |
| Automatic garbage collection | Optional Docker settings | Built into kubelet |
Wrapping up
As you can see, this tool is a pretty cool utility to have laying around, especially if in the home lab you are dealing with low-resource Kubernetes clusters that you use to play around with and accumulate tons of container images. These stack up over time. If you run into a situation where your disk space gets low with Kubernetes, you can run the crictl tool to clean up space on your persistent storage and make your Kubernetes cluster happy again. Let me know in the comments if you have used this tool before.


