Monitor Proxmox with CheckMK Open Source Monitoring
Many are utilizing Proxmox VE Server in their home labs. Proxmox is a great option for running virtual machines and containers and self-hosting. You will likely want to monitor your Proxmox environment with some type of tool to make sure everything is running as expected. CheckMK Raw edition is a free and open source monitoring solution that allows you to monitor your Proxmox VE Servers. Let’s take a look at how to Monitor Promxox with CheckMK and see how this is setup.
Table of contents
- What is CheckMK?
- What is Proxmox?
- Why is monitoring important?
- Install the CheckMK agent for Debian Linux in Proxmox
- Add Proxmox VE Server host to CheckMK
- Add a Host Monitoring Rule for Proxmox
- Apply your changes in CheckMK
- Run service discovery
- Pros and Cons of Using CheckMK
- Additional features and integrations with CheckMK to enhance monitoring
- Wrapping up
What is CheckMK?
First of all, let’s take a closer look at CheckMK and see what it is exactly. CheckMK has both a free and open source editon (CheckMK Raw edition) and a commercial version of the product. It is designed to monitor your servers, networks, applications, and even cloud environments. It will monitor Windows, Linux, and virtual environments as well.
It allows you to have visibility into the performance of your system and gather health metrics and availability information. It can monitor infrastructure using both an agentless approach and also has an agent as well, which we will be showing how to use to monitor Proxmox.
One of the things I really like about CheckMK is that it is super easy to spin up using a Docker container. You can literally be up and running in a few seconds from running a Docker container, letting the image pull down, and then logging into the web interface.
What is Proxmox?
Proxmox needs no introduction and I have said for a while now that it is a “home lab darling” hypervisor as everyone and their brother are running Proxmox VE server at home to self-host their apps, virtual machines, containers, Kubernetes clusters, etc.
Proxmox is also an open-source solution that provides a virtualization platform based on Kernel Virtual Machine (KVM). It also uses Linux Containers (LXC) for very lightweight, VM-like containers. It is one of the easiest open-source hypervisor solutions out there and has all the features you would want to have for running high availability virtual resources, including clustering, software-defined storage (Ceph, ZFS) and also has software-defined networking features.
Proxmox Virtual Environment (VE) is an open-source virtualization platform based on KVM (Kernel-based Virtual Machine) and LXC (Linux Containers). It provides an easy-to-use web interface and powerful enterprise-grade features such as high availability (HA), software-defined storage (Ceph, ZFS), and robust networking options.
Why is monitoring important?
It is important to monitor your environment, whether it is Proxmox, VMware, Hyper-V, or any other hypervisor. When you are running multiple virtual instances of servers on a single host or even a few hosts in a cluster, it is more important than ever to know that your hosts are operating and running cas expected.
Monitoring a Proxmox VE environment ensures that administrators can detect performance issues early, optimize resource allocation, and prevent failures.
CheckMK provides good features for Proxmox monitoring:
- Real-time monitoring: Keeps track of CPU, RAM, disk usage, network traffic, and VM/container health.
- Alerts: Notifies admins via email, Slack, or other channels when critical thresholds are breached.
- Historical data: Helps analyze trends and plan resource scaling.
- Dashboards: Visualize performance metrics efficiently.
- Agent-based or Agentless Monitoring: Supports both approaches for flexibility.
Install the CheckMK agent for Debian Linux in Proxmox
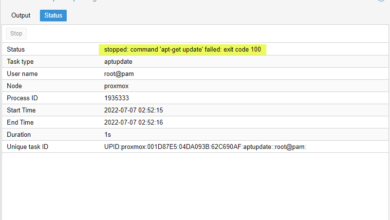
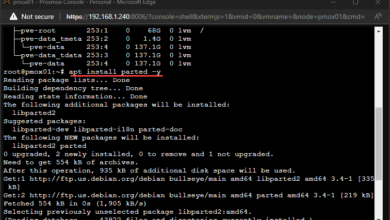
Before we get started doing the setup inside of CheckMK, we need to install the CheckMK agent for Debian Linux in Proxmox.
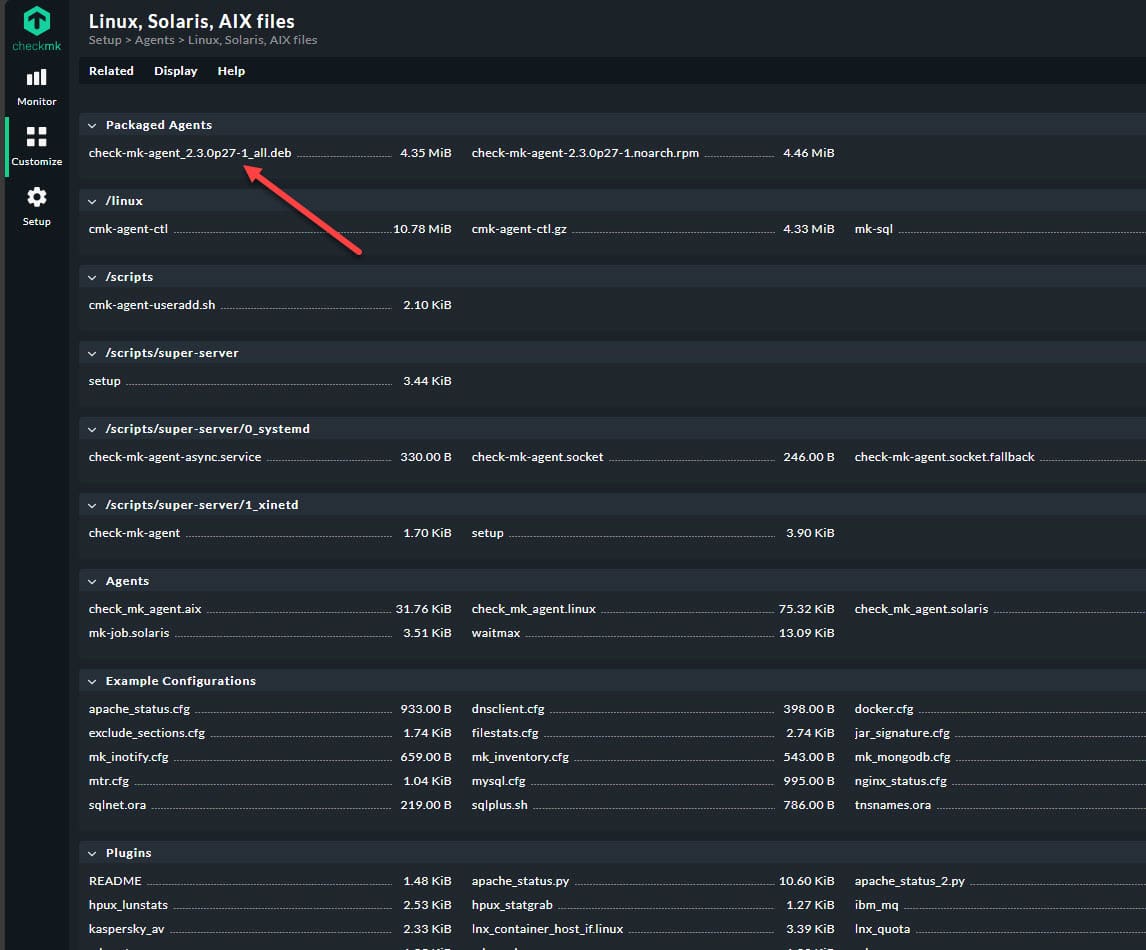
Next, you can copy the .deb file over to your Proxmox host and then use the following command to install:
dpkg -i check-mk-agent<version>.deb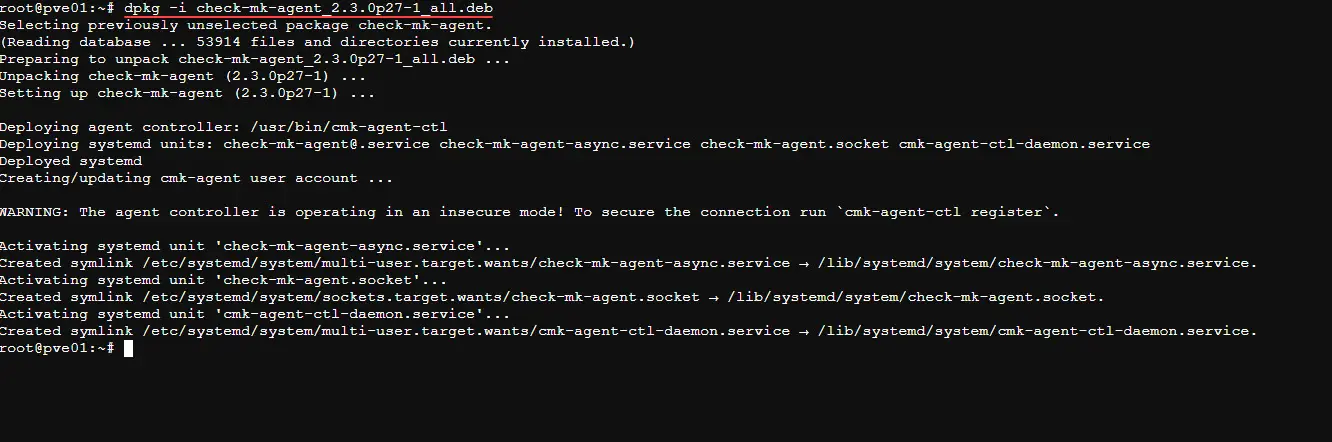
Add Proxmox VE Server host to CheckMK
Navigate to Setup > Hosts. Here you will click the Add host button. This will allow us to Monitor Proxmox with CheckMK as an added host.

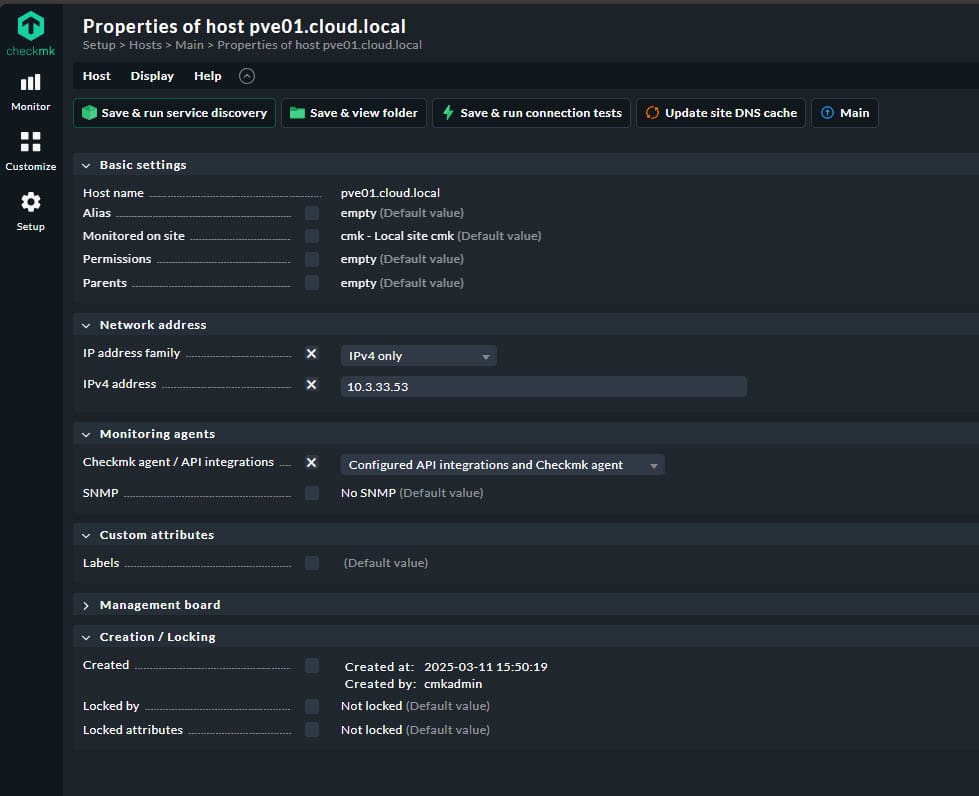
Next, fill in the details of the host in CheckMK. Note the following that I have filled in:
- Checkmk agent /API integrations – Since we are using the CheckMK agent, we need to select Configured API integrations and Checkmk agent from the dropdown.
Add a Host Monitoring Rule for Proxmox
The first thing we need to do in CheckMK is add a host monitoring rule for Proxmox. This is a “profile” of sorts on the connection information for monitoring your Proxmox servers.
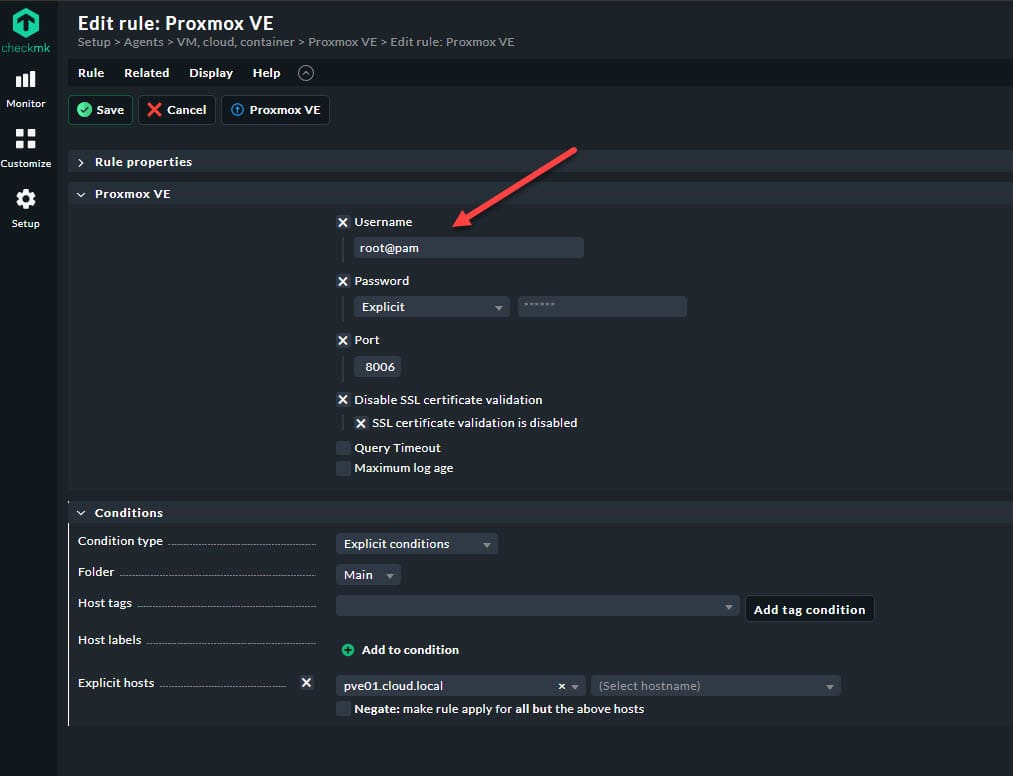
Navigate to Setup > Agents > VM, cloud, container > Proxmox VE. Click the Add rule button.

Here we fill in the credentials for Proxmox. If you are using your regular root user and password (which for testing and home lab is probably fine), you enter this in the form of root@pam for the username and then enter your password by changing the password dropdown to Explicit.
Also, you will see the option for Explicit hosts. Here we will choose from the dropdown our Proxmox VE server host that we have added in the previous step.
Apply your changes in CheckMK
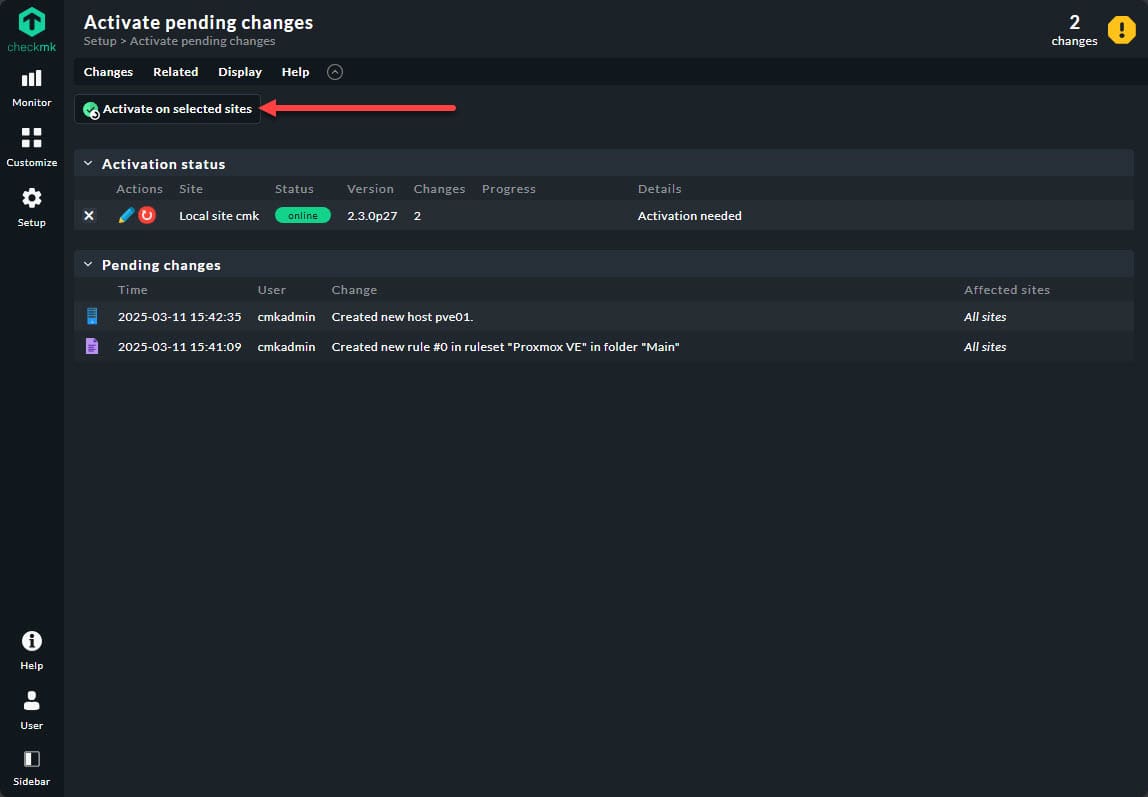
Apply your changes to your CheckMK instance. You should see the pending changes notification in the upper right-hand corner. Click this.
We will now click the Activate on selected sites button.
Run service discovery
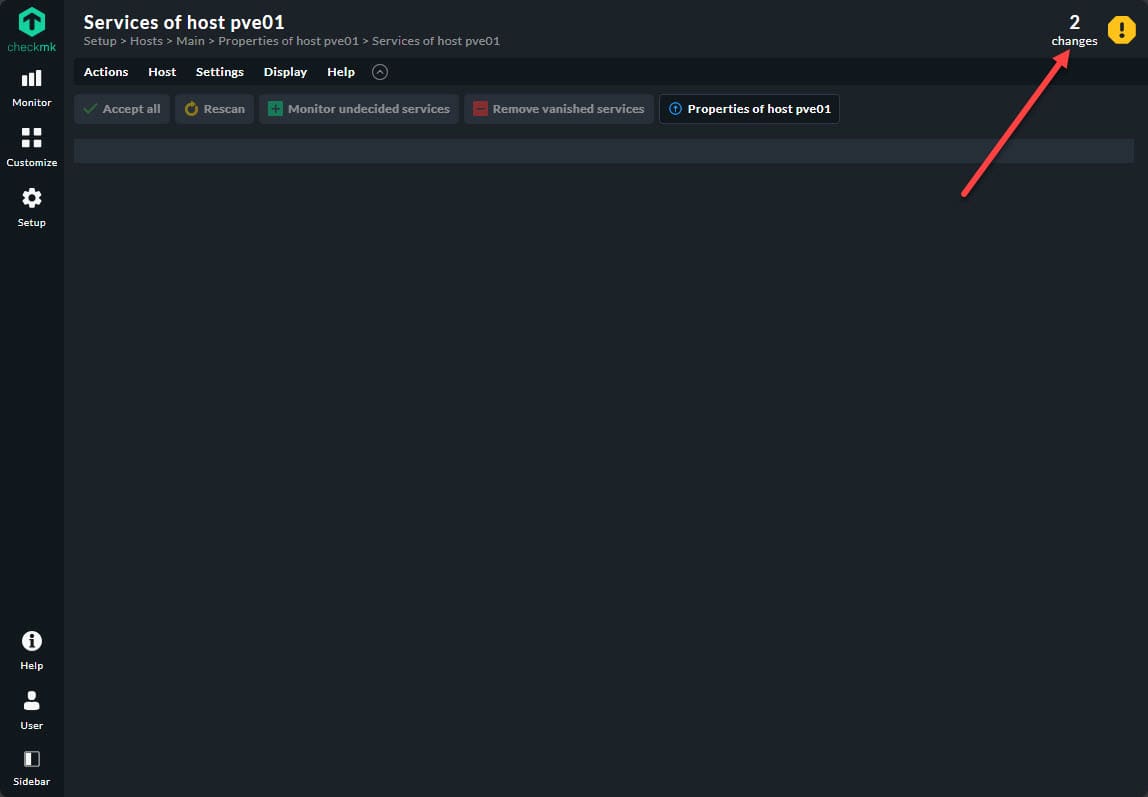
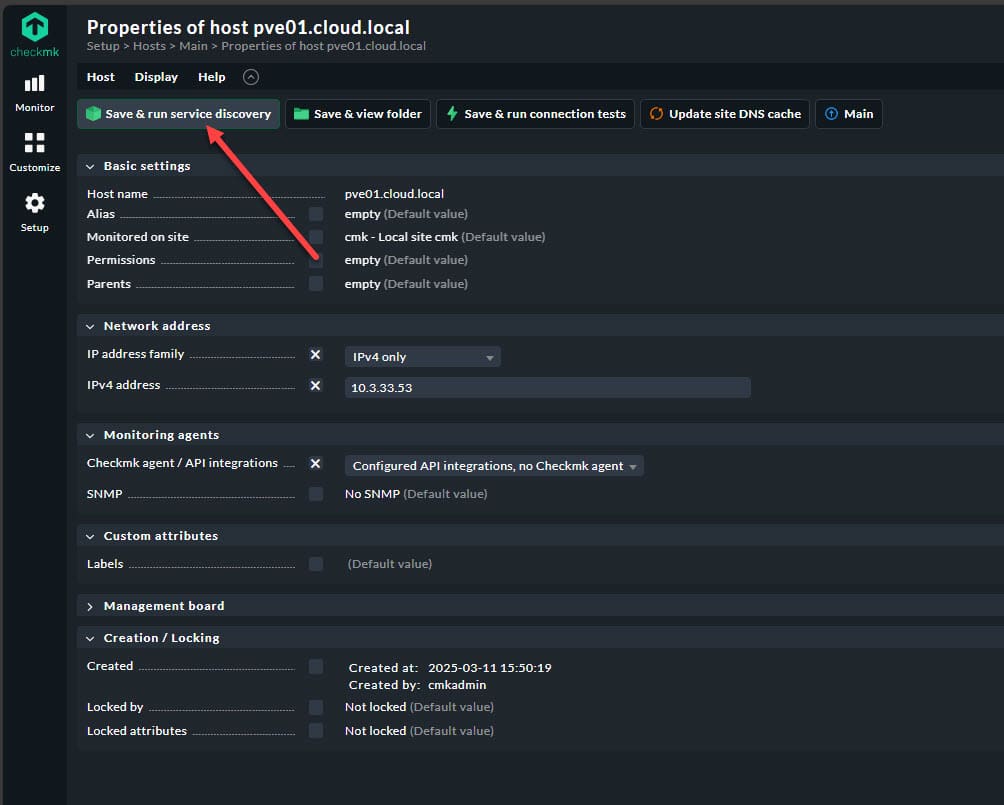
Now, go back to your Setup > Hosts area and choose your Proxmox host. Click the Save & run service discovery button. This will discover services to monitor Proxmox with CheckMK.
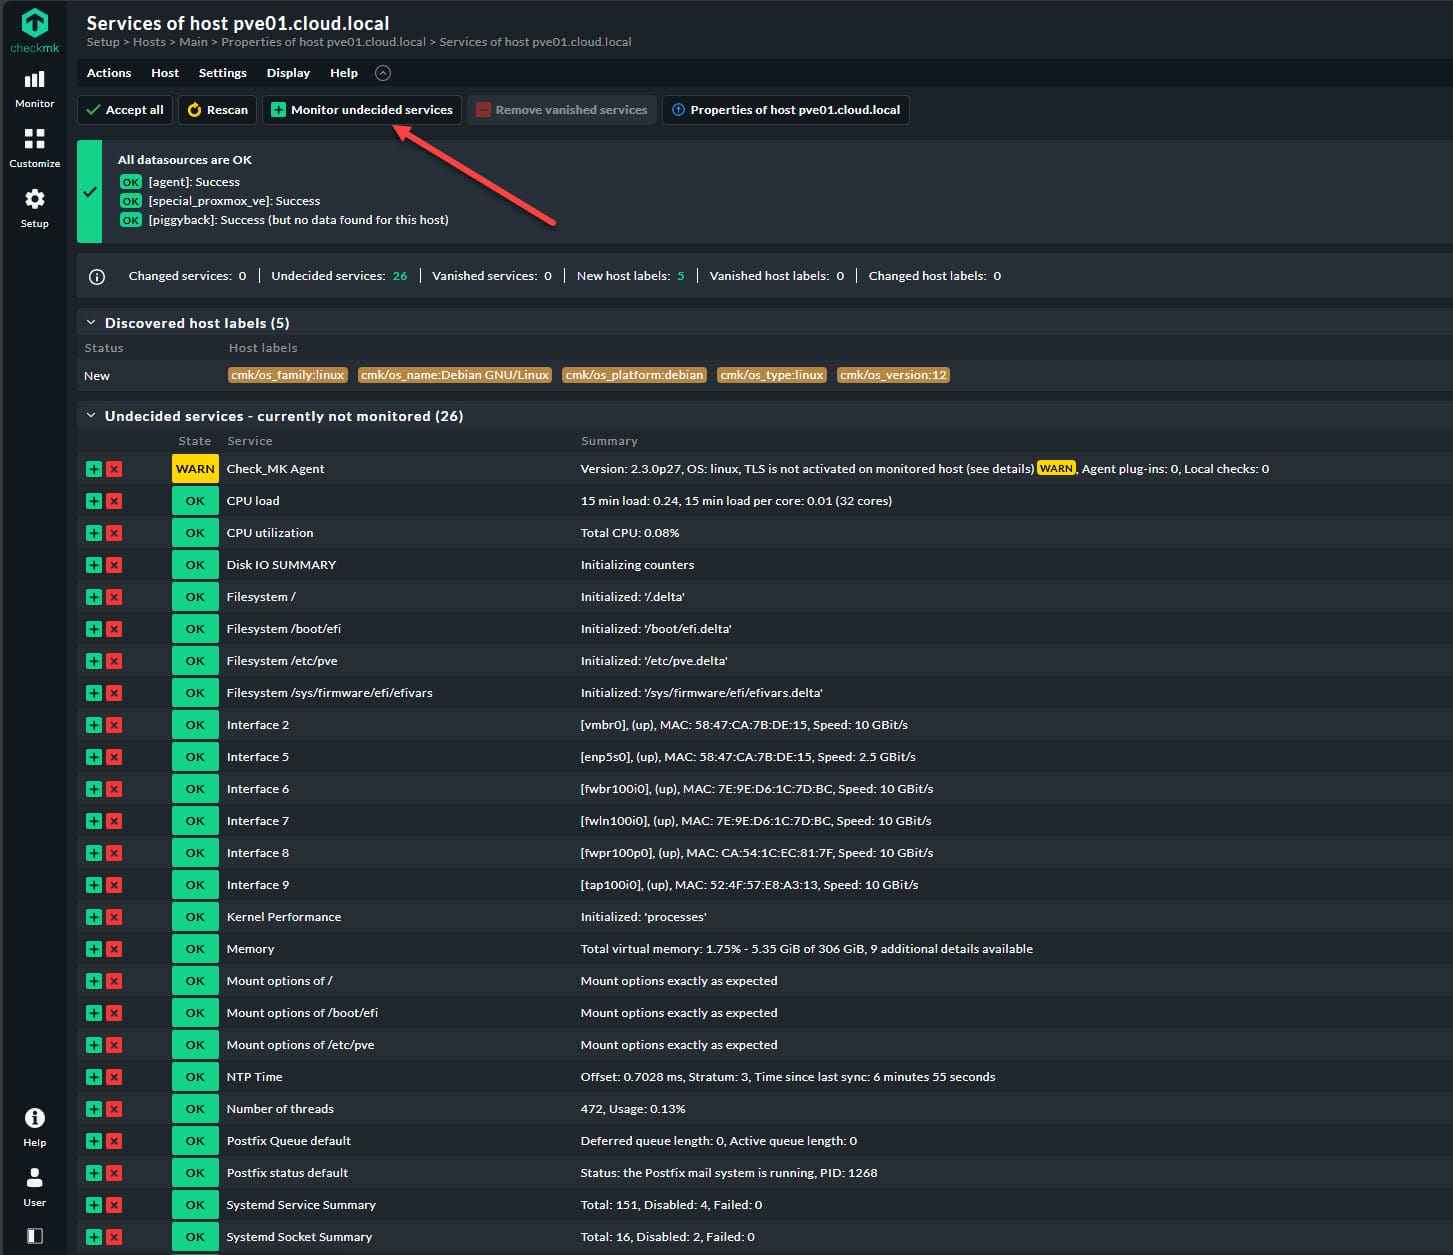
We should see the services discovered and you can click the Monitor undecided services to add everything to CheckMK.
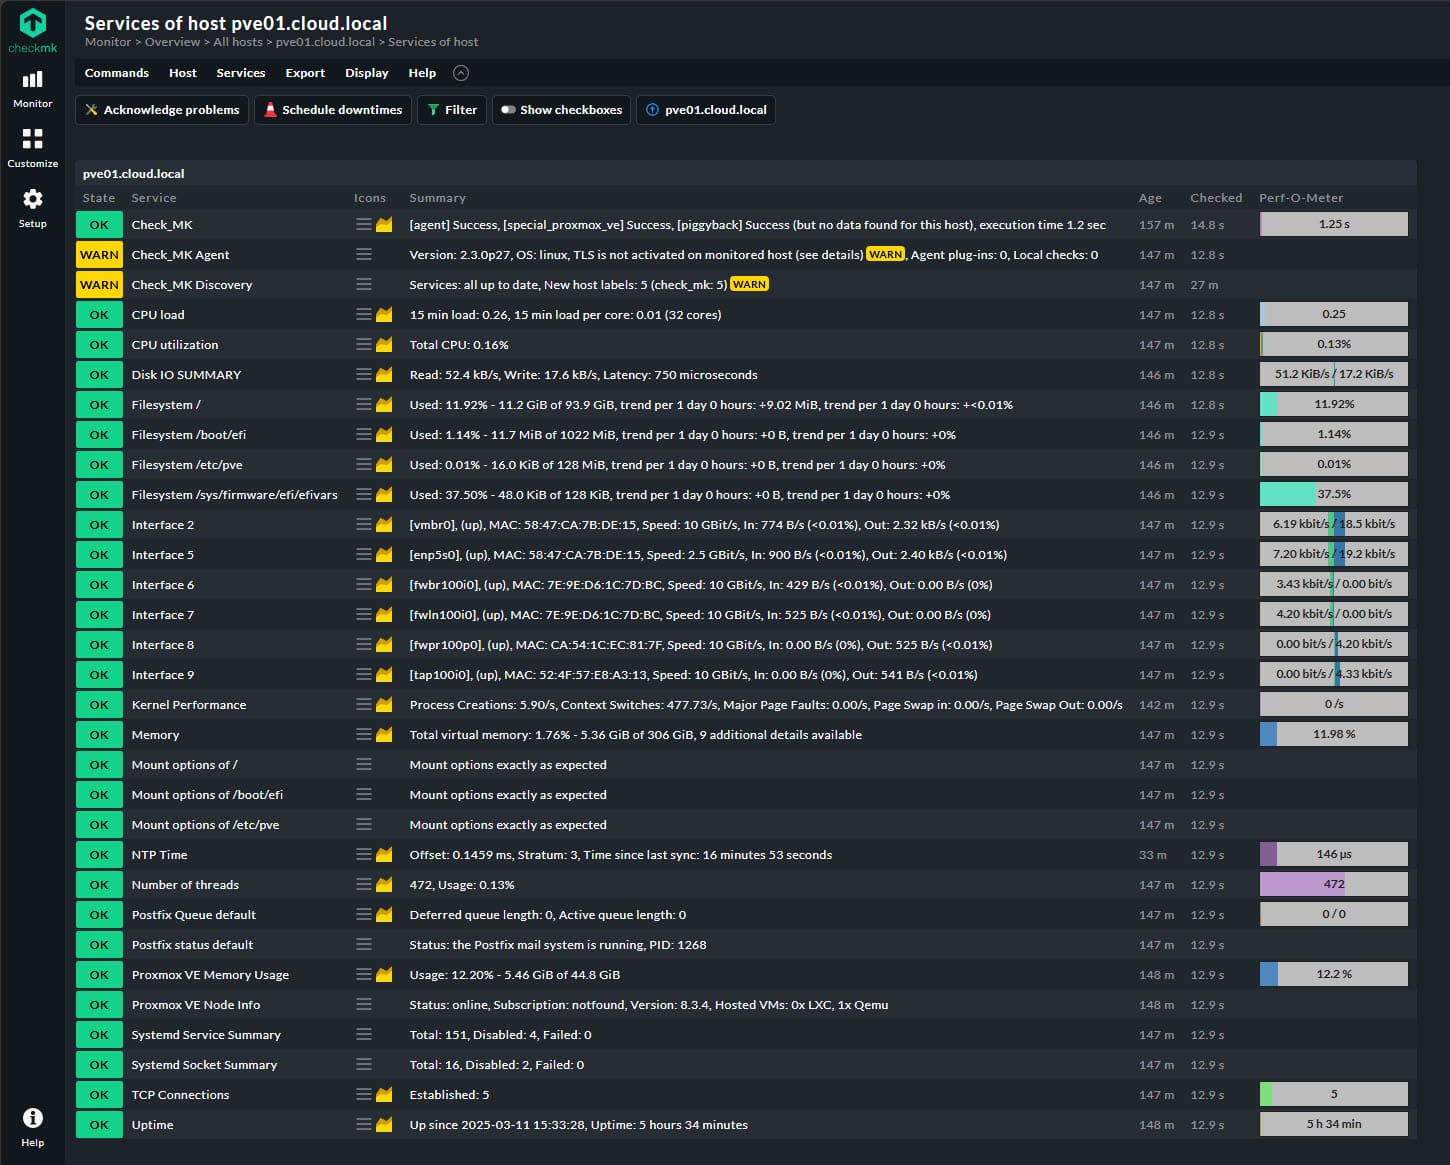
After a bit, you can see metrics flowing in after everything has had a bit to start flowing in.
Pros and Cons of Using CheckMK
Pros
- Lightweight and easy to get up and running – Minimal overhead on Proxmox hosts or any other platform. You can easily spin up in Docker.
- Pulls all the KPI metrics – CPU, RAM, Disk, VM stats, etc.
- Scalability – You can monitor a Proxmox cluster
- Alerting – You can create custom notifications
- Automation – You can create automated monitoring setups
Cons
- Learning Curve – Even though it is fairly easy to get going, if you aren’t familiar with Docker or other Linux concepts this could be a little bit intimidating at first
- Configuration complexity – Advanced monitoring (e.g., API metrics) can be a little bit challenging to wrap your mind around. CheckMK has a few different ways of doing things that you need to experiment with
- Agent-based – If you go the route of using agents, this is something that you will have to think about maintaining and lifecycle management
Additional features and integrations with CheckMK to enhance monitoring
- Grafana : You can add Grafana to CheckMK for better visualizations
- Logs : You can monitor Proxmox logs for error detection
- Cluster monitoring: Monitor your Proxmox cluster nodes
- SNMP: You can include monitoring network devices included in your Proxmox environment
Wrapping up
CheckMK is a neat solution that I think many will enjoy deploying in the home lab. However, it is not just a free and open source solution for home lab and may even be a solution that ones consider for production environments. If you are like me, it is a great opportunity to get used to a solution in the home lab that you like and are comfortable with, this is a great segway to springboarding into monitoring production. As shown, you can monitor Proxmox with CheckMK fairly easily.