Most likely one of the first types of storage you will work with in a home lab server running Proxmox is a locally attached NVMe drive in a mini PC or other type of server. NVMe drives are cheap and easy to get (at least right now) and provide super fast storage for your VMs and containers. However, we want to make sure we get the most space out of them when we configure them. For this, we can do thin provisioning. Let’s see how to thin provision your NVMe drive in Proxmox VE server.
Table of contents
- What is thin provisioning?
- Thin provisioning NVMe storage is a win/win
- Step 1 – Locate the NVMe drive in Proxmox
- Step 2 – Initialize the NVMe drive as an LVM physical volume
- Step 3 – Create a volume group
- Step 4 – Create an LVM thin pool
- Step 5 – Add the LVM-thin storage to Proxmox
- Step 6 – Reload our storage configuration in Proxmox
- Step 7 – Verify you see the storage in Proxmox web UI
- Build your own Proxmox server
- Wrapping up
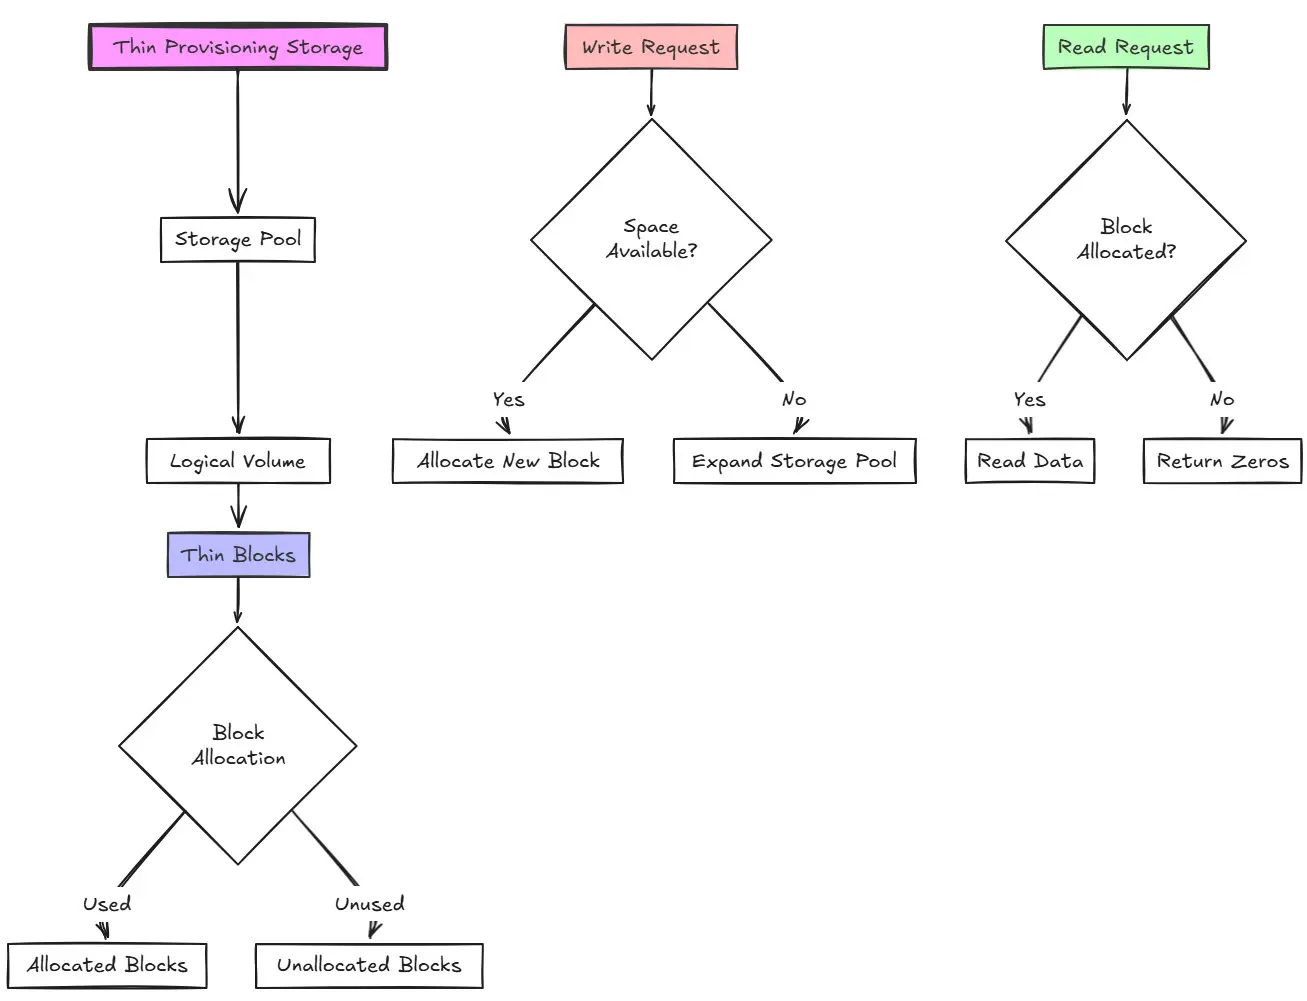
What is thin provisioning?
Thin provisioning is now the mainstream and recommended way for provisioning storage in a virtualization enviornment with today’s extremely fast storage, including SSDs and NVMe drives. Thin provisioning essentially lets you cheat on your storage and overprovision your storage so that you actually have more storage configured than you actually have.
The reason for this is that all the blocks on disk are not zeroed out, only the blocks that actually contain data. So, if you are only using 30 GB of a 100 GB virtual disk, you will only see 30 GB of storage space used on disk. So it definitely has advantages.
Thin provisioning NVMe storage is a win/win
Back in the day with very slow spinning “rust” disks, spindles, it was recommended for best performance that you thick provision your virtual storage. The reason for this is that since the disk performance was low, you didn’t want the extra overhead of a write operation needing to “zero” out a block before data was written. This could impact performance.
However, with ultra fast modern storage like NVMe drives, this is no longer a consideration since they are so fast anyway. Not only do you not see any performance degradation realistically, you also get the benefit of being able to squeeze as much storage out of your NVMe drive as possible.
Thin Provision your NVMe drive in Proxmox VE Server
Let’s look at the steps to thin provision your NVMe drive in Proxmox VE Server. This is actually fairly straightforward and is something we can easily do from the command line.
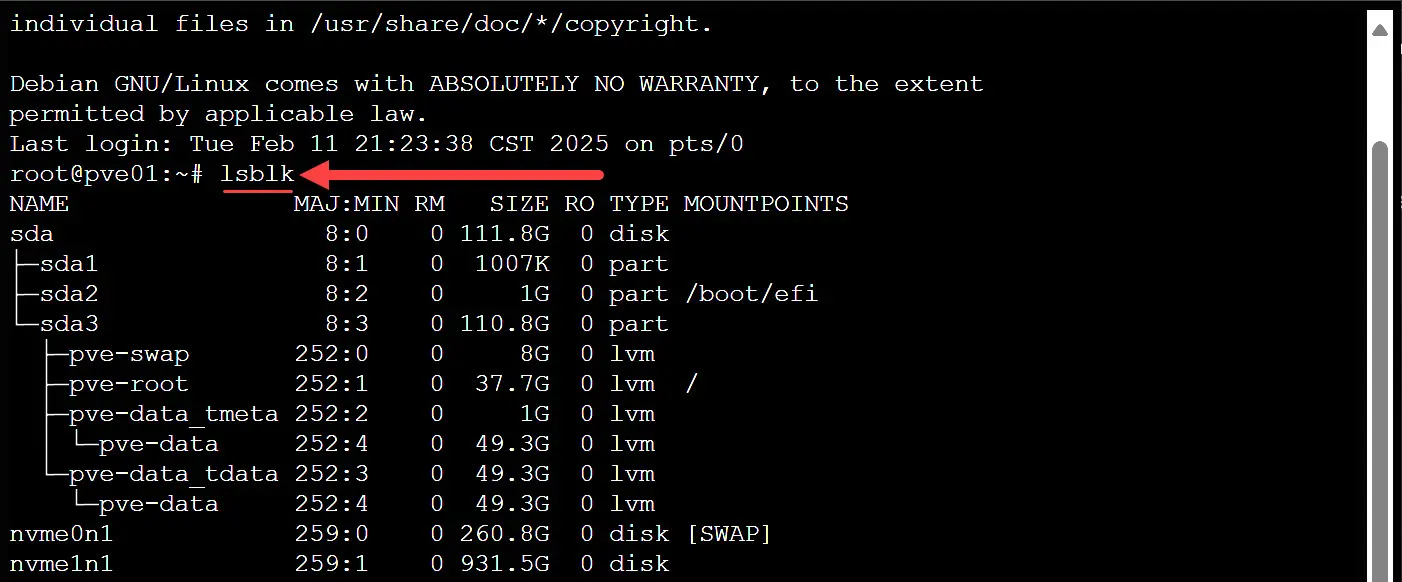
Step 1 – Locate the NVMe drive in Proxmox
First, we need to locate the NVMe drive in Proxmox. To do that, we can run the command:
lsblkI will be working with the NVMe storage listed as nvme1n1 in the following examples. You will need to replace the commands below with the name of your particular NVMe storage as it is listed in Proxmox with the lsblk command.
Step 2 – Initialize the NVMe drive as an LVM physical volume
Next, we need to take the steps to initialize the NVMe drive as a physical volume. To do that, run this command using the identifier of your NVMe drive you want to work with from the output of the lsblk command:
pvcreate /dev/nvme1n1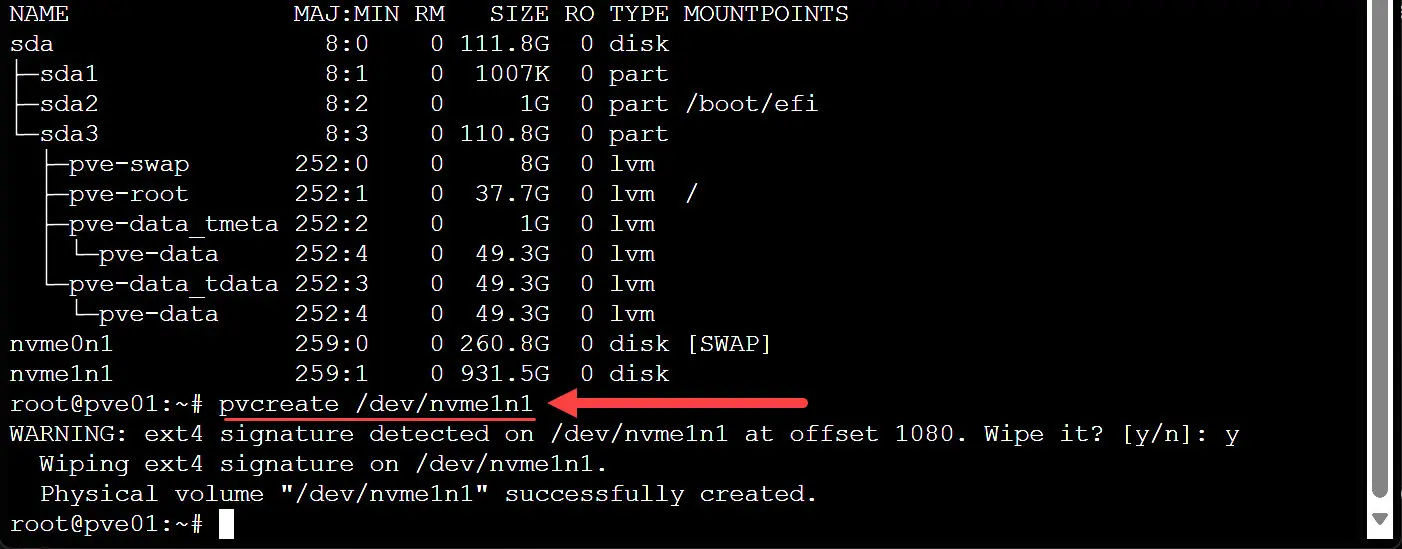
Step 3 – Create a volume group
The next step we need to carry out is create a volume group on the NVMe drive. This can be named anything. Below, we are using nvme-vg:
vgcreate nvme-vg /dev/nvme1n1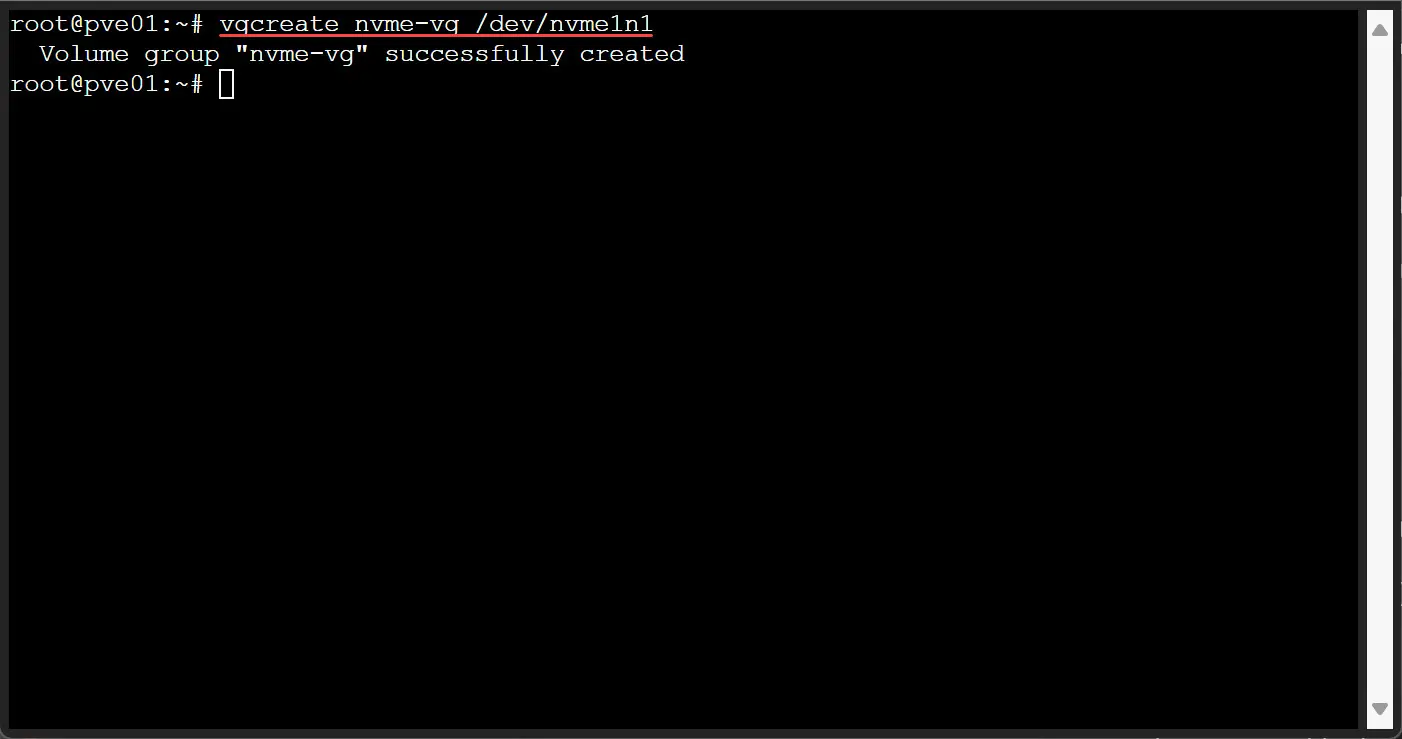
Step 4 – Create an LVM thin pool
Next, we create an LVM thin pool within the volume group that we created in the last step. The command below will use all available space:
lvcreate -l 100%FREE -T nvme-vg/thinpool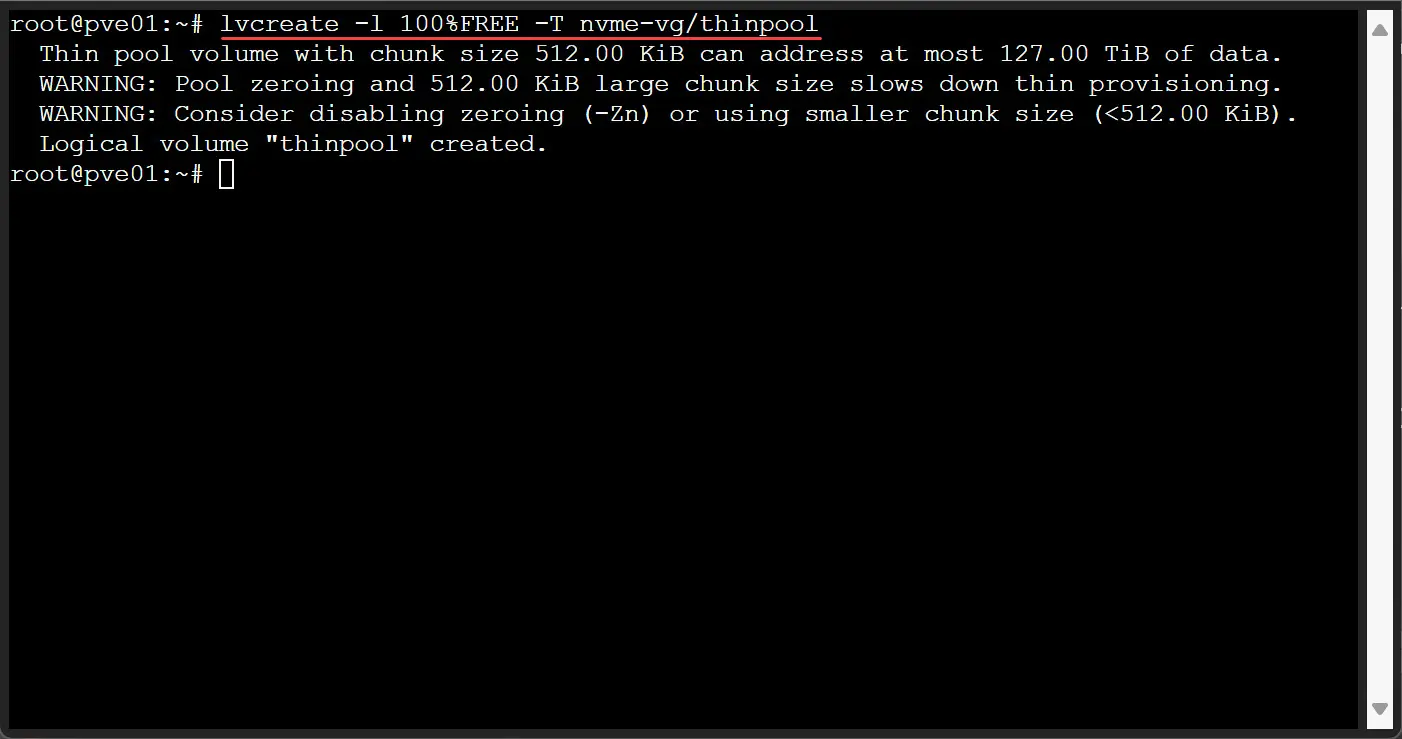
Step 5 – Add the LVM-thin storage to Proxmox
Now that we have the storage created, we need to add this new LVM-thin storage to Proxmox by modifying our storage configuration file. That file is located here: /etc/pve/storage.cfg.
nano /etc/pve/storage.cfgWe need to add the lines below, which reference our newly created nvme-thin pool. In this directive we also specify the following:
- nvme-thin – this is the name that Proxmox will use for the storage
- thinpool thinpool – this is the name of the LVM thin pool created in previous steps
- vgname nvme-vg – this is the volume group name
- content images,rootdir – this directs which types of content can be stored here, in this case VM images and container root directories
Lines to add:
lvmthin: nvme-thin
    thinpool thinpool
    vgname nvme-vg
    content images,rootdir
Add the lines to your storage configuration file, save, and exit.

Step 6 – Reload our storage configuration in Proxmox
The final step in the configuration process is to reload the storage configuration for Proxmox. You can do that with either of the following two commands:
systemctl restart pve-clusterOr you can run this command:
systemctl restart pvedaemon pvestatd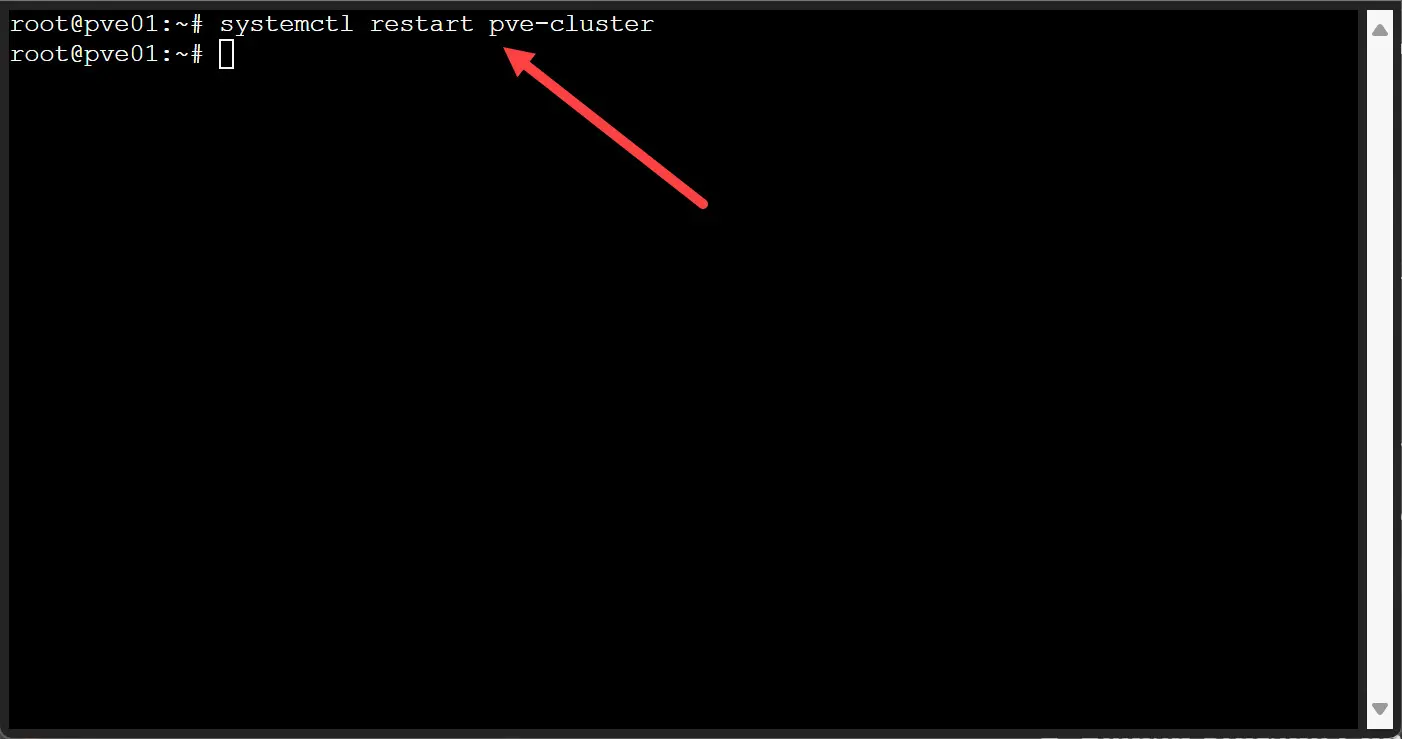
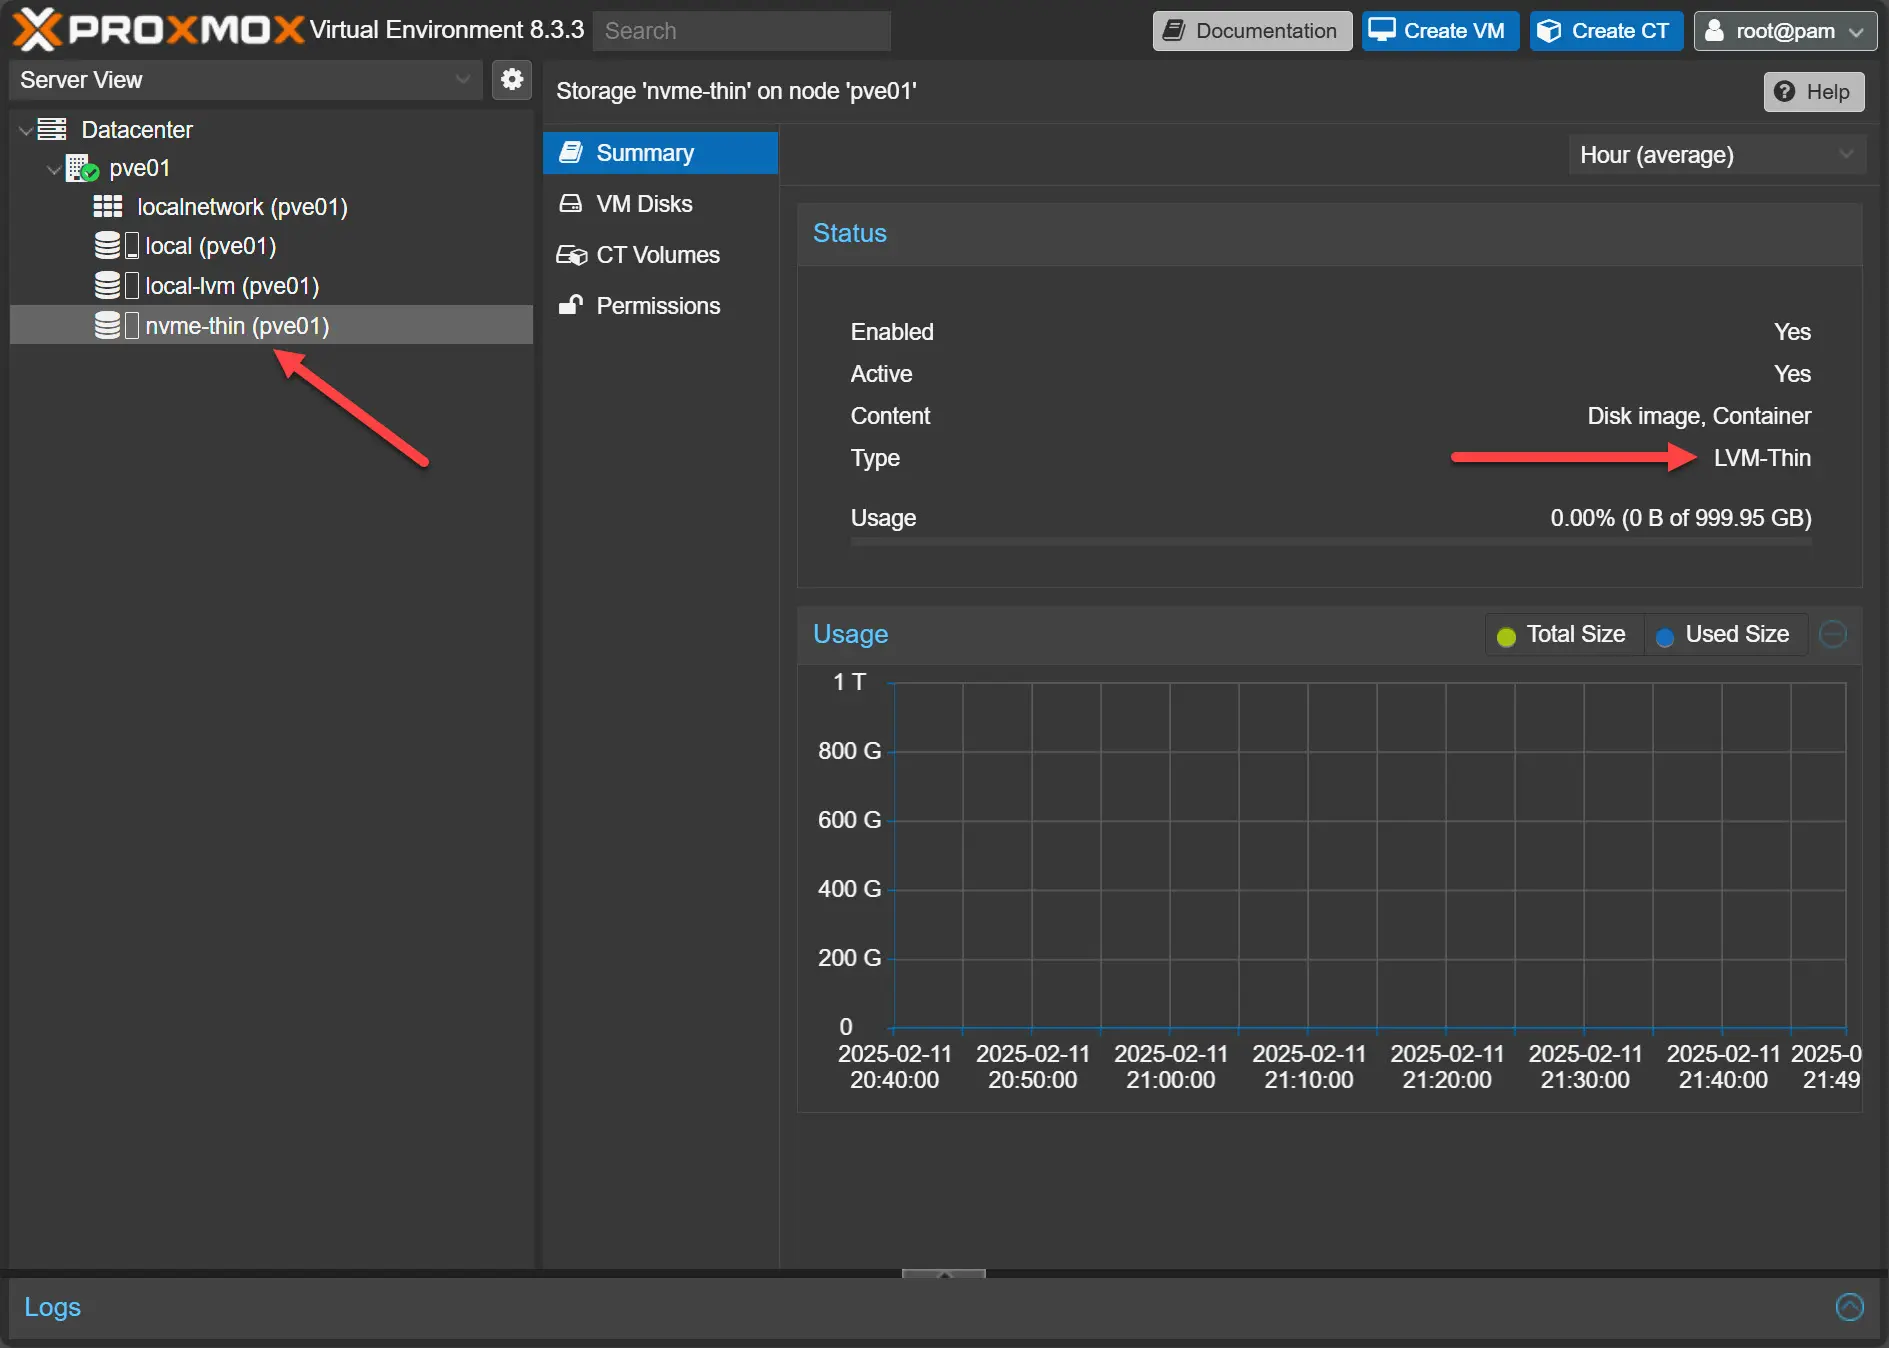
Step 7 – Verify you see the storage in Proxmox web UI
Now that we have reloaded the Proxmox storage configuration, we should be able to check in the Proxmox web UI and see the newly added nvme-thin storage available to use. Below, we can see the storage appears and it is of type LVM-Thin.
Build your own Proxmox server
See my bill of materials for my Proxmox Server Build 2025 below:
- Minisforum BD795M – https://amzn.to/3PQXFa8
- RackChoice 2U Micro ATX Compact – https://amzn.to/3CeIW5H
- Cooler Master MWE Gold 850 V2 – https://amzn.to/4aFXhET
- Noctua NH-L9i-17xx, Premium Low-Profile CPU Cooler – https://amzn.to/4hAKIwG
- Crucial 96GB kit of DDR5 SODIMM memory kit – https://amzn.to/40w3ONQ
- Intel X520-DA2 10 GbE network adapter – https://amzn.to/4jv05ZA
- Kingston 240 GB drive for boot – https://amzn.to/4hv6sKG
- Samsung EVO 990 Pro 2TB – https://amzn.to/40OwtiA
Wrapping up
When you thin Provision your NVMe drive in Proxmox VE Server, it is a great way to have the best of both worlds – both fast storage and storage that you can “cheat” and overprovision until your heart is content. Keep in mind that thin provisioning can also grow if you overprovision too much and needs to be monitored a bit more closely if you have virtual machines that have sporadic or explosive growth from time to time. As you can see in the post, it is fairly straightforward to add NVMe storage that is thin provisioned to your Proxmox VE server or Proxmox clulster that is very fast and efficient with storage capacity.
Google is updating how articles are shown. Don’t miss our leading home lab and tech content, written by humans, by setting Virtualization Howto as a preferred source.
About The Author