Proxmox Swap Tweaks Guide! Dedicated drive, Swappiness, Page Cluster
I have been doing quite a bit of testing with Proxmox swap and Intel Optane drives for ultra fast swap storage. In doing so have learned quite a bit about configuring your Proxmox swap drive to use dedicated storage, tweak the swappiness value, and other configuration settings that can definitely have a major impact on performance at least making it where you can truly have extremely fast and efficient swap for your Proxmox host.
Table of contents
- What is Proxmox swap?
- Viewing swap and turning off the default swap
- Configuring Proxmox swap to use a dedicated disk
- Verify new swap space and comment out the old swap
- Checking our free memory and swap space
- What is swappiness?
- Checking and configuring the swappiness value
- Increase page cluster for faster Proxmox swap reads/writes
- Build your own Proxmox Home Lab Server in 2025
- Wrapping up
What is Proxmox swap?
First of all, what is Proxmox swap and what is it used for? The Proxmox swap space is space configured in a Proxmox Virtual environment that acts like virtual memory. It is used when the system’s physical RAM is fully used up. Swap allows the operating system to unload inactive memory pages from RAM to disk. This helps to keep things from crashing or slowing down dramatically when memory is completely used up.
Proxmox can have a couple of different types of swap space that is configure. Swap can be configured at both the host level (on the Proxmox VE node which is what we will be looking at), and at the virtual machine level or containers (LXC).
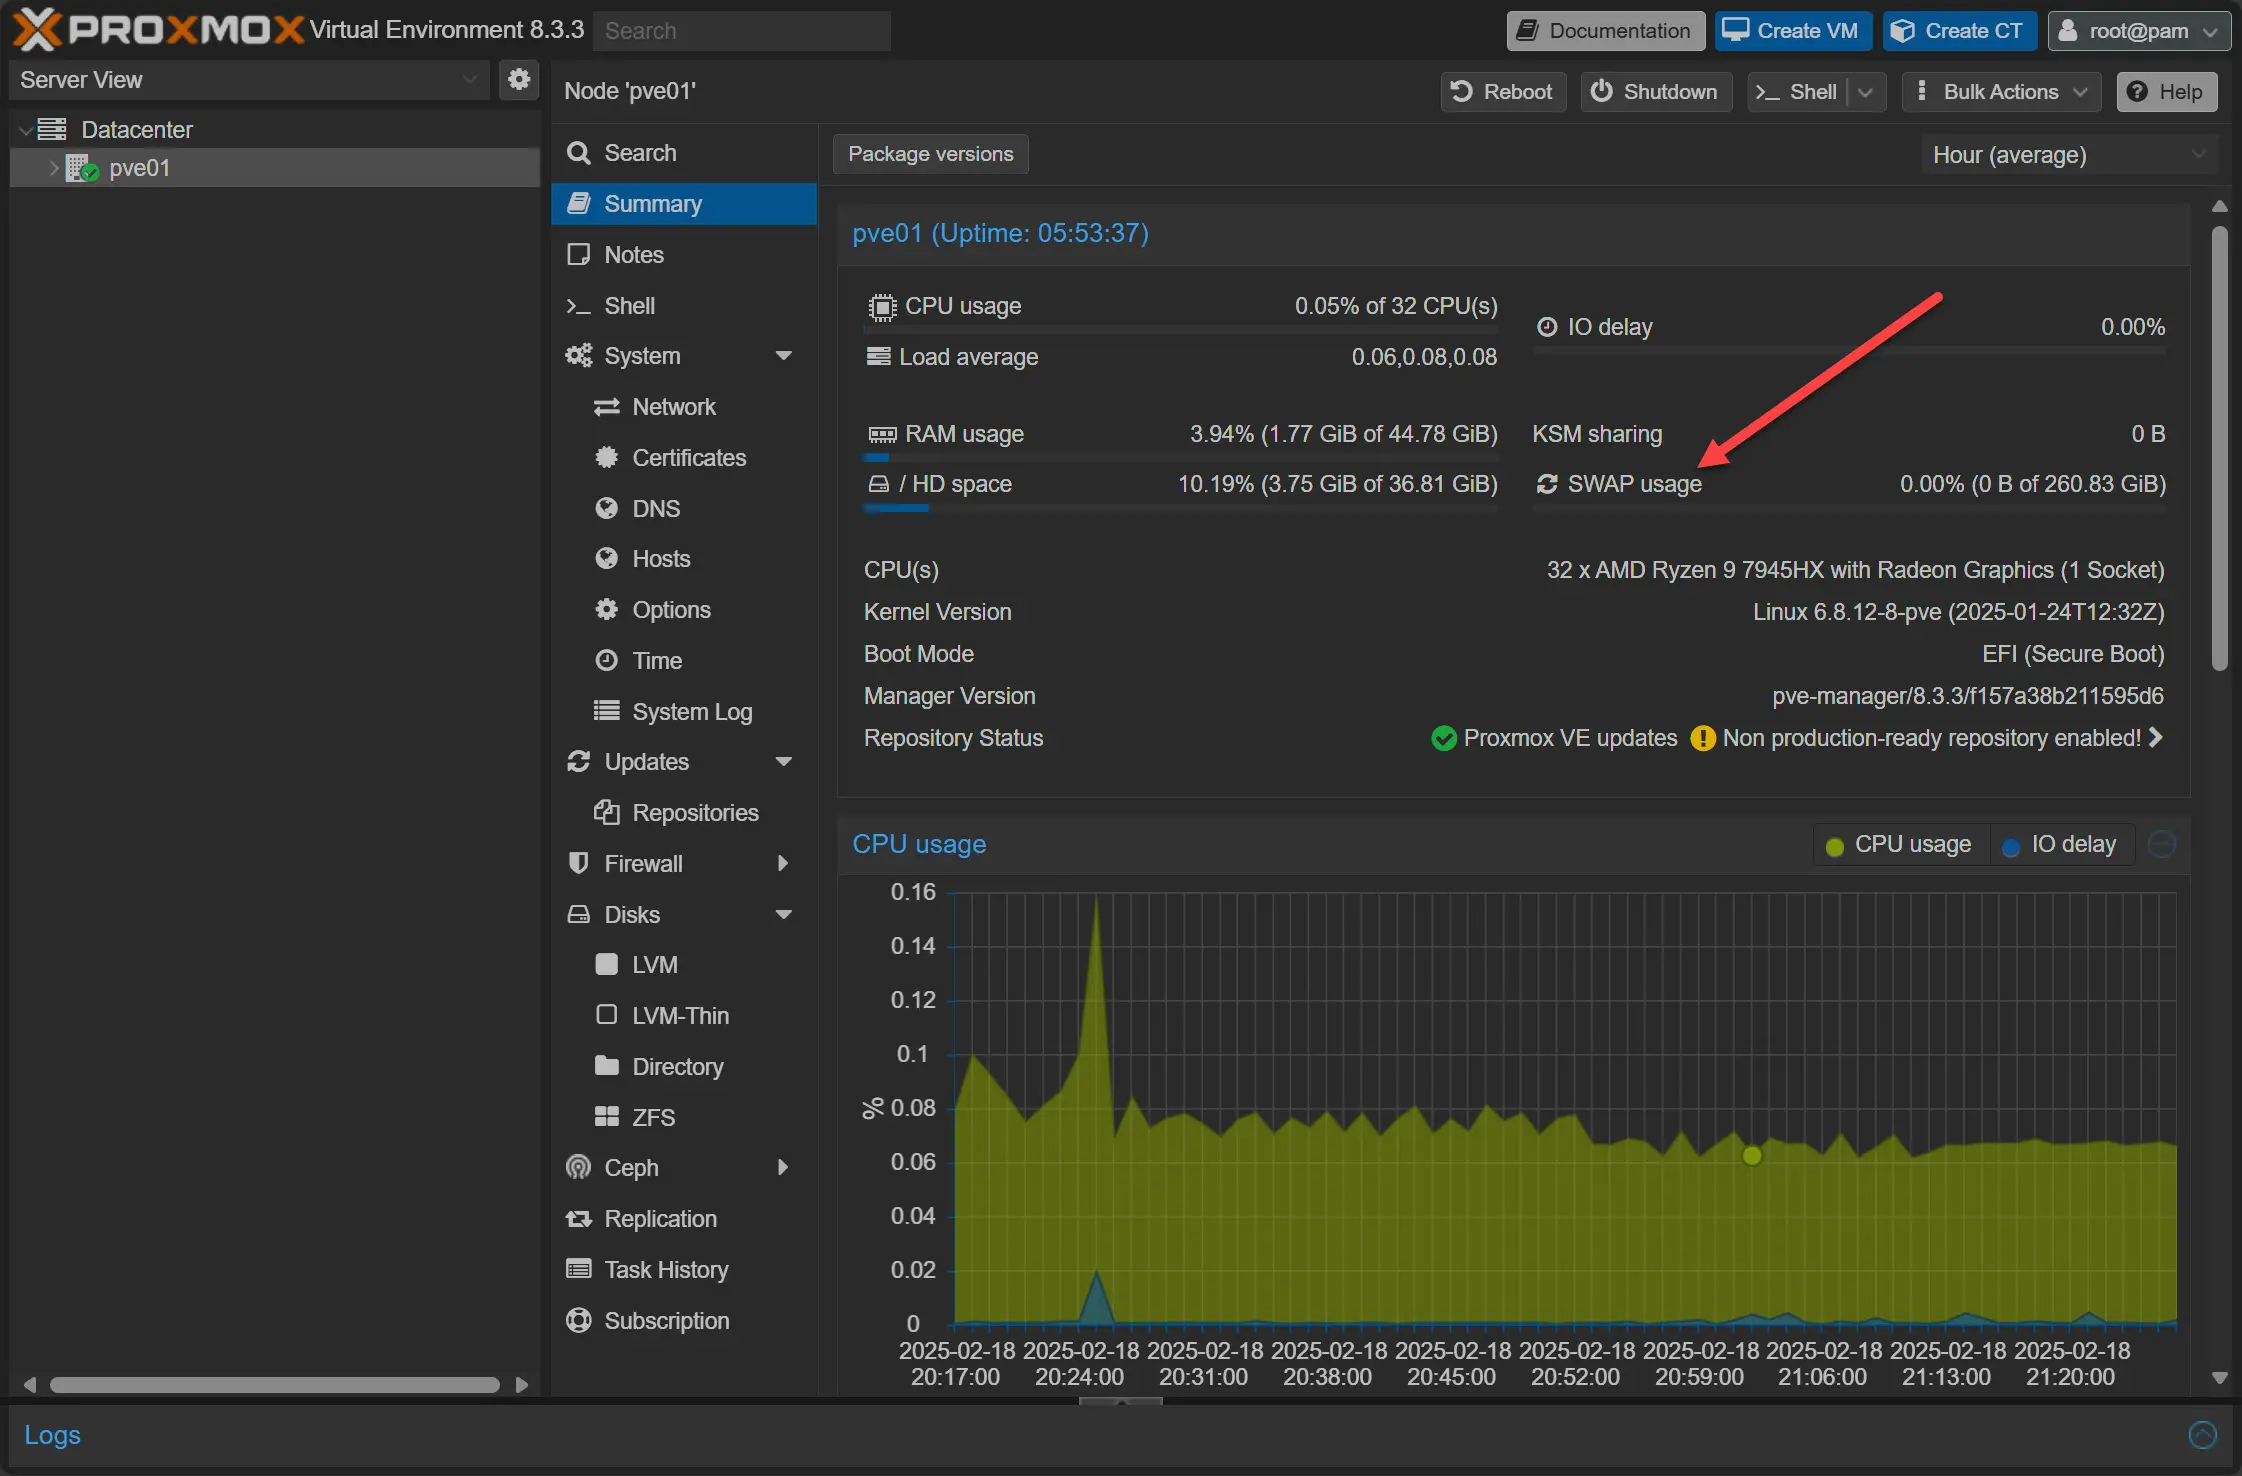
If you look at the official documentation, swap is not meant to replace your true system memory as typically disk operations are much slower than RAM. You can keep an eye on how much swap space is used by looking at the command line:
free -mYou can also see this in the Proxmox web interface. When you click on your Proxmox node > Summary screen > Swap usage, you will see a current view of how much swap space is being used.
Viewing swap and turning off the default swap
Let’s take a look at how to view Proxmox swap for the system and how we can turn off the default swap space. First, to view the configured swap in our Proxmox system, run the command below:
swapon --summaryAs you can see below, we see the default 8 GB partition that is configured when we install Proxmox. This will use the same disk that your Proxmox installation uses.

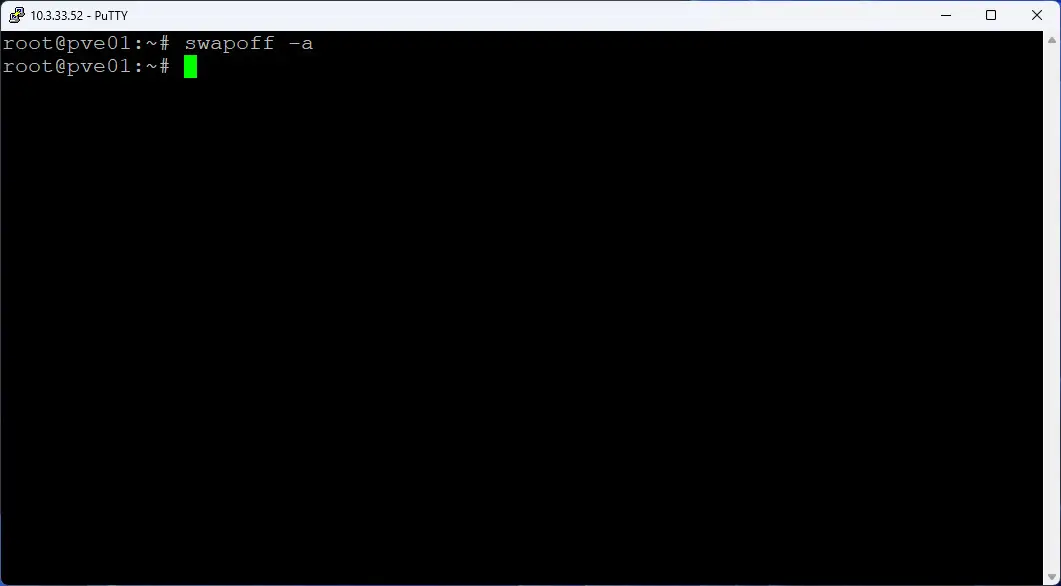
Next, if we want to disable the configured swap space that is set up by default, we can run the command:
swapoff -aThis command will say that any swap space that is currently configured we want to turn it off. Since we only have the default Proxmox swap space configured, this is fine as we want to turn this off and assign some fast dedicated storage for this purpose.
Configuring Proxmox swap to use a dedicated disk
Now, let’s say we want to use a dedicated drive for our Proxmox swap. I have been experimenting with Intel Optane storage that is blazing fast and that has super low latency and high IOPs. Optane mimics memory in many ways. So this is what I would like to use for my Proxmox swap space.
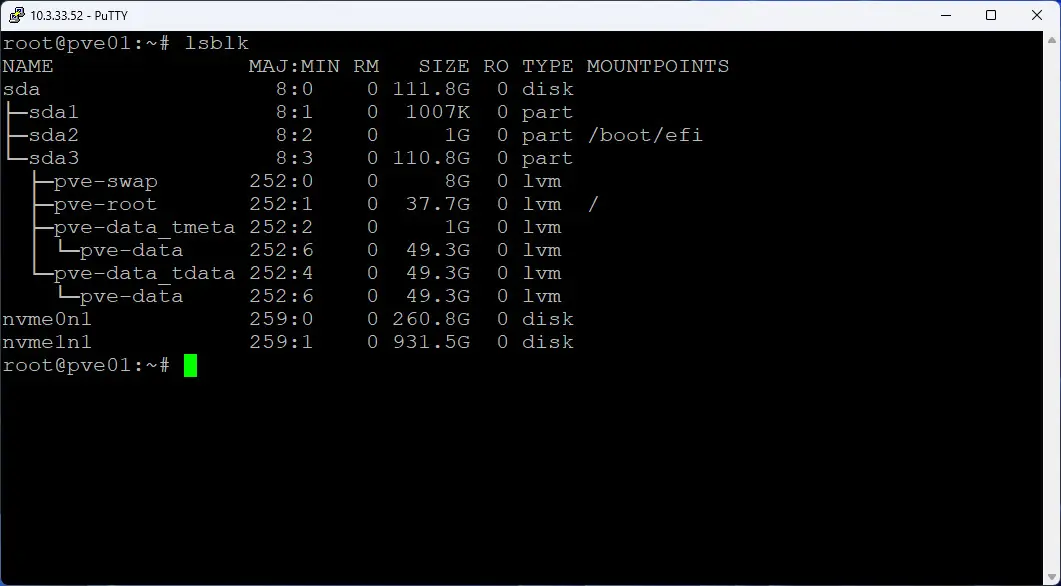
We need to find the disk that we want to use for our dedicated swap space. You can do that with the command:
lsblkBelow, in the output for the lsblk command, I want to use the nvme0n1 device since this is my Intel Optane storage.
To use this drive for dedicated swap storage, we can use the command:
mkswap /dev/nvme0n1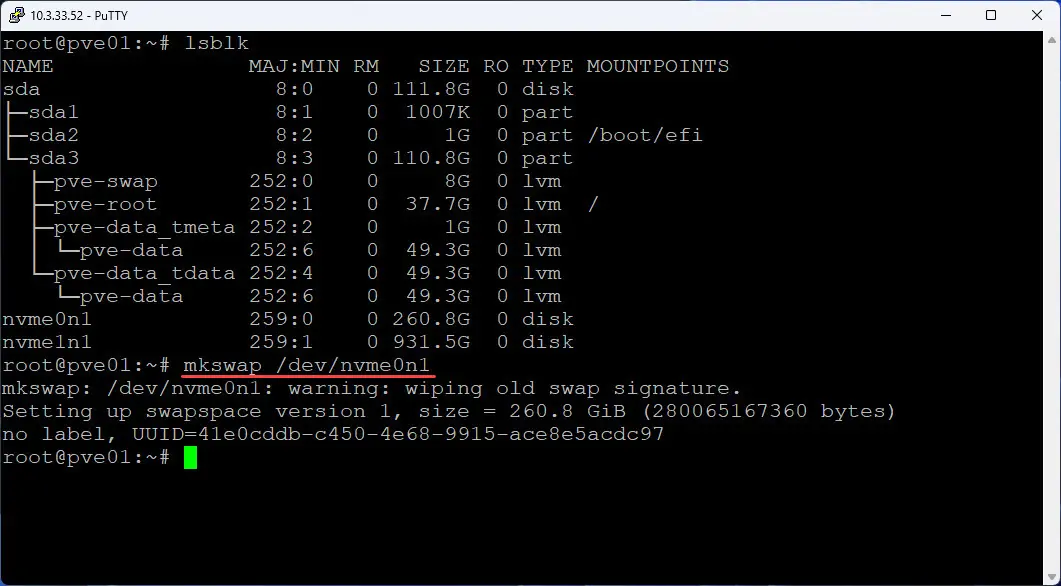
Now, to make this persistent, we need to add this drive to the fstab file located at /etc/fstab.
echo "/dev/nvme0n1 none swap sw 0 0" | tee -a /etc/fstab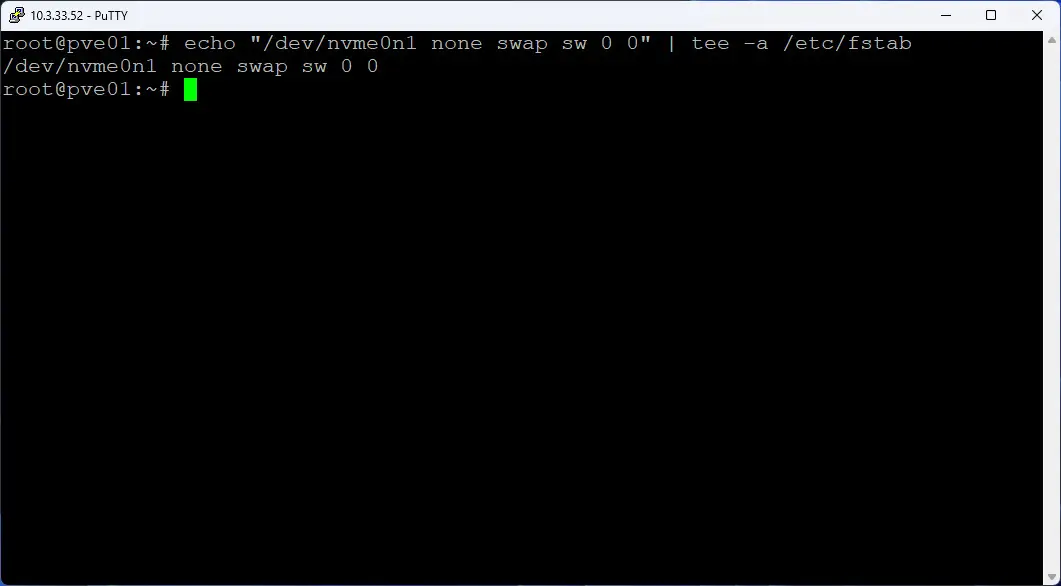
Verify new swap space and comment out the old swap
Below I am using nano to edit the /etc/fstab file. Here I am commenting out the default swap storage:
#/dev/pve/swap none swap sw 0 0And, we can see the new swap space has been added:
/dev/nvme0n1 none swap sw 0 0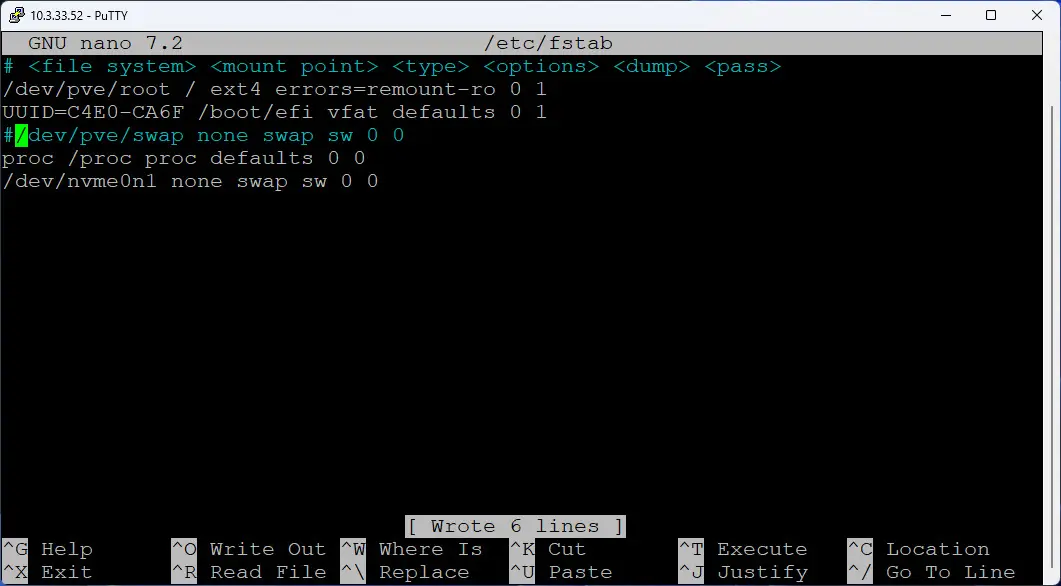
Checking our free memory and swap space
Now that we have done this, we can check our free memory which also shows the swap space configured using the command:
free -m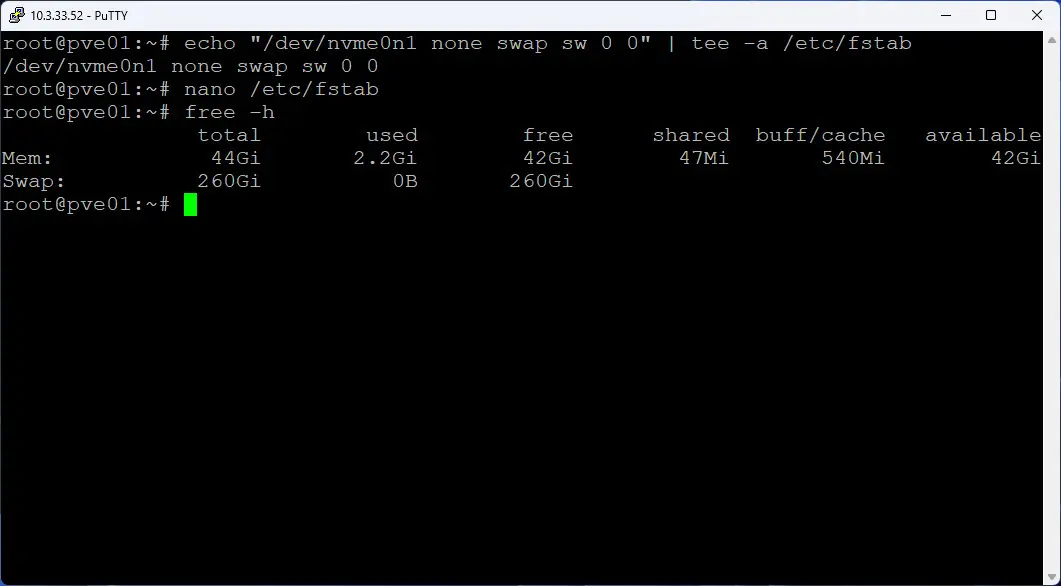
What is swappiness?
It may not sound like it, but the term “swappiness” is actually a real thing in the Linux world, I love the terminology! The swappiness value is a Linux kernel parameter. It controls how agressively the system uses swap space when it manages memory.
Swappiness is configured using a number between 0 and 100. The lower the value or closer to 0, it means the system prioritizes keeping data in RAM and only use swap if it is absolutely necessary. Higher values, or values closer to 100 encourage the system to use more frequent swapping of inactive memory pages to disk.
The default swappiness value in Linux, including Proxmox is 60. This is a value that balances RAM with swap utilization. In a system with plenty of memory and if you are running virtual machines and containers that can be quite sensitive to latency, some may even decrease the swappiness value.
However, if you have a memory-starved host which is often the case in a home lab, and you are using fast swap storage like intel optane, increasing the swappiness value to something between 75-90 helps to make sure the system offloads as many memory pages as it needs to fast Intel Optane storage, freeing up as much memory as possible.
You will need to monitor and test these settings out in your particular environment to find the balance of performance and memory use.
Checking and configuring the swappiness value
There are a couple of ways to check the current swappiness value. You can do this with the command:
cat /proc/sys/vm/swappinessOr you can use the command:
systemctl vm.swappiness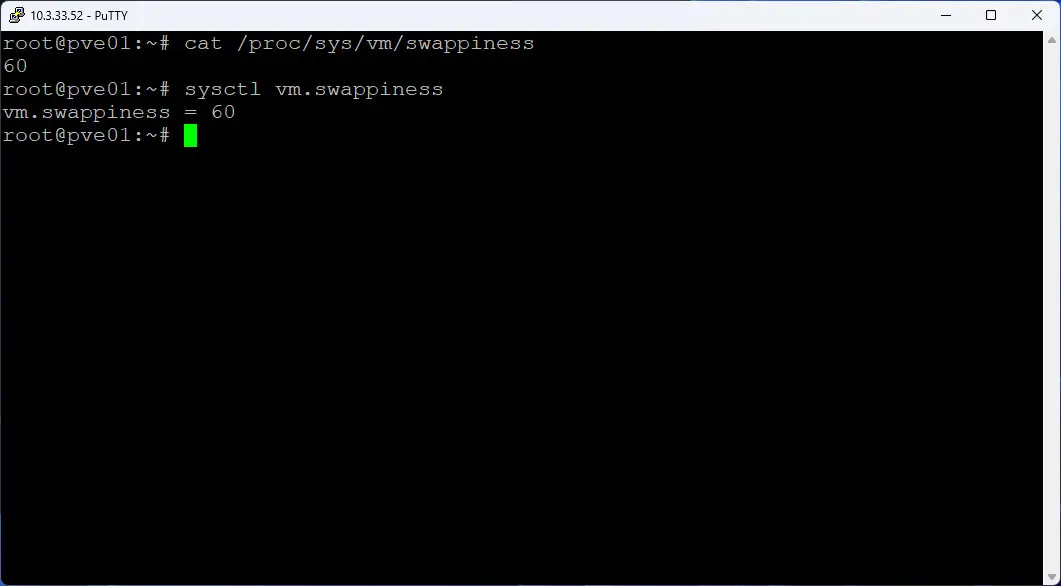
Now, let’s see how we configure the swappiness value. We can do this with the command:
sysctl -w vm.swappiness=75
We can make this change permanent with this command:
# Make the change permanent
echo "vm.swappiness=70" | tee -a /etc/sysctl.conf

# Apply the changes immediately
sysctl -p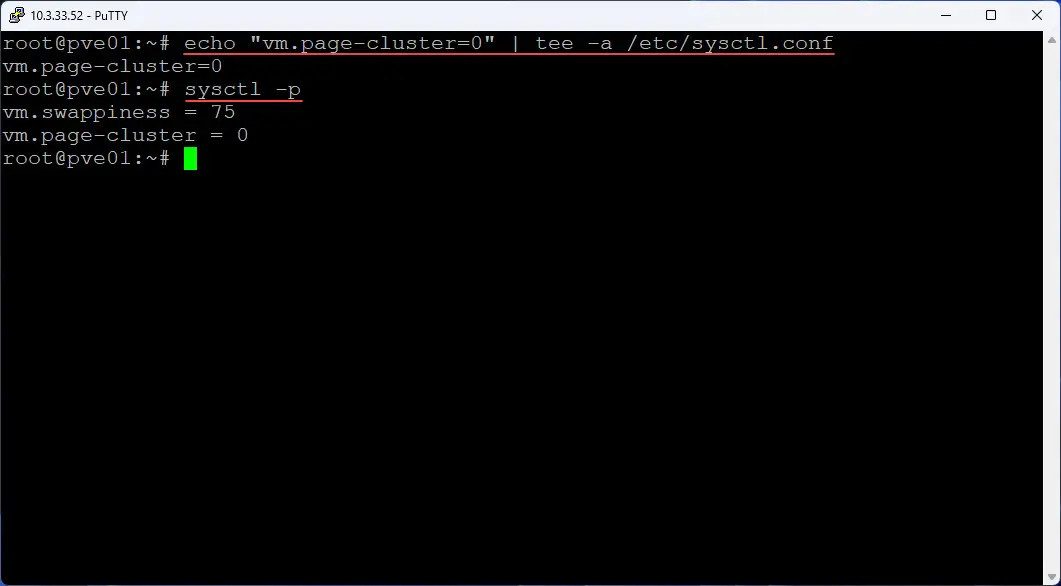
Increase page cluster for faster Proxmox swap reads/writes
The vm.page-cluster setting in Proxmox controls how many pages (which are 4kb in size each) the Linux kernel tries to read and write to your swap space at once. The default value is 3 which means Linux will swap in and out 2^n pages (2^3 which equals 8 pages at a time). Optane can handle high IOPS efficiently and doesn’t need this batching operation due to its performance
Setting the vm.page-cluster setting to 0 forces Linux to swap only one page (4kb) at a time instead of bundling these together. If your swap usage is random and latency-sensitive (e.g., high-memory VMs, databases, etc) using vm.page-cluster=0 is preferred. It makes sure you have near RAM speed response from swap and it takes advantage of Optane’s super low latency.
You can set this withthe following:
# Set the page cluster setting
echo "vm.page-cluster=0" | tee -a /etc/sysctl.conf

# Apply changes immediately
sysctl -p
Build your own Proxmox Home Lab Server in 2025
I have recently completed a build for a Proxmox home lab server in 2025 and it turned out really well. It is the machine that I am using for my swap testing. Here is the bill of materials:
- Minisforum BD795M – https://amzn.to/4i2VEDH
- RackChoice 2U Micro ATX Compact – https://amzn.to/3CeIW5H
- Cooler Master MWE Gold 850 V2 – https://amzn.to/4aFXhET
- Noctua NH-L9i-17xx, Premium Low-Profile CPU Cooler – https://amzn.to/4hAKIwG
- Crucial 96GB kit of DDR5 SODIMM memory kit – https://amzn.to/40w3ONQ
- Intel X520-DA2 10 GbE network adapter – https://amzn.to/4jv05ZA
- Kingston 240 GB drive for boot – https://amzn.to/4hv6sKG
- Samsung EVO 990 Pro 2TB – https://amzn.to/40OwtiA
See it on kit.co here:
Wrapping up
Hopefully, this post can serve as a guide if you want to tweak your Proxmox swap space to have the most performance possible using something like a dedicated drive running on Intel Optane or other very fast storage. Optane has near memory latency and is extremely fast. So, it can be used in situations where you want to essentially extend your system memory as far as possible and run more workloads on a memory starved system. Let me know in the comments if you have tweaked on your Proxmox memory configuration. Have you found a configuration that works great for you in the home lab, production, etc?