Microk8s is one of the coolest small Kubernetes distros you can play around with and it is not just for playing around, it is actually built for running production workloads in the cloud. But, it can also serve as the platform you use in your home lab for running Kubernetes and getting familiar with it. Let’s look at Microk8s for beginners and how it can be installed and configured.
Table of contents
- What is Microk8s?
- Compared to Minikube, k3s, and others
- Microk8s add ons
- Why choose MetalLB, Traefik, etc as addons?
- How do you install Microk8s?
- Setting up an alias for microk8s kubectl
- Check the status of microk8s
- Start a Microk8s cluster
- Stop a Microk8s cluster
- Reset your Microk8s cluster
- Enabling the Microk8s dashboard
- Adding a node to your microk8s Kubernetes cluster
- Joining a node
- Upgrading your Microk8s cluster
- Persistent storage with Microceph
- Fully automated with Portainer
- Wrapping up
What is Microk8s?
Microk8s is a very lightweight Kubernetes distribution from Canonical (same people that make Ubuntu) that provides a platform for not just testing and development, but also for production workloads. It is super easy to install and it can easily setup a HA cluster and install add-ons as you need.
Canonical bills it as a production-ready Kubernetes version that is CNCF-certified. You get automatic security updates and upgrades with Microk8s as well. For production environments, it has some pretty appealing benefits. Those are:
- 99.9% uptime SLA
- 10-year security maintenance
- over the air updates
Compared to Minikube, k3s, and others
I really like Microk8s compared to Minikube. I think it is less complicated to setup and it is production ready Kubernetes where Minikube is not. Minikube is only for single-node Kubernetes installs.
I think k3s is honestly a very good Kubernetes distro that compares very well to microk8s. However, Microk8s is still a little less complex than k3s I think, even though k3s can be installed with a single binary. Canonical has made microk8s pretty rock solid from an operational standpoint, including installing, resetting, configuring, etc.
Integrated with the Canonical ecosystem
One of the things I love about the microk8s distribution is that it is tightly integrated with the Canonical ecosystem. Most operations are a simple snap command. Also, you have access to integrate microk8s easily with Microceph.
Microceph is a production-ready HCI storage solution and CSI for your microk8s cluster that allows you to use locally attached storage to form a logical storage pool between your microk8s nodes. We will look at this a bit more below.
Microk8s add ons
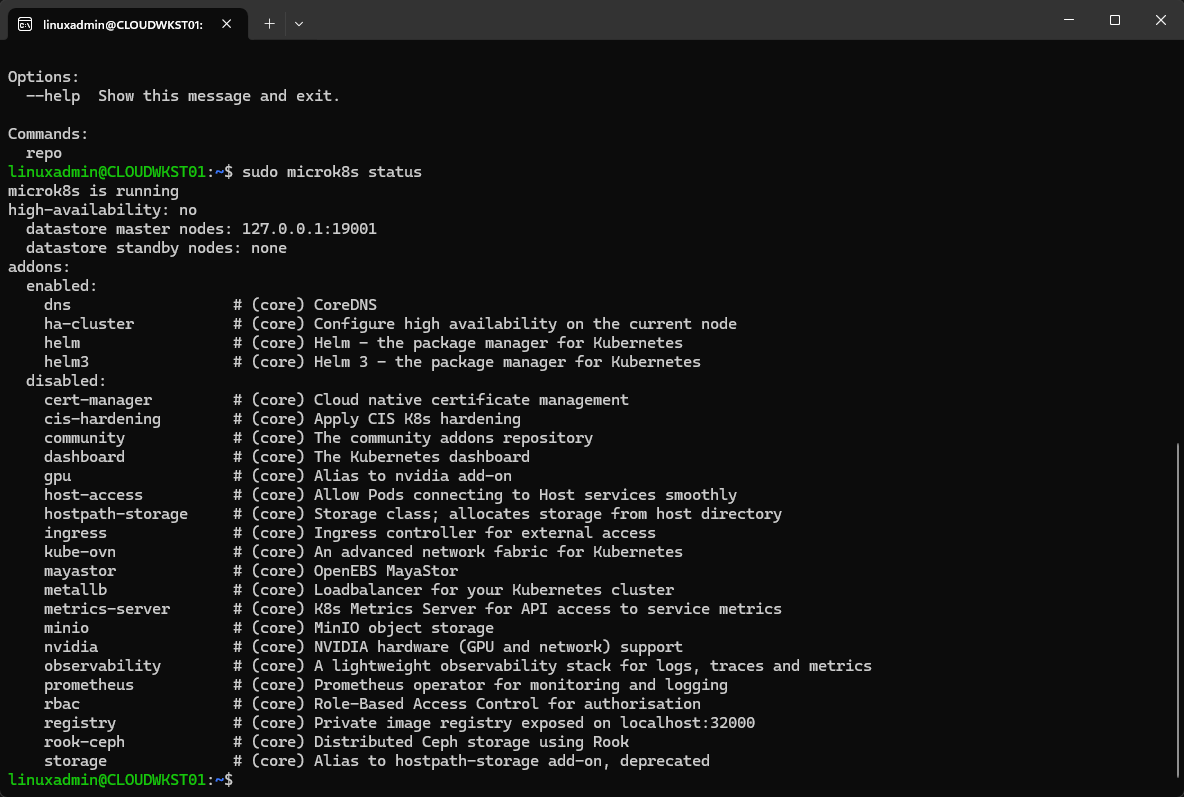
One of the really cool things about Microk8s is the fact that you can easily install add-ons with the microk8s enable <add on> command. You can see the available list of Microk8s addons and which ones are enabled with the microk8s status command.
This really makes it much easier to add services and configurations to the Microk8s cluster as it is just a simple one-liner command you run from the prompt.
There are a few core services that are enabled when you install Microk8s. These include:
- DNS
- ha-cluster
- helm
- helm3
These are available to be added:
- cert-manager
- cis-hardening
- community
- dashboard
- GPU
- host-access
- hostpath-storage
- ingress
- kube-ovn
- mayastor
- metallb
- metrics-server
- minio
- nvidia
- observability
- prometheus
- rbac
- registry
- rook-ceph
- storage
Community add-ons
You can also enable the community addons. Enabling the community addons module gives you access to even more plugins that you can enable for additionl functionality. As a good example of an addon you get access to after enabling the community addon is Traefik.
With Traefik you have a professional and enterprise-grade ingress controller that enables you to get traffic into your Kubernetes cluster, provide SSL termination, and many other benefits that Traefik brings to the table.
Why choose MetalLB, Traefik, etc as addons?
MetalLB and Traefik are two of my favorite addons to enable. What are these used for?
- MetalLB – This addon lets you set up a pool of IP addresses that can be used for Kubernetes services that are configured as type “LoadBalancer” for the service. This gives the service a “public” IP or one that is on your network for DNS purposes, etc. What I like to do is setup MetalLB, and then setup Traefik as type LoadBalancer and let Traefik be provisioned with one of these IP addresses. This way you can point your DNS to Traefik and it handles the SSL termination, ingress, etc.
- Traefik – Traefik is an ingress controller for Kubernetes that allows you to handle incoming traffic to your Kubernetes pods and have these routed to the correct pods for the request. It is also very popular for SSL termination in conjuction with certbot and Let’s Encrypt certificates.
How do you install Microk8s?
You can install Microk8s very easily. In fact, with a single-line command in Ubuntu, using the following:
sudo snap install microk8s --classicIs possible to install in Windows Subsystem for Linux (WSL)
You can also install Microk8s inside of Windows Subsystem for Linux as well which makes it a great way to play around with Kubernetes even on a workstation machine that you have running with WSL installed.
I am using an Ubuntu Server 24.04 LTS WSL instance and it works just fine with the normal installation command without issue.
Setting up an alias for microk8s kubectl
One thing you will note with microk8s kubectl is that you have to issue the explicit command microk8s kubectl to run kubectl commands. Many who work with Microk8s quite a bit will set up an alias for that command so they can just issue a simpler command like mkctl.
alias kubectl ="microk8s kubectl"Check the status of microk8s
After you install Microk8s, it should start the cluster, you can check the status:
sudo microk8s status --wait-ready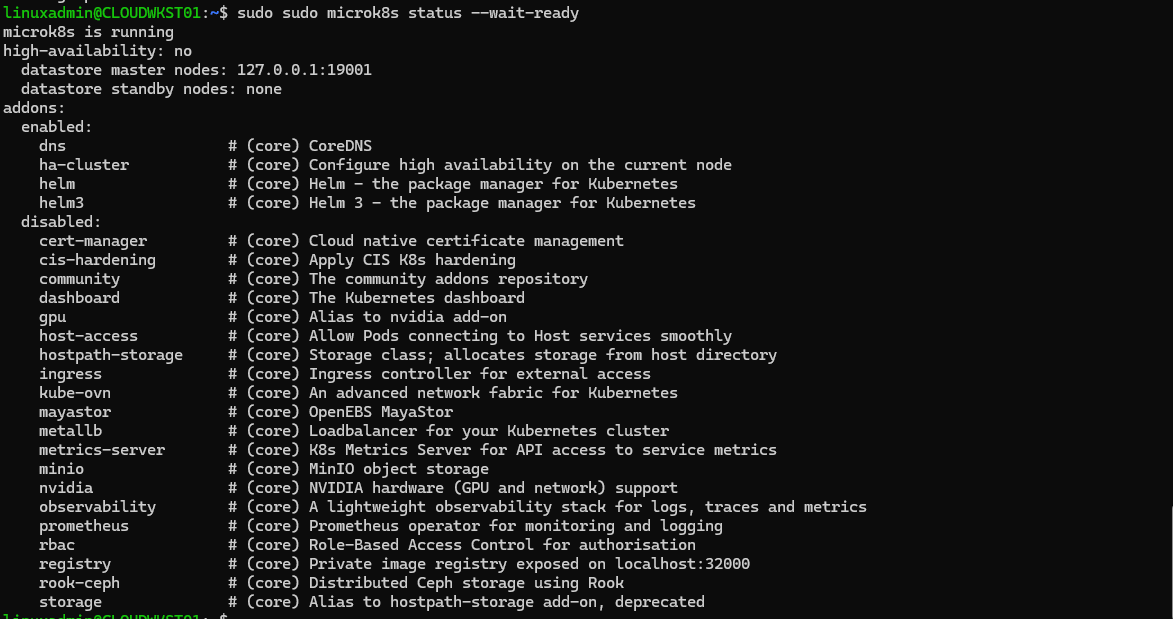
Start a Microk8s cluster
You can easily start a Microk8s cluster if stopped with the command:
sudo microk8s startStop a Microk8s cluster
You can stop your Microk8s cluster if needed using the command:
sudo microk8s stopReset your Microk8s cluster
If you have issues with your Microk8s cluster, you can reset the cluster using the command:
sudo microk8s reset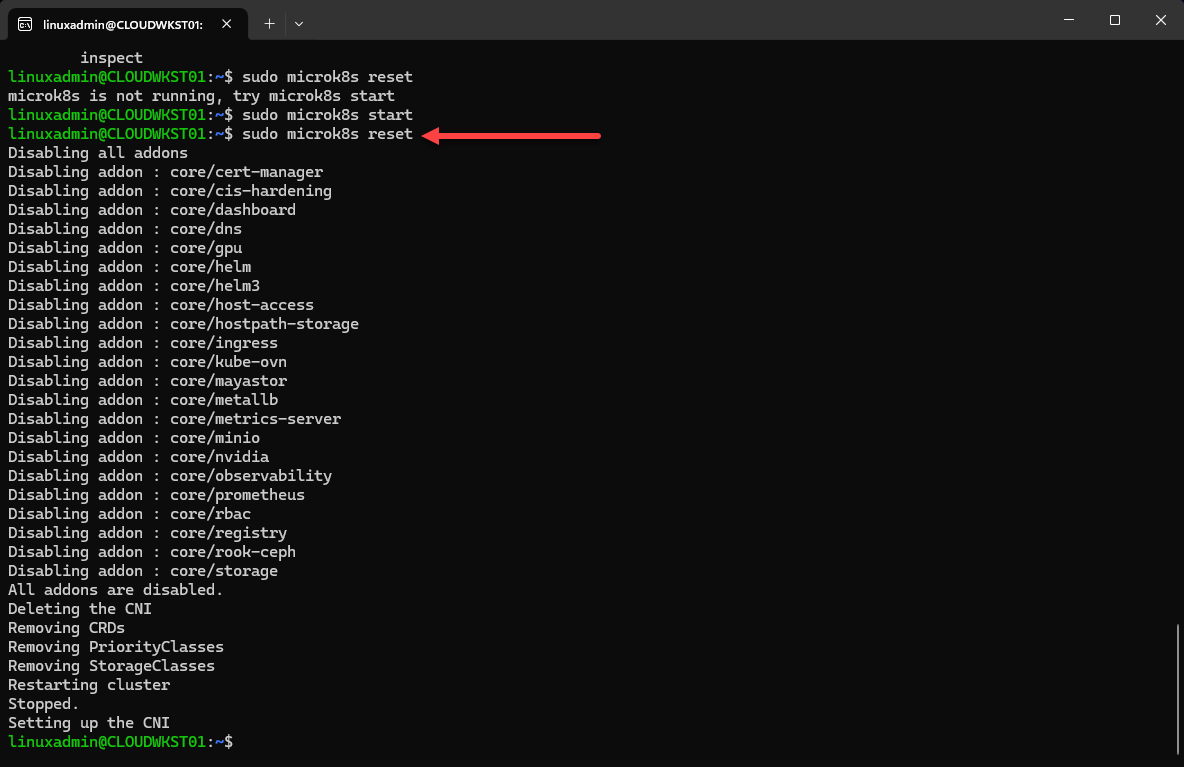
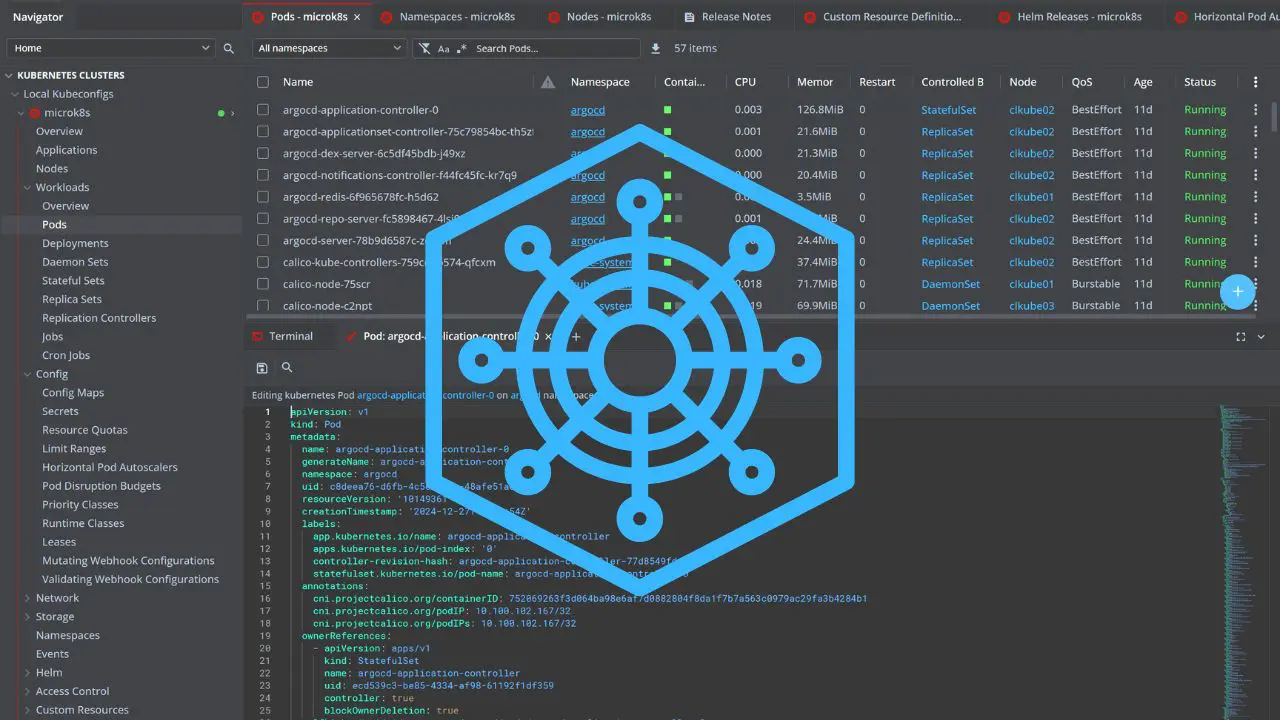
Enabling the Microk8s dashboard
As an example of enabling an add-on, you can enable the Microk8s dashboard using the command below:
sudo microk8s enable dashboard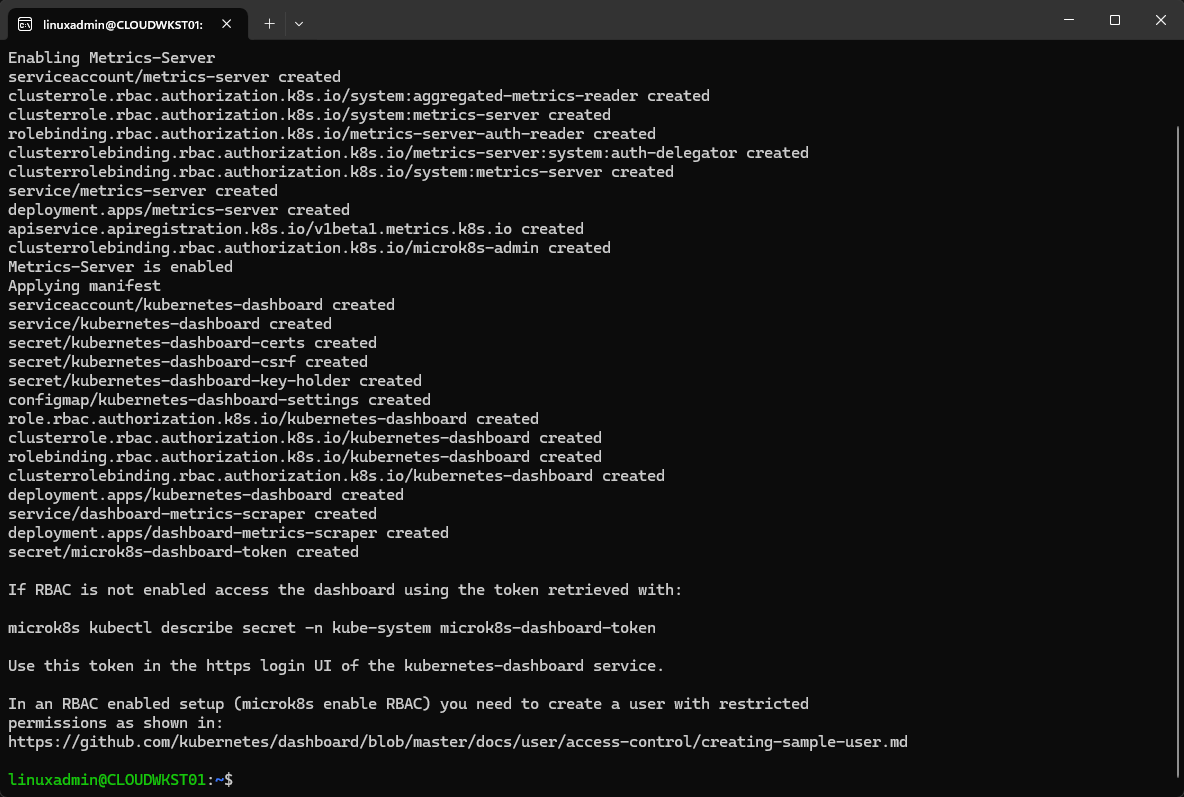
Adding a node to your microk8s Kubernetes cluster
The command to add a node couldn’t be much simpler, it is the command:
microk8s add-node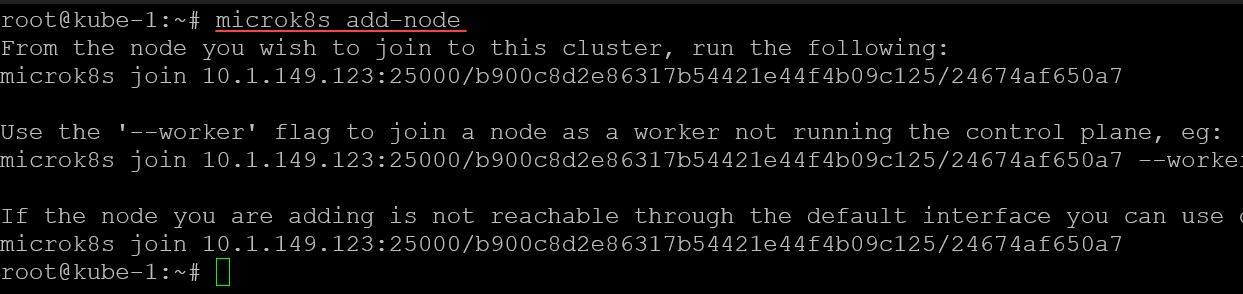
This will create a join string you will need to use to join another node to the cluster. You will use this with the microk8s join command for adding the node.
Joining a node
Now that we have the join token that we need to use, we can join another node using the command:
microk8s join <your master node and token string>
Upgrading your Microk8s cluster
Let’s say you have a new version of Microk8s that you want to upgrade to. The process of upgrading is simple. First, drain your Kubernetes node:
microk8s kubectl drain <your node> --ignore-daemonsets --delete-emptydir-data --forceNext, once the node is drained, you can upgrade your Microk8s node with this command:
sudo snap refresh microk8s --channel=1.32/stableCheck the version of your Microk8s nodes:
microk8s.kubectl get noFinally, uncordon your node:
microk8s kubectl uncordon <node>Uncordon the node once the upgrade process finishes:
microk8s kubectl uncordon <node>Finally, rinse and repeat through your cluster until all nodes have been upgraded.
Persistent storage with Microceph
You can use Microceph with Microk8s for a persistent storage solution for your Microk8s cluster. With Microceph you can use a local disk on all of your Kubernetes nodes to provision and have persistent storage.
Persistent storage is critical in a Kubernetes cluster as this is what allows you to have failover and HA capabilities. Since all nodes have access to the same data, if a node fails, another healthy node can pick up where the failed node left off.
Install and configure Microceph
To install microceph, you can use this command on all of your Kubernetes nodes that you want to participate in the Microceph cluster (typically your worker nodes).
sudo snap install microcephOnce you have microceph installed on all your nodes, we need to bootstrap the cluster. This only needs to be done on the first node you want to start with:
sudo microceph cluster bootstrapNext, add your other nodes to the cluster:
sudo microceph cluster add <node 2>
sudo microceph cluster add <node 3>
This will produce a join string. Use the join command and string to join the cluster from your other nodes:
sudo microceph cluster join eyJzZWNyZXQiOiIzZmY5YjcxMDhmMGUxOThhOGJiMDY1N2ZmZTMyOWQ4MjU4Y2IzNDhlNTZlMDIxNWQzOGI4NzcxMWZlYzgwMzQwIiwiZmluZ2VycHJpbnQiOiI5ZjBlYmNkODA2NzAwOWMyMTU2OTJhMjZjN2FjYTQ5NjQ3YTVkNTgxOGI4NmM3MzE3MTJmMTFiZjUzMjEyNGIzIiwiam9pbl9hZGRyZXNzZXMiOlsiMTAuMS45NjQ3YTVkNTgxOGI4NmM3MzE3MT=Add a disk for Microceph on each of your nodes:
sudo microceph disk add <path to disk> --wipeOnce you have the disk added on all your nodes, you can check the status of your microceph cluster with:
microceph statusNow, we can enable the rook-ceph orchestrator for Microk8s:
microk8s enable rook-cephThen connect your microk8s cluster to the ceph storage with the command:
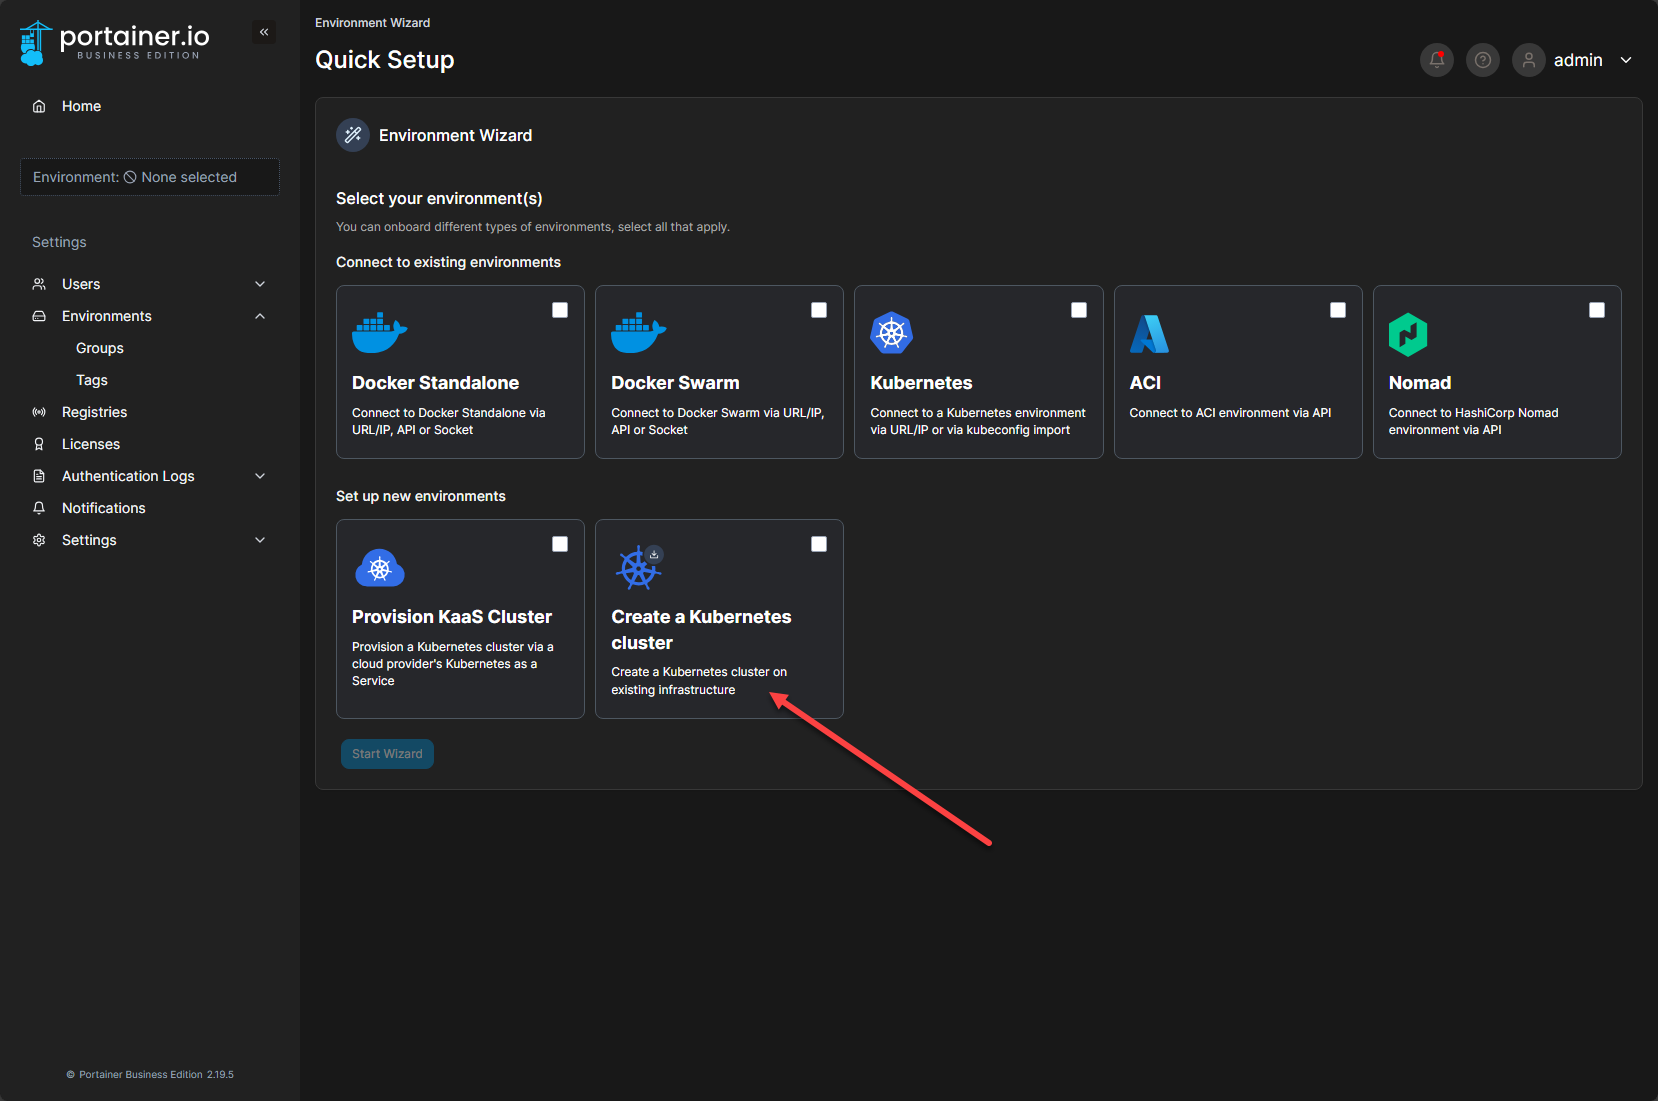
microk8s connect-external-cephFully automated with Portainer
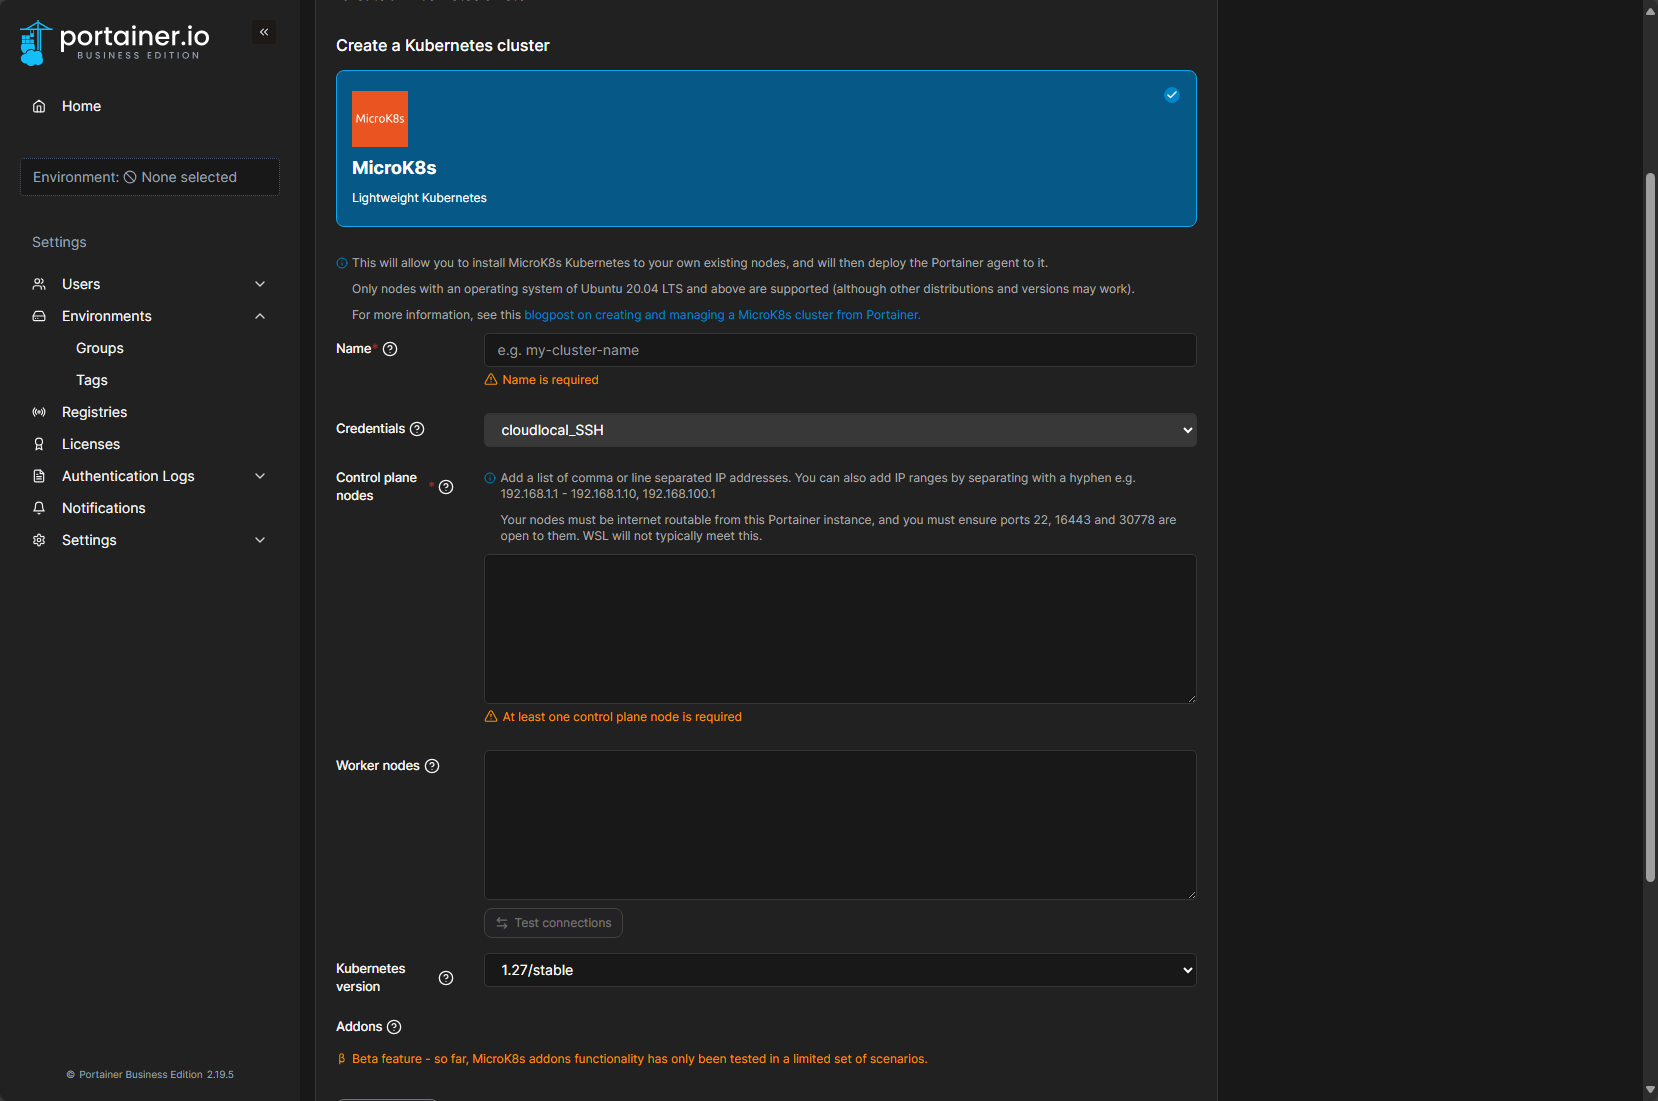
Another tool to mention that works great with Microk8s is Portainer. If you add an environment in Portainer, you will see the option for Create a Kubernetes cluster on existing infrastructure. Basically, with this option, you provide Portainer with 3 Linux virtual machines and it will do the rest by installing Microk8s, configuring clustering, and will bring in the cluster as part of your Portainer environments you can manage.
Portainer will step you through a wizard of sorts that will provision the portainer agents on your nodes and then proceed to install and configure microk8s for you. At the end, the cluster is automatically onboarded into your Portainer environment.
You can read my full write up on using Portainer to orchestrate your Microk8s nodes in this blog post here:
Wrapping up
Hopefully, this Microk8s for beginners install and configuration guide will help any who are looking to start playing around with Microk8s in the home lab or development environment. It doesn’t take long to get familiar with microk8s and it is a great distro for production, development, and the home lab. Let me know if you are using Microk8s in your lab environment.
Google is updating how articles are shown. Don’t miss our leading home lab and tech content, written by humans, by setting Virtualization Howto as a preferred source.
About The Author