One of the viable solutions for shared storage for running your Docker containers is NFS. Many are running a NAS in their home lab environment that is used for storage. With that said, one of the use cases for a NAS in the realm of home lab is using it for shared storage with your Docker containers. Especially if you are running a Docker Swarm cluster you need shared storage, so this is a requirement. Let’s look at Docker NFS mount on Synology NAS and performance tweaks to know.
Table of contents
- What is shared storage?
- NFS for shared storage
- Setting up NFS storage in Synology
- Add NFS client in Ubuntu
- Create a mount directory
- Testing the NFS mount from your Docker host
- Placing the NFS mount in your FSTAB file
- Mount the NFS storage and reload the systemctl daemon
- Viewing your storage
- Performance considerations
- Wrapping up
What is shared storage?
Shared storage allows multiple hosts to access the same storage and this is important due to the need for all hosts to be able to access the same storage of your containers, so each one can run any container with persistent storage. This allows failover and high availability.
If you have a host go down, a healthy host can take over for the failed host since it also has access to the same data. This also is a good thing to have that allows you to carry out maintenance when needed, including apply updates and upgrades.
NFS for shared storage
NFS is a storage protocol where clients interact with storage at a file level, whereas iSCSI is a block-level storage protocol. NFS is a protocol that many have relied on when it comes to connecting to NAS devices and is well-trusted for shared storage.
Setting up NFS storage in Synology
You will want to:
- Setup a shared folder in Synology DSM
- Configure permissions for NFS
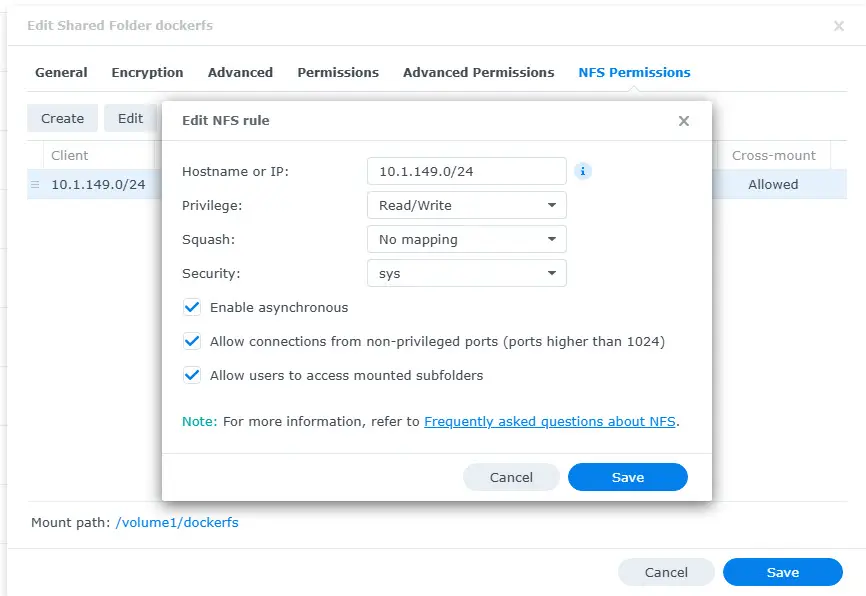
Below is a look at the NFS permissions on my Synology NAS device. For the home lab, I am setting up the hostname or IP address that will be allowed, the privilege, and checking the enable asynchronous, allow connections from non-privileged ports, and allow users to access mounted subfolders.
As you can see underneath the opened dialog box, the path is: /volume1/dockerfs.
Add NFS client in Ubuntu
I am using Ubuntu Server 24.04 for Docker Swarm hosts. The NAS is the NFS server component and the Ubuntu Server 24.04 hosts are the client for the NFS storage. The NAS serves out the files and the Ubuntu Servers are the clients that consume the storage.
First step is to install the NFS client in Ubuntu. The command to install the NFS client in Ubuntu is the following:
apt install -y nfs-common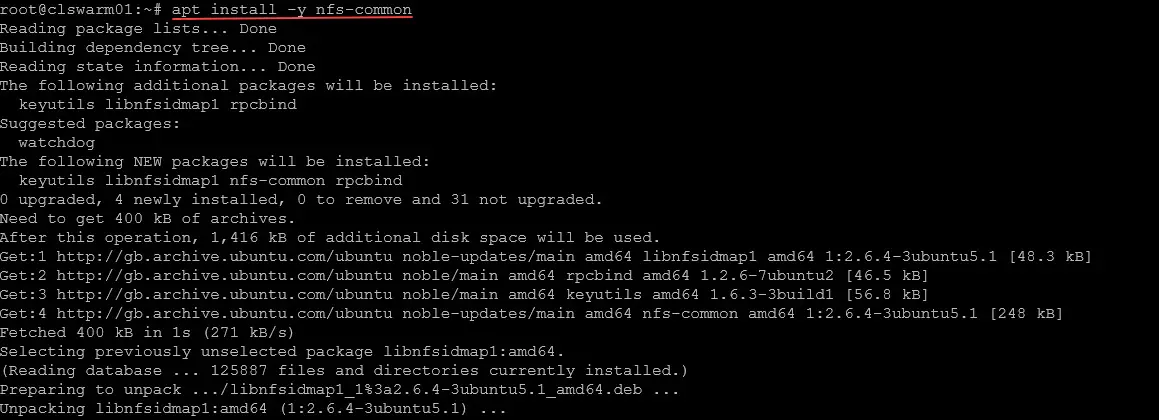
Create a mount directory
We will need to create a local directory in Linux that will be used as the mount point for the remote NFS storage. We can easily create a directory using the command (change the directory name as you want, below is just an example):
mkdir /mnt/dockerfsNow that we have the mount point created, we can target this directory for mounting the remote NFS storage.
Testing the NFS mount from your Docker host
You can easily test the NFS mount from your Docker host using the command below:
mount -t nfs -o rw,sync,hard,intr 10.1.149.4:/volume1/dockerfs /mnt/dockerfsThen you can perform the command below to test listing out the directory:
ls -lah /mnt/dockerfs
Placing the NFS mount in your FSTAB file
We want the NFS mount to be in the FSTAB file so our storage will mount correctly after a reboot of our Docker host. To do that, we can simply edit the FSTAB file using the command:
sudo nano /etc/fstabThen, once in the file, we can add our configuration to mount the NFS share in FSTAB:
10.1.149.4:/volume1/dockerfs /mnt/dockerfs nfs defaults,_netdev,noatime,rsize=1048576,wsize=1048576 0 0
Save and close the FSTAB file.
Mount the NFS storage and reload the systemctl daemon
We can now test mounting the NFS storage in our mount point using the FSTAB file, using the commands below. You may see the message: “your fstab has been modified, but the systemd still uses the old version; use ‘systemctl daemon-reload’ to reload.” If so, you can run that command after the mount command as below.
mount -a
systemctl daemon-reload
Viewing your storage
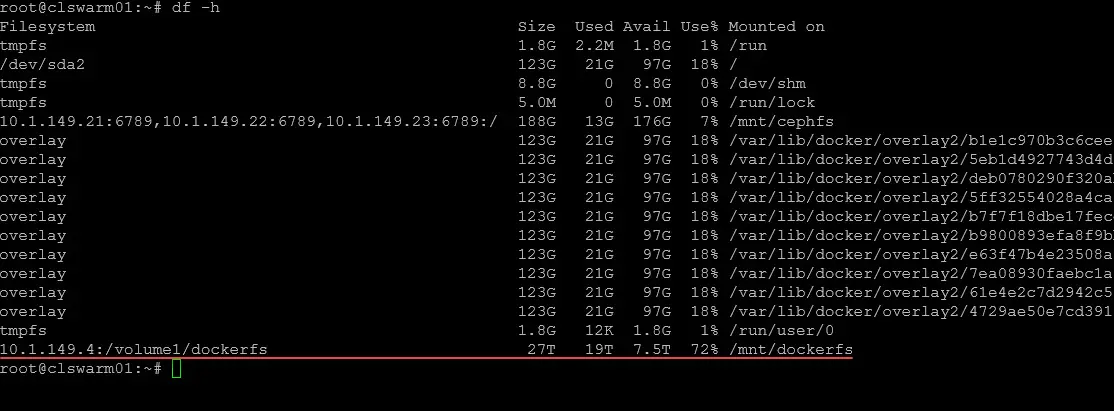
You can view your storage that has been mounted, using the command:
df -hYou should see your NFS storage mounted and ready to go.
Performance considerations
If you have NFS storage mounted and notice performance issues along the way, there are a few tweaks you can do to make things faster.
- Use NFSv4 instead of NFSv3
- Use NFS client cache
- Enable async
- Tune the TCP Window Size
- Use Jumbo Frames
Use NFSv4 instead of NFSv3
In your mount command in FSTAB, you can use the nfsvers parameter for mounting:
10.1.149.4:/volume1/dockerfs /mnt/dockerfs nfs defaults,_netdev,noatime,nfsvers=4,rsize=1048576,wsize=1048576,tcp 0 0Use NFS client cache
You can enable local file caching with the parameter fsc. You will need to install the cachefilesd service:
sudo apt install cachefilesd -y
sudo systemctl enable --now cachefilesd
Then add the fsc parameter to your FSTAB mount:
10.1.149.4:/volume1/dockerfs /mnt/dockerfs nfs defaults,_netdev,noatime,nfsvers=4,rsize=1048576,wsize=1048576,tcp,fsc 0 0Enable async
You can enable async to help with performance. However, keep in mind if there is a sudden power outage or host crash or storage crash, this increases the chances there will be data corruption.
10.1.149.4:/volume1/dockerfs /mnt/dockerfs nfs defaults,_netdev,noatime,nfsvers=4,rsize=1048576,wsize=1048576,tcp,async,fsc 0 0Increase TCP Window Size
The TCP window size makes a huge difference for NFS. You can change the TCP window size and make it persistent with the following:
echo "1048576" > /proc/sys/net/core/rmem_max
echo "1048576" > /proc/sys/net/core/wmem_max
Make it persistent by adding to /etc/sysctl.conf:
net.core.rmem_max=1048576
net.core.wmem_max=1048576
Use jumbo frames
You can also use jumbo frames for more efficient network communication. In Linux, you can set jumbo frames:
sudo ip link set eth0 mtu 9000Wrapping up
Hopefully this walkthrough of creating NFS storage and mounting your NFS storage in ubuntu Docker hosts will help show how easy this process really is to use NFS NAS storage on something like a Synology NAS device as shared storage for Docker hosts, and in particular, Docker Swarm hosts. Let me know in the comments if you are using NFS storage in your home lab or other environment.
Google is updating how articles are shown. Don’t miss our leading home lab and tech content, written by humans, by setting Virtualization Howto as a preferred source.
About The Author