One of the software-defined storage solutions gaining popularity in the enterprise and home lab community is Ceph. Ceph is a powerful storage solution and has many great benefits. However, it can be intimidating to configure and manage if you haven’t had any experience with it before. Microceph is a Ceph implementation that simplifies the deployment and management of a Ceph cluster. Let’s see how we can use Microceph for an easy Ceph deployment.
Table of contents
What is Microceph?
First off, what is Microceph? You might have seen it in connection with microk8s. However, it is also a general storage. It is a self-proclaimed “easiest way to get up and running with Ceph” solution. You can read the official documentation around Microceph here: MicroCeph documentation. It is also self-proclaimed as an opinionated solution that is focused on the small scale, compared tot he ceph common package.
However, the TLDR; of the solution is it is a lightweight version of Ceph that still has most of the benefits of full-blow Ceph, but is easier to install and manage. Its focus is more on the experience of Ceph administrators and storage software developers.
It simplifies key distribution, service placement, and disk administration. This applies to clusters that span private clouds, edge clouds, as well as home lab environments.
Note the following features and benefits:
- Quick deployment and minimal overhead
- Single-command line operations (for bootstrapping, adding OSD disks, service enablement, etc)
- It isolates the services from the host and is upgrade-friendly
- It has built-in clustering so you don’t have to worry about those details
Requirements
There aren’t many requirements outside of the following:
- You need to have a minimum of (3) OSD disks for a proper Ceph cluster (outside of playing around with a single-node cluster
- This means you will need (3) different nodes contributing (1) OSD disk each
Microceph single-node installation
The really cool thing about Ceph clusters with microceph is that you can run it in a single-node configuration or a multi-node configuration. Both of these are great for learning and beginning to understand Ceph setup and microceph clusters.
Let’s look at the single node deployment. You can install a single node with the following steps:
sudo snap install microceph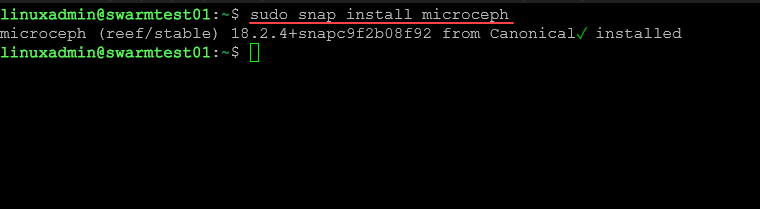
The Microceph documentation notes that for most, you will want to place a hold on automatic updates for microceph since there can always be unintended consequences for updating your Ceph cluster. This will give you the opportunity to read through the release notes of future releases and make sure there are not changes that will affect your storage. Note the following microceph snap command to do that:
sudo snap refresh --hold microceph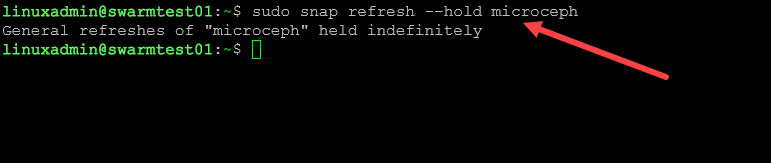
Next we bootstrap the cluster with the following cluster bootstrap command. This initializes Ceph:
sudo microceph cluster bootstrapYou can then take a look at the microceph status with the following command:
sudo microceph status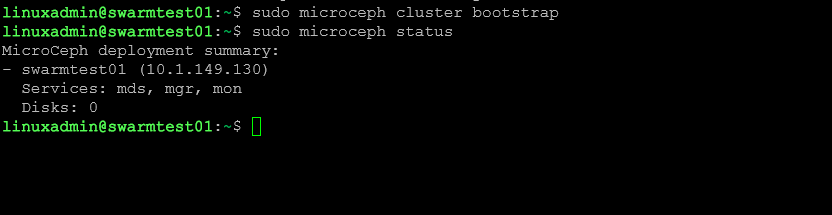
In the above command, we can see the status of the single node ceph. Now, we can add our disk and disk partitions for microceph.
sudo microceph disk add <path to disk> --wipe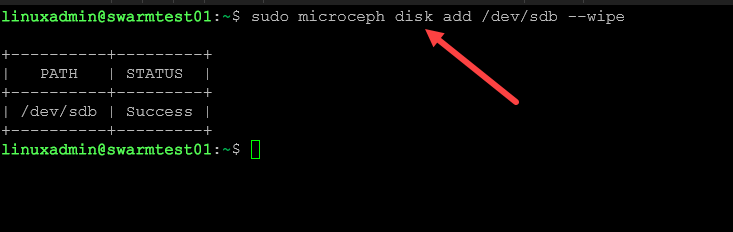
Installing Microceph multi-node cluster
Next, let’s install the microceph multi-node cluster. This will use at least (3) multi-node cluster hosts and (1) disk at least from each. Multiple disks are recommended for best performance and efficiency. We will start by running the following commands on all three nodes to get microceph installed and the package on hold for updates:
sudo snap install microceph
sudo snap refresh --hold microceph
Then on the first node, we will run the cluster bootstrap command:
sudo microceph cluster bootstrapCreating the Ceph join token
Then from the first node only, we will issue the command to add the other two nodes. Note you can’t use the same join token for both nodes. These are unique to the node you are adding.
sudo microceph cluster add <node 2>
sudo microceph cluster add <node 3>
Joining the Ceph cluster
Then on the other two nodes that will be joining, you issue the command on your other nodes:
sudo microceph cluster join <join token>
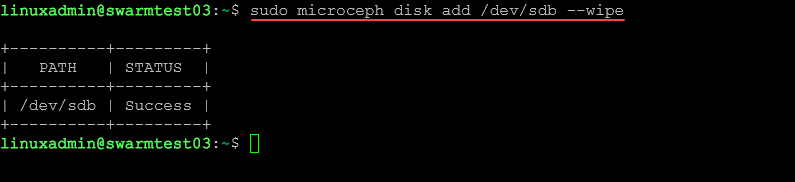
Below, running the same command on the third node.

On all three nodes, you run the following command to add your microceph disk to the microceph cluster:
sudo microceph disk add <path to disk> --wipe
Check the status of Ceph
Now, we can check the status of the microceph cluster, including MDS, MGR, MON, and OSD services:
sudo microceph status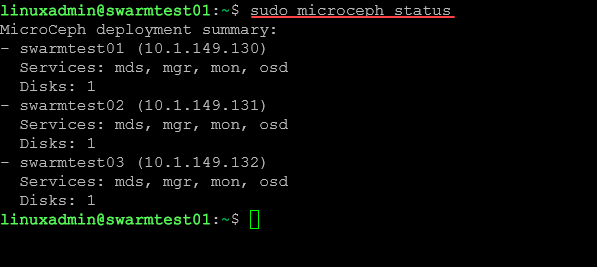
You can also use the status command:
sudo ceph status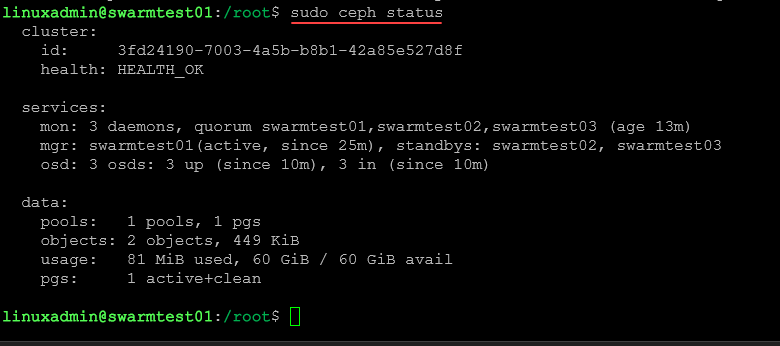
Best Practices for Deploying Microceph
Below are a few best practices to keep in mind when deploying Ceph:
- Make sure you are meeting the minimum Ceph cluster requirements, including three OSDs
- Use unpartitioned disks since Microceph does not support partitioned disks
- Make sure you have high-speed networks connecting cluster nodes, recommended at least 10 GbE
- You can use Cephadm to create the cluster if you want to use NFS backing storage
- Microceph doesn’t support NFS, but Cephadm does
- Use a distributed SQLite store for distributed access to SQLlite DBs as an example of making database solutions aware of distributed storage across cluster nodes
Wrapping up
In case you have wanted to spin up a modern deployment of software-defined storage using a Ceph cluster and weren’t sure about all the steps, the Microceph snap command takes the heavy lifting out of the process. It also allows you to have block devices and file-level storage without the maintenance overhead of a traditional Ceph cluster.
With GlusterFS and other storage types being deprecated, Ceph is the go-to storage of choice for those who want to have a resilient software-defined storage solution and using a storage solution that is alive and well and fully supported. I like the fact that Ceph is multi-purpose as well, as you can use it for block and file-level storage. Many will recognize Ceph from Proxmox as it has native Ceph integration with Proxmox that allows you to easily create a Ceph cluster on top of your Proxmox cluster hosts for easy shared storage without the need for external storage.
Google is updating how articles are shown. Don’t miss our leading home lab and tech content, written by humans, by setting Virtualization Howto as a preferred source.
About The Author

Great Article! But I have some questions:
– the one single shared disk is going to be attached to all cluster nodes? So, one disk – attached to three nodes?
– and if so, the same disk has to be initialized & wiped on each node (again)?
Hey Pat!
Thank you for the comment. Actually with HCI, what we are doing is attaching one local disk per each server that each one contributes to the software-defined storage stack. Let me know if that makes sense. So we need to wipe the local disk designated for this purpose on each host in the microceph cluster.
Brandon
Hey Brandon,
Following the wipe do you need to mount it on each node using one the node’s IP address ? Am I write in saying that writes on the mounted paths should replicate across the 3 nodes ?
Roderick
Roderick,
Yes, you are correct, this process is local to each node in your cluster. So you allocate the storage and then wipe the disk and add to the microceph environment. Yes, also, once you have your Microceph storage in place, writes are replicated across the nodes.
Brandon
Brandon,
Ok.
Just to confirm that I’ve understood correctly… Currently I just concluded this guide, so I have /dev/sdb added in microceph from all 3 nodes. So if I mount /dev/sdb on /mnt/test on each node, and create a txst file from one of the nodes I should see it on the others ?
Roderick
Brandon,
Ok..
Just checking if I understood well..
So If I mount /dev/sdb to /mnt/test on all 3 nodes, and create a file from one of the nodes, I will see it on the other nodes ?
Roderick
Brandon,
Ok.
So I have /dev/sdb configured on microceph. If I mount it on /mnt/test on all 3 nodes and create a file from a particular node, will I see this file on the other nodes ?
Or am I missing something ?
Roderick
Brandon,
Thanks for the above.
So If I mount /dev/sdb on /mnt/test on all 3 nodes and create a text file on one of the nodes I should see it on the others as well right ?
Regards
Roderick
Brandon,
Ok.
So I have /dev/sdb configured on microceph. If I mount it on /mnt/test on all 3 nodes and create a file from a particular node, will I see this file on the other nodes ?
Or am I missing something ?
Roderick