The NetBox solution is a great tool that can allow you to document and have a single source of truth for your network and infrastructure. Network and infrastructure engineers can use it as the starting point for driving automation and data center infrastructure management, as well as things like IP address management.
Table of contents
Quick overview of NetBox
First of all, NetBox is an open-source solution. It helps to manage and document networks, infrastructure resources, cloud network infrastructure, etc. It was first developed by an engineer at DigitalOcean to serve as a source of truth for the network.
It has many features and capabilities, including:
- IP address management (IPAM) for the network engineering team and network operations
- Data center infrastructure management (DCIM)
- Modeling and documenting networks
- Keep up with devices, racks, connections, and IP addresses
- External user authentication with LDAP for your authenticated user to come from a source like Active Directory
You can check out the official NetBox website here: NetBox.
NetBox Prerequisites and Components
You can definitely run NetBox using a full virtual machine, and many do this. However, there are really great advantages to running it inside Docker since you can easily upgrade the components much more easily and have a more idempotent way of running your NetBox services. You don’t have to worry with the requirements of the solution on your host virtual machine and go through the process to fix dependency issue problems as well.
Prerequisites
You will need the following:
- A Linux Docker host
- Docker installed with Docker Compose, and Docker CLI
- An admin account on the Docker host or new user account with sudo privileges
- Preferrably SSH enabled for remote authentication enabled
Components (Docker containers) that are needed for the NetBox Docker Compose installation
- NetBox Docker image
- Netbox-worker (same NetBox image)
- Postgres database Docker image
- Redis instance Docker image
- Redis Cache
Healthchecks
Also, there are a few housekeeping stanzas that we will use for ensuring services are running in the Docker compose code:
- NetBox housekeeping commands
- Postgres healthcheck
- Redis healthcheck
NetBox Docker Compose Installation
Here is the Docker Compose code example for bringing up NetBox. You will want to save this as docker-compose.yml. Below, in the example, you will see the required containers and their configurations. Be sure to change out the volume paths with paths that are appropriate for your environment. Also, make sure the path to the .env files is correct.
services:
  netbox: &netbox
    image: netboxcommunity/netbox:${VERSION-v4.1-3.0.2}
    depends_on:
      postgres:
        condition: service_healthy
      redis:
        condition: service_healthy
      redis-cache:
        condition: service_healthy
    env_file: ./env/netbox.env
    user: "unit:root"
    healthcheck:
      test: curl -f http://localhost:8080/login/ || exit 1
      start_period: 90s
      timeout: 3s
      interval: 15s
    volumes:
      # - "/home/linuxadmin/homelabservices/netbox/configuration:/etc/netbox/config:z,ro"
      - "/home/linuxadmin/homelabservices/netbox/media:/opt/netbox/netbox/media:rw"
      - "/home/linuxadmin/homelabservices/netbox/reports:/opt/netbox/netbox/reports:rw"
      - "/home/linuxadmin/homelabservices/netbox/scripts:/opt/netbox/netbox/scripts:rw"
    networks:
      - nginxproxy
    ports:
      - 8000:8080
    container_name: netbox

  netbox-worker:
    <<: *netbox
    depends_on:
      netbox:
        condition: service_healthy
    command:
      - /opt/netbox/venv/bin/python
      - /opt/netbox/netbox/manage.py
      - rqworker
    healthcheck:
      test: ps -aux | grep -v grep | grep -q rqworker || exit 1
      start_period: 20s
      timeout: 3s
      interval: 15s
    networks:
      - nginxproxy
    container_name: netbox-worker

  netbox-housekeeping:
    <<: *netbox
    depends_on:
      netbox:
        condition: service_healthy
    command:
      - /opt/netbox/housekeeping.sh
    healthcheck:
      test: ps -aux | grep -v grep | grep -q housekeeping || exit 1
      start_period: 20s
      timeout: 3s
      interval: 15s
    networks:
      - nginxproxy
    container_name: netbox-housekeeping

  postgres:
    image: postgres:14
    env_file: ./env/postgres.env
    healthcheck:
      test: ["CMD-SHELL", "pg_isready -q -t 2 -d $${POSTGRES_DB} -U $${POSTGRES_USER}"]
      start_period: 20s
      timeout: 30s
      interval: 10s
      retries: 5
    volumes:
      - "/home/linuxadmin/homelabservices/postgresql:/var/lib/postgresql/data"
    networks:
      - nginxproxy
    container_name: postgres

  redis:
    image: redis:6-alpine
    command:
      - sh
      - -c
      - redis-server --appendonly yes --requirepass $$REDIS_PASSWORD
    healthcheck: &redis-healthcheck
      test: '[ $$(redis-cli -a "$${REDIS_PASSWORD}" ping) = ''PONG'' ]'
      start_period: 5s
      timeout: 3s
      interval: 1s
      retries: 5
    env_file: ./env/redis.env
    volumes:
      - "/home/linuxadmin/homelabservices/redis:/data"
    networks:
      - nginxproxy
    container_name: redis

  redis-cache:
    image: redis:6-alpine
    command:
      - sh
      - -c
      - redis-server --requirepass $$REDIS_CACHE_PASSWORD
    healthcheck:
      test: '[ $$(redis-cli -a "$${REDIS_CACHE_PASSWORD}" ping) = ''PONG'' ]'
      start_period: 5s
      timeout: 3s
      interval: 1s
      retries: 5
    env_file: ./env/redis-cache.env
    volumes:
      - "/home/linuxadmin/homelabservices/redis-cache:/data"
    networks:
      - nginxproxy
    container_name: redis-cache

networks:
  nginxproxy:
    driver: bridge
    name: nginxproxy
    ipam:
      driver: default
      config:
        - subnet: 172.19.0.0/16
Environment files
You will need to create the following environment files:
- netbox.env
- postgres.env
- redis.env
- redis-cache.env
They will contain the following:
netbox.env
CORS_ORIGIN_ALLOW_ALL=True
DB_HOST=postgres
DB_NAME=netbox
DB_PASSWORD=J5brHrAXFLQSif0K
DB_USER=netbox
[email protected]
EMAIL_PASSWORD=
EMAIL_PORT=25
EMAIL_SERVER=localhost
EMAIL_SSL_CERTFILE=
EMAIL_SSL_KEYFILE=
EMAIL_TIMEOUT=5
EMAIL_USERNAME=netbox
# EMAIL_USE_SSL and EMAIL_USE_TLS are mutually exclusive, i.e. they can't both be `true`!
EMAIL_USE_SSL=false
EMAIL_USE_TLS=false
GRAPHQL_ENABLED=true
HOUSEKEEPING_INTERVAL=86400
MEDIA_ROOT=/opt/netbox/netbox/media
METRICS_ENABLED=false
REDIS_CACHE_DATABASE=1
REDIS_CACHE_HOST=redis-cache
REDIS_CACHE_INSECURE_SKIP_TLS_VERIFY=false
REDIS_CACHE_PASSWORD=t4Ph722qJ5QHeQ1qfu36
REDIS_CACHE_SSL=false
REDIS_DATABASE=0
REDIS_HOST=redis
REDIS_INSECURE_SKIP_TLS_VERIFY=false
REDIS_PASSWORD=H733Kdjndks81
REDIS_SSL=false
RELEASE_CHECK_URL=https://api.github.com/repos/netbox-community/netbox/releases
SECRET_KEY='r(m)9nLGnz$(_q3N4z1k(EFsMCjjjzx08x9VhNVcfd%6RF#r!6DE@+V5Zk2X'
SKIP_SUPERUSER=true
WEBHOOKS_ENABLED=true
postgres.env
POSTGRES_DB=netbox
POSTGRES_PASSWORD=J5brHrAXFLQSif0K
POSTGRES_USER=netbox
redis.env
REDIS_PASSWORD=H733Kdjndks81redis-cache.env
REDIS_CACHE_PASSWORD=t4Ph722qJ5QHeQ1qfu36Bringing NetBox up with Docker Compose
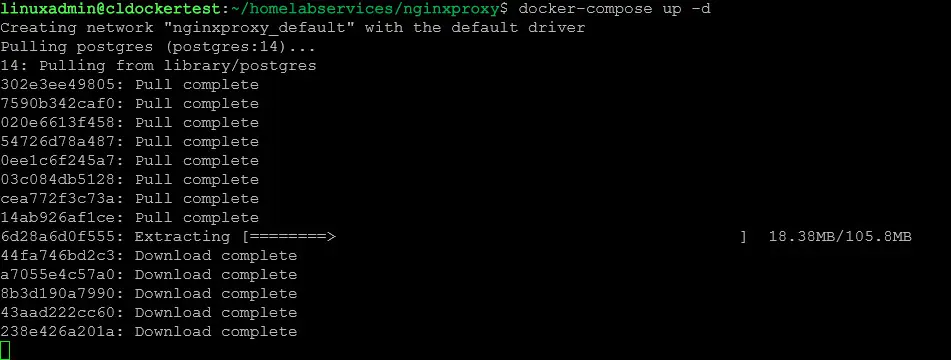
Then we will bring up our docker-compose containers, using the command:
docker-compose up -dBelow, you can see running the docker-compose up -d command.
Setting your admin account password
You will need to set up your admin account to access the NetBox web UI. When you install NetBox, it doesn’t automatically create local accounts for use with the web UI. To do that, use docker exec to expect into your NetBox container and then change to /opt/netbox/netbox directory if it doesn’t take you there to begin with.
Run the script command:
./manage.py createsuperuserIt will then ask you for your username, email address, and password, which you will need to confirm.
Logging into the NetBox Dashboard
Once you set your super user account. You will need to browse out to your Docker container host at port 8080. As a note, this is not setup with TLS/SSL out of the box, so will be cleartext HTTP. You will likely want to use a reverse proxy to provide SSL certificates by something like LetsEncrypt.
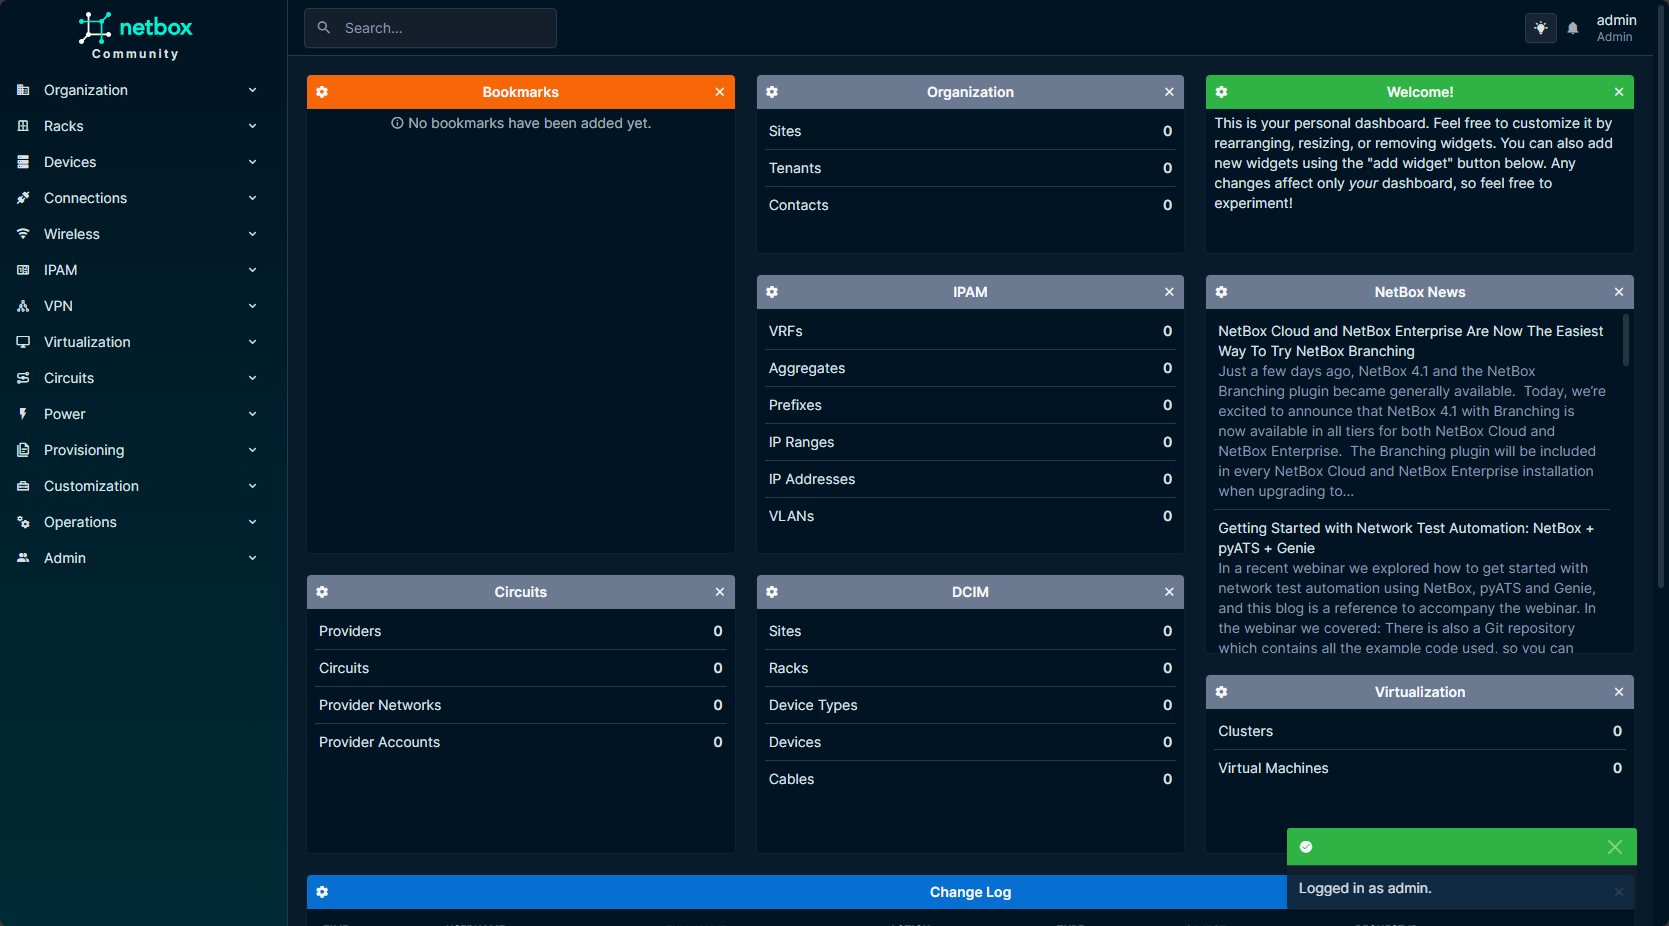
Log in with your credentials and you will be taken to the dashboard.
Remote Authentication Settings
There are many different remote authentication settings and configuration parameters you can use with NetBox for users authenticated with the solution. The REMOTE_AUTH_ENABLED parameter must be true in order for these settings to take effect.
REMOTE_AUTH_BACKEND
A Python path to the custom Django authentication backend to use for external user authentication. NetBox provides two built-in backends. You can configure a string for a single backend or multiple backends, which will be used in the order given.
- netbox.authentication.RemoteUserBackend
- netbox.authentication.LDAPBackend
REMOTE_AUTH_GROUP_HEADER
When remote user authentication is in use, this is the name of the HTTP header which informs NetBox of the currently authenticated user. For example, to use the request header X-Remote-User-Groups it needs to be set to HTTP_X_REMOTE_USER_GROUPS. (Requires REMOTE_AUTH_ENABLED and REMOTE_AUTH_GROUP_SYNC_ENABLED )
Troubleshooting
If you have issues getting the containers to come up or being able to access NetBox on port 8080. Make sure of the following:
- Make sure you are not trying to use SSL HTTPS if you haven’t introduced a reverse proxy it will timeout using SSL
- Check your docker-compose stack status with the command: docker-compose ps.
- If you see a container is exiting and not coming up use the command: docker logs <container name> to view the logs for that particular container to see what it is having issues with
- If you are having issues with your YAML code in your docker-compose.yml, use a YAML linter and validator like the one here: YAMLlint – The YAML Validator.
Wrapping up
NetBox is a great tool for those who want to have a one-stop shop for inventory, documentation, automation, and even backing up configurations and creating gold configurations for firewalls, switches, and other devices. Hopefully the Docker compose example in this post will be helpful for those who want to have a validated example of working code to get up and running quickly.
Google is updating how articles are shown. Don’t miss our leading home lab and tech content, written by humans, by setting Virtualization Howto as a preferred source.




Hellooo.. Am trying to follow your instructions, but fell into a bit of a pickle barrel! It all seemed ok, but am not sure how to configure the environment variables. Your link seems non-relevant (https://www.virtualizationhowto.com/2011/11/create-exe-batch-file-map-drives/)
Are these manually entered into /etc/environment?
Hello Francis,
On the .env files, these are files that are located on your docker host. I have them in a folder called .env and that is in the directory where I am running the docker-compose.yml file from when bringing up docker-compose up -d. Let me know if this helps.
Brandon
Hi Brandon, thanks for this documentation. I tried to deploy the netbox via portainer (as a stack) using your approach and documentation, but it’s throwing an error with the message “service netbox.housekeeping.depends_on must be a list” and it does not create the stack (nor anything…). I checked on the syntax of your compose File, but all is valid.. If I check on the error message via google it only tells me to update my docker compose, but I already have the latest version installed.
Can you help me out with this?..
There does seem to be a small typo in the compose file.
services:
    netbox: &netbox
In this line, netbox seems to have been indented one stop too much.
Sandip,
Thank you for taking a look at the code. I checked this and this is actually an anchor in YAML that lets you have a reusable block of configuration code so you can reference it as an alias in other places in your code. Hopefully this helps!
Brandon
Hi Brandon,
I am not talking about the anchor part. 🙂 I am saying that line itself is *indented* too much.
services:
    netbox: &netbox
    image: netboxcommunity/netbox:${VERSION-v4.1-3.0.2}
Here, the topmost key is
services, thennetbox, the service name, should be indented two spaces. Theimageis supposed to be indented as a child key of the service name. So it should be:services: netbox: &netbox image: netboxcommunity/netbox:${VERSION-v4.1-3.0.2}Sandip,
Ok gotcha, sorry I didn’t catch that 🙂 Sure thing, I will get this updated in the text. Thank you again! Always helps to have a second set of eyes!
Brandon
netbox is one of my favorite solutions for home lab helps me keep up with everything