Mounting your NAS storage inside of Proxmox is a great way to add storage to your Proxmox VE Server for things like storing ISO images and other purposes, even running virtual machines. Let’s look at a helpful guide on how you can mount Synology Drive in Proxmox with NFS
Table of contents
Configure your Synology NAS for Proxmox VE Server
There are a couple of ways that we can configure a Synology NAS to store data from your Proxmox host. You can configure a shared folder using NFS. We can also use iSCSI for block storage as well.
Which do you choose? Well, when it comes to storing all types of files, NFS is the way to go. Many Proxmox admins will use an NFS share to store things like ISO images, templates, CT templates, snippets and also Proxmox backups, which is a great use case for NFS. Also, NFS is generally fairly easy to setup.
You can just create a folder on your Synology NAS and mount the folder using NFS as a Synology Drive in Proxmox. I personally like to use iSCSI storage when it comes to running virtual machines. When you use iSCSI storage for virtual machine use, it has certain performance advantages.
iSCSI vs NFS for Proxmox
- Use iSCSI if:
- You need high-performance and low-latency storage for vms like databases
- You want to have storage features like thin provisioning, snapshots, or replication.
- Your VM workload benefits from block-level storage access (databases, high-performance applications).
If you want to see how to mount Synology drive to Proxmox Server using iSCSI, check out my blog post here: Proxmox iSCSI target to Synology NAS.
- Use NFS if:
- You need simple, shared storage that multiple Proxmox nodes can access at the same time
- You have mixed workloads or a home lab environment where you just want something easy
- Your workload may have smaller files or you need easier management and backup
- You want snapshot capabilities
Configuring Synology Drive in Proxmox using NFS
Let’s first look at configuring a Synology Drive in Proxmox using NFS. First things first. On the Synology side of things, you need to Enable NFS service under the File Services menu. Place a check in the checkbox. Note the maximum nfs protocol setting. This defines the maximum NFS protocol that is supported to connect to the shared folder. I didn’t have any issues settings this to NFSv4.1 as it is backwards compatible with the range you see listed.

Configure the shared folder and NFS settings in Synology
You will want to create a new shared folder on your Synology NAS if you don’t already have a folder you want to use.
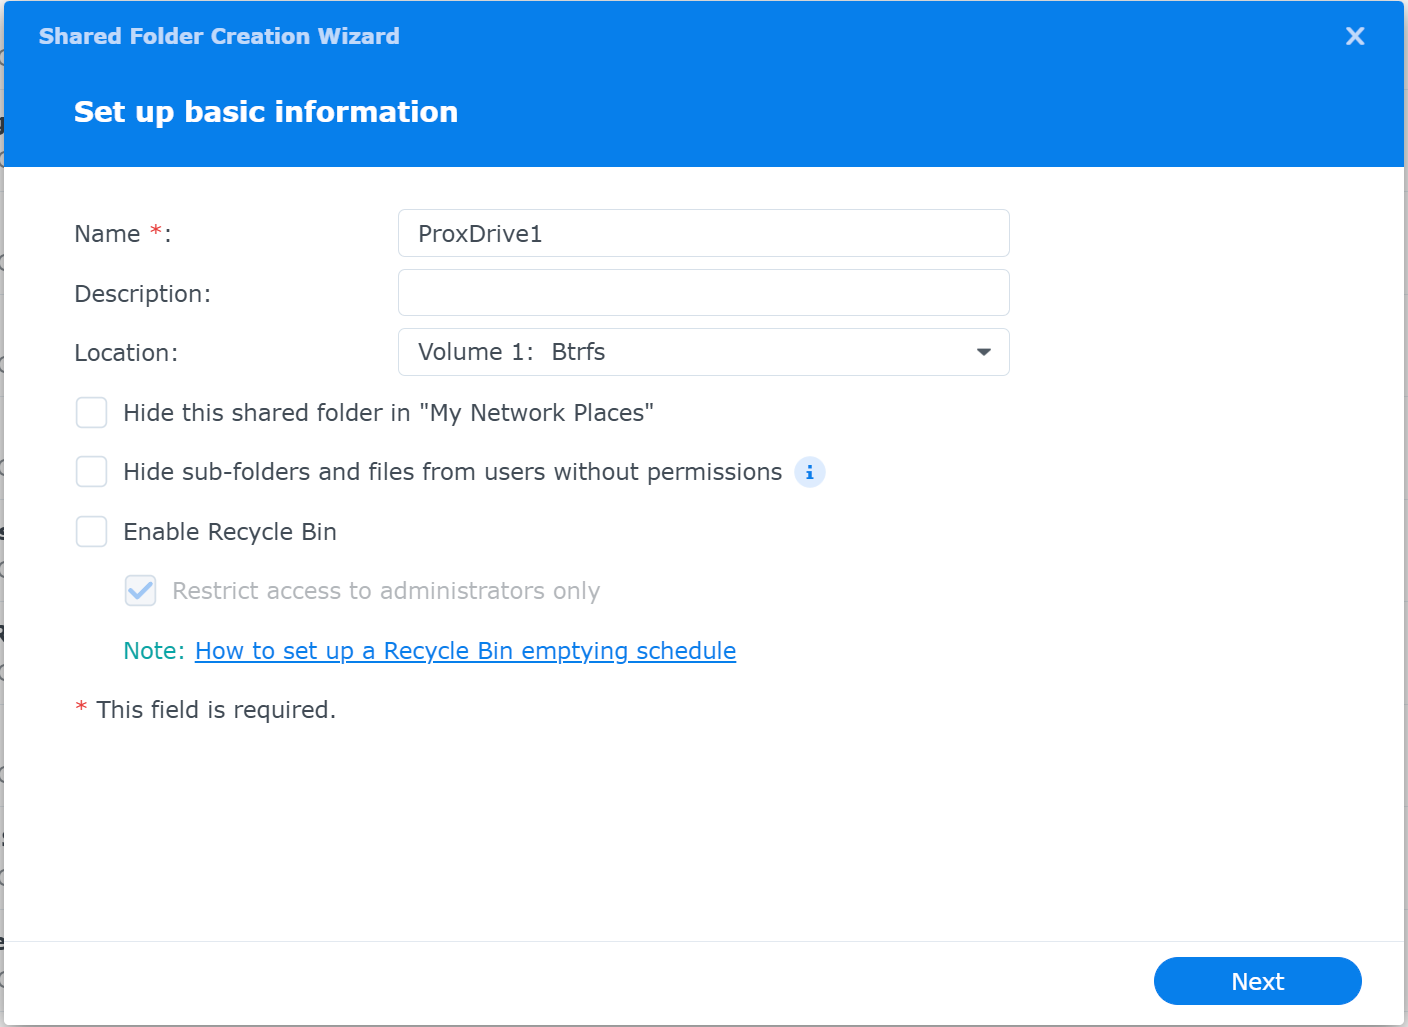
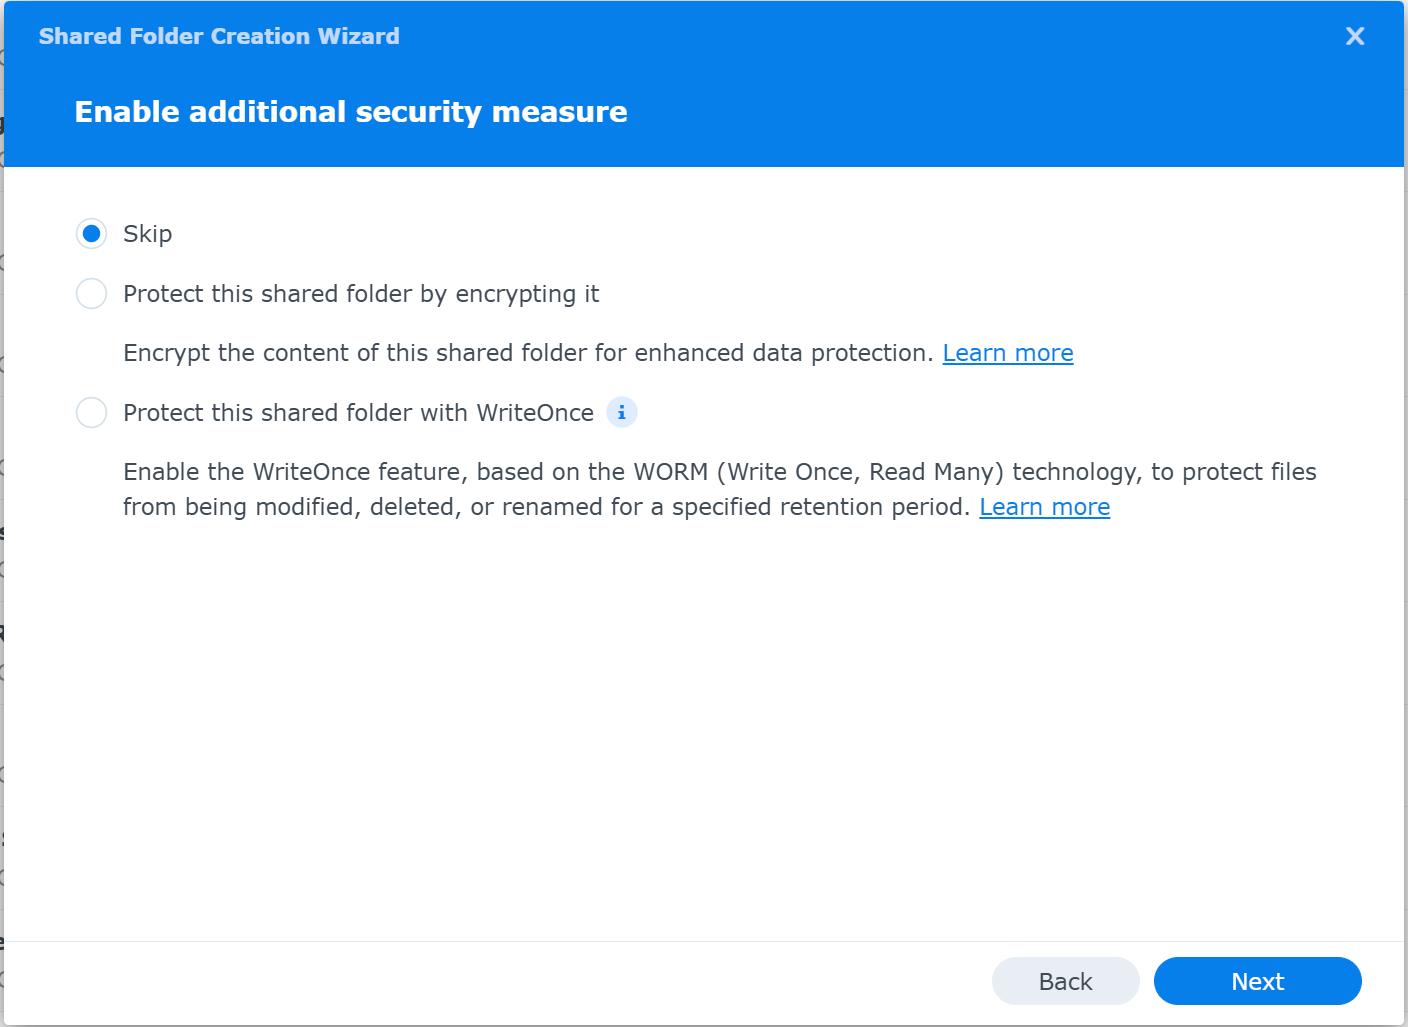
Here, I am simply skipping the enable additional security measure settings.
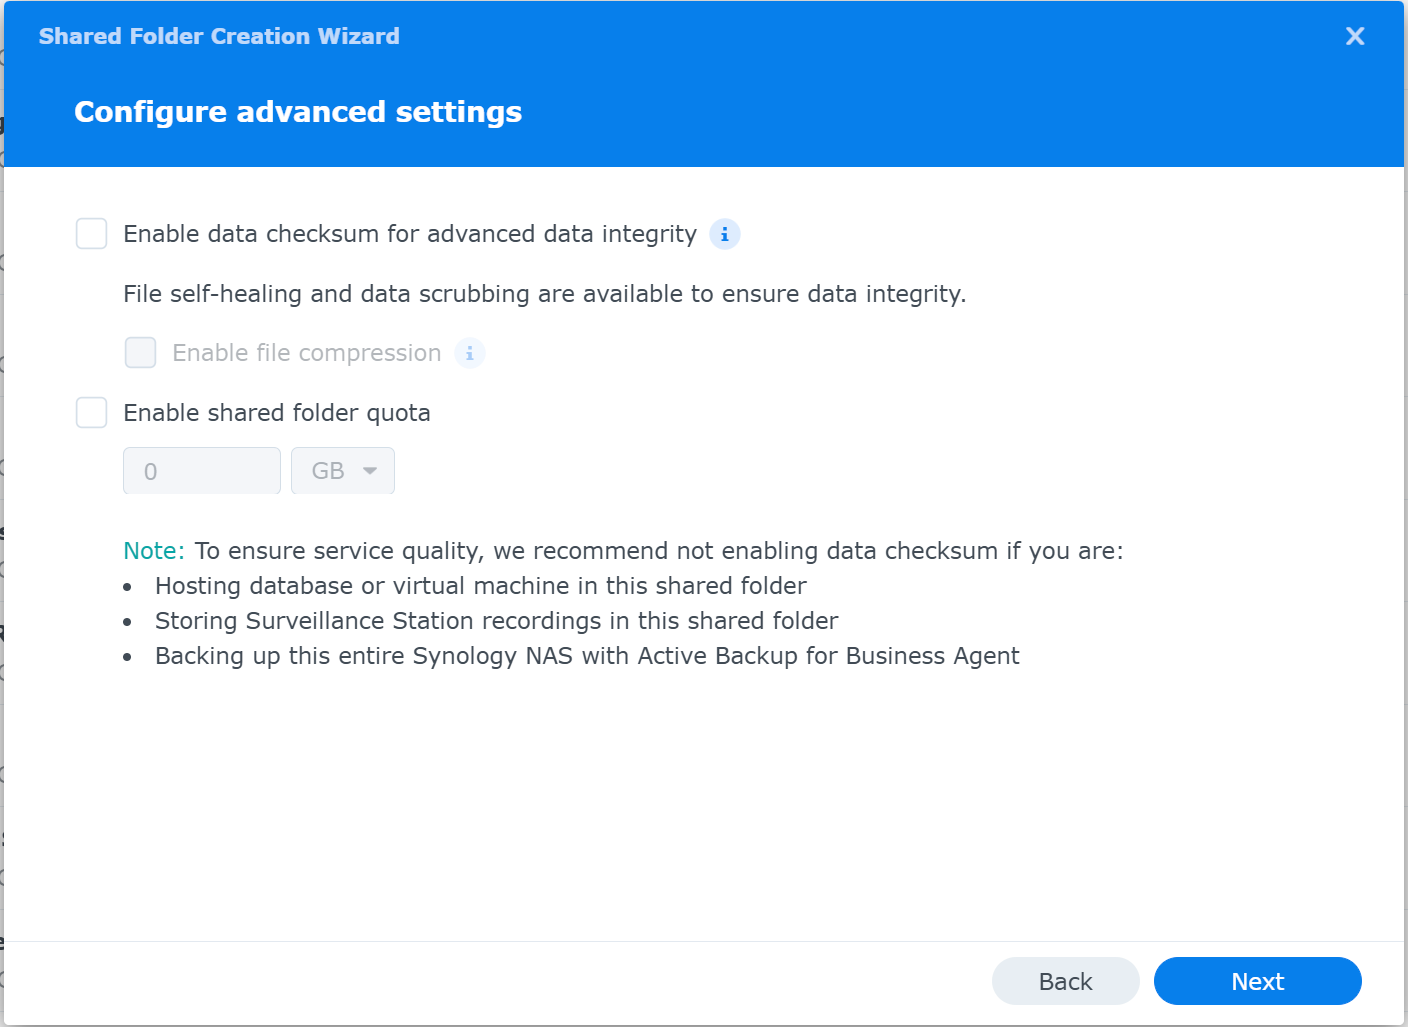
Nothing selected on the configured advanced settings. You can configure things as needed in your environment. However, I like to start loose on the security side to make sure things work and then tighten down later.
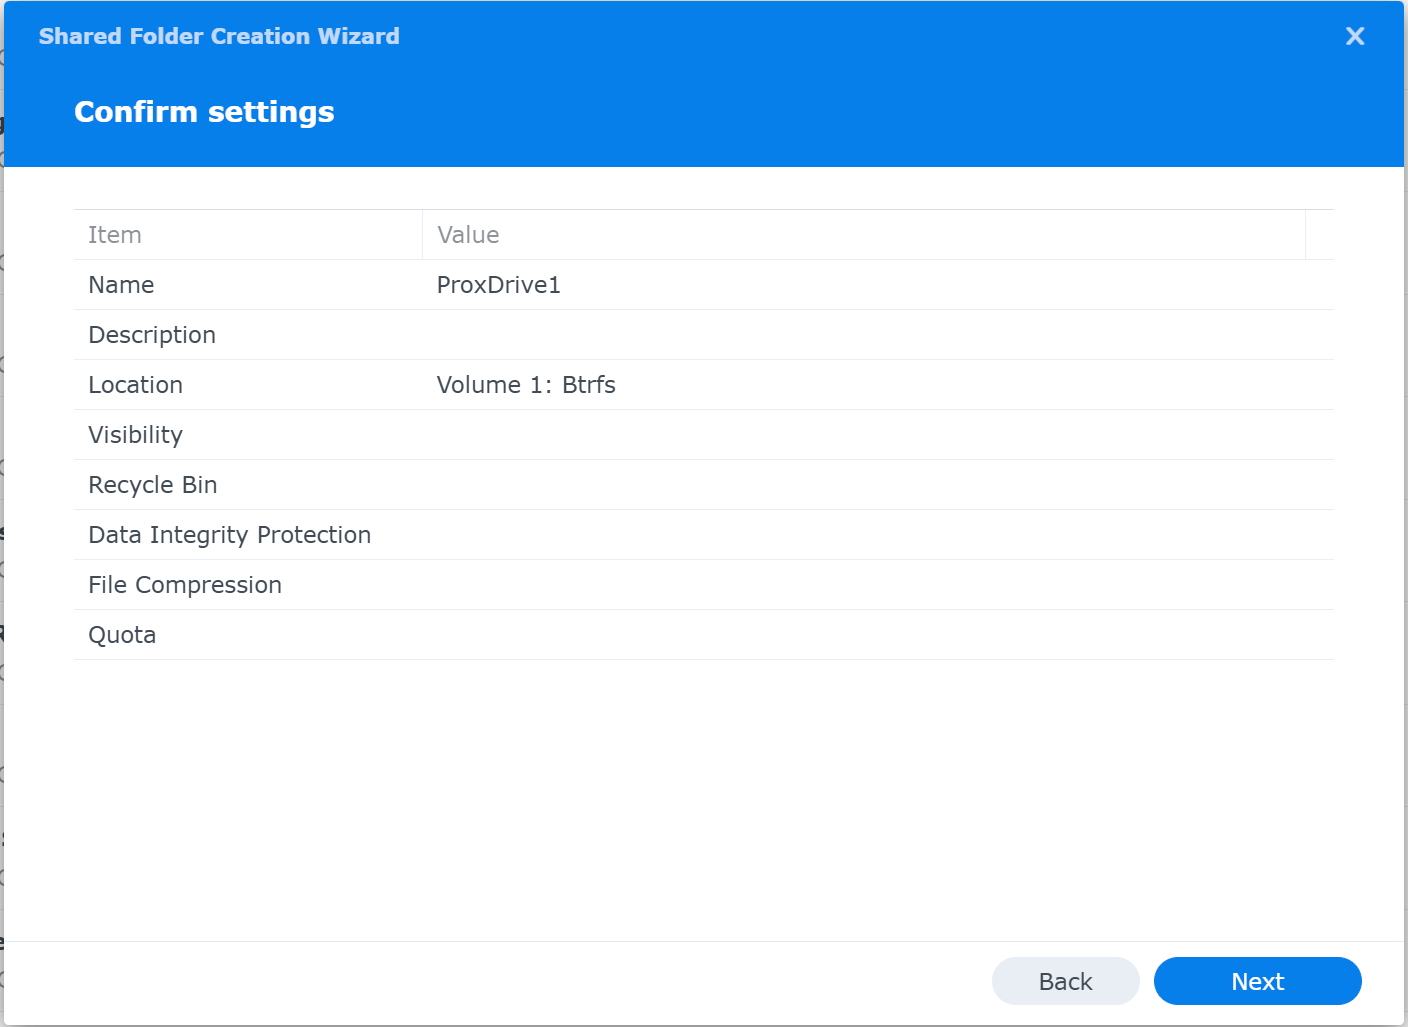
Confirm your settings and create the new shared folder in Synology.
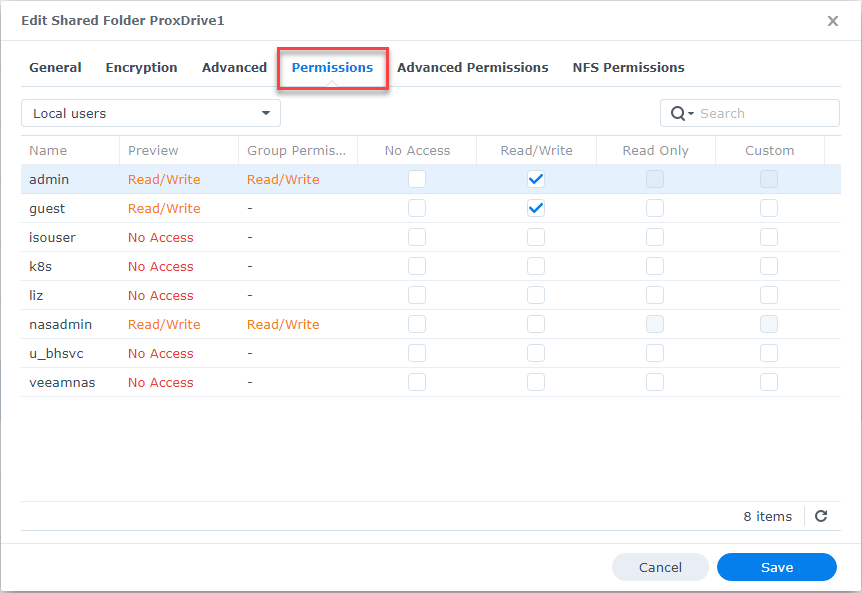
Next, right-click your shared folder and click Edit > Permissions. Here I am selecting read/write for admin and guest. Click save.
Next, click on the NFS Permissions tab and Create a new NFS rule. Here I am defining the host subnet that is allowed to connect over NFS, privilege (read/write), and then setting Squash to map all users to admin.
Also checking these settings for NFS storage:
- Allow connections from non-privileged ports (ports higher than 1024)
- Allow users to access mounted subfolders
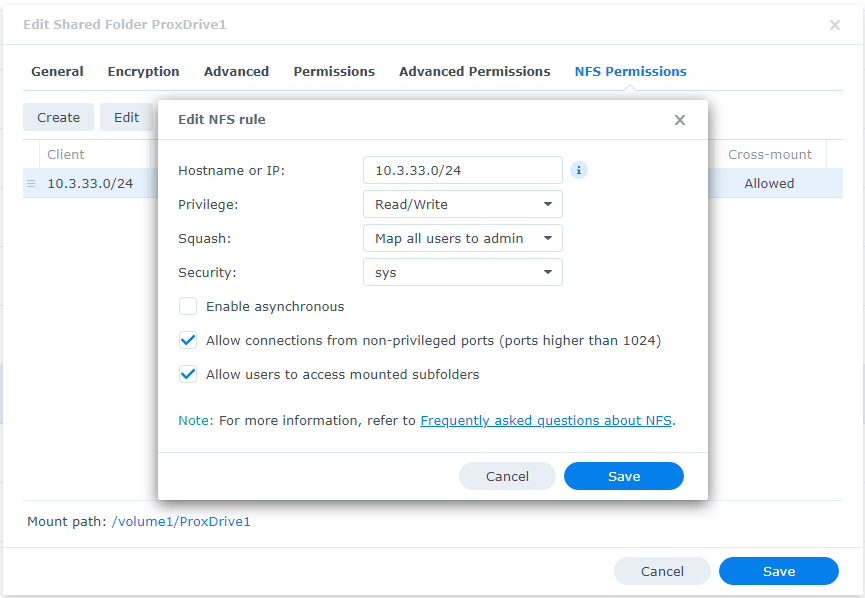
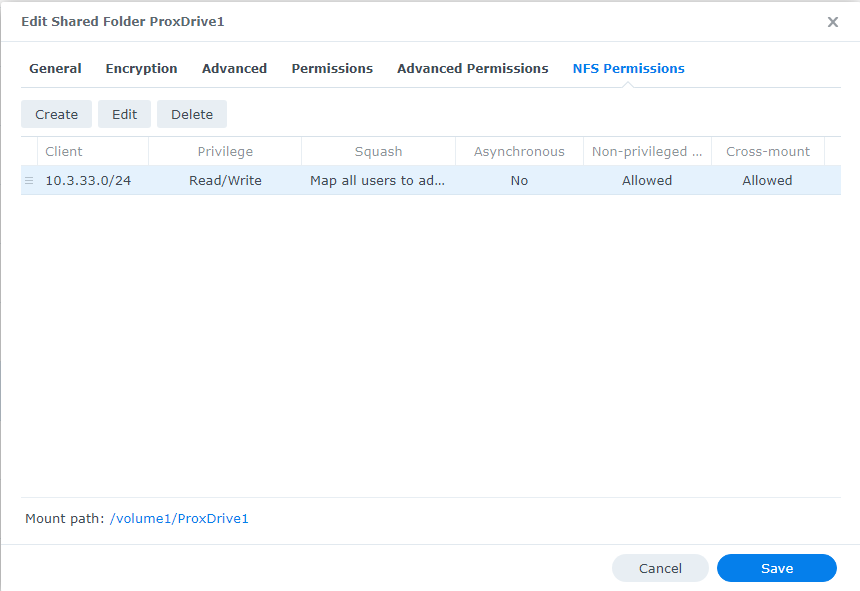
After saving the new rule, below is the rule after creation.
Configure NFS storage in Proxmox Server
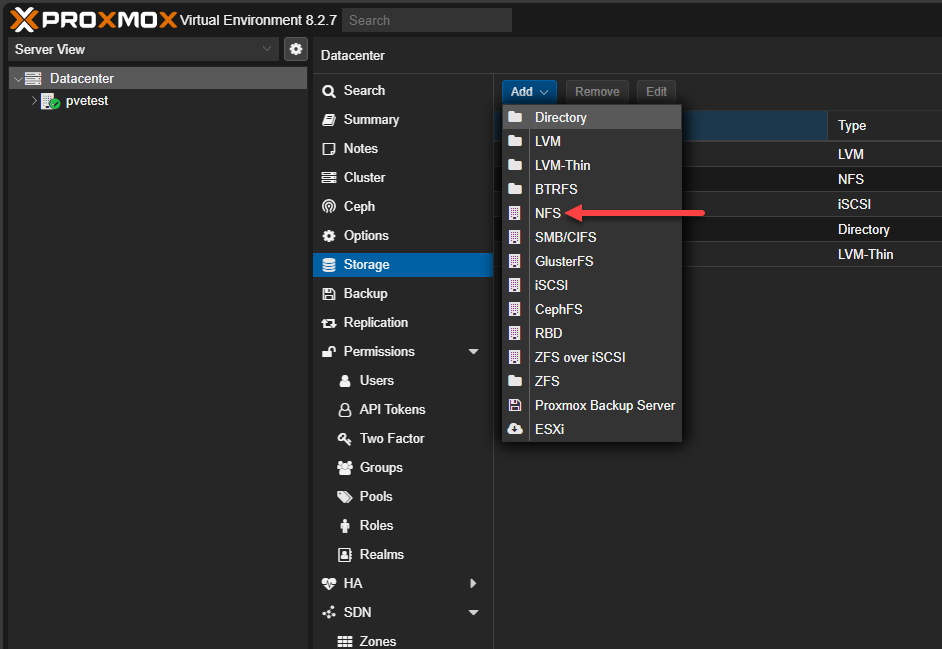
Now that we have the Synology NFS share configured, we can configure the settings on the Proxmox server. Log into Proxmox and navigate to Datacenter storage > Add > NFS.
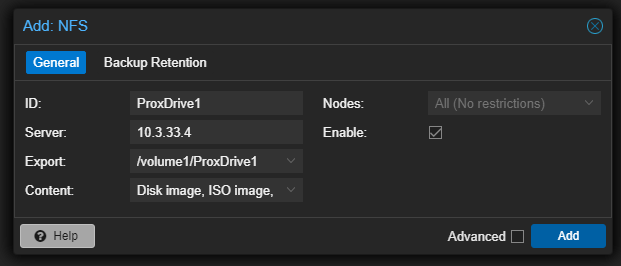
In the Add: NFS dialog box, you configure an ID for your NFS storage, server, export, and content:
- ID – you can call this anything
- Server – the IP or FQDN of your NFS server
- Export – Make sure to put the full path to your NFS storage, including the volume path. If you just put the shared folder here, it will fail in my experience with permission denied
- Content – select the types of files and content that will be allowed to be stored here. You can select disk image, ISO image, container template, VZDump backup file (backup job), container, snippets
Once you double check your settings configured, click Add.
We have successfully gone through the process to mount Synology drive in Proxmox using NFS.

Mounting and Managing Synology Drive in Proxmox
- Mount the Synology NFS share on your Proxmox host using the mount path.
- Verify that the Synology NFS share is successfully mounted and accessible.
- Configure the Proxmox server to use the mounted Synology drive for storage.
- Manage the Synology drive in Proxmox, including creating and managing virtual machines.
Troubleshooting and Best Practices
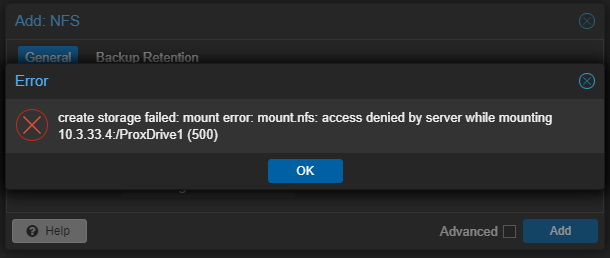
As with any type of network connection and storage configuration, you may run into issues with NFS. The most common type of problem by far is related to permissions. If you receive an access denied error, there is likely a configuration you have missed, either with the permissions setup or the path.
Below, I didn’t include the volume1 in the path and it gave me an access denied. Also, give attention to the NFS rules as a culprit if you get access denied. You may need to squash user permissions to a specific level using the settings shown above, depending on how secure you want to make your NFS connection.
You can also check your logs in Proxmox for errors and to help troubleshoot connectivity or other problems with mounting your NFS storage.
If you have a specific question related to Proxmox, post your question or comment in the VHT forums to get help from a community member, including myself to help troubleshoot: VHT Forums
There are also a few best practices to keep in mind when running NFS with Proxmox:
- Consider using a dedicated network for NFS traffic – this helps with performance and security
- Use NFS version 3 and 4 – these versions of the protocol have better security and performance, especially version 4 that reduces open ports even more
- Set the right permissions – Be sure to control access and limit root privileges from NFS clients which helps make sure things are secure and less vulnerable
Wrapping up
Mounting a Synology drive in Proxmox using NFS is a great way to extend your useable storage in Proxmox and have a great place to store things like ISO images, templates, and Proxmox backups created by Proxmox backup server. NFS is simple to configure on the Synology side of things, and it is easy to configure also on the Proxmox VE server as well.
So, it doesn’t take long or much configuration to add this type of storage in your Proxmox environment and the process worked flawlessly. I like to use NFS for these types of storage. When it comes to creating a datastore for running VMs, I tend to use iSCSI just due to the advantages it b
Google is updating how articles are shown. Don’t miss our leading home lab and tech content, written by humans, by setting Virtualization Howto as a preferred source.
About The Author