I have been deep-diving lately into helpful suggestions, configurations, and settings that help to lower the power bill in a home lab or edge environment with server hardware or even mini PCs running as servers. I want to shed light on CPU C states which can help to drastically reduce power consumption. Let’s take a look and see what these are and how we can implement them.
Table of contents
What are CPU C states?
You may have heard of these before and wondered what they refer to. These are power-saving modes used by modern processors that help to make them more efficient and reduce the amount of energy consumed when the CPU is idle (which is going to be the case with many home lab environments or edge environments).
There are different “states” that are represented by C states. Each of these states is a different or higher level of power consumption. Let’s briefly consider these:
- C0 – This is the state of the CPU when there aren’t really any power-saving modes going on and is normal operations where it is active and processing things
- C1 (Halt) – This mode of C states turns on when the CPU is idle, but it can quickly return back to C0 to start handling new operations and tasks. It saves a good bit of power without sacrificing a lot of performance
- C2 & C3 C states – In this mode, the CPU is placed in a deeper reduced power mode that shuts down more parts of the CPU, but still doesn’t drastically affect performance
- C6 & C7 – These modes are the deepest power-saving modes where even part of the CPU cache is turned off. In this mode, you have the greatest amount of power savings, but it also means that the performance impact will be noticeable when the CPU needs to resume back to C0.
CPU C States demotion
There is something else called CPU C states demotion. What is demotion as it relates to C states? Demotion is a process that allows the system to detect that a deeper C state like C3 or C6 may be a negative impact on performance with the high latency needed for waking the CPU up.
It will then automatically demote the CPU to a lighter C state like C1 which still has a lot of power saving benefits but lower latency to wake up. These demotions are made in real-time and are based on the work that actually needs to be done and the CPU’s power state history.
What do CPU C states look like in the BIOS?
In home labs especially, if you are wanting to maximize power efficiency, which is probably the case if you are going to mini PCs, you can squeeze even more power efficiency out of your configuration by enabling C states.
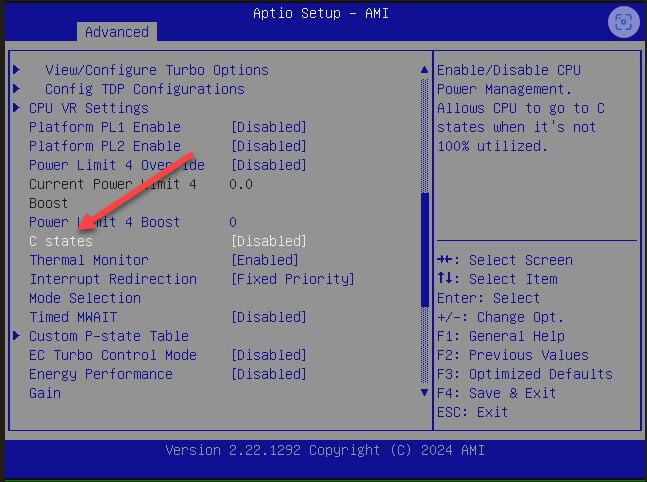
To make this more helpful to understand what we are looking for, below is a screenshot of the BIOS of a Beelink SEI14 mini PC. You can find the C states configuration under Advanced > Power & Performance > CPU – Power Management Control > C States. Keep in mind that each BIOS will be different and look different. So, be sure to consult the manufacturer of your motherboard or vendor of your mini PC to enable or disable C states.
Enabling CPU C states
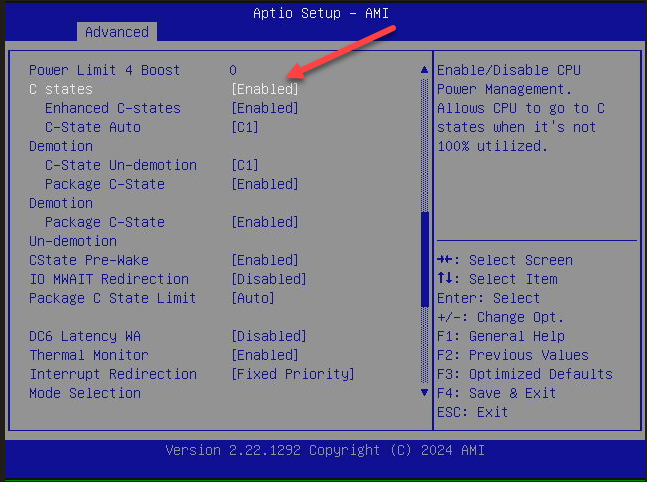
If you want to enable CPU C states, just drill into the BIOS option and set the option to Enabled. When you enable the CPU C states, you will notice that several child options appear, including the following:
- C states
- Enhanced C-states – This will enable or disable C1E, which allows it to switch to the minimum speed when all cores enter the C state.
- Configure C-State Auto demotion
- Demotion
- C state un-demotion
- Package C state
- Demotion
- Package C state
- Un-demotion
- CState Pre-Wake
Setting VMware ESXi to work with C states
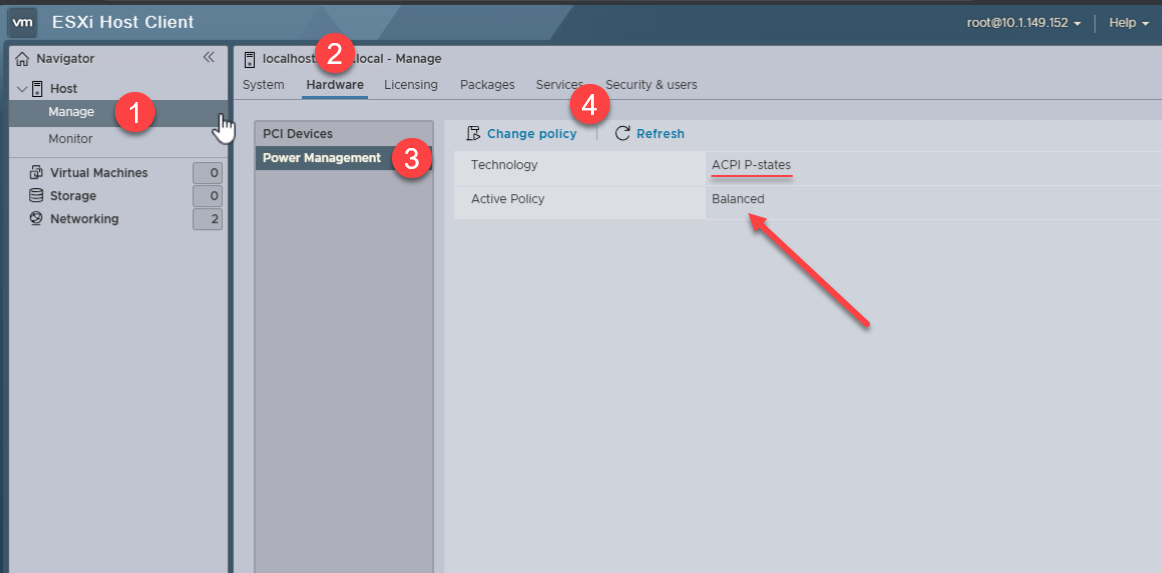
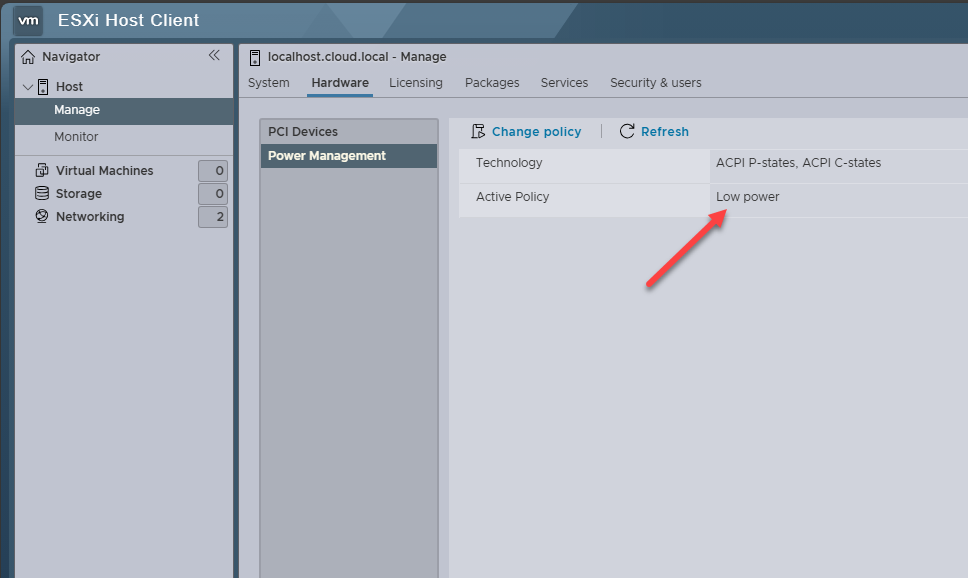
VMware ESXi has some easy settings that allow easily taking advantage of the C states configured in the BIOS. All we need to do is navigate in the host client to the Host > Manage > Hardware > Power Management > Change Policy if we want to change the policy.
Below, you see that the default setting is enabled, Balanced mode and it shows which CPU states are used, in this case P-states (performance states) as this was before changing the BIOS settings to allow C states.
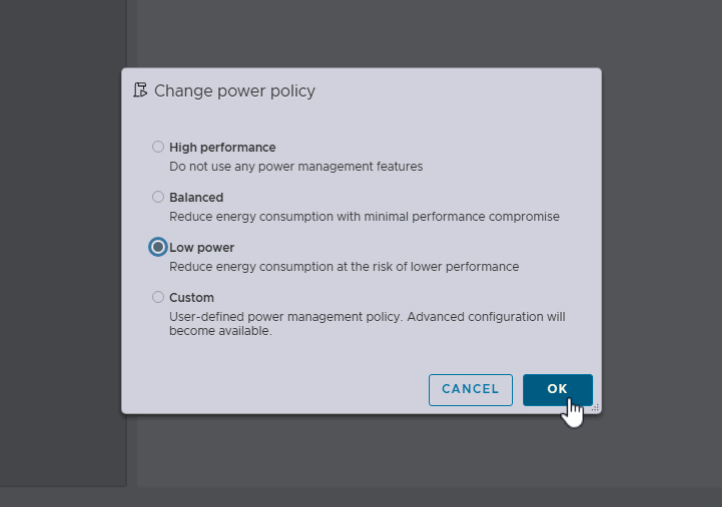
If we click the Change policy button, we will see the following screen. We can see we have the Low power mode that allows us to reduce energy consumption at the risk of lower performance.
After you click OK, you will see the low power mode enabled and ACPI C states showing under the technology as well if you have enabled these in the BIOS.
Results in VMware ESXi
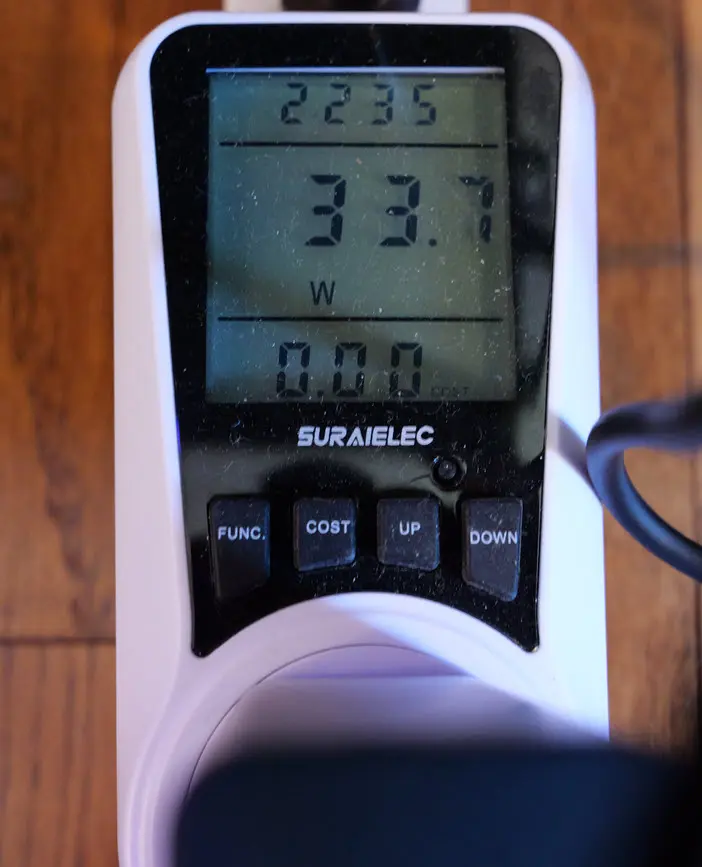
You may want to know what the results were when enabling C states and the low power power policy in VMware ESXi. Below is a pic I took before enabling these settings:
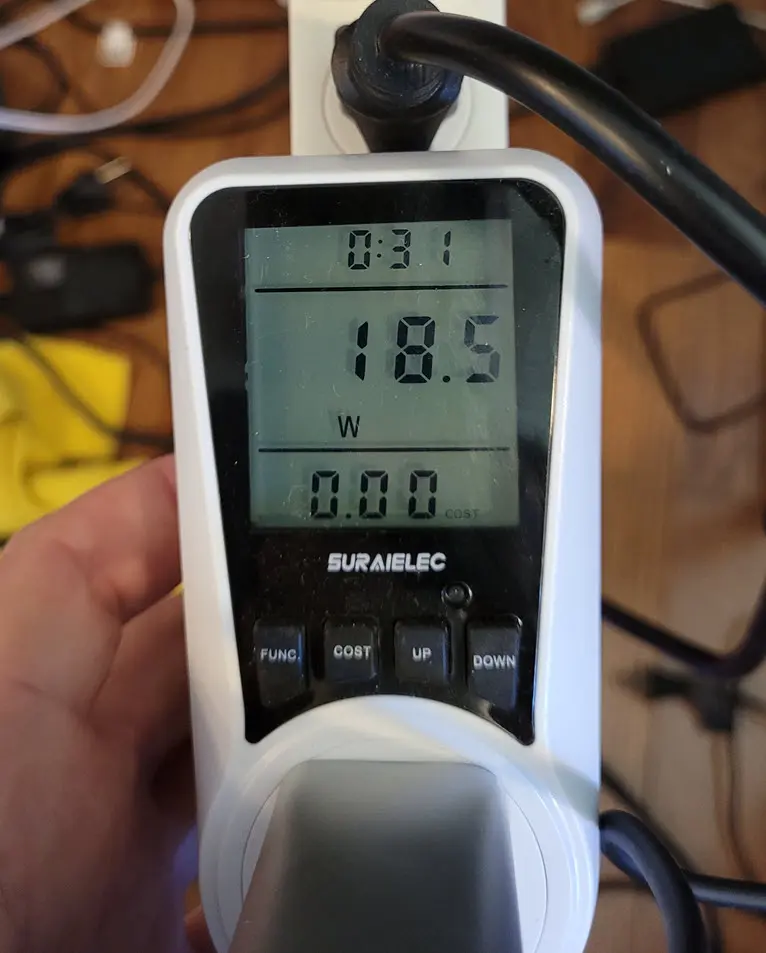
Now, with the CPU C states enabled and the power plan set to low power, I saw the below. That is over a 15 watt difference! That is significant.
Enabling in Proxmox
You can also enable a power policy to something similar to the VMware ESXi policy in Proxmox with the following command:
echo "powersave" | tee /sys/devices/system/cpu/cpu*/cpufreq/scaling_governorVideo
Wrapping up
If you are looking to save lots of power in your home lab, likely, you won’t care if the performance will win benchmark awards. Day to day, most home labs will be sitting idling. Enabling C states will allow your CPU to throttle down to extremely efficient modes that save lots of power in conjunction with setting the hypervisor to power saving plans that can capitalize on the underlying C states enabled in the BIOS.
Google is updating how articles are shown. Don’t miss our leading home lab and tech content, written by humans, by setting Virtualization Howto as a preferred source.


