RSAT Windows 11 Install Step-by-Step
In building a Windows 11 management workstation virtual machine lately, I was reminded of the need to get the server administration tools RSAT installed. These Windows tools are a great addition to a workstation build for anyone who is managing Windows Server roles along with other infrastructure in the environment. Let’s take a look at the list of steps needed for RSAT Windows 11 install step-by-step and how this can be accomplished.
Table of contents
Brief overview of RSAT tools
First of all, note, let’s see what the RSAT tools are. The Remote Server Administration (RSAT) tools are a group of tools that allow admins to manage Windows Server roles installed on servers in their environments. These roles can include infrastructure roles and features. It is good for security since you don’t have to interactively log into a server to run the tools local to the server.
RSAT Windows 11 installation can include tools like Active Directory Domain Services, DNS Server Tools, Group Policy Management Tools, Lightweight Directory Services Tools, Active Directory Certificate Services, Active Directory Users and Computers, Dynamic Host Client Configuration DHCP server administration tools, and others for Windows administrators.
Install Remote Server Administration Tools in Windows 11
There are various ways you can install the RSAT in Windows 11, including:
- Windows settings
- PowerShell
- Command line
Using Windows Settings
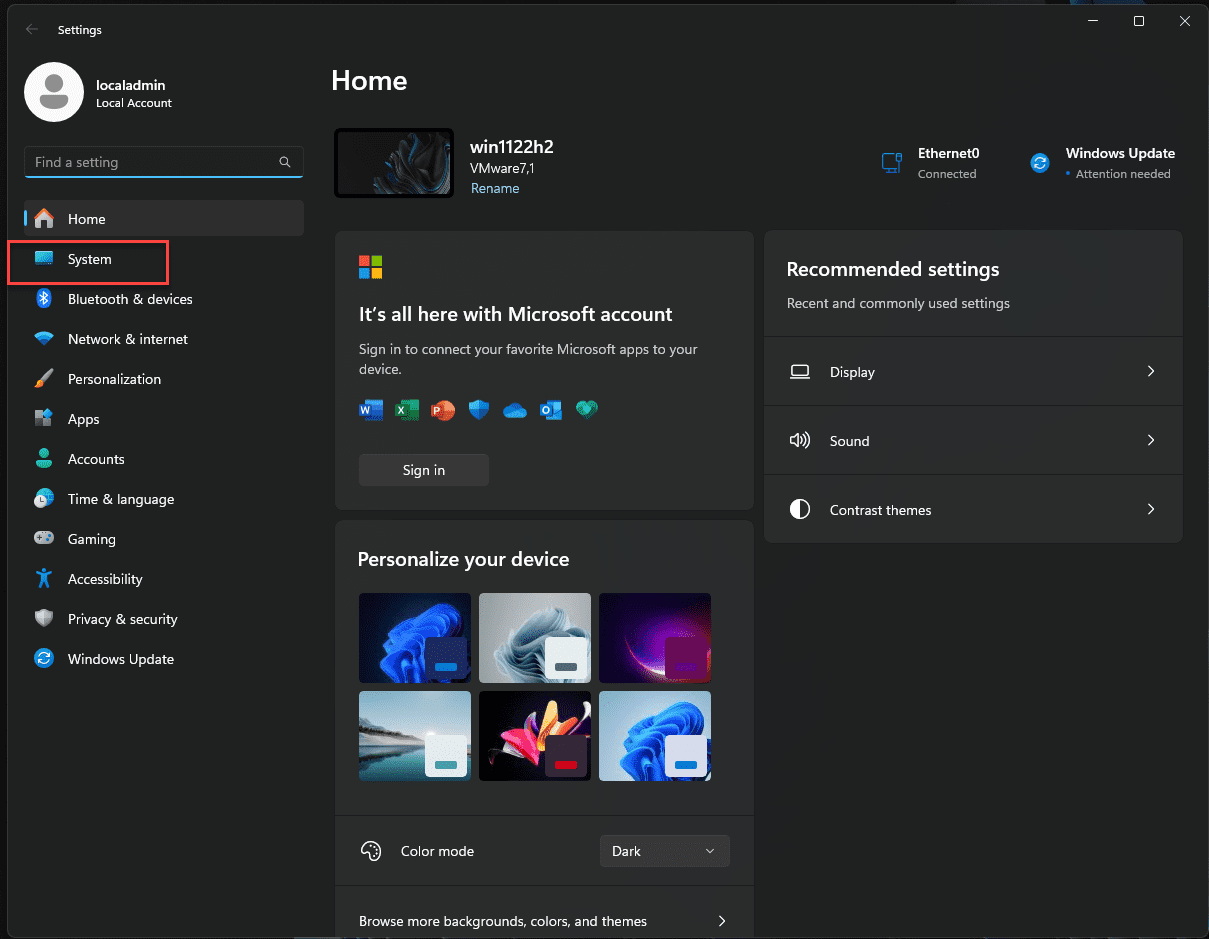
To install the remote server administration tools in Windows 11 using Windows settings, open the Settings app by pressing Windows + I.
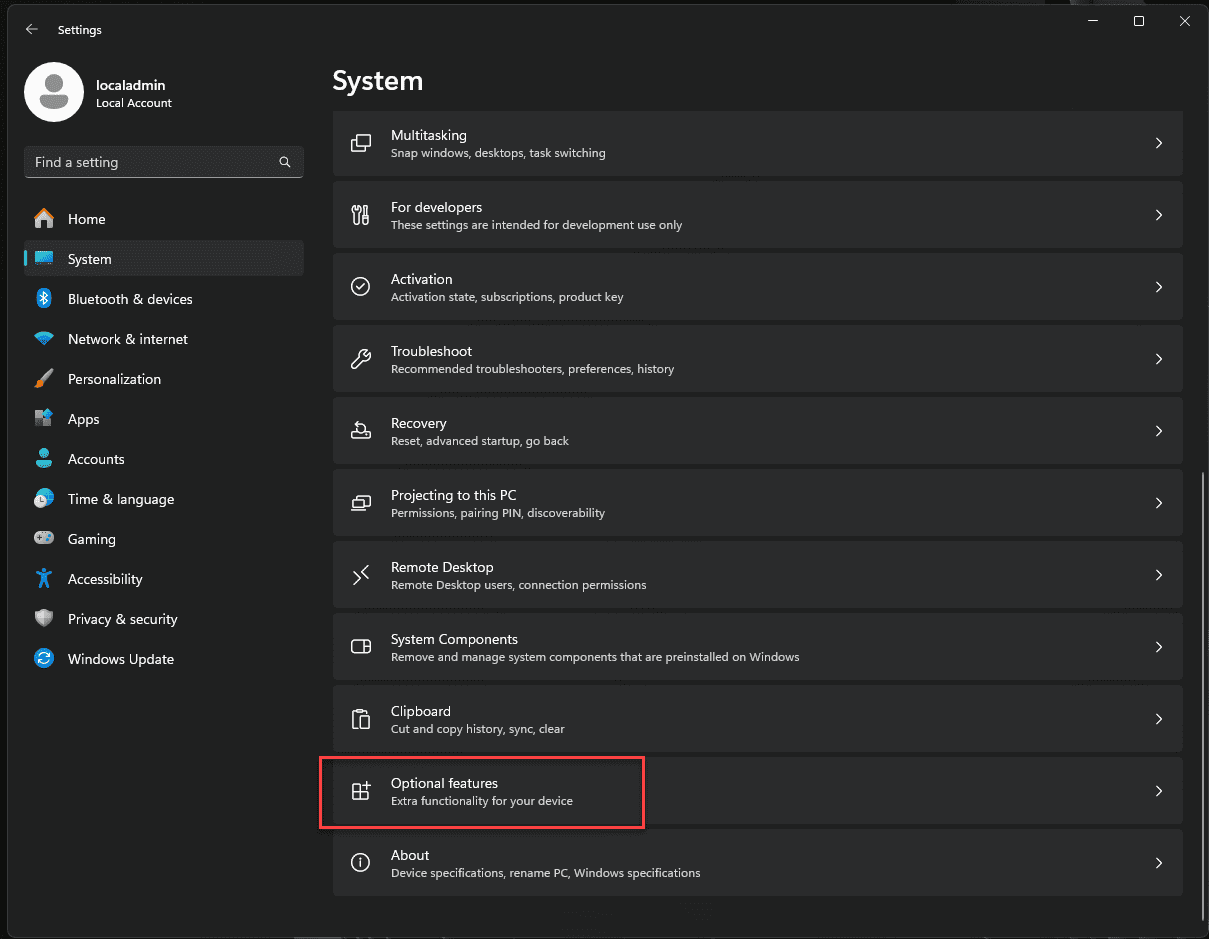
Navigate to System > Optional features.
Choose optional features.
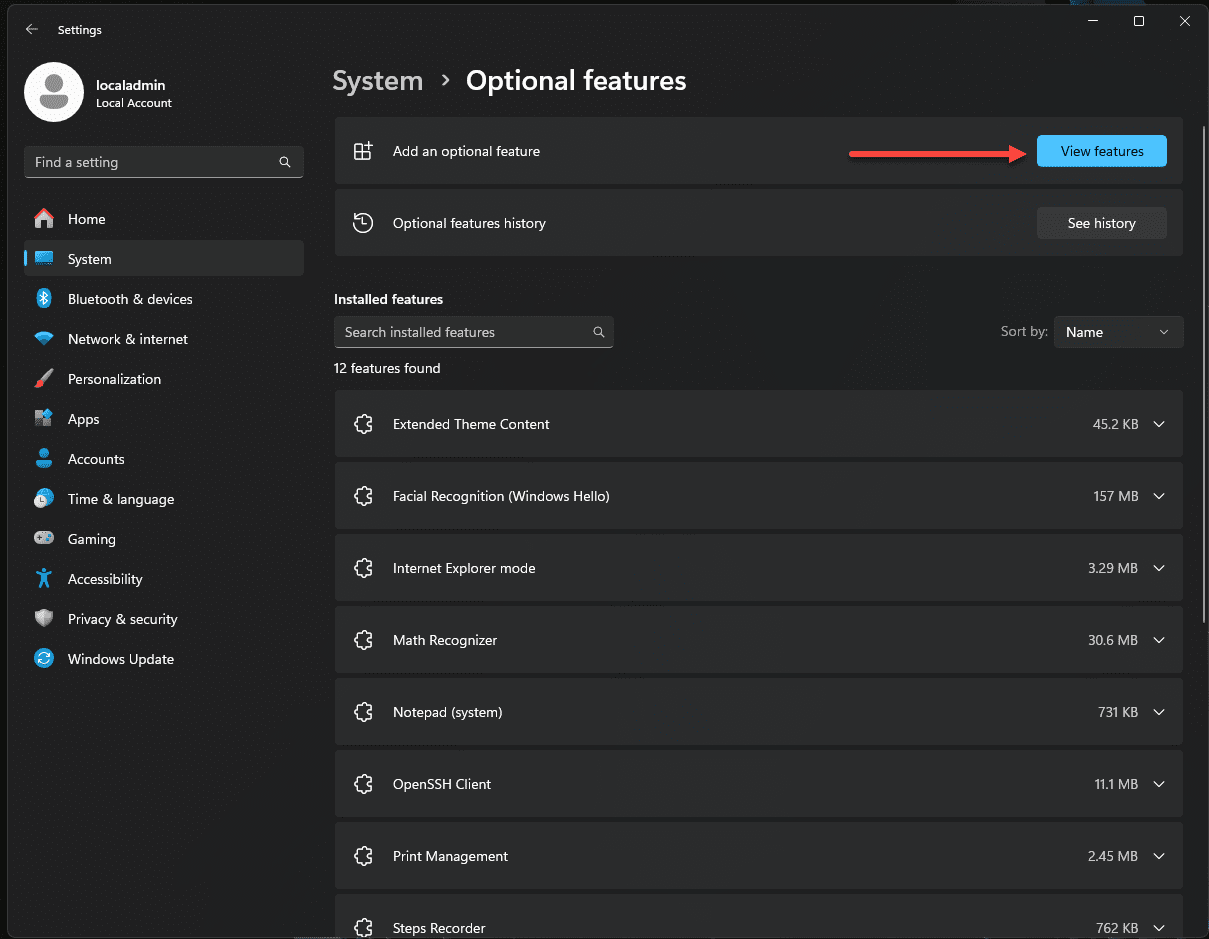
Click on View features next to Add an optional feature.
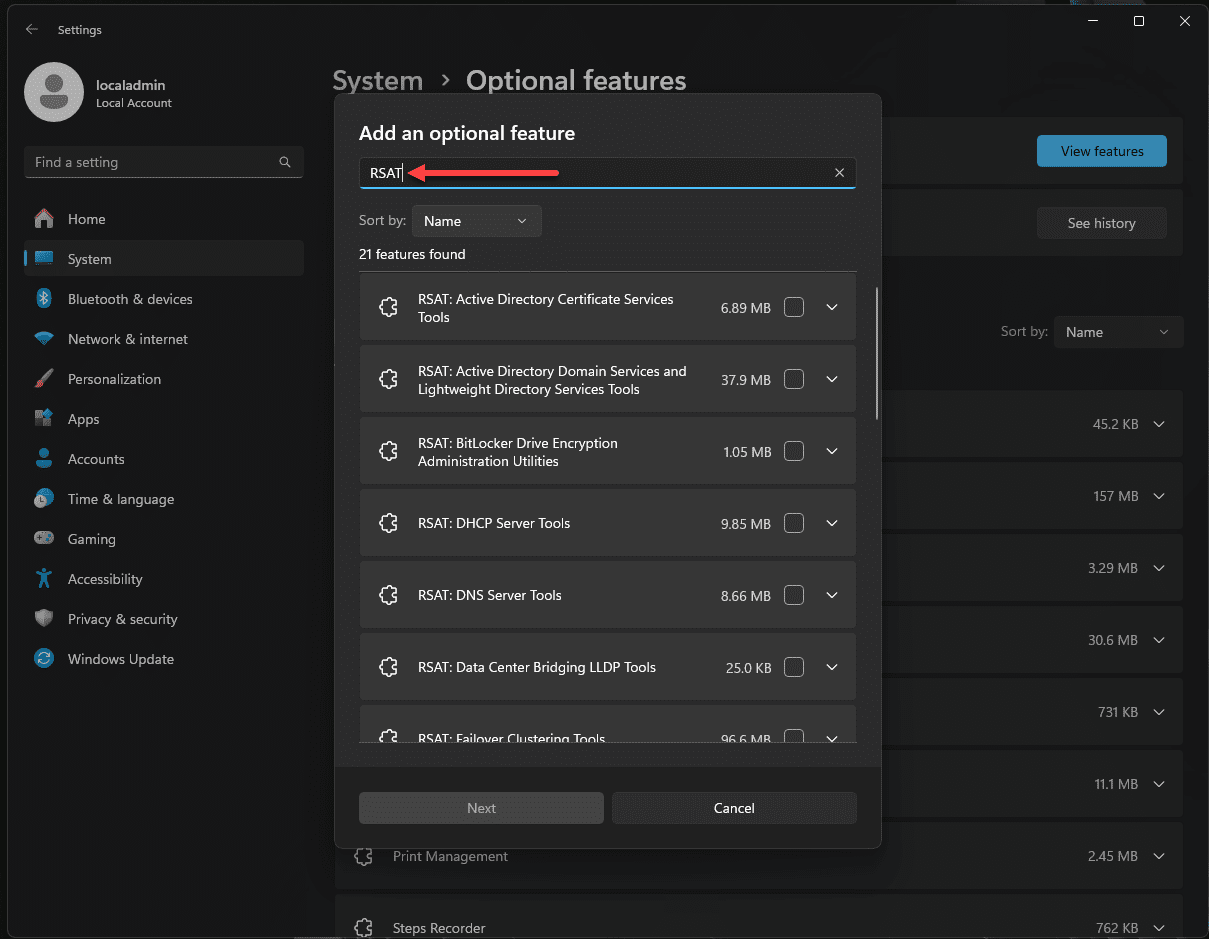
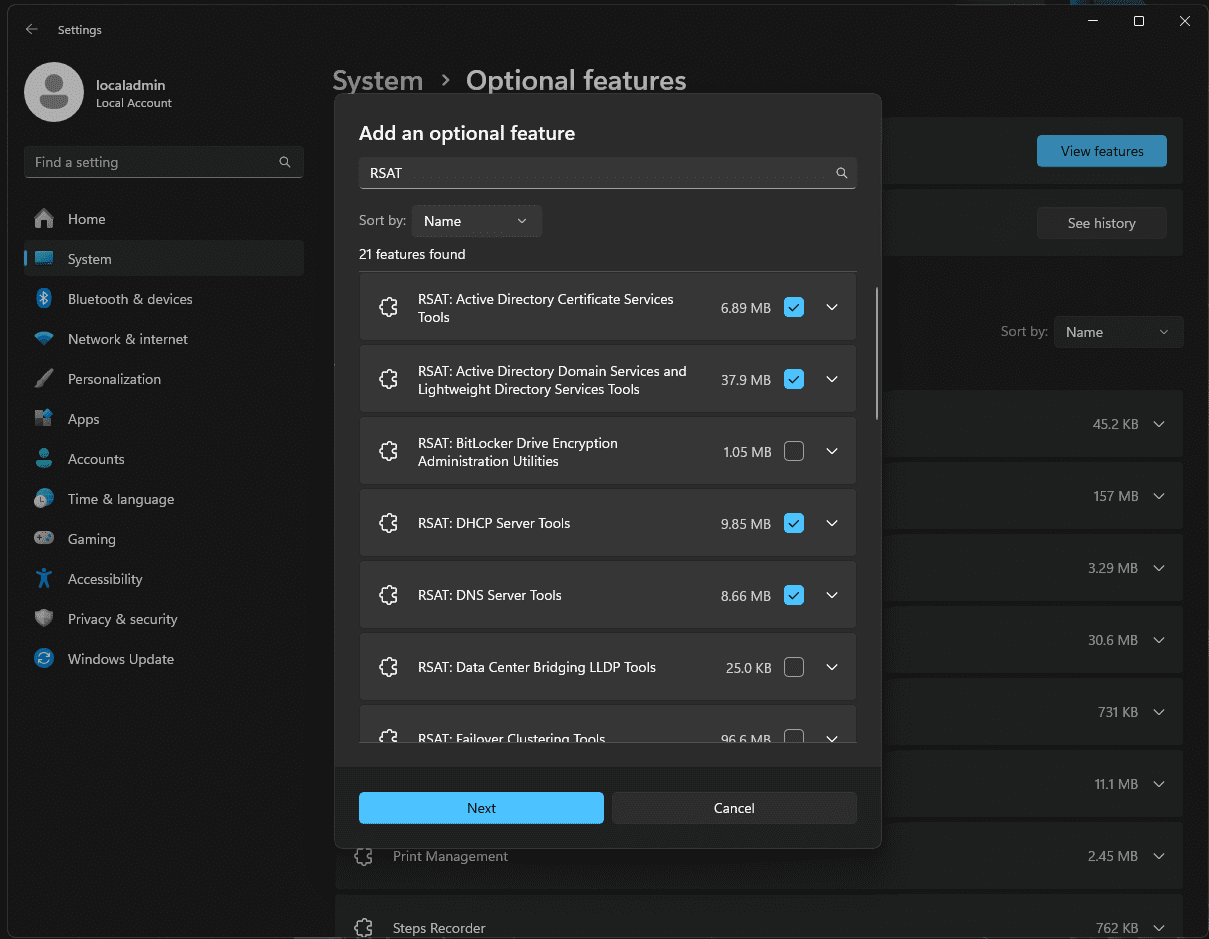
In the search bar, type “RSAT” and check the boxes for the tools you need or you can add all the RSAT tools you use across your Windows Servers.
Place a checkbox next to the additional RSAT features you want to install and click Next. As a note, this dialog box will not display tools you may have already installed. So, if you see one missing from the list, it is highly likely you have it installed already.
Finally, click Install to install RSAT on Windows 11.
Using Windows PowerShell
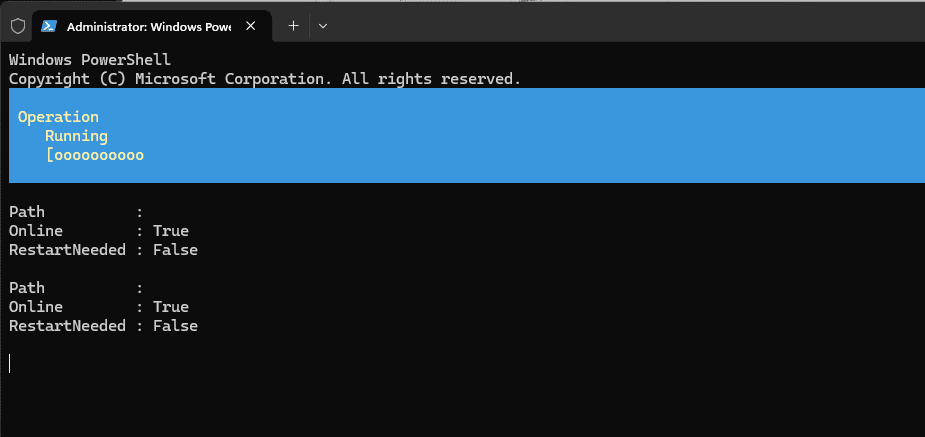
Open Windows PowerShell as an administrator.
Use the command:
Get-WindowsCapability -Name RSAT* -Online | Add-WindowsCapability -OnlineThis command will install all RSAT features available for Windows 11.
Using Command Line
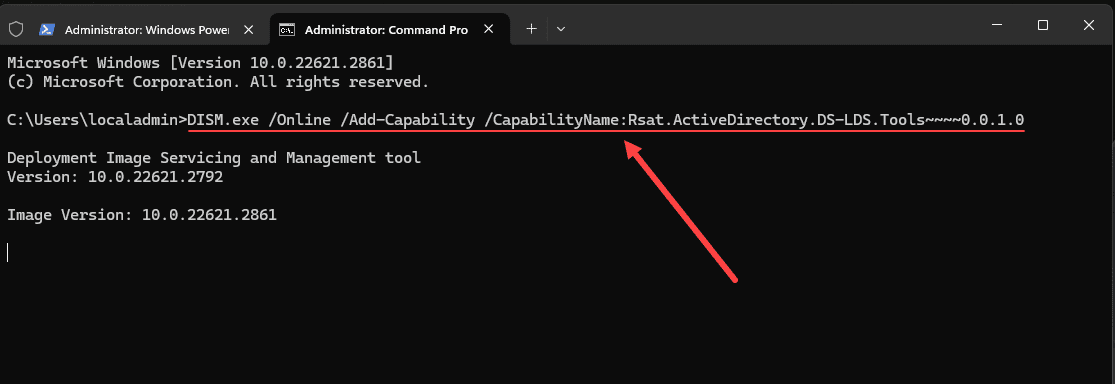
Open the Command Prompt as an administrator.
Execute the command:
DISM.exe /Online /Add-Capability /CapabilityName:Rsat.ActiveDirectory.DS-LDS.Tools~~~~0.0.1.0Replace the CapabilityName with the desired RSAT feature you want to install.
Brief overview of some of the common RSAT tools
Let’s look at a few of the tools that I think are the most common tools installed in the RSAT toolset.
Active Directory Domain Services
Note RSAT Active Directory Domain Services (AD DS) tools – and what they are. Using it, admins can config user accounts, groups, and organizational units in Active Directory Domain Services (AD DS). You can do things like resetting passwords and configuring group memberships, which are common operations.
Group Policy Management Tools
Note the Group Policy Management Tools. With the GPEDIT tool, you can do several things. Including: edit and apply group policy objects (GPOs) to users and computers. With these, you can enforce security settings and manage users and computers, and what they can do, across multiple machines in a way that lines up with organizational policies.
DNS Server Tools
DNS Server Tools in RSAT allows an admin to manage DNS records, zones, and servers. It is an effective tool for maintaining the domain name system within your network.
Remote Desktop Services Tools
Remote Desktop Services Tools enable the management of remote desktop environments. It allows you to configure sessions, user access, and server settings.
Lightweight Directory Services Tools
Lightweight Directory Services Tools are used to manage lightweight directory services that do not require full Active Directory capabilities.
Encryption Administration Utilities
These tools manage BitLocker Drive Encryption. It provides options to encrypt drives and manage encryption keys.
Troubleshooting RSAT Windows 11 install
Let’s consider some common issues that may be seen when installing RSAT in Windows 11. Note the following:
RSAT not showing up in your optional features: Make sure your Windows 11 installation is updated to the latest version. RSAT requires specific updates to be installed. Also, make sure you are not pointed to a WSUS server for updates. This can also cause issues when pulling the catalog of available features and updates.
Installation errors: Make sure you have administrative privileges. RSAT installation requires admin rights.
There are a couple of solutions to the issues noted:
Reinstall RSAT: Sometimes, reinstalling RSAT can fix issues. Use the following command to remove, then reinstall:
DISM.exe /Online /Remove-Capability /CapabilityName:Rsat.ActiveDirectory.DS-LDS.Tools~~~~0.0.1.0Update Windows: Ensure your system is up-to-date with the latest Windows updates and that you are not pointed to a WSUS server for updates.
Wrapping up
I think most who manage Windows Server environments will want to have the RSAT tools installed on their management workstation. As we have seen Remote Server Administration Tools (RSAT) are management consoles that can be installed on a Windows client to performance management of most of the common Windows Server roles. Since many are using Windows 11 as a management workstation, understanding how to load up the tools needed in Windows 11 is important. There is quite a bit of flexibility here since you can install it using the optional features in Windows 11 apps, PowerShell, or traditional Windows command line.


