How to Back Up and Restore VMware ESXi Host Configuration
When thinking about disaster recovery strategies for your virtualization environment, it is easy to miss one of the important aspects of disaster recovery in your VMware environment: your host configuration. Have you ever had an ESXi host crash and you thought to yourself, man I wish I had a backup of my configuration, including VMkernel ports, storage configuration, network labels, etc? I know I have. However, VMware ESXi has a few built-in tools that allow you to backup your ESXI configuration to a backup file that you can use to easily restore. Let’s look at these utilities and see how they can be used and the effort involved to back up and restore ESXi configuration.
Table of contents
- What is in an ESXi Host Configuration?
- Step-by-Step Guide to Backing Up Your ESXi Host
- Restore ESXi backup configuration file
- Sample PowerCLI script for backing up multiple hosts
- Tools for scheduling scripts
- Best Practices for Backup Scripts
- Third-party tools are still needed for Backups
- Troubleshooting
- Wrapping up
What is in an ESXi Host Configuration?
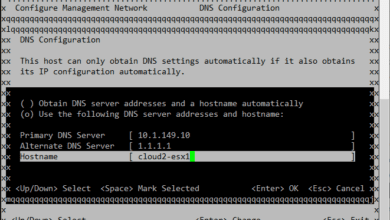
An ESXi host configuration includes all settings and configurations that allow the host to interact with virtual machines, storage devices, and network connections. It includes the network settings, storage configurations, and system security settings you have configured manually or programmatically on your host. Understanding these elements is crucial for effective backup and recovery.
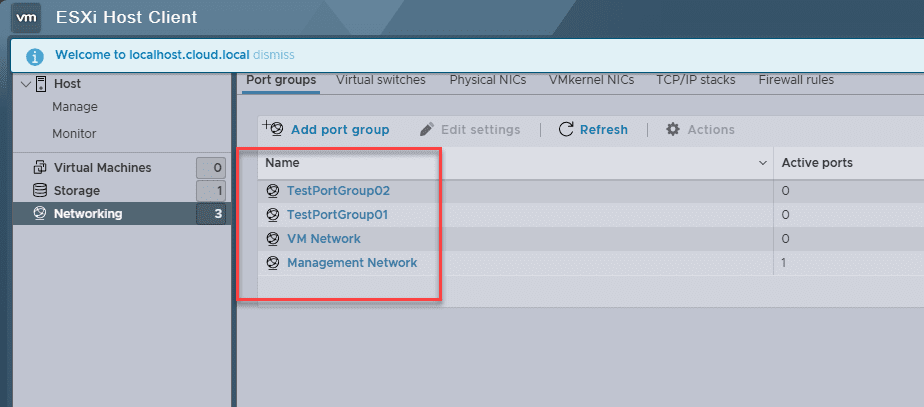
Part of the helpful configuration that is included with the firmware backup of your ESXi host configuration are your network labels.
Step-by-Step Guide to Backing Up Your ESXi Host
We look at the commands provided officially on the VMware by Broadcom support page found here: How to back up and restore the ESXi host configuration (broadcom.com).
You can backup your ESXi host using the ESXi command line and with PowerCLI. Let’s look at at few tools that allow you to do this.
vSphere CLI
You can configure vSphere CLI with the command vicfg-cfgbackup to backup and restore your ESXi config. Note the command below to backup your config:
vicfg-cfgbackup --server=esxi_host_ip_address --username=root -s esxibackup.tgzThis command backs up the host configuration and saves it as a .tgz file.
Using the vim cmd hostsvc firmware tool
Another tool for backing up your ESXi config from the vmware vsphere CLI command line is the vim-cmd hostsvc/firmware command.
Note the command to create backup files
vim-cmd hostsvc/firmware/backup_configIt creates a backup archive of the host’s firmware configurations. This includes all critical settings and configuration.
The output of the command gives you a URL where the backup file can be downloaded from. This is typically in a .tgz format. This tool is an easy way to backup your configuration using scripting and other automation in smaller environments.

VMware PowerCLI
Using VMware PowerCLI is another great way that many are using to back up their VMware ESXi host configuration. There is a native ESXi configuration backup command by way of the PowerCLI cmdlet Get-VMHostFirmware.
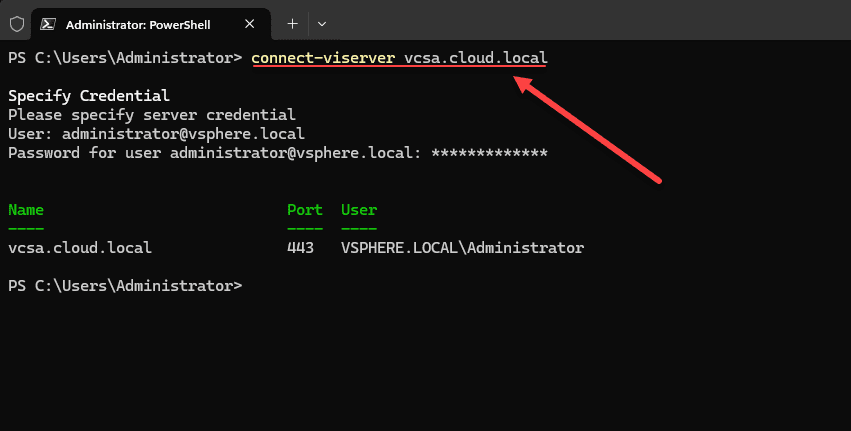
First you will need to connect to your host or vCenter Server with PowerCLI. The syntax to do that is:
connect-viserver <your VCSA or ESXi IP or FQDN>Below, I am connecting to my vCenter Server.
You can use PowerCLI for easy automation. Note the following syntax:
Get-VMHostFirmware -VMHost esxi_host -BackupConfiguration -DestinationPath C:\BackupsThis PowerCLI cmdlet creates the ESXi configuration backup archive and stores it at the path you specify which is a local path on the workstation from which you run the PowerCLI cmdlet.
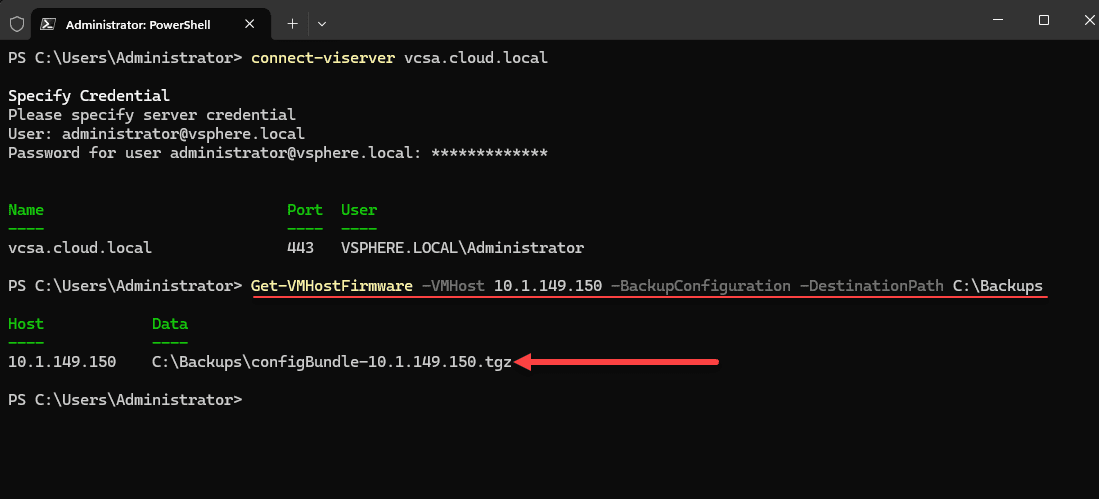
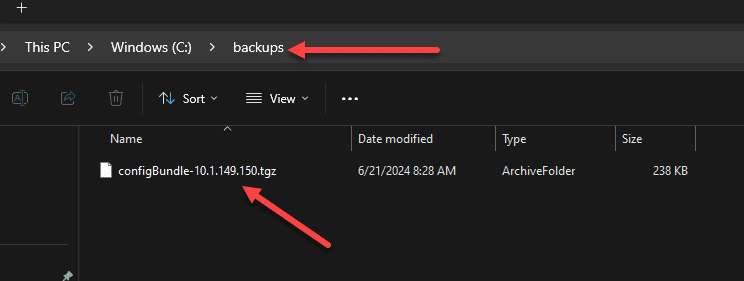
When you look at the backups folder you see the config bundle tgz that is created.
Restore ESXi backup configuration file
The process to restore ESXi host configuration is a straightforward process as along as you have a good backup of your ESXi host configuration created using one of the tools above and credentials to login to your target ESXi host.
Before you restore
Before restoring configuration data, put your host in maintenance mode. As part of the restore process, the ESXi host will reboot. Also, you will likely want to enable ssh access to the host so you can remote in and not have to use the ESXi console.
Restore command using vicfg-cfgbackup
Restoration involves reversing the backup command:
vicfg-cfgbackup --server=esxi_host_ip_address --username=root -l backup.tgzThis command loads the configuration from the .tgz file you specify back onto the ESXi host.
Restore using vim cmd hostsvc firmware
To restore the ESXi host configuration using the vim-cmd utility, you will need to use a similar command. But, this time, we will be restoring the configuration.
- Download the backup file: First, make sure you have the backup file (.tgz file) on the ESXi host. This is the file you created using the vim-cmd hostsvc/firmware/backup_config command.
- Use the restore command: To restore the configuration from your backup file, use the following vim-cmd command:
vim-cmd hostsvc/firmware/restore_config /path/to/your/backup_file.tgzRestore ESXi configuration with VMware PowerCLI
Now, let’s look at the command to restore the configuration using VMware PowerCLI.
- Connect to the vCenter Server or Directly to the ESXi Host: First, you need to connect to your vCenter server or directly to the ESXi host using the Connect-VIServer cmdlet.
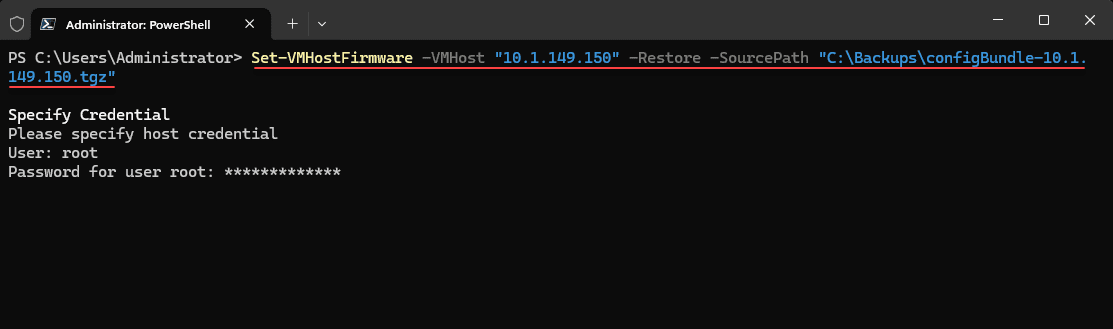
Connect-VIServer -Server "vCenter_or_ESXi_IP" -User "username" -Password "password" - Perform the restore: Use the Set-VMHostFirmware cmdlet to restore the firmware configuration from the backup file. You need to specify the VMHost and the local path to the .tgz backup file.
Set-VMHostFirmware -VMHost "esxi_hostname_or_ip" -Restore -SourcePath "C:\Path\To\Your\BackupFile.tgz" -HostUser "root" -HostPassword "your_host_password"
In this command:
- -VMHost is the host where you want to restore the configuration.
- -Restore indicates that you want to perform a restoration.
- -SourcePath provides the path to the backup file.
- -HostUser and -HostPassword are used if you’re directly connected to an ESXi host and not using vCenter credentials.
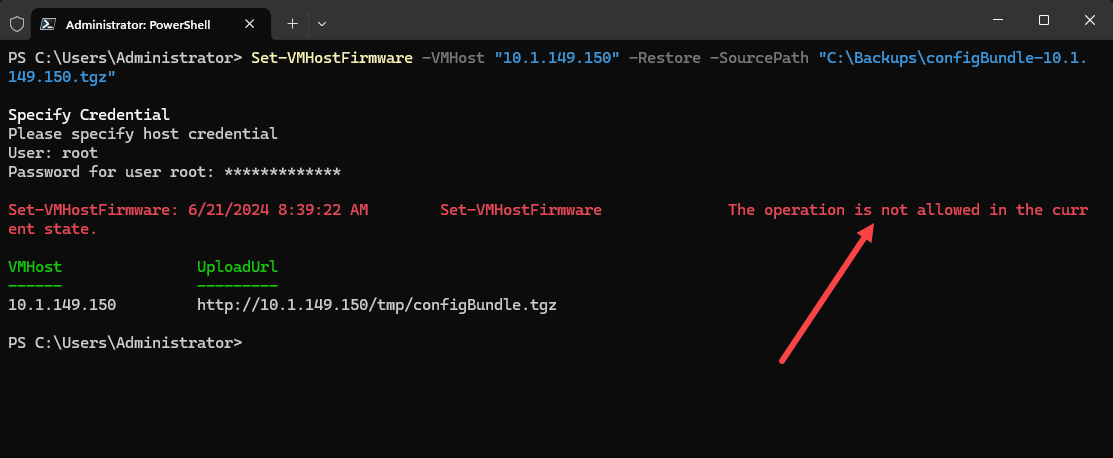
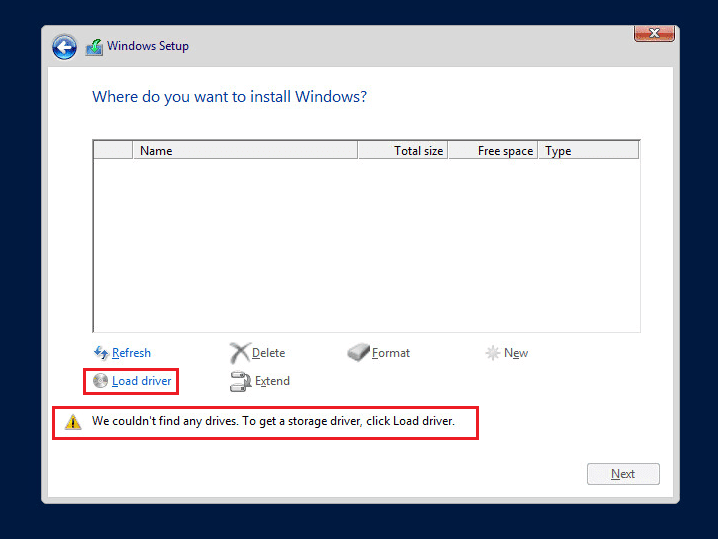
If you don’t have the ESXi host in maintenance mode, you will see the following error when attempting to restore the ESXi configuration:
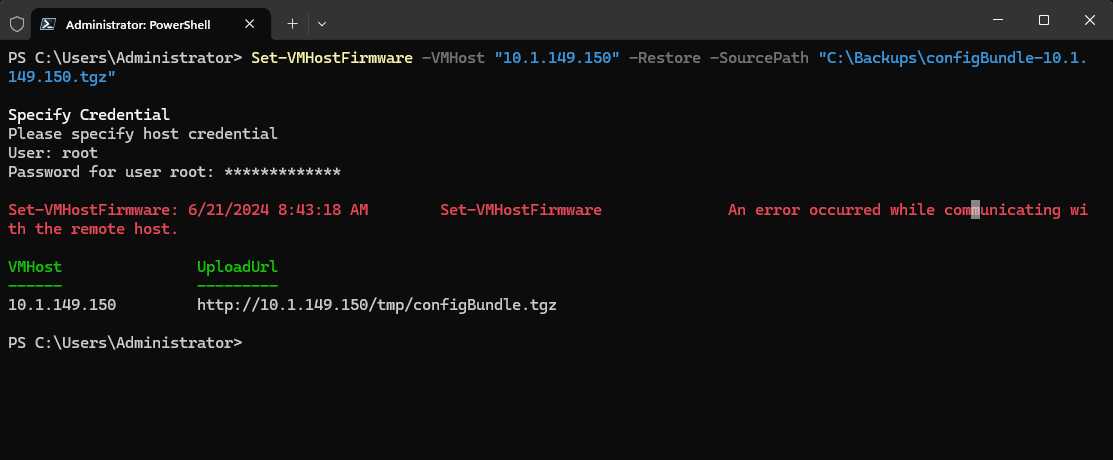
After putting the host in maintenance mode, rerun the cmdlet. Below, even though it looks like it errored out, what is happening is the host is automatically rebooted as part of the config restore, so we get the “error occurred while communicating with the remote host”. After restoring the config it immediately reboots the host.
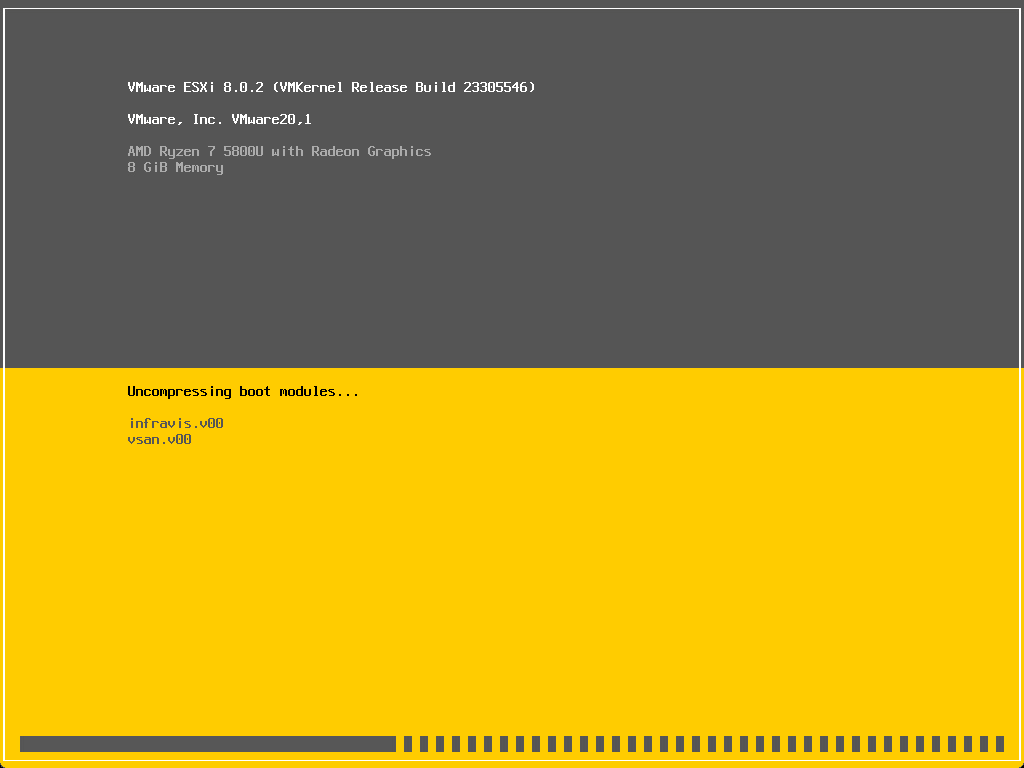
If you look at the console of your ESXi host, you will see the host rebooting:
Sample PowerCLI script for backing up multiple hosts
Let’s now look at some automation with this process, using VMware PowerCLI. If you have multiple hosts in the environment and you want to backup the configuration of your hosts on a daily basis, which is a good idea, we can create a script that:
- Connects to vCenter Server
- Pulls all the hosts in the environment
- Creates a parent folder using the date/time as the name
- Creates subfolders in the parent folder for each ESXi host
- Creates a text file that details the host version, build, etc
- Contains the configuration backup for each host
Keep in mind in the below, we are hard coding credentials. Use a proper secrets management solution so you don’t have to hard code credentials in clear text.
# Define variables
$vCenterServer = "your vcenter server"
$username = "[email protected]"
$password = "password"

# Generate a timestamp for the parent folder
$timestamp = Get-Date -Format "yyyyMMdd_HHmmss"
$parentFolderPath = "C:\ESXiConfigs\$timestamp"

# Create the parent folder if it does not exist
if (-not (Test-Path -Path $parentFolderPath)) {
    New-Item -ItemType Directory -Path $parentFolderPath -Force
}

# Connect to vCenter Server
Connect-VIServer -Server $vCenterServer -User $username -Password $password

# Get all ESXi hosts
$allHosts = Get-VMHost

foreach ($esxihost in $allHosts) {
    # Define export paths
    $hostFolderPath = "$parentFolderPath\$($esxihost.Name)"
    $exportPath = "$hostFolderPath\$($esxihost.Name)_config.vSphereConfiguration"
    $infoPath = "$hostFolderPath\$($esxihost.Name)_info.txt"

    # Create the host-specific folder if it does not exist
    if (-not (Test-Path -Path $hostFolderPath)) {
        New-Item -ItemType Directory -Path $hostFolderPath -Force
    }

    # Export ESXi configuration to a file
    # Create a temporary folder to hold the backup file as Get-VMHostFirmware requires a directory path
    $tempFolder = "$hostFolderPath\temp"
    if (-not (Test-Path -Path $tempFolder)) {
        New-Item -ItemType Directory -Path $tempFolder -Force
    }

    Get-VMHostFirmware -VMHost $esxihost -BackupConfiguration -DestinationPath $tempFolder

    # Move the backup file to the desired location
    $backupFile = Get-ChildItem -Path $tempFolder -Filter *.tgz | Select-Object -First 1
    if ($backupFile) {
        Move-Item -Path $backupFile.FullName -Destination $exportPath
    }

    # Remove the temporary folder
    Remove-Item -Path $tempFolder -Recurse

    # Get ESXi version, build, and image profile information
    $hostVersion = $esxihost.Version
    $hostBuild = $esxihost.Build
    $imageProfileName = $esxihost.ExtensionData.Config.ImageProfileName
    $fullVersion = $esxihost.ExtensionData.Config.Product.FullName

    # Create a text file with version, build, and image profile information
    $infoContent = "ESXi Host: $($esxihost.Name)`n"
    $infoContent += "Full Version: $fullVersion`n"
    $infoContent += "Version: $hostVersion`n"
    $infoContent += "Build: $hostBuild`n"
    $infoContent += "Image Profile: $imageProfileName`n"

    $infoContent | Out-File -FilePath $infoPath
}

# Disconnect from vCenter Server
Disconnect-VIServer -Server $vCenterServer -Confirm:$false

Write-Host "Export completed. Check $parentFolderPath for the configuration and info files."
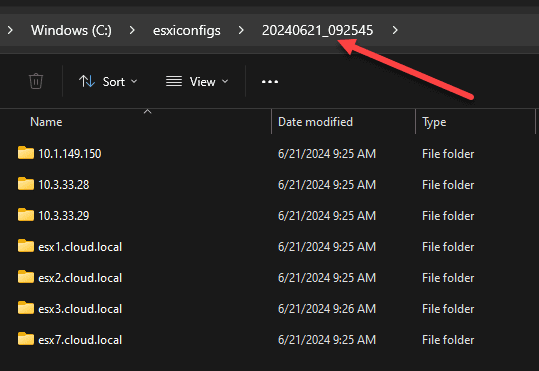
After running the PowerCLI script on my home lab vCenter Server, we see the time/date stamped/named folder that contains subfolders for all ESXi hosts in the environment.
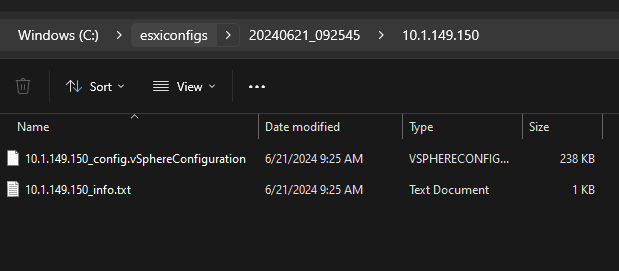
After drilling into one of the host folders, you can see the resources created:
- The ESXi configuration backup archive
- The “info.txt” file that contains information about the host
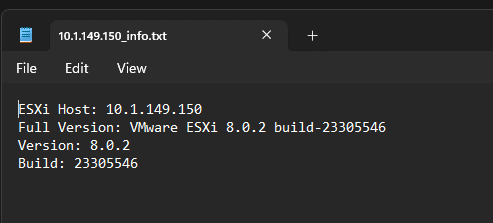
The info text file contains the hostname/IP, the full version of the ESXi host, the version, and the build.
Tools for scheduling scripts
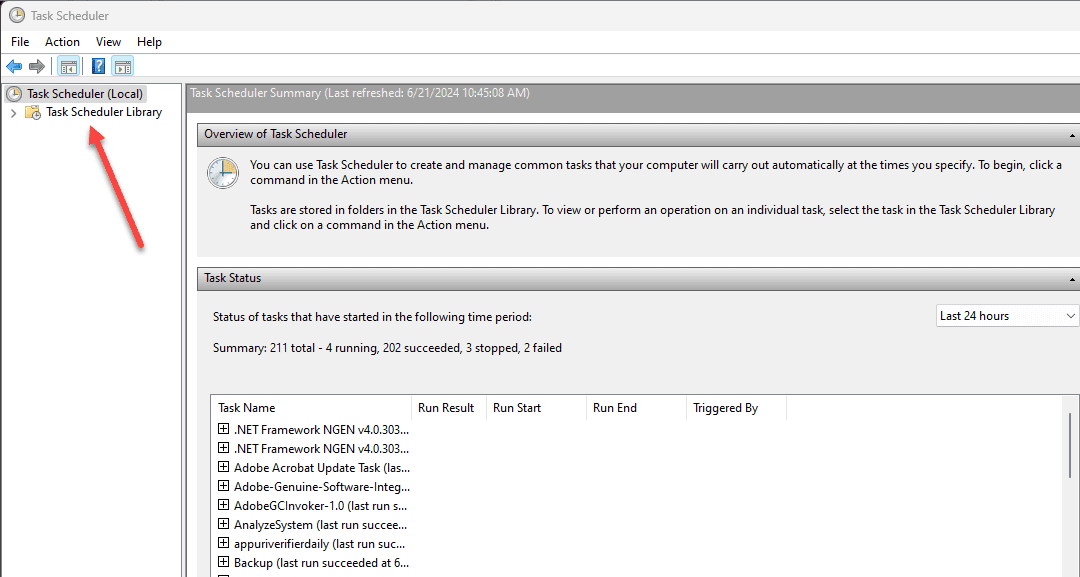
There are a few tools that can be used to schedule scripts to run the PowerCLI sample script shown above. Of course, we can use classic tools like Windows Task Scheduler to schedule running a PowerCLI script at a set interval. This is easy to do and provides the benefit of not having to really implement anything new as most have a Windows Server that already may have tools installed, loaded, and is running tasks.
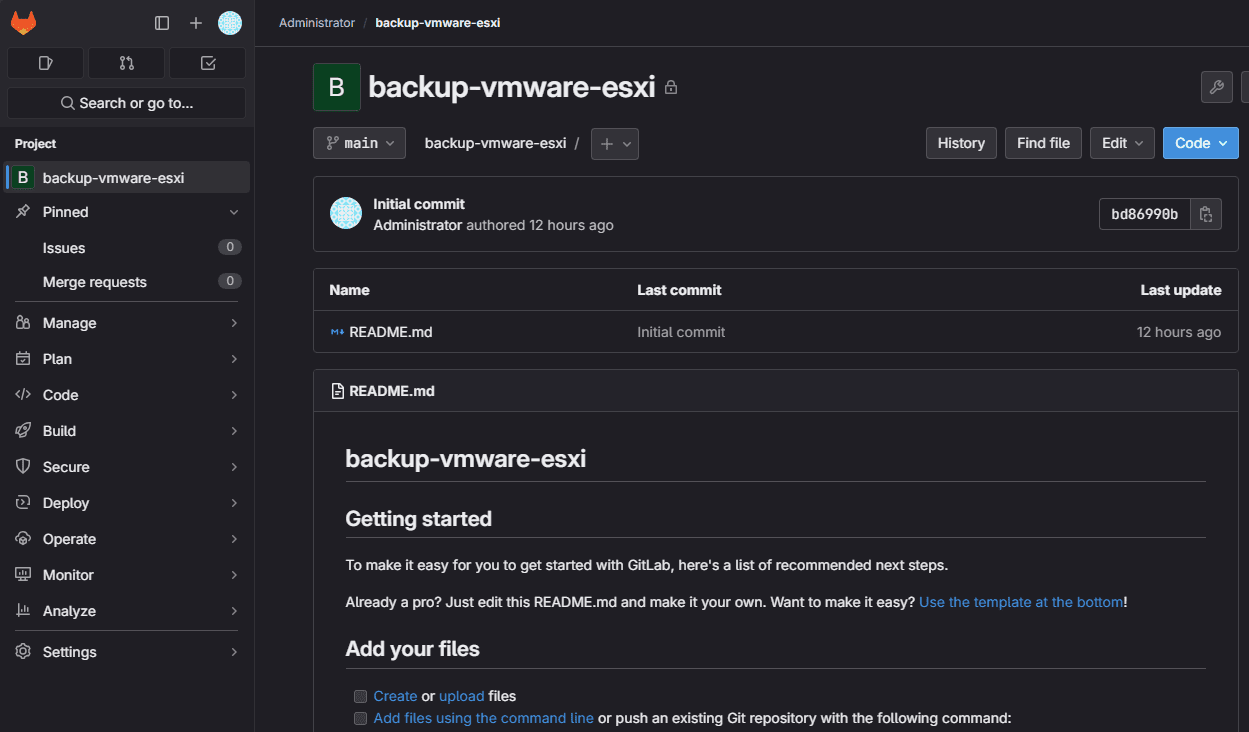
Another great tool to think about using that requires more setup is using something like GitLab to run the script using a pipeline. This is a little more complicated to do, but the benefits outweigh the challenges, since you get to use a proper versioning system, and it has a built-in way to handle secrets so you don’t have to hard code your credentials.
Best Practices for Backup Scripts
There are a few things to keep in mind when using backup scripts for backing up your ESXi host configuration.
- Put error handling in place to have visibility on errors during the backup process
- Verify your backups from time to time and restore them on a test server
- Use versioning systems like git to document and version your scripts and configurations
- Don’t hard code credentials (as we have done in the sample script). This should be a starting point. But, use proper solutions for handling credentials so these are not hard coded.
Third-party tools are still needed for Backups
With VMware vSphere you still need third-party backup solutions to back up VMware vSphere VMs, since with this process we have detailed above, we are not backing up the VMs and configuration.
Third-party tools like Veeam Backup & Replication, NAKIVO, and BDRSuite, for instance, provide enhanced backups and integration with VMware environments.
Combined with the host configuration will help cover the bases of disaster recovery, for your VMs and your actual virtualization hosts.
Troubleshooting
What if the backup of the ESXi host configuration fails? Take note of any error messages you receive in the process. Make sure you have connectivity to your host. Make sure your credentials are correct to login to the host.
If you are scheduling the backups using a script, is the script running properly? Are there errors related to your scheduling tool?
Make sure if you are restoring a configuration from an ESXi host, that the ESXi host target is running the same version of ESXi as the source backup that was pulled. This is why in the script above, we are capturing details about the ESXi host configuration, version, build, etc.
You can still override and have the Set-VMHostFirmware restore the configuration even if the version doesn’t match, but it is best practice to restore to the same version.
Wrapping up
I think it is a great idea for anyone administering a VMware vSphere environment to have a scheduled script to back up their ESXi host configuration. This helps to round out your disaster recovery strategy for protecting your virtualization environment running on top of ESXi in addition to VM backup tasks. The ESXi host configuration backup contains all the settings you need to restore a host back to its original configuration if you have to load it with a fresh installation of ESXi.


Great stuff, Brandon!
Now do vCenter!