oVirt Install with GlusterFS Hyperconverged Single Node – Sort of

I haven’t really given oVirt a shot in the home lab environment to play around with another free and open-source hypervisor. So, I finally got around to installing it in a nested virtual machine installation running in VMware vSphere. I wanted to give you guys a good overview of the steps and hurdles that I saw with the oVirt install with GlusterFS hyperconverged single-node configuration.
Table of contents
What is oVirt?
First of all, just as a quick overview, what is oVirt? The oVirt solution is free and open-source and uses Kernel Virtual Machine (KVM) as the underlying hypervisor. The oVirt platform provides a slick and modern user interface to manage your KVM hosts, virtual machines, storage, and networks.
It allows you to scale your KVM management to the next level compared to managing things with the command line since you can manage multiple different hosts at the same time.
Components
It has two main components, including the oVirt engine which includes the web GUI that you can use to manage your KVM hosts and also an agent construct that allows the oVirt engine to communicate with the KVM hosts it manages.
oVirt Download
You can download the oVirt packages if you are already running something like Red Hat enterprise Linux or CentOS Stream 8 or 9. However, one of the easiest ways is to download the oVirt node ISO. This is an ISO built on top of Enterprise Linux 8 or 9 and allows getting up and running with KVM, oVirt and the platform itself in one installation on bare metal physical hardware or in a virtual machine, which is what I am doing in the lab to play around with the solution.
You can browse the downloads of oVirt here: Index of /pub (ovirt.org).
The process I used for the oVirt install
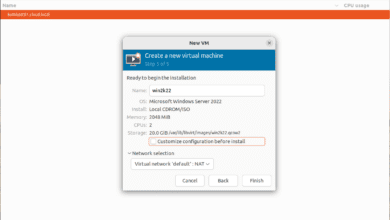
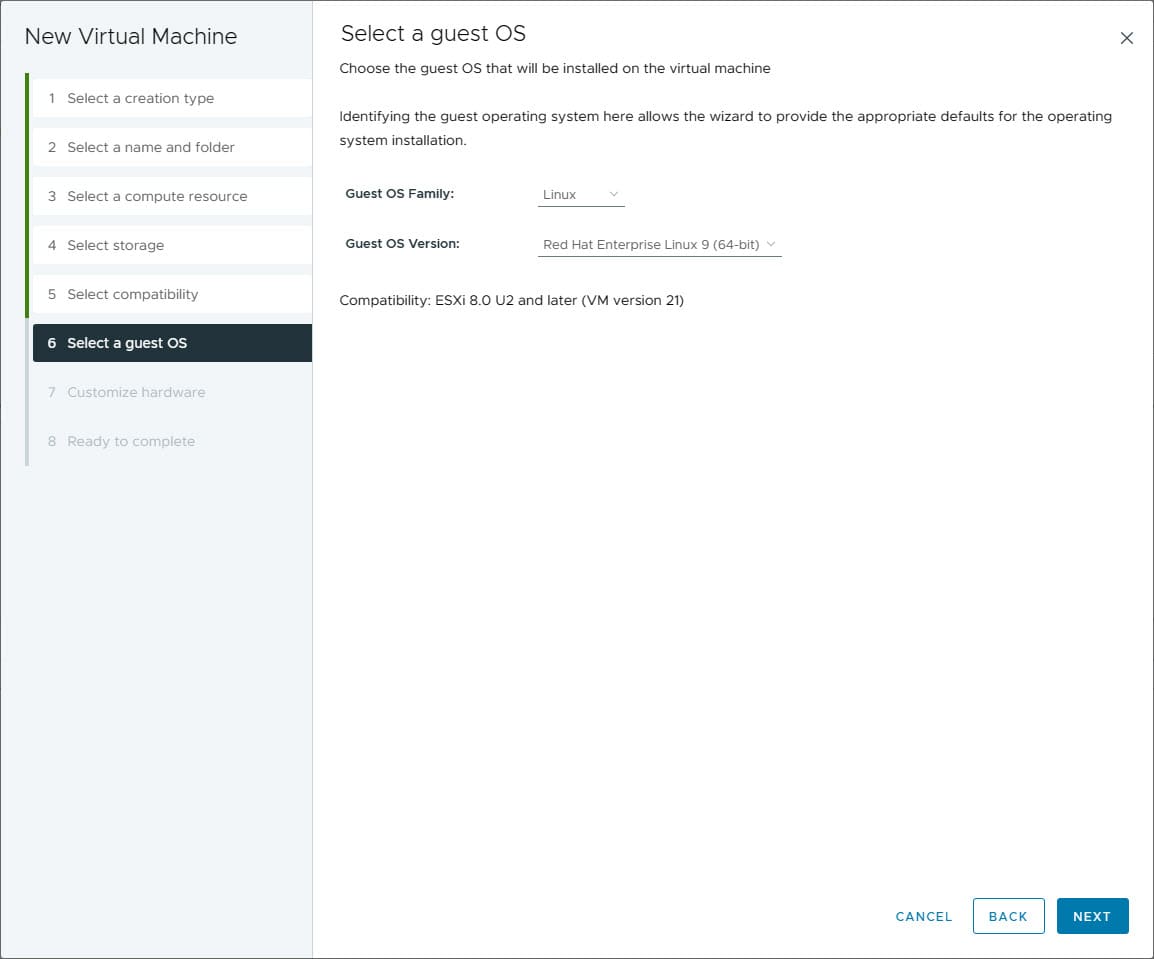
To get up and running with oVirt, I simply downloaded the oVirt node ISO from the link above, copied it to a VMware vSphere datastore and mounted this to a new virtual machine that I created in VMware for Red Hat Enterprise Linux.
Below, you will see the CPU configuration and enabling Expose hardware-assisted virtualization to the guest OS. This is referred to as nested virtualization, which allows you to run a hypervisor inside a virtual machine.
Memory is bumped up to 16 GB.

Note – I later added a second hard disk to the virtual machine configuration for GlusterFS.
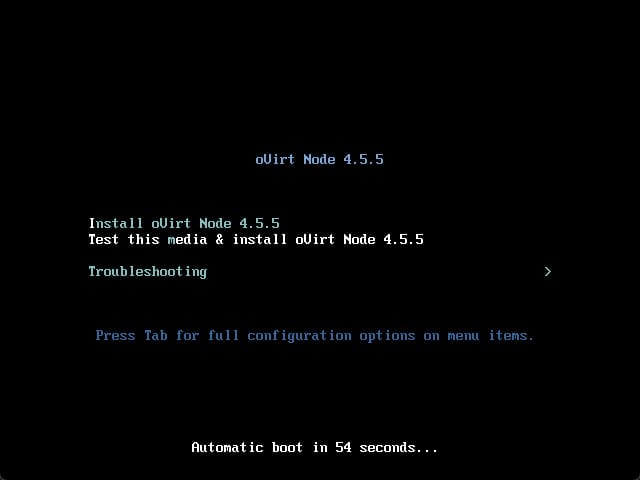
Booting from the ISO image
After mounting the ISO for oVirt, I booted the VM for the oVirt install.
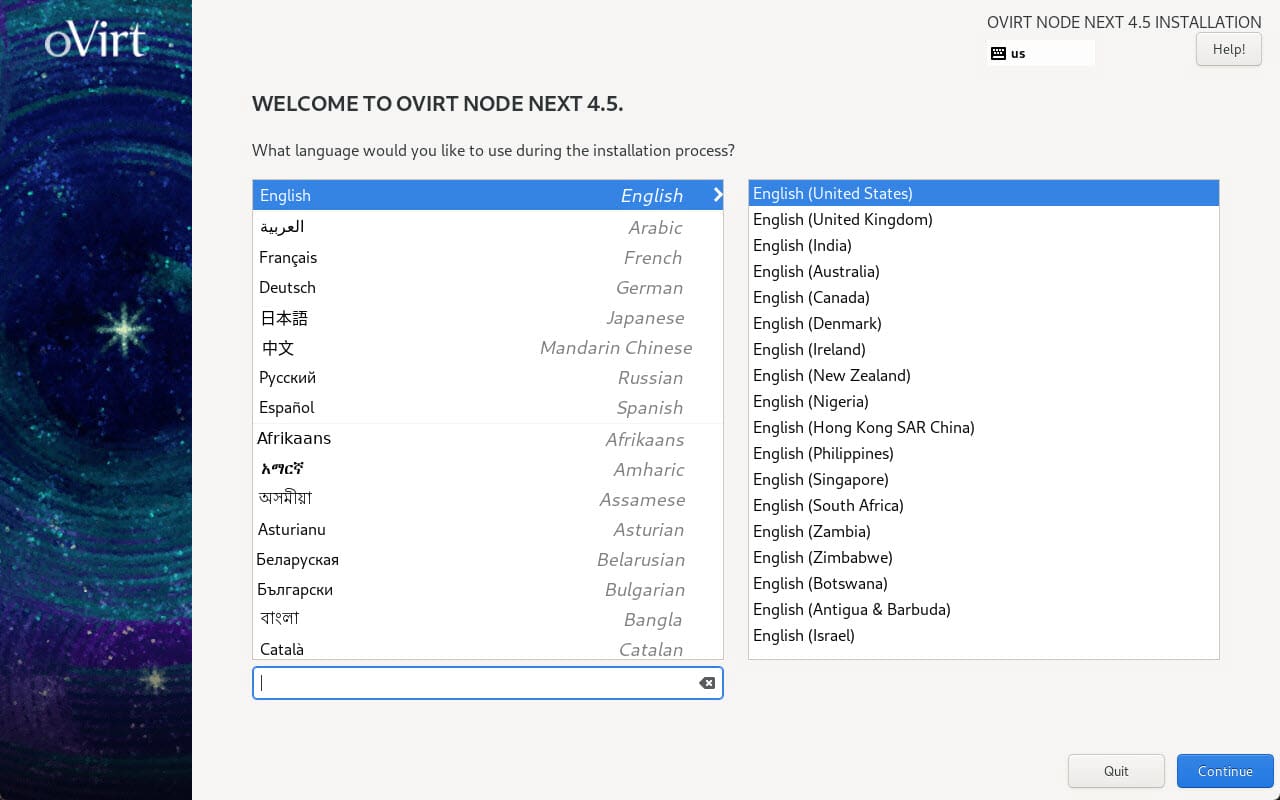
Now we get the normal CentOS Stream type installer. Here we are choosing the language.
On the configuration screens with the red exclamation points, you just drill into each one and set the configuration or select Done even if you don’t make changes.

Configuring the network connection. Be sure to enable your network card and set the host name. I have always felt like this is a little silly in CentOS that you have to enable the network card, but you do.
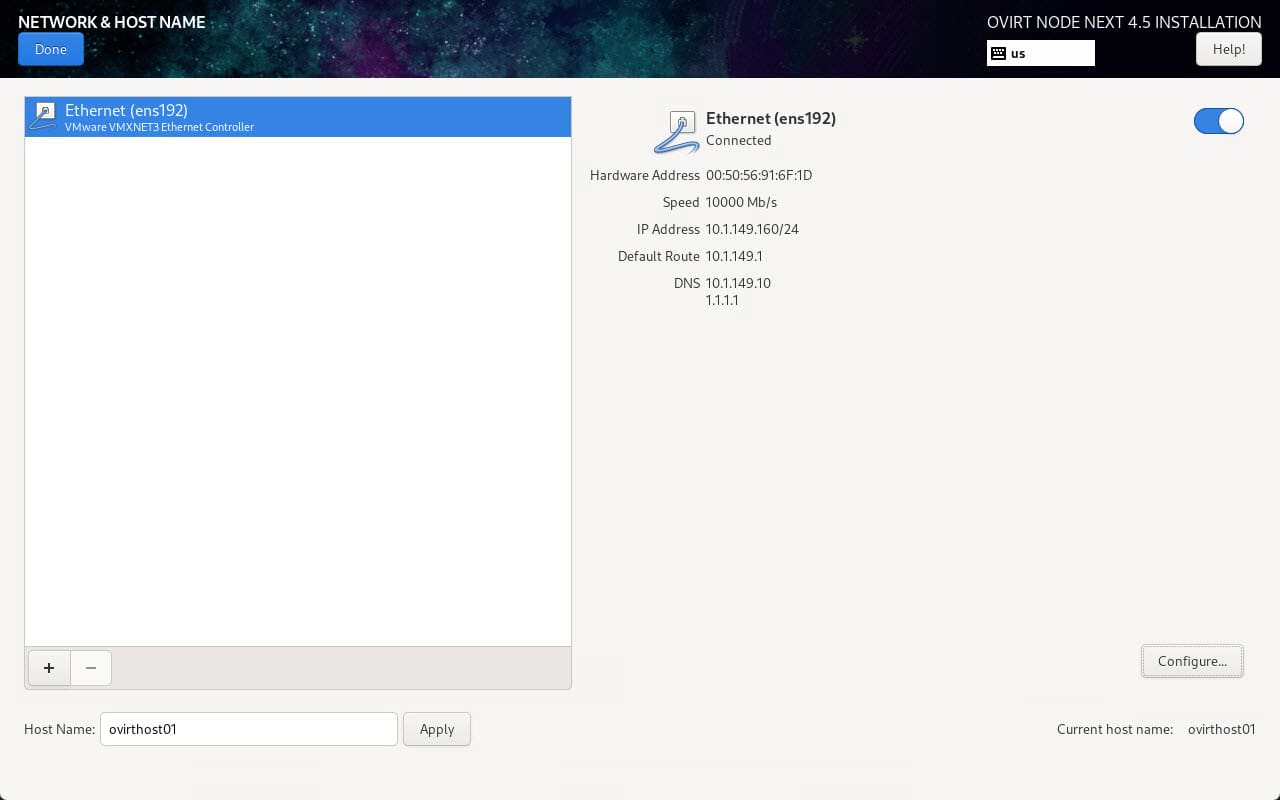
Make sure on this screen you no longer see any red exclamation points that need to be taken care of. Then click Begin installation.
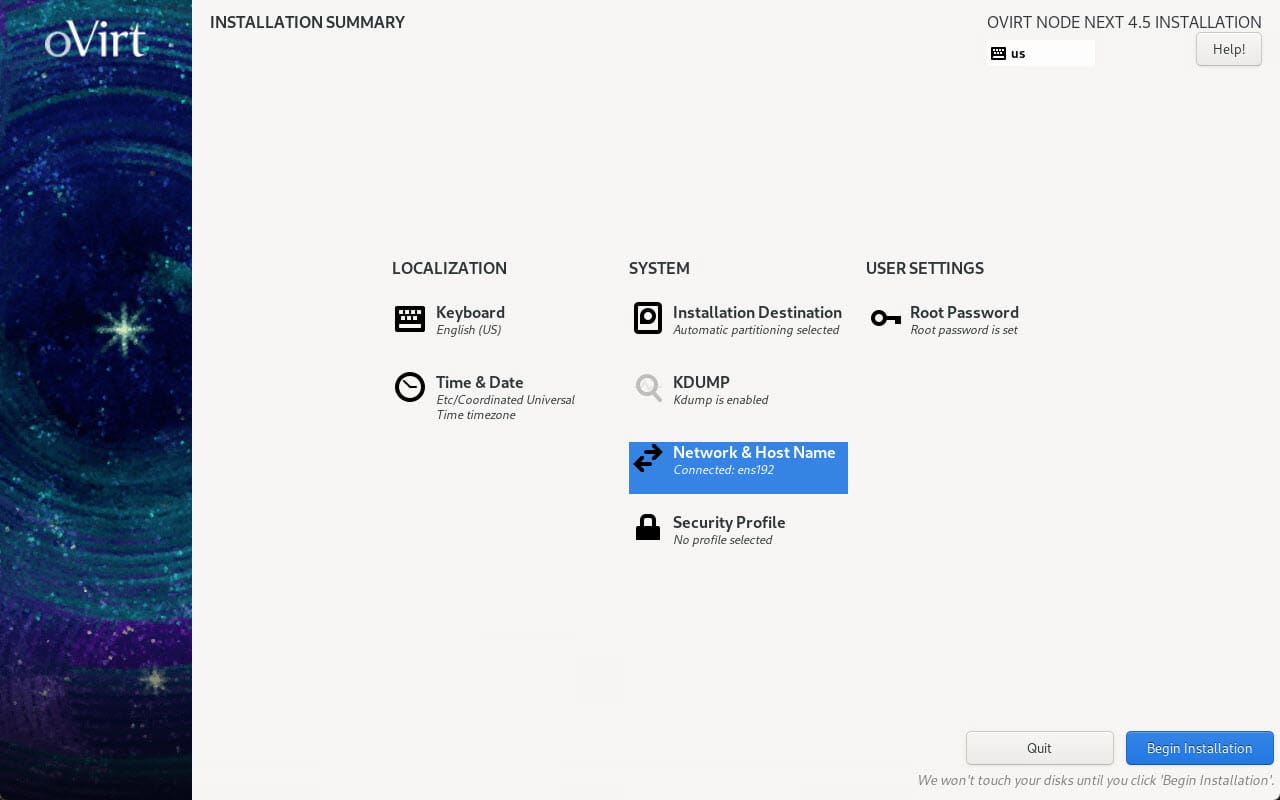
The installation begins.

After the installation finishes, click the Reboot System button.

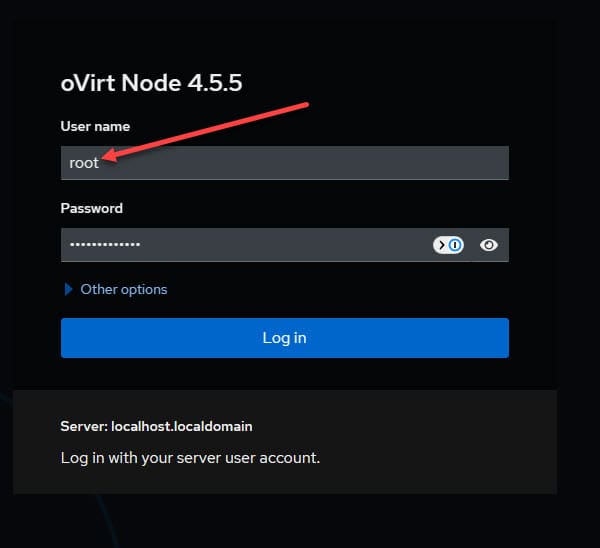
Log in to the web interface
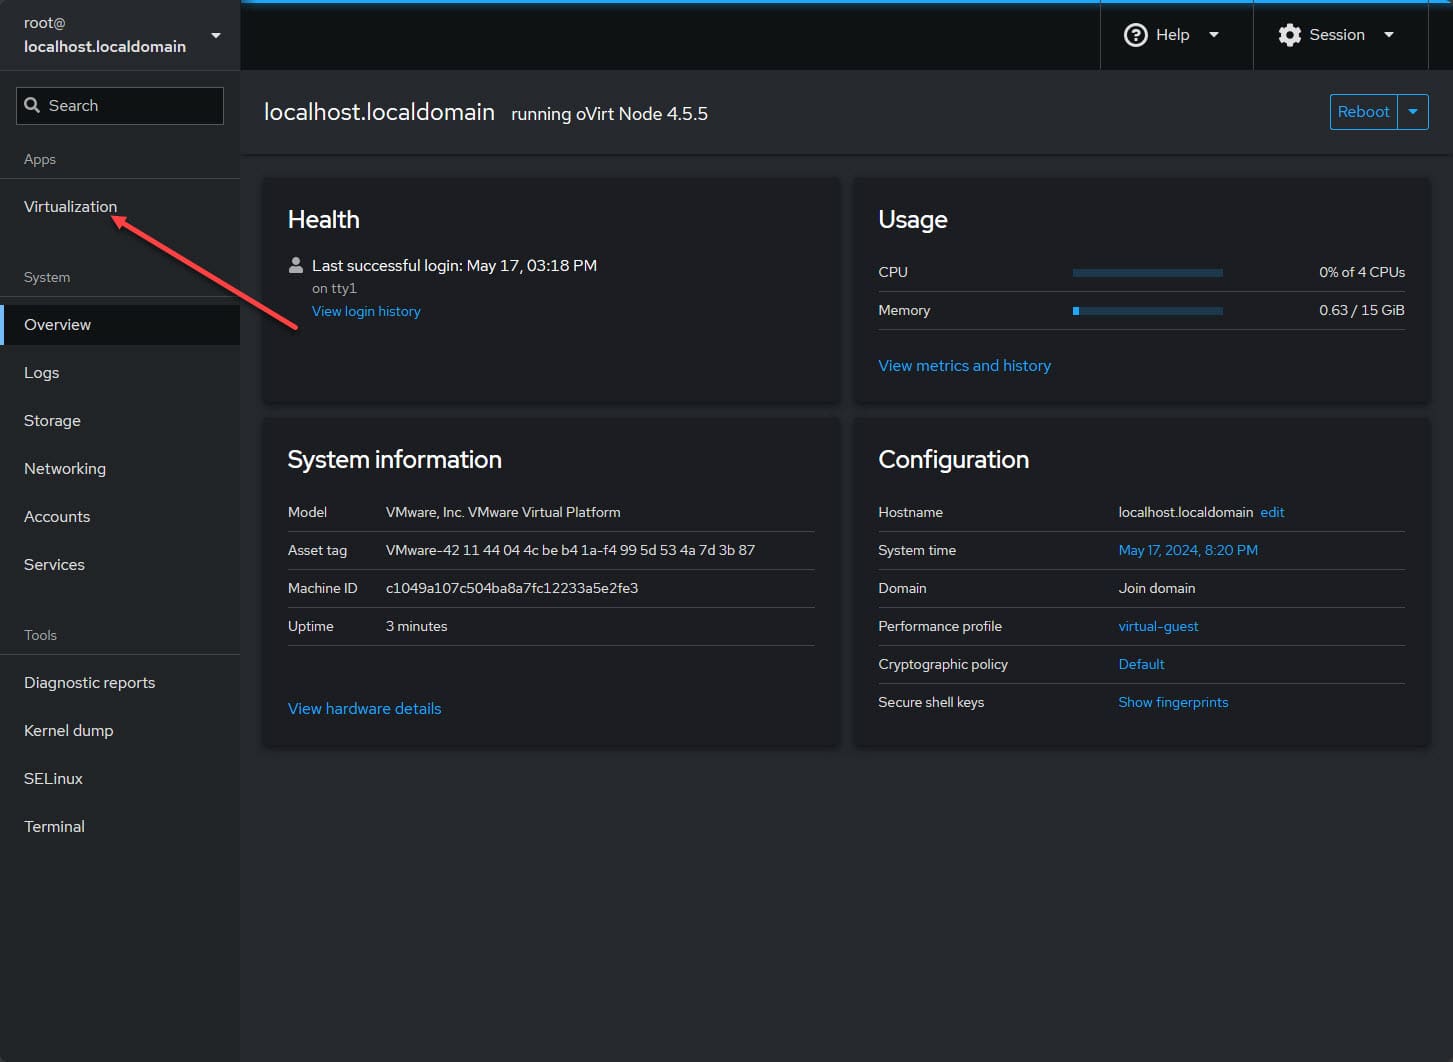
Browse to the IP address of your oVirt Node installation and login with your root account that you set during the installation.
As a note. I haven’t got to the bottom of this as of yet, but using the oVirt node ISO built for Enterprise Linux 9 does not give me the virtualization option.
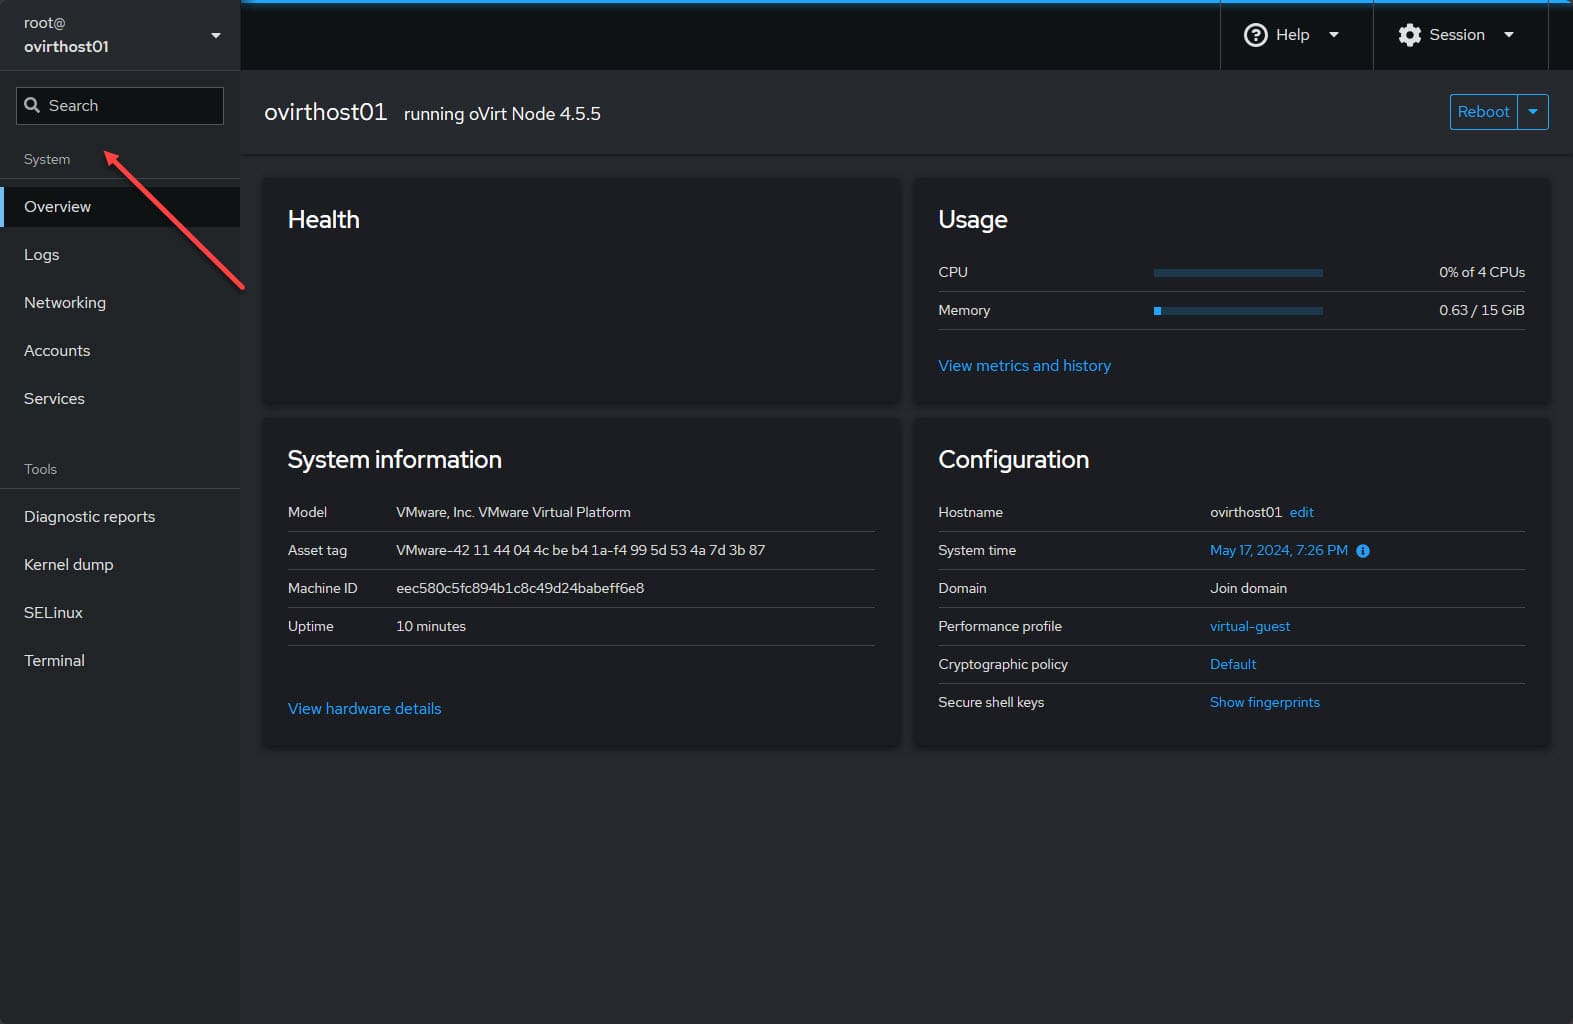
After reloading with the Enterprise Linux 8 ISO, I have the virtualization option.
Deploying the hosted engine with GlusterFS hyperconverged
The next step we need to take is deploying the hosted engine. Click Virtualization and then click Hosted Engine.
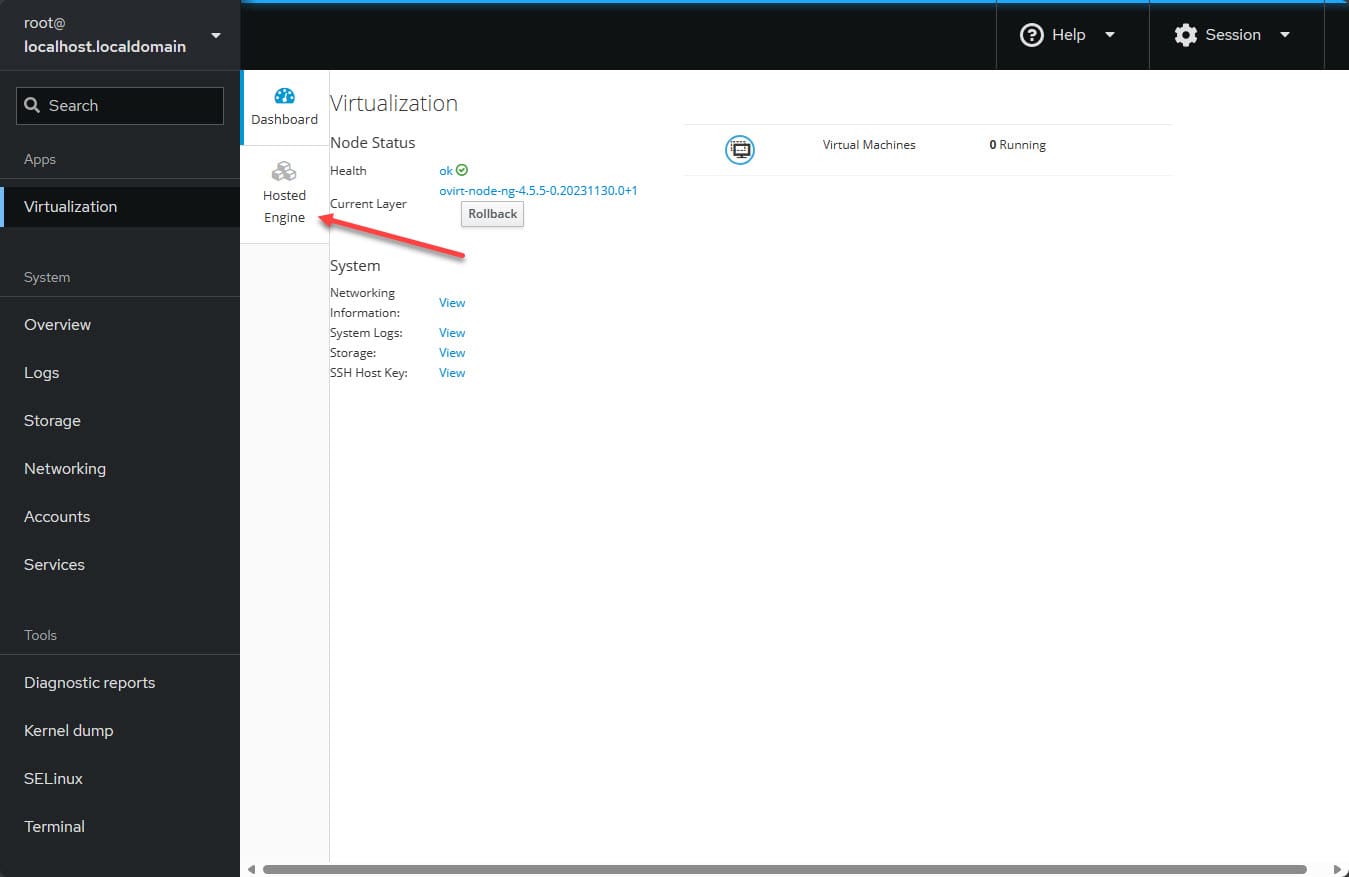
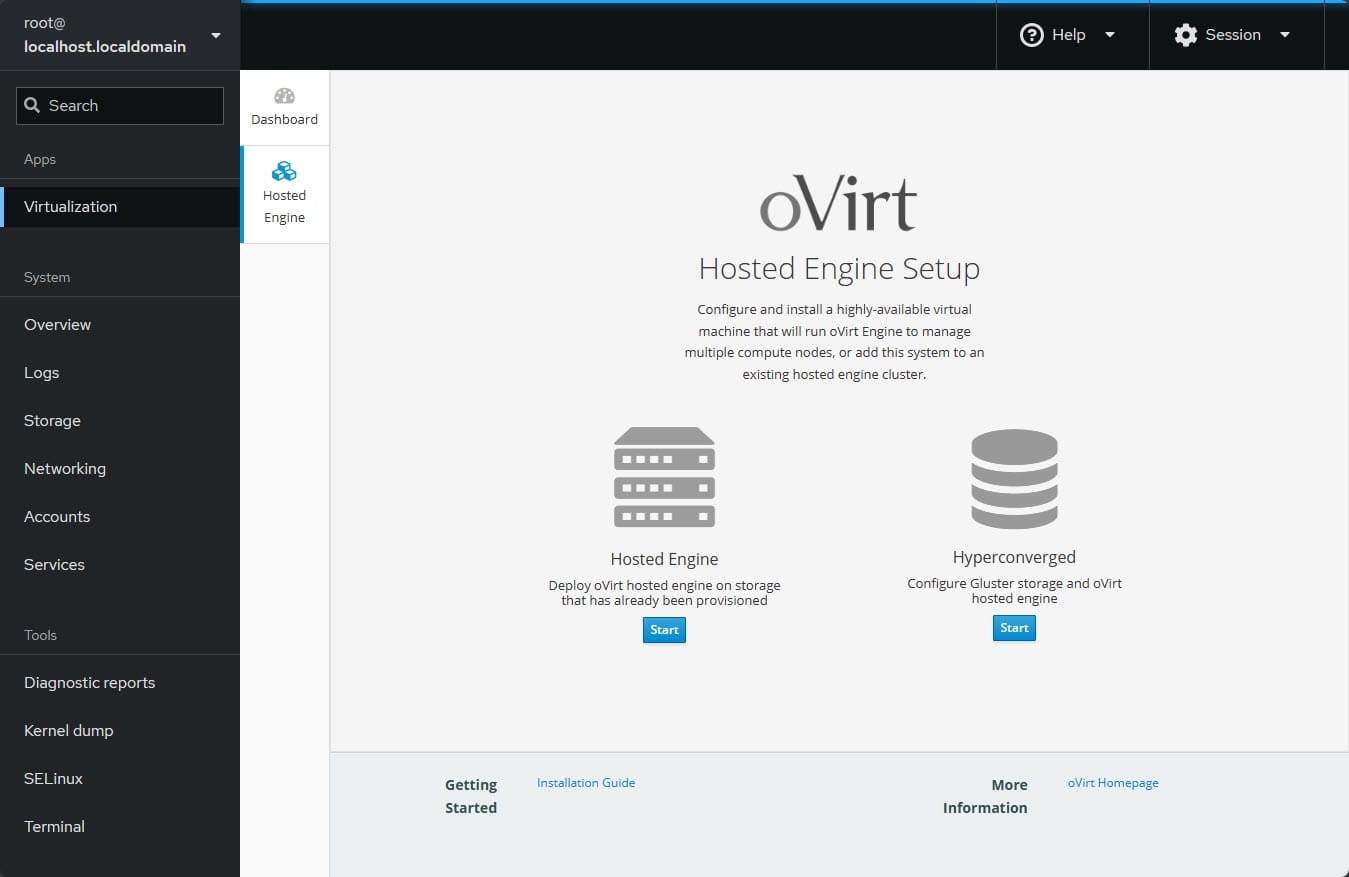
You will see the options for Hosted Engin or Hyperconverged. I am using the Hyperconverged option.
Here I am clicking Run Gluster Wizard for Single Node.
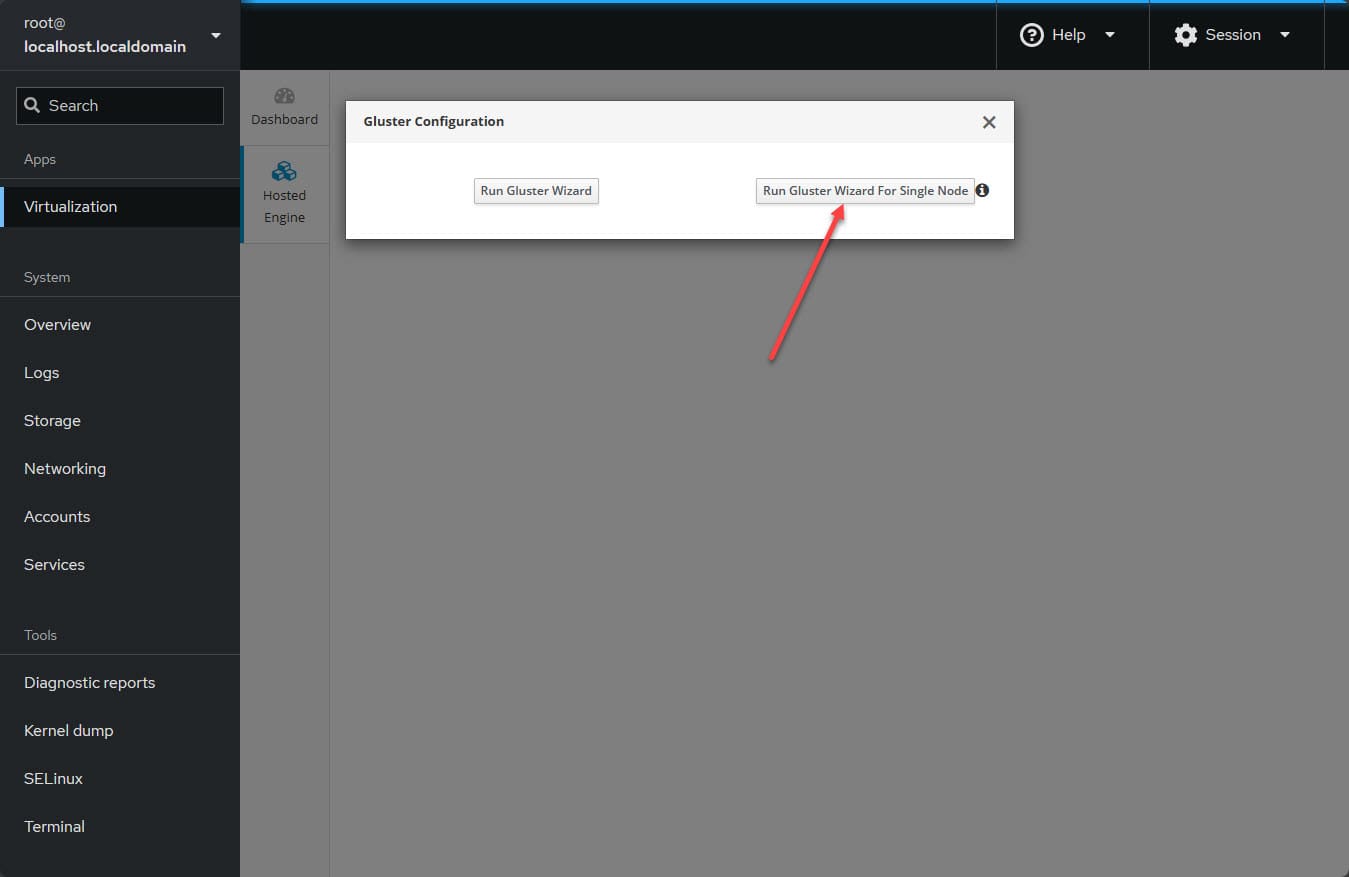
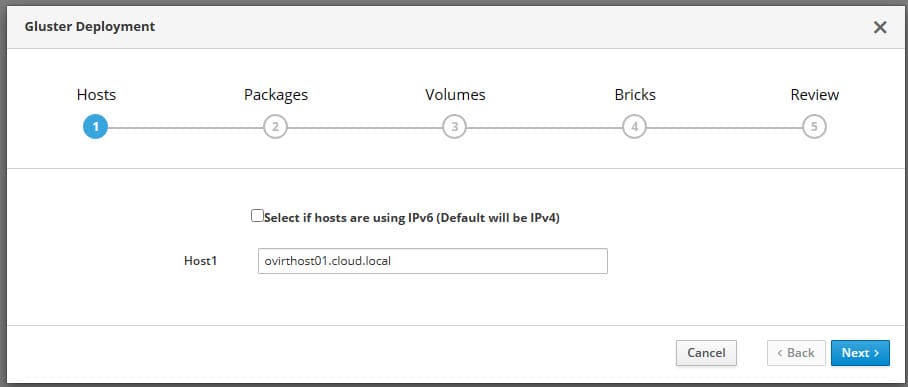
This will launch the Gluster deployment wizard. First, enter the FQDN of your host itself. If you get an error about the host not being in the Known_Hosts file, check out the forum post here: oVirt GlusterFS Host is not added in Known_Hosts.
After working around the issue above, moving on to the Packages step. Here I just clicked Next.

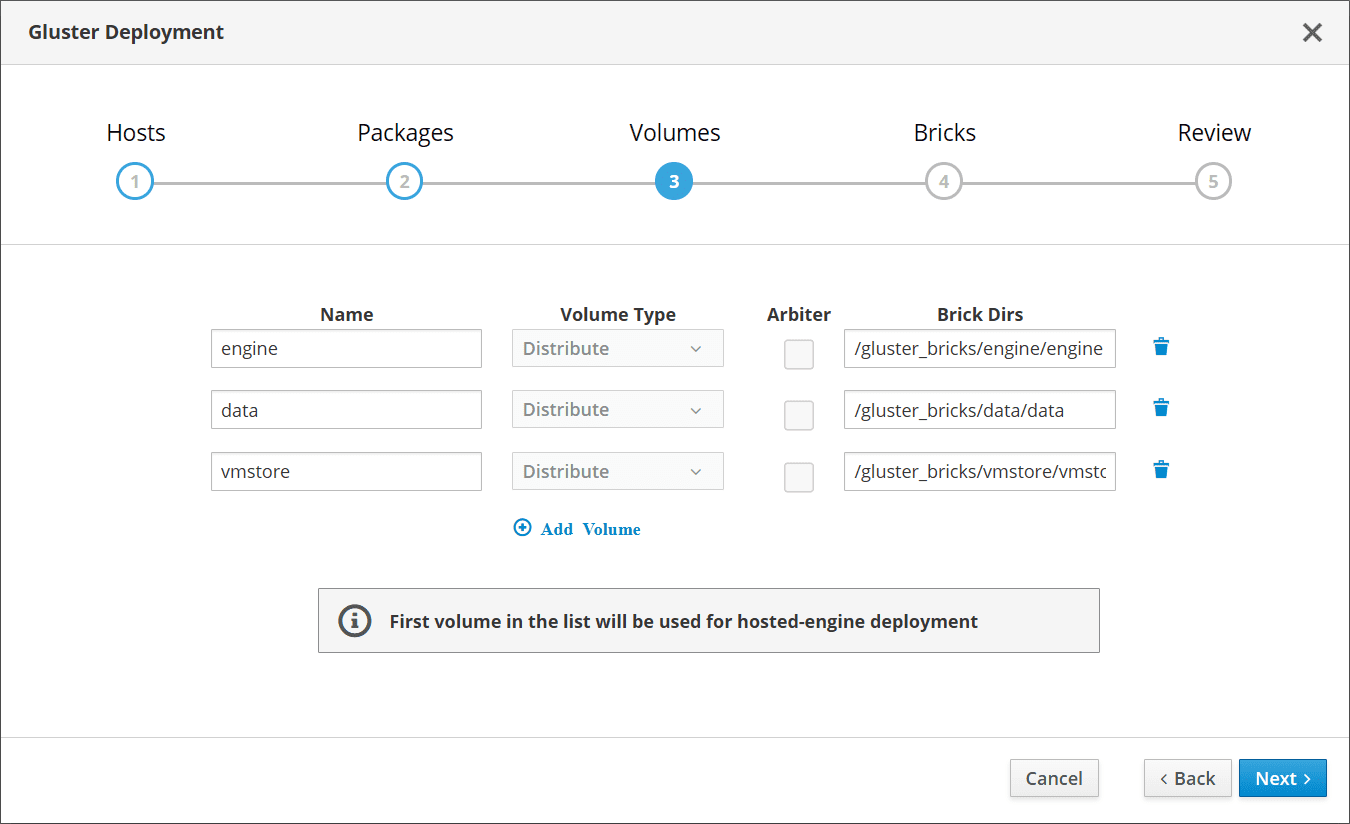
Click Next on the Volumes page.
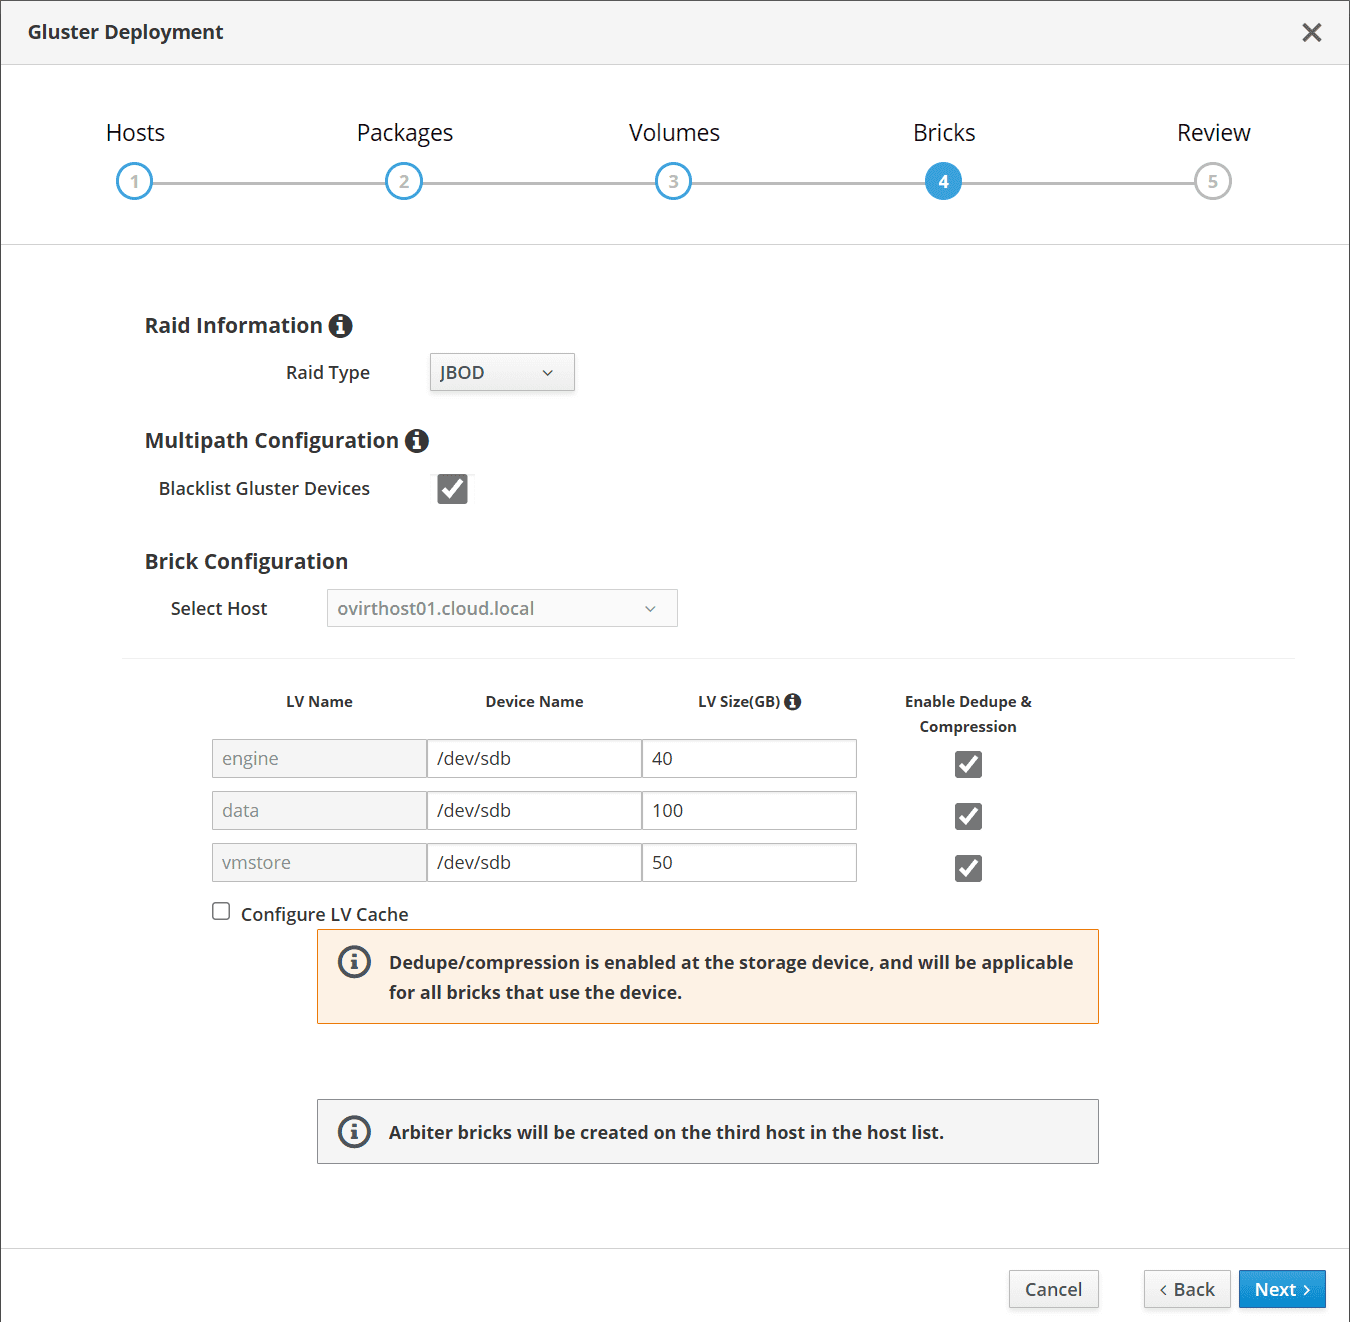
On the Bricks page, I changed to JBOD and then adjusted the sizes of the volumes according to the disk I had added to my oVirt host.
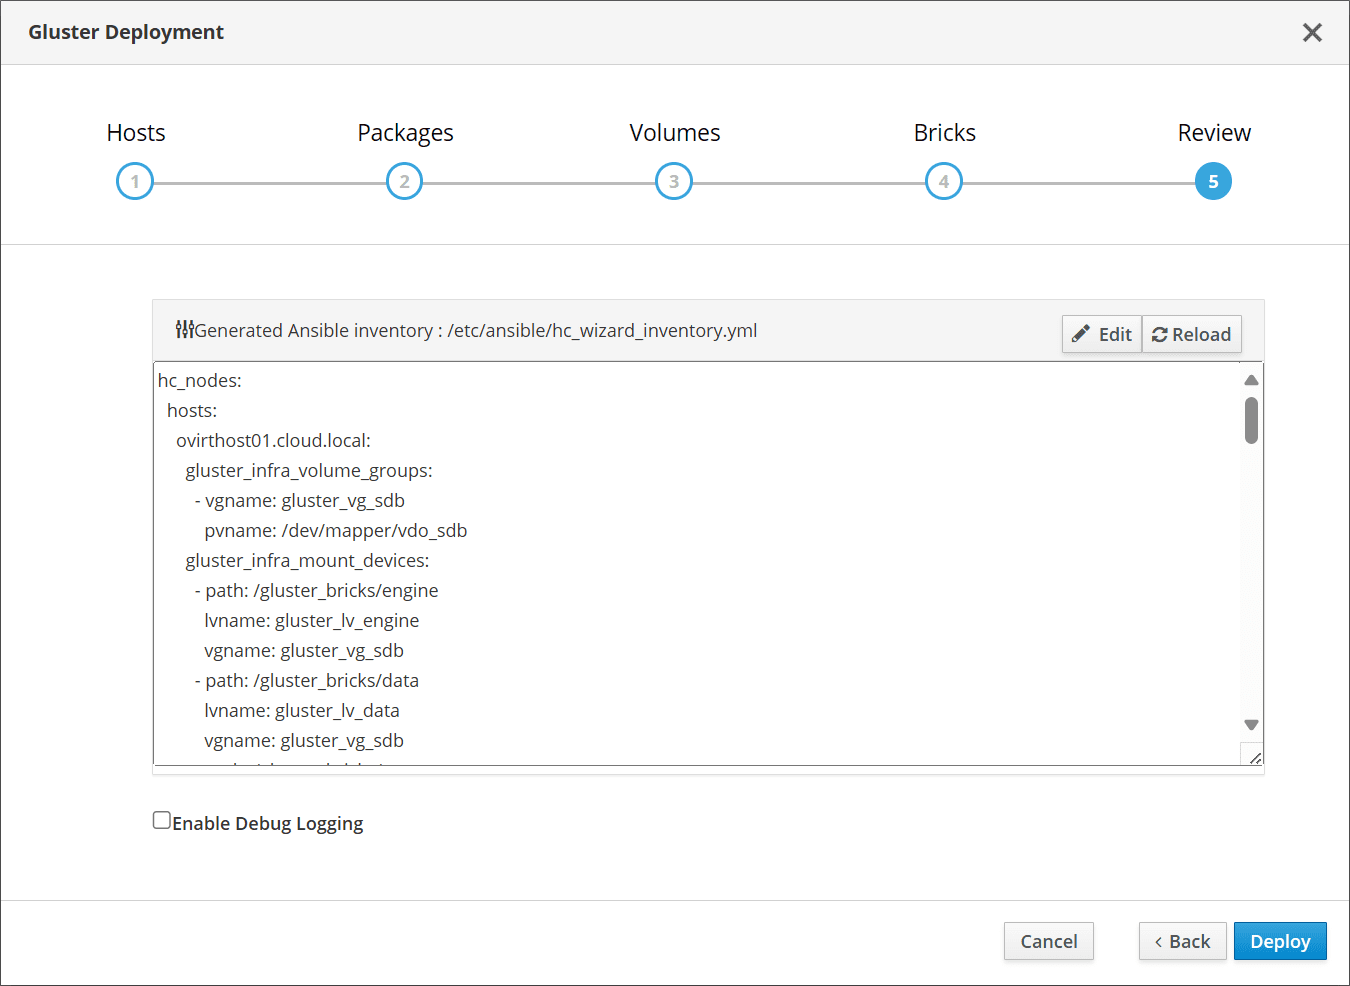
On the Review page, just clicked Deploy here.
On this screen, I clicked the Continue to hosted engine deployment instead of the close button. Here I encountered an error that took some time to figure out. I kept seeing the deployment fail with creating the volume group.
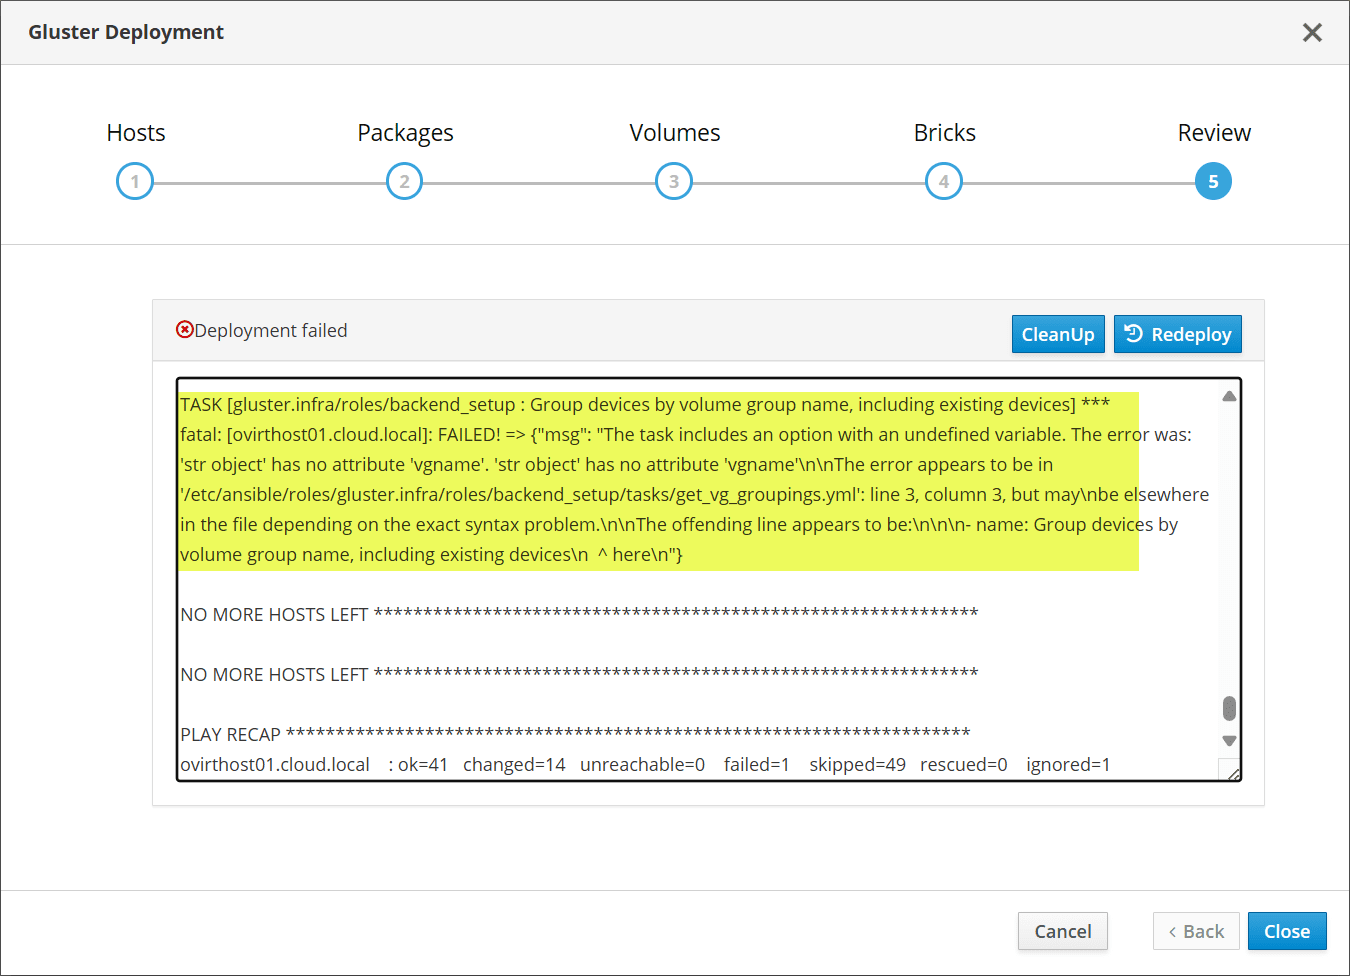
I finally found a stack overflow thread where someone ran a SED command to change some values in the Ansible playbook to move forward.
sed -i 's/output | to_json/output/' /etc/ansible/roles/gluster.infra/roles/backend_setup/tasks/get_vg_groupings.yml
sed -i 's/output | to_json/output/' /etc/ansible/roles/gluster.infra/roles/backend_setup/tasks/thick_lv_create.yml
sed -i 's/output | to_json/output/' /etc/ansible/roles/gluster.infra/roles/backend_setup/tasks/thin_pool_create.yml
sed -i 's/output | to_json/output/' /etc/ansible/roles/gluster.infra/roles/backend_setup/tasks/thin_volume_create.yml 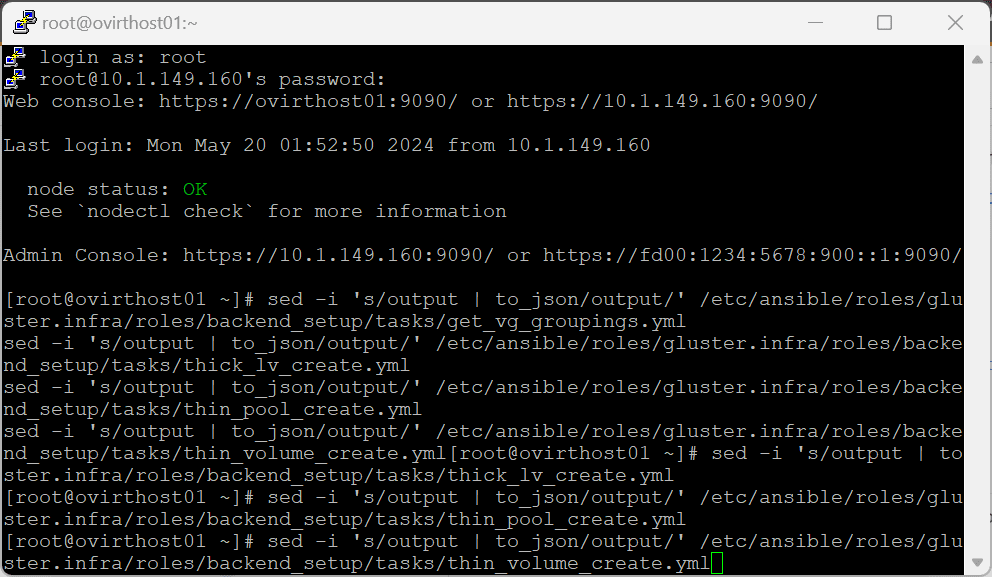
After running this, was able to get the gluster deployment to finish successfully.
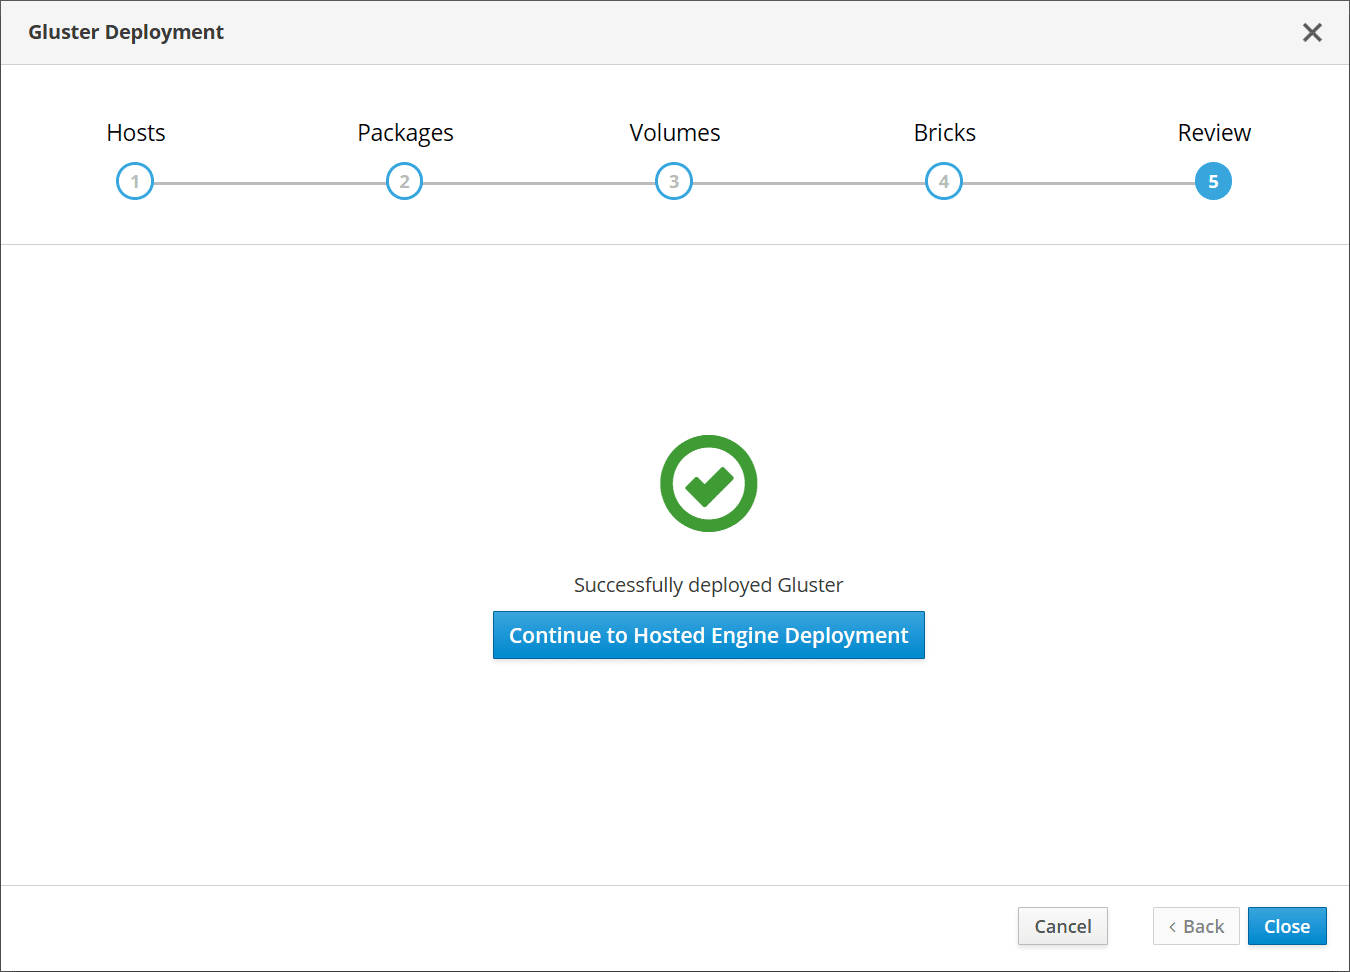
This will take you to deploy the hosted engine and launch that wizard next.
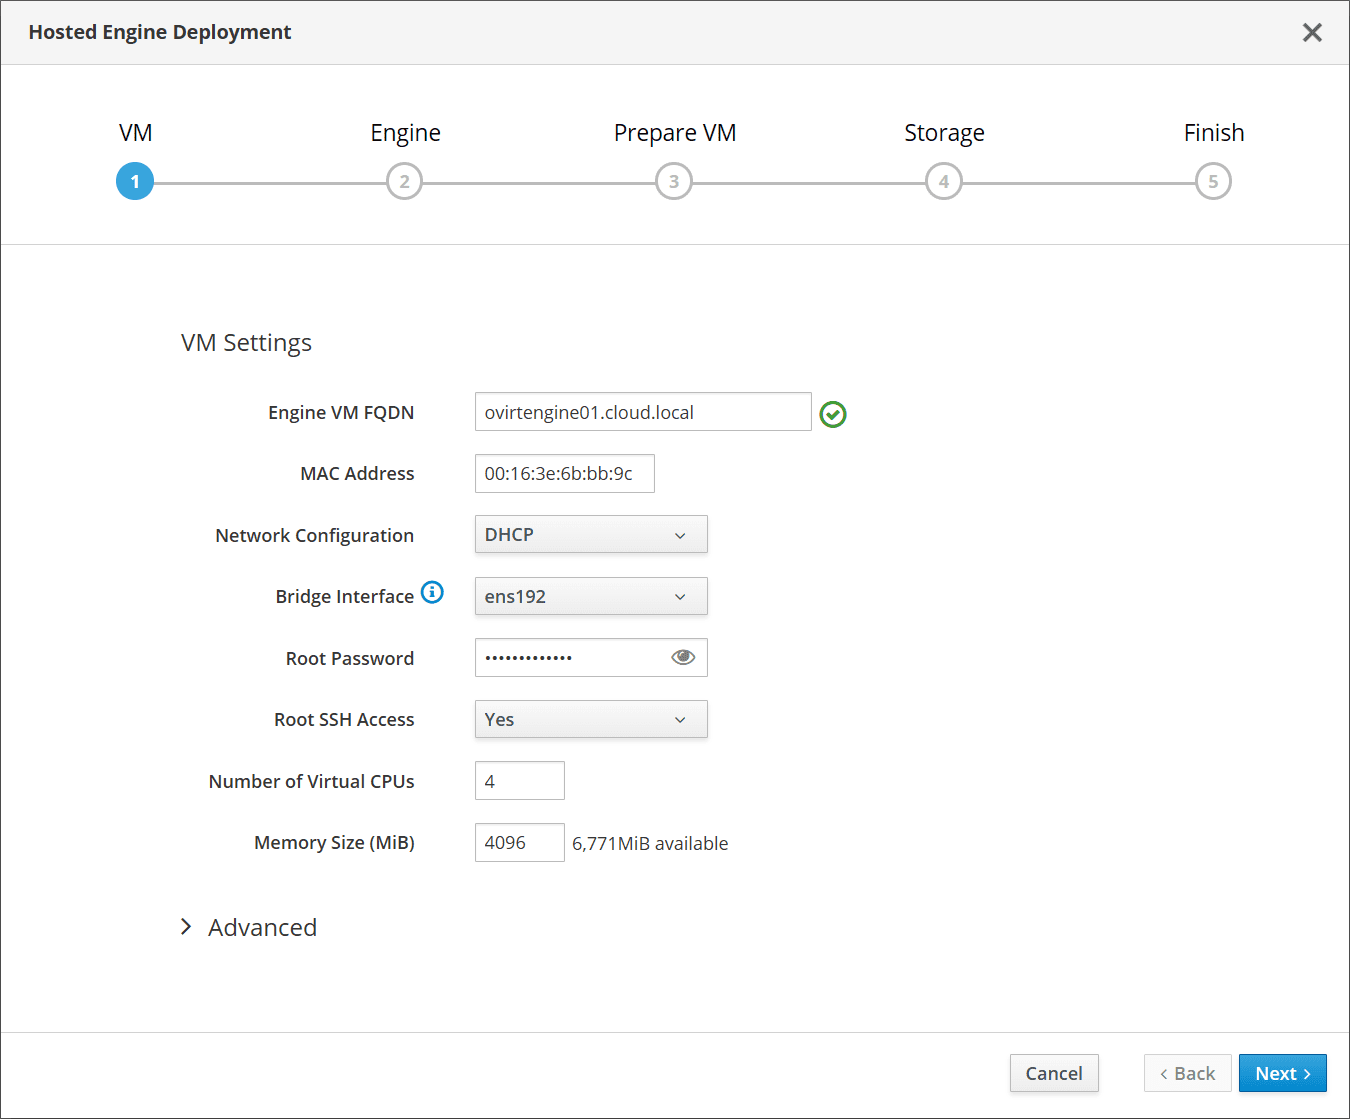
Deploying the Hosted Engine
Here is where things got extremely frustrating, with error after error that seemed to never end. On the VM screen. I prestaged a DNS record with the MAC address it gave me. It will fail if you don’t have a DNS record in place before moving on.
I left the bridge interface and configured the root password. Memory was set to 4096 MB.
On the Engine screen, I set the admin portal password and left the email config as is.

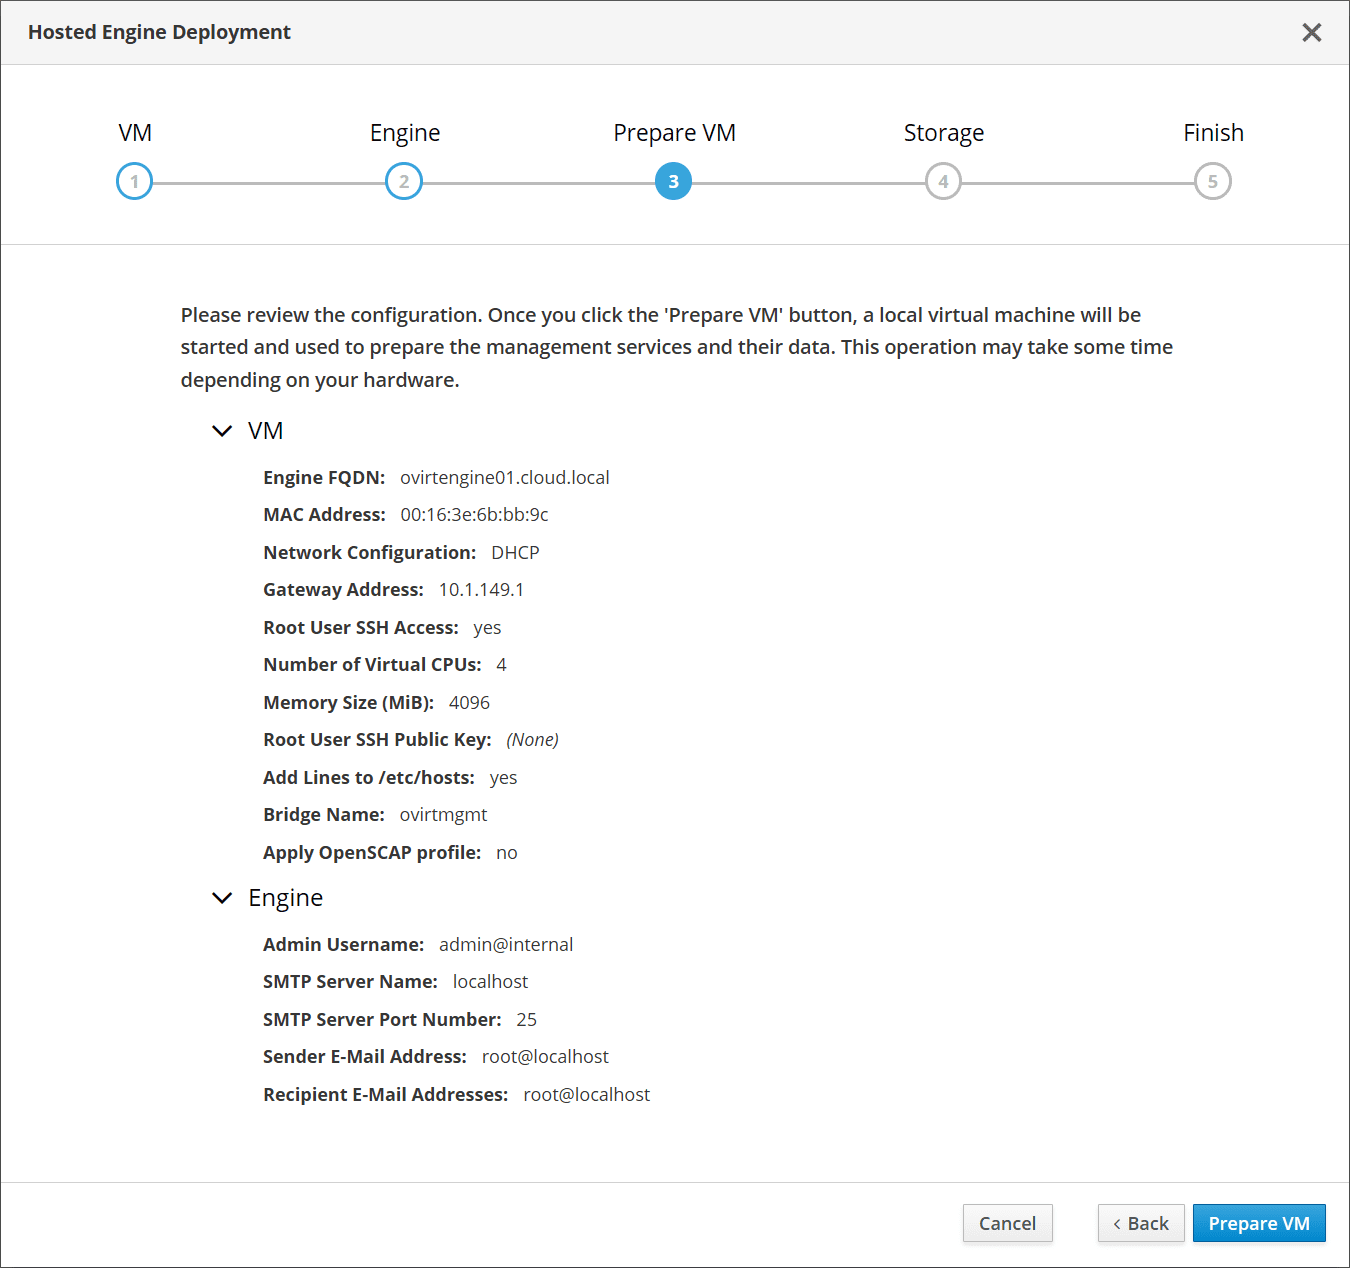
The Prepare VM screen has you review the settings and click Prepare VM.
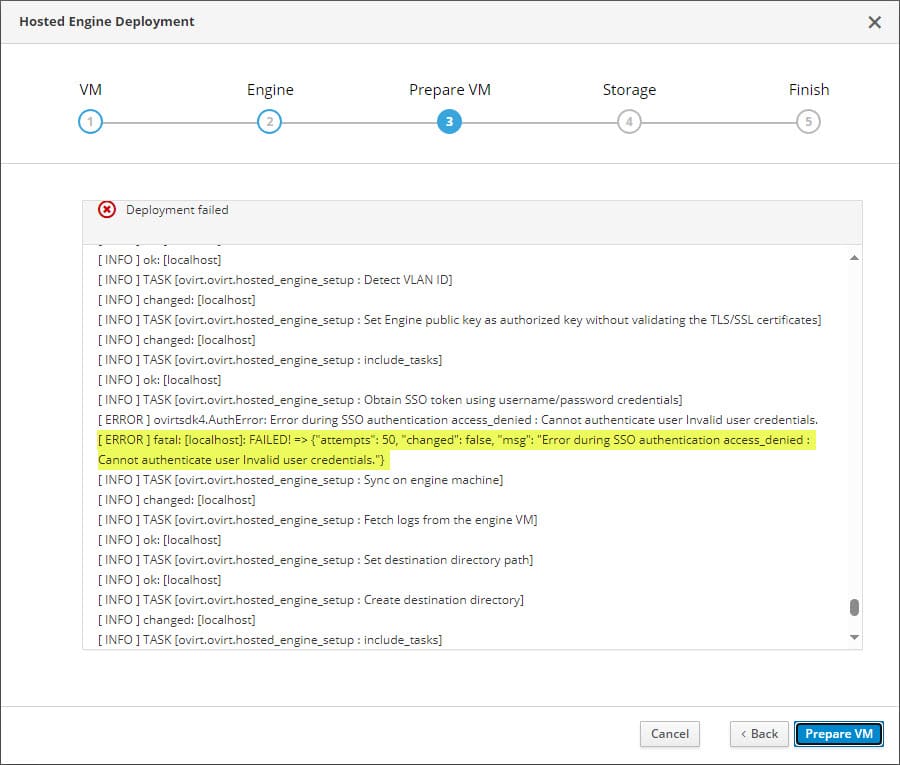
The error that I was never able to get past was the error below: Error during SSO authentication access _denied. There were many threads that I found covering this error. However, no real silver bullet answer. Many users seemed to have success reverting back to 4.4 install of oVirt instead of using 4.5, which I am using.
Troubleshooting
I ran into so many issues with the deployment. There seemed to be issues from start to finish:
- The EL9 Linux oVirt host didn’t have the Virtualization module installed
- There was the Known_hosts issue that I linked to above
- I had an issue with the GPG signature on the hosted engine, worked around that with with dnf -y install ovirt-engine-appliance –nogpgcheck
- There was also an FQDN issue where I had to make sure the host could connect to itself via passwordless SSH
- There was the Ansible playbook issue where I had to run the SED command above
- Then finally, after several hours in and testing for 2-3 days, I threw in the towel for now with the SSO error
Wrapping up
As of now, I wouldn’t recommend the oVirt 4.5 installation for testing out the hyperconverged single-node solution. There were just too many issues with it. I also tried setting up the appliance without the glusterfs option and received the same error message.
For now, I can’t recommend to install oVirt for home lab scenarios or any type of production. With this many issues with a new install, it is scary to think how an upgrade would go or support this in production. If you are experienced with oVirt and know how to get past a few of these issues, please comment and let me know. I would be so glad to “pick your brain”!