In moving a lot of VMs around over the past couple of days trying to get my home lab resources situated so I could start consolidating down my server resources for the hot summer months, I ran into a problem trying to get VMs over to a specific host and I couldn’t figure out why. Let me take you guys through what I encountered with he cannot connect to host VMware error.
Table of contents
What happened
When I planned on moving several of my critical home lab VMs over to a couple of mini PCs to first of all work on a server and home lab migration, I ran into an issue with a simple storage vMotion from my VMware vSAN cluster to a couple of standalone hosts (mini PCs).
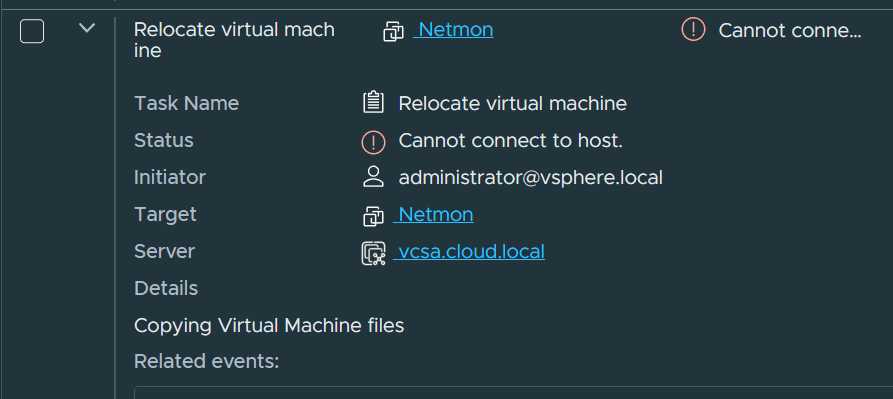
One of the mini PCs had no issues (MS-01). However, the other mini PC (Trigkey S7 Pro) kept failing to receive the storage vMotion traffic for some reason. The error is below as I snagged it from the tasks screen for vCenter Server to show.
If you search for the error message, you will see the VMware KB referenced quite a bit: VMware vCenter Server displays the error: Failed to connect to host (1010837). However, in investigating this further and looking at the logs and other things going on, this didn’t pan out.
I removed the host from vCenter Server and then added it back. I also tried removing and adding the server via IP instead of DNS name and vice versa. Still I received the error message above.
Jumbo frames or the lack thereof will kill your migration
However, I kept looking at the message, trying different things pinging, vmkpinging, and other troubleshooting. I even tried a different physical switch in between. However, in bringing in another mini PC to try out to see if I could just get past the error and target another mini PC, I started a migration of the first VM that was successful and making progress.
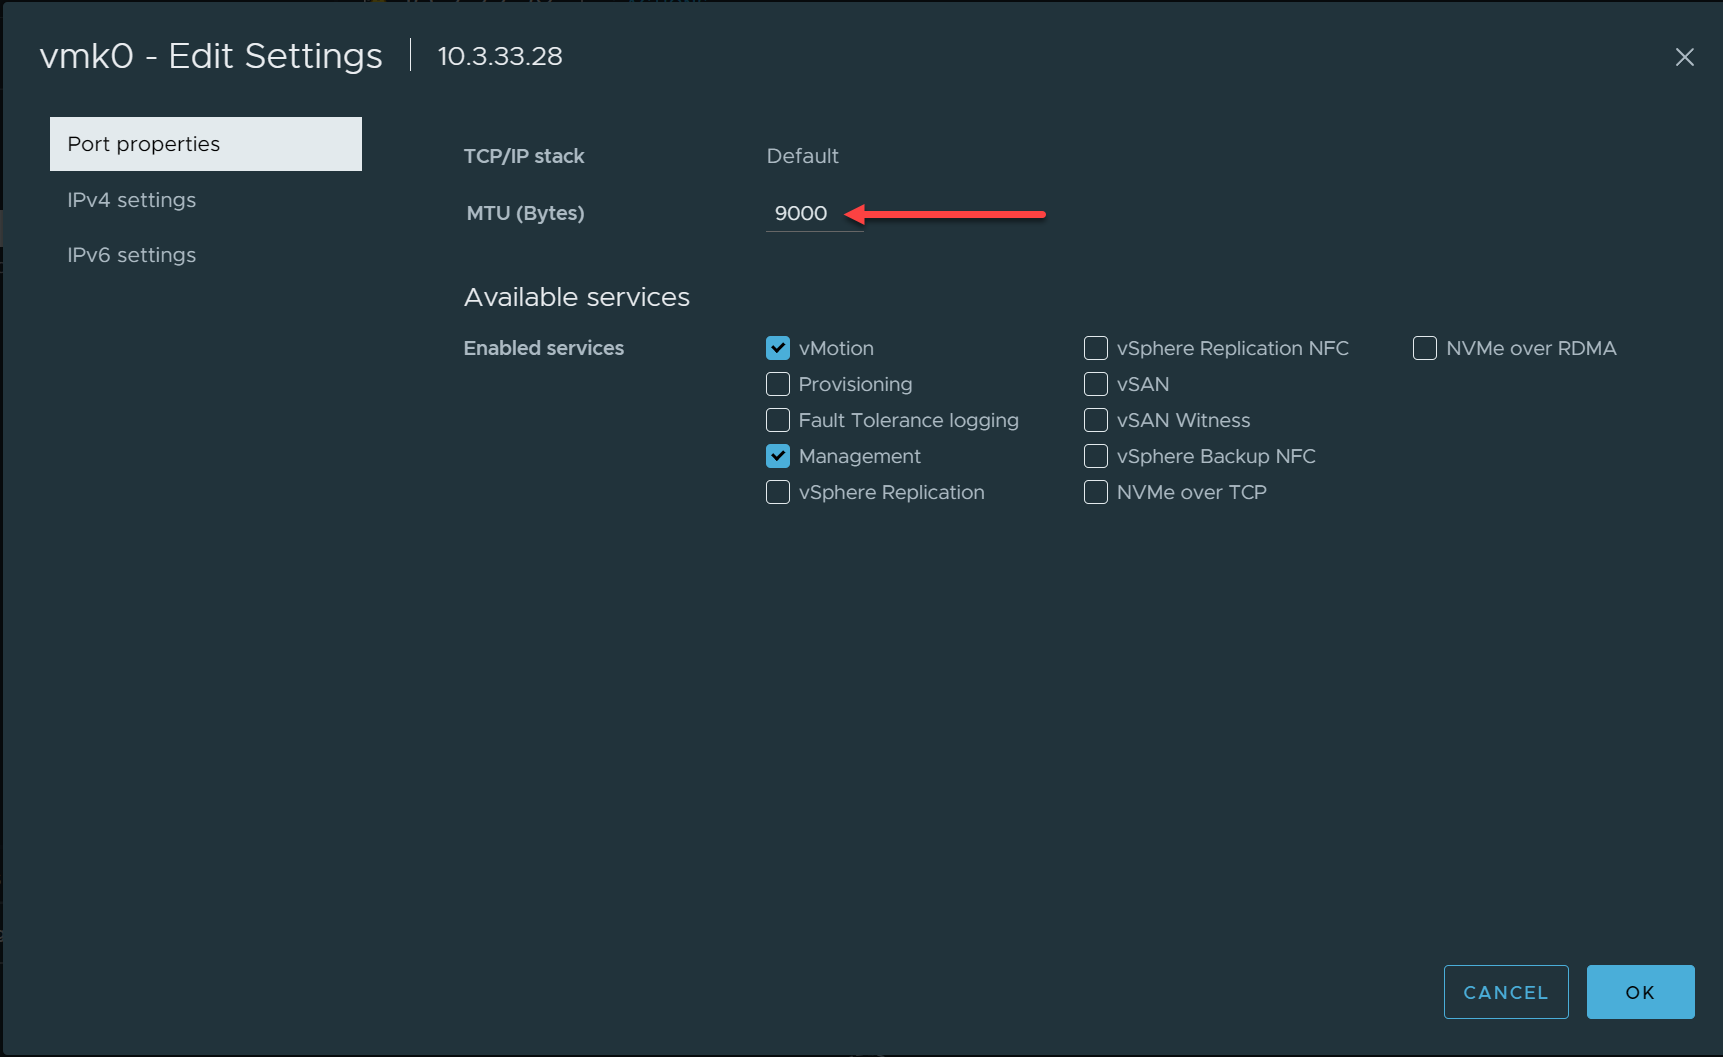
However, after bringing the PC into vCenter Server, I changed the MTU value on the VMkernel port to hopefully get a little better migration performance. Then, the next migration failed with the error above.

However, when looking at the switch port configuration as I threw the mini PCs on a couple of ports without thinking, the ports were not configured with Jumbo frames! Evidently, the packets were getting fragmented as the mismatch between jumbo and standard port MTU size configuration didn’t line up.
What are jumbo frames: a refresher
Jumbo frames are Ethernet frames that are larger than the standard maximum transmission unit (MTU) of 1500 bytes. These typically carry up to 9000 bytes of payload. Using jumbo frames can improve network performance by reducing CPU load and increasing throughput, especially in data-heavy environments such as data centers and enterprise networks. Here are some facts about jumbo frames:
- Increased Payload Capacity: Jumbo frames can carry up to 9000 bytes of payload. This is large compared to the standard 1500 bytes. The larger capacity helps reduce number of frames sent over the network and decrease the overhead on CPU and network.
- Reduced Network Overhead: By enabling the transmission of more data at once, jumbo frames reduce the number of frames needed for sending the same amount of data. It reduces the overhead and the number of packet headers and acknowledgments required. This leads to better utilization of network resources.
- Enhanced Data Transfer Rates: Jumbo frames can enhance the data transfer rates within a network by allowing more bytes to be carried in each packet. This is beneficial in high-throughput scenarios such as vMotion or storage vMotion.
- Compatibility Considerations: Not all network equipment supports jumbo frames, so you need to make sure everything in between matches up with jumbo configuration, including switches and routers. Make sure these are configured to handle jumbo frames. Incompatibility can lead to packet loss or the need for packet fragmentation.
- Potential for Improved Latency: Jumbo frames can improve network latency. They do this by reducing the number of packets that need to be processed. Fewer packets mean fewer processing tasks and fewer instances of network-induced delay.
- Configurational Requirements: Enabling jumbo frames requires configuration changes on network equipment including switches, routers, and network interface cards. Proper setup means that all parts of the network can handle larger frames.
The resolution
The resolution to the issue I was seeing involved making sure I had jumbo frames configured on the port where the mini PCs were connected. After I updated the port configuration, the problem with the cannot connect to host went away on the next try of storage vMotion.
I hope this explanation of what I saw in the home lab environment will help any who might be encountering this issue and the VMware KB isn’t in play in terms of changed IP address or other oddities with the vpxa configuration.
Google is updating how articles are shown. Don’t miss our leading home lab and tech content, written by humans, by setting Virtualization Howto as a preferred source.


Your posting this, Brandon, has me thinking. It might not be a bad idea to configure jumbo frames on [only] my vMotion network.
In my experience, you don’t get much performance benefit, day to day, with jumbo frames, but vMotion is solid traffic, so a couple of percentage points increase in speed wouldn’t be a bad thing.
vMotion is on its own port group and subnet, so why not. Hmmm
I have encountered this problem some times in the context of normal network traffic. The cause of this phenomenon is that the MTU size between the ports does not match, leading to traffic being dropped only when the request size (using the curl command to check) exceeds the MTU configured on the destination port. Meanwhile, other tests such as ping and telnet still give normal results…
Thanks – this helped me, also.
jg3,
Thank you for the comment and glad this helped!
Brandon