If you are looking for one of the slickest and coolest solutions for streaming applications and desktops in your home lab or production, I want to introduce you to Kasm. It is a solution that will totally change how you do things, easily spinning up test environments, creating safe browsing sandboxes, and many other use cases. In this post, we will take a look at Kasm Workspace install and configuration to stream Docker container environments across a modern web browser.
Table of contents
- What are Kasm Workspaces?
- Kasm Workspaces Community Edition
- Install Kasm Workspaces Community Edition
- Adding additional registries
- Safe browser for safe website browsing and links
- Install software and custom workspace images
- Browser-based Access for cloud desktops and apps
- Single Sign-On, 2FA, and Containerized Workloads
- KasmVNC
- Wrapping up Kasm Workspaces
What are Kasm Workspaces?
It is a containerized desktop infrastructure that allows streaming Docker containers in a secure, browser-based communication channel for applications and desktops. You can easily create virtual desktop infrastructure (VDI) solutions for full desktops or single applications for a team with application images streamed by Kasm. It helps administrators with data loss prevention (DLP) tools, includes two-factor authentication, SSO credentials, and the Kasm web services can be accessed by users using a simple web browser.
For home labs or office, it is a great solution as well since it can provide an easy way to spin up new Linux environments and access applications in a very streamlined way using web services. A DevOps engineer will appreciate the tools you can easily spin up and access from a simple web browser, meaning your tools are always accessible streaming across Kasm workspaces. You can create custom workspaces with apps, tools, environment variable configuration, and other customizations, including networking.
Kasm Workspaces Community Edition
The Kasm Workspaces community edition container streaming platform allows users to self-host Kasm on their own servers or computer for free on-prem. This version is great for home labbers who want to run streaming desktops, applications, and other tools and utilities quickly and easily.
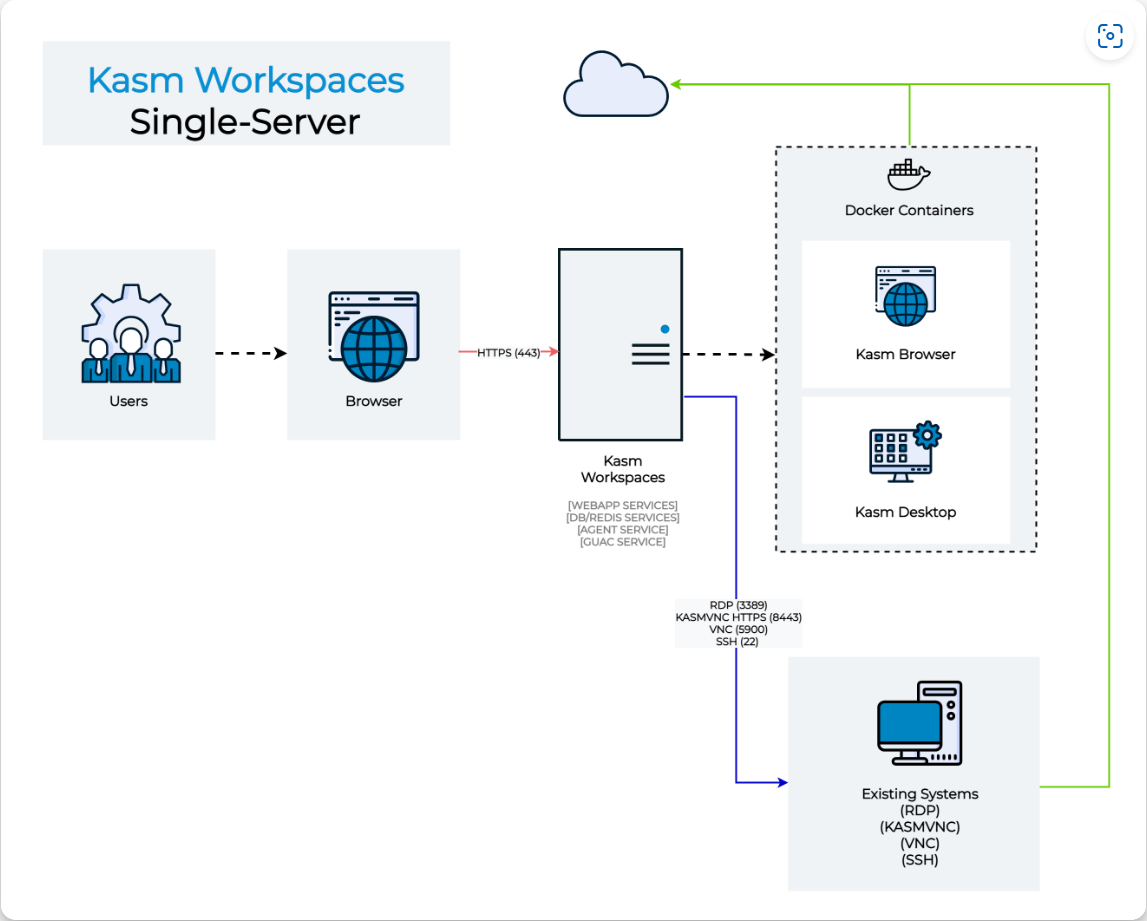
Below is an overview of the Kasm Workspaces architecture found in their documentation.
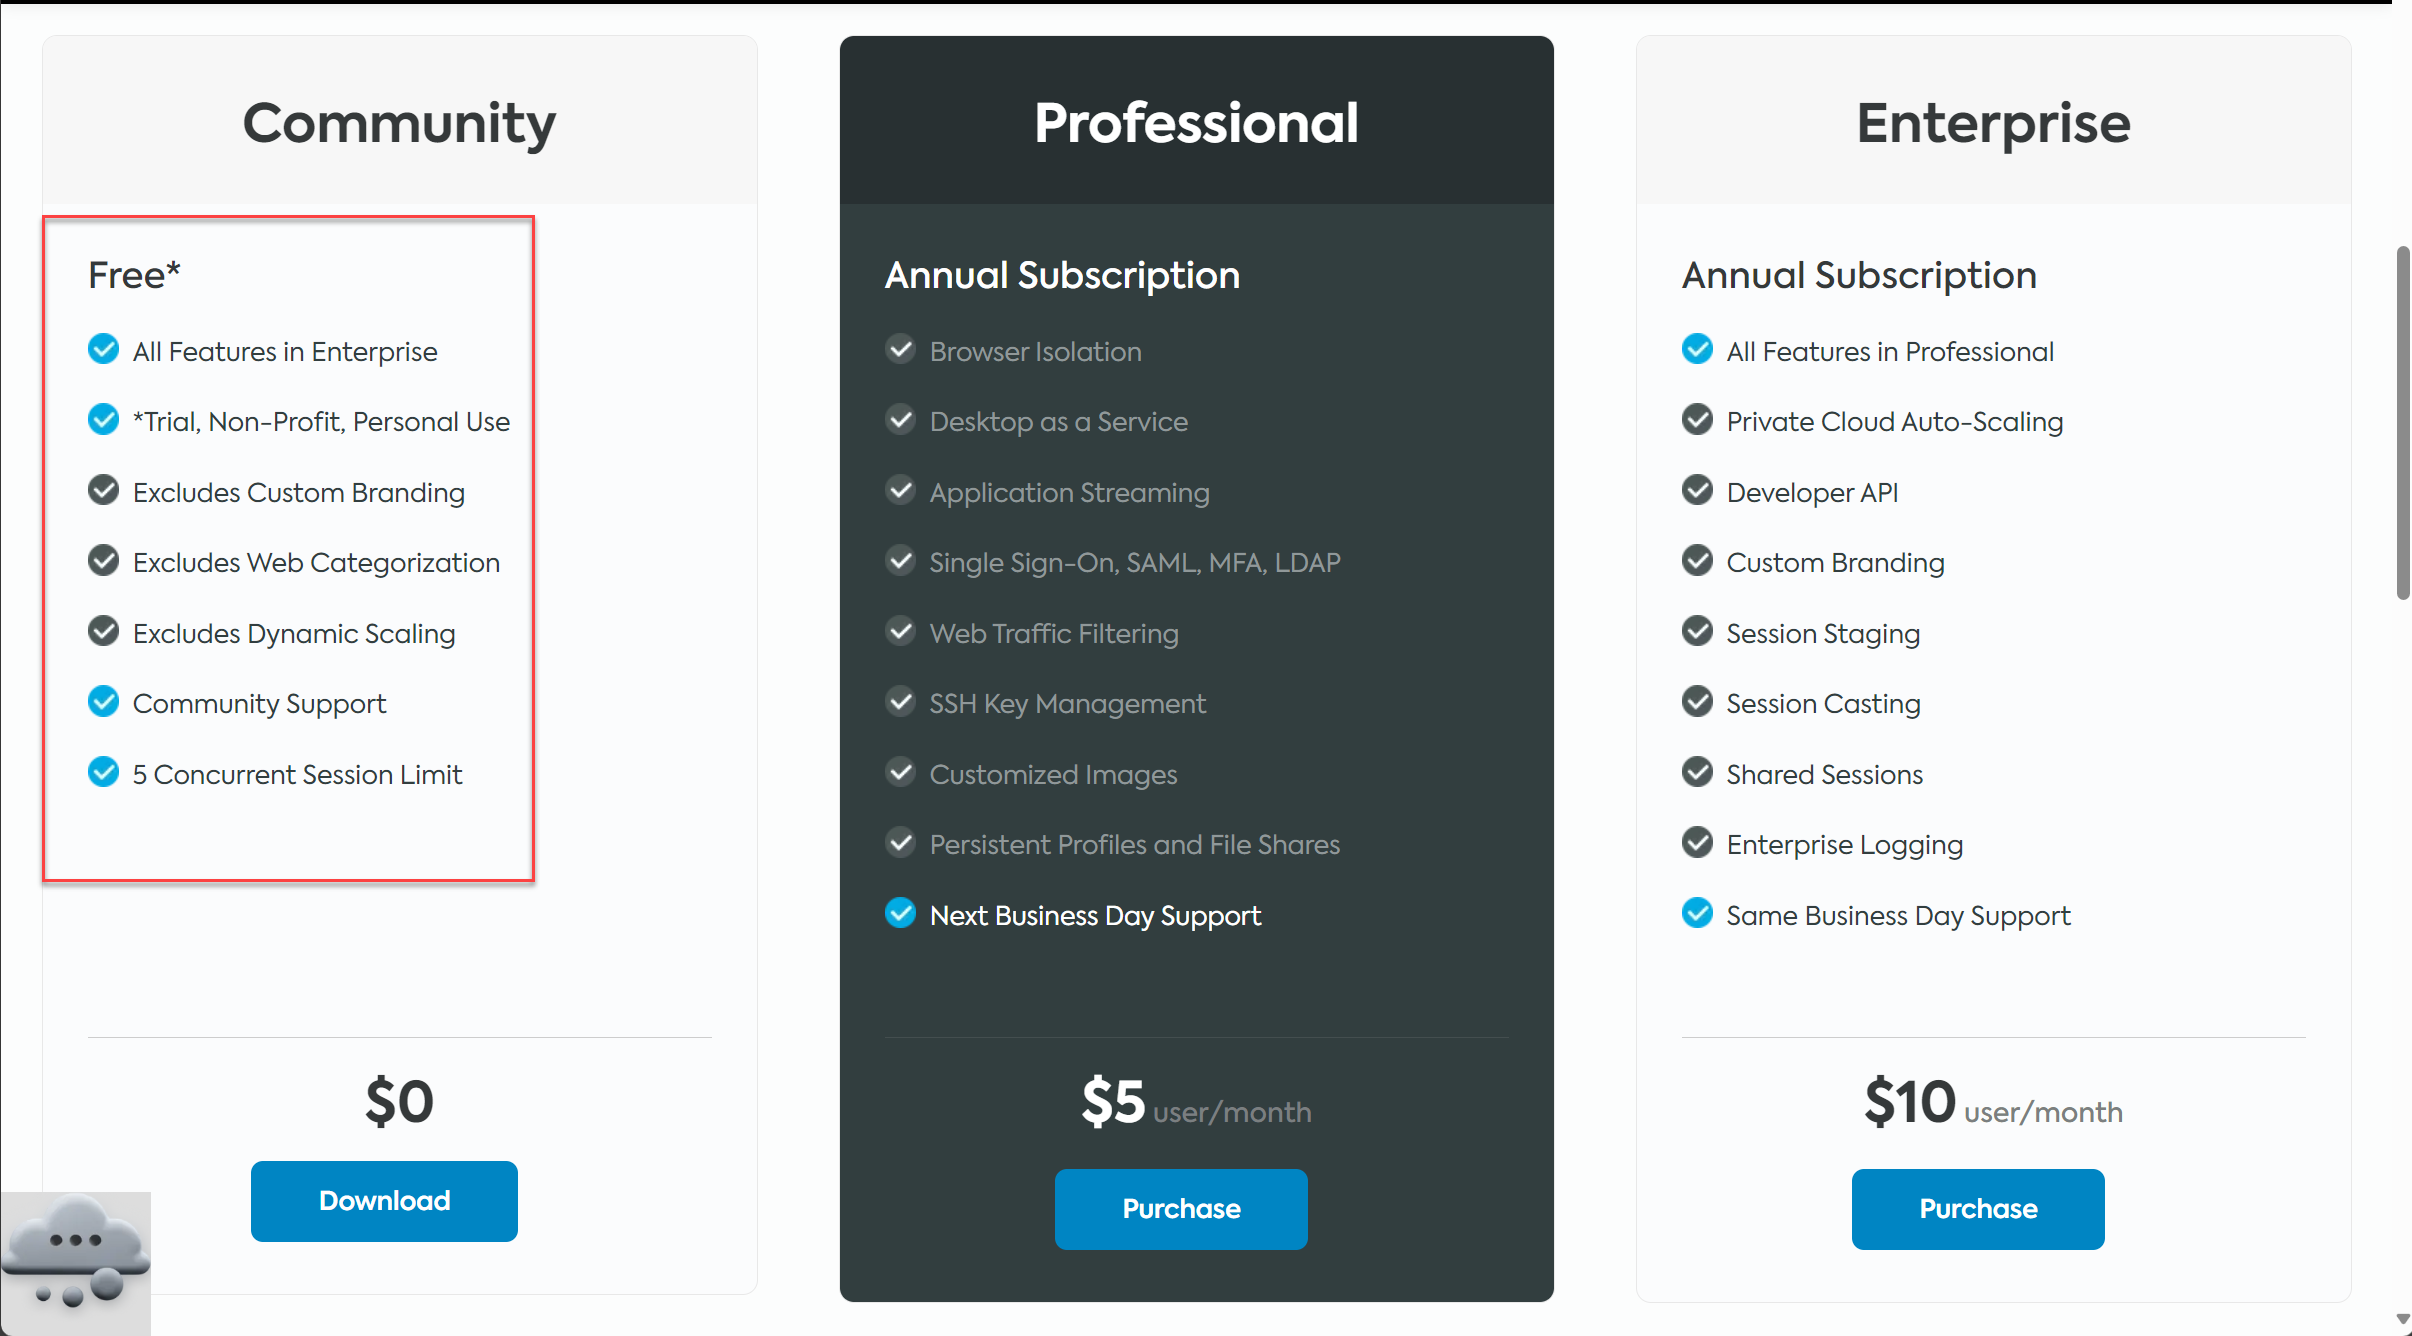
How does the community edition compare to the professional and enterprise plan? There are many great features of the community edition. However, you will see three limitations noted in the information graphic provided by Kasm and a usage limit for sessions:
- Excludes custom branding
- Excludes web categorization
- Excludes dynamic scaling
- Also there is a 5 concurrent session limit
I don’t think the 5 concurrent sessions will be a big deal for most running this in the home lab or the inability to dynamically scale systems. You can see the Enterprise version gives you more features for developers and other employees, like a developer API. The company licenses it per user and is really not a lot of money for the capabilities you get with the product in order to provide security, accessibility, and manageability for your business.
Let’s take a look and see how to install Kasm Workspaces Community Edition.
Install Kasm Workspaces Community Edition
Note the following steps to install Kasm Workspaces Community Edition.
1. Create a Linux host for your Kasm Workspaces Community Edition machine
First things first, build yourself a Linux virtual machine that will serve as the Kasm host. I quickly Terraformed out a new Ubuntu Server 22.04 LTS virtual machine to serve as the Kasm host.
The size of the VM I created contained 4 vCPUs, 8 GB of RAM and 80 GB of thin-provisioned hard drive space. Below, I used Terraform to clone an existing Ubuntu template.
2. Run the commands to install Kasm Workspaces
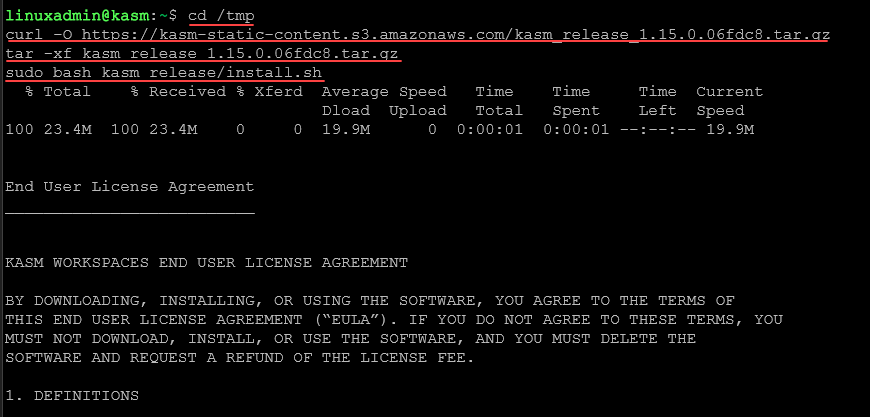
Next, we run the following commands:
cd /tmp

curl -O https://kasm-static-content.s3.amazonaws.com/kasm_release_1.15.0.06fdc8.tar.gz

tar -xf kasm_release_1.15.0.06fdc8.tar.gz
sudo bash kasm_release/install.sh
Below is an example of running the commands. You will quickly see the EULA to agree to with the installation of Kasm.
Enter Y on the prompt to accept the end user license agreement.
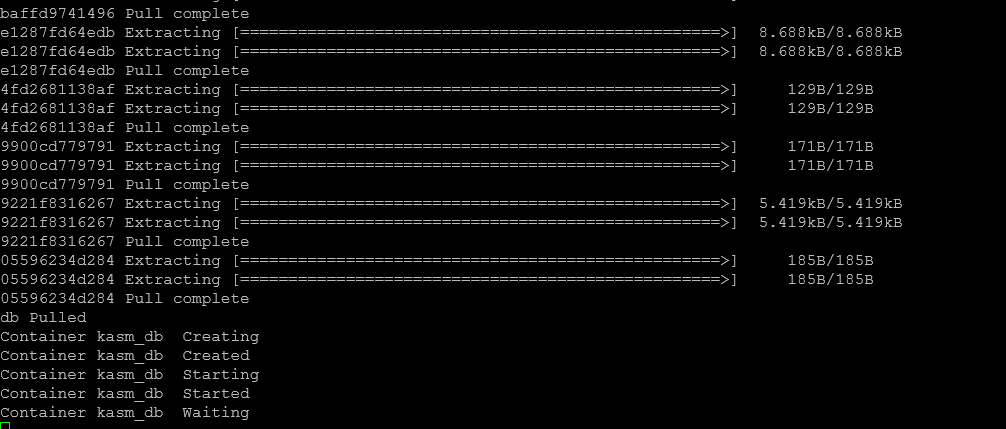
It will then begin pulling down the containers for the Kasm solution. Kasm does all the heavy lifting for you like copying files, installing Docker, setting up networks, installing versions of software needed for the solution, etc.
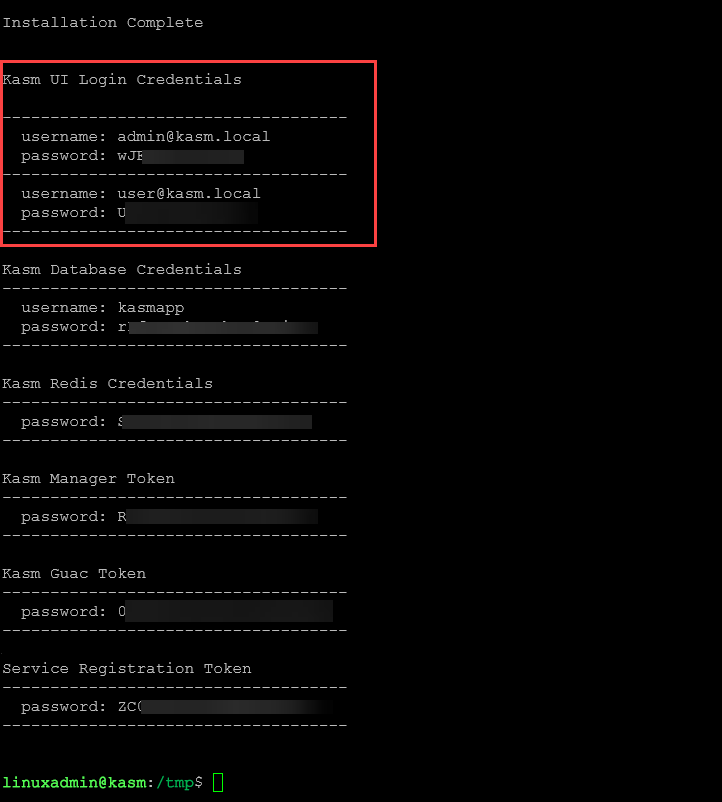
After a few minutes, the solution should be installed. It will display the administrator and user accounts and their passwords that have been set. Take note of the username and password as you will need these for logging into the Kasm workspaces (machines, apps, etc).
If you run a docker ps after the installation, you will see the following containers running right out of the install.
3. Browse to the Kasm workspaces web interface
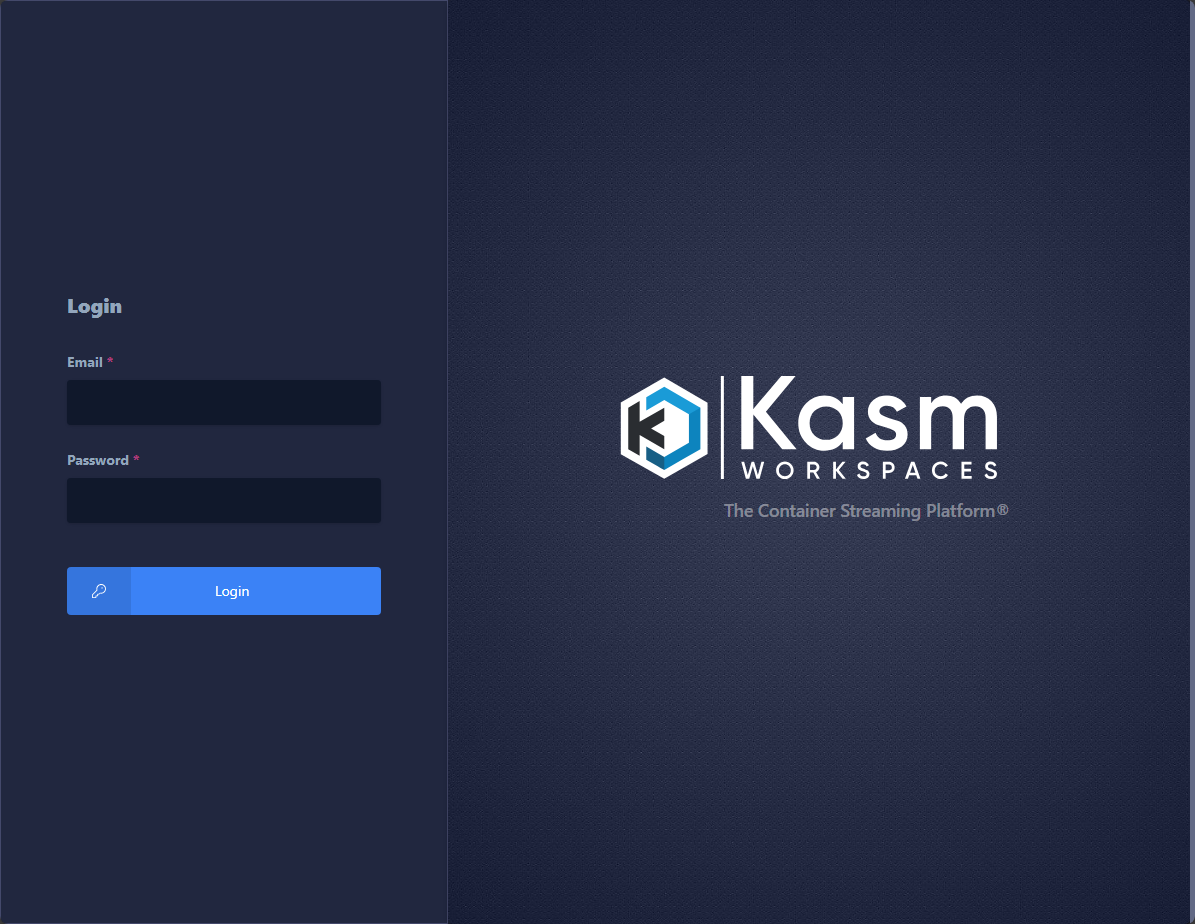
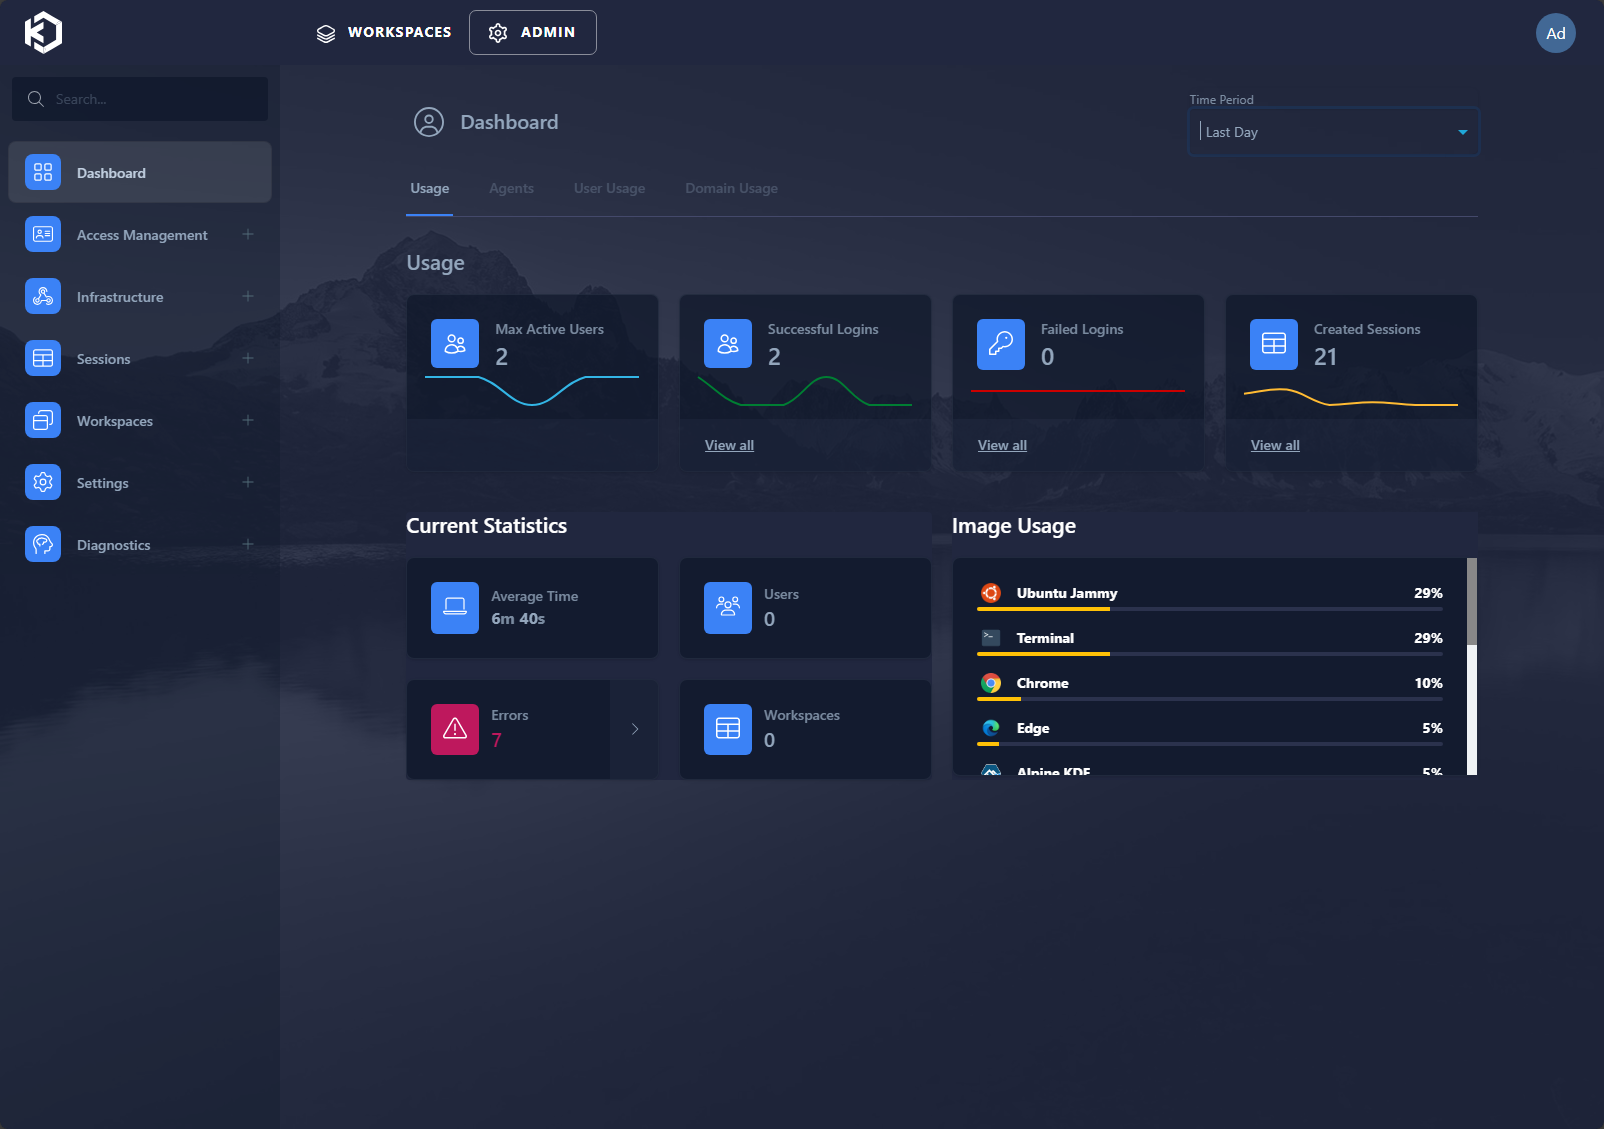
In a browser, if you browse to the IP of your Kasm host, you will see the dashboard where you will need to login with the admin user and password.
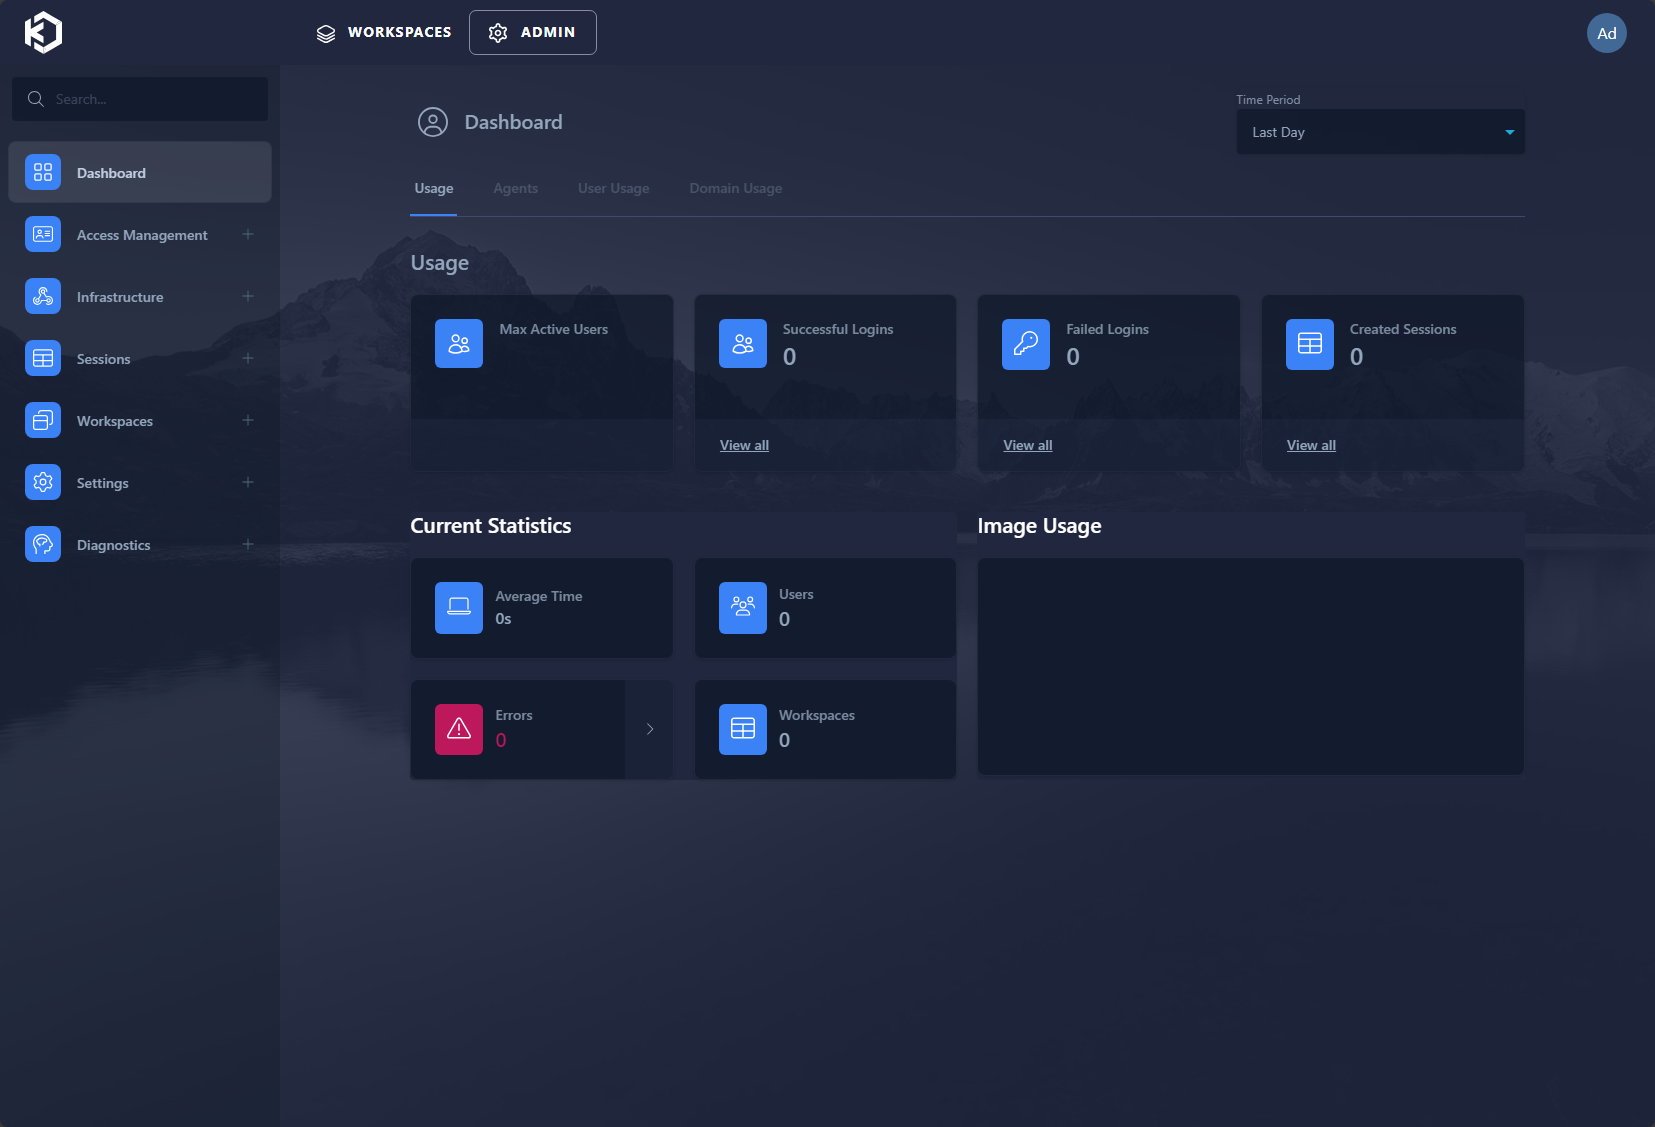
On the dashboard control panel you will see handy statistics of things like:
- Max active users
- Successful logins
- Failed logins
- Created sessions
- Current statistics
- Image usage
This is what it looks like after you have had some activity:
4. Setting up workspaces in Kasm
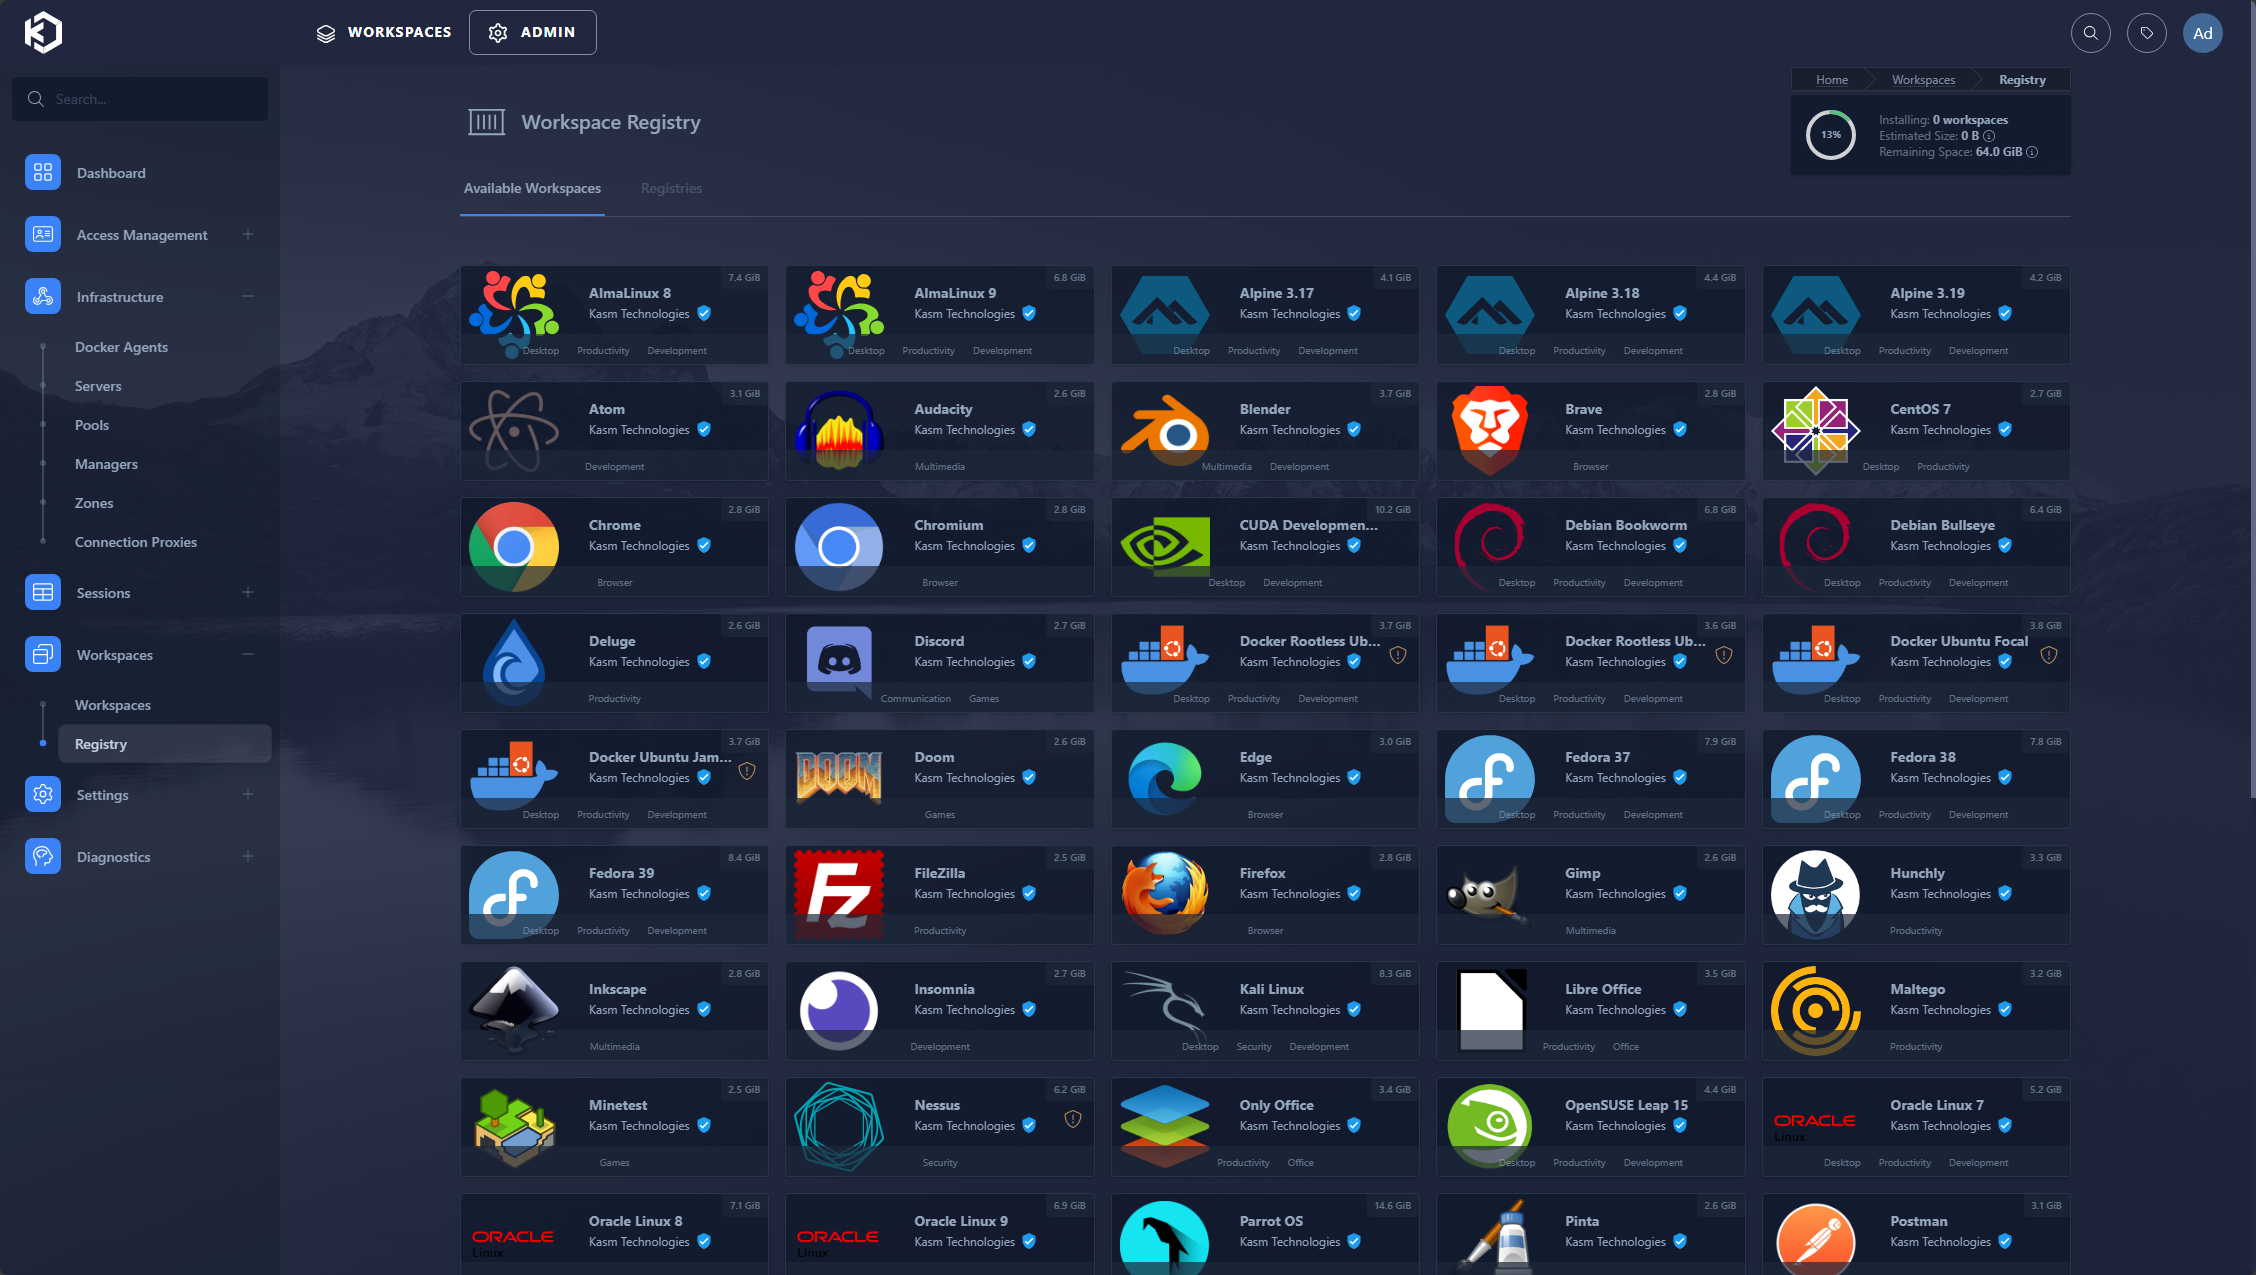
One of the really great things about Kasm is the number of workspaces that are available out of the box. Using what Kasm calls the registry, you can browse a catalog of Docker containerized services that can be used as the basis for a workspace. There are quite a few available workspaces by default as you can see below.
These range from full desktop workspaces like Ubuntu Jammy to individual applications, like Chrome, Firefox, Postman, and others that are part of the public open-source community. You will see collaboration tools, developer utilities, Docker tools, and their details etc.
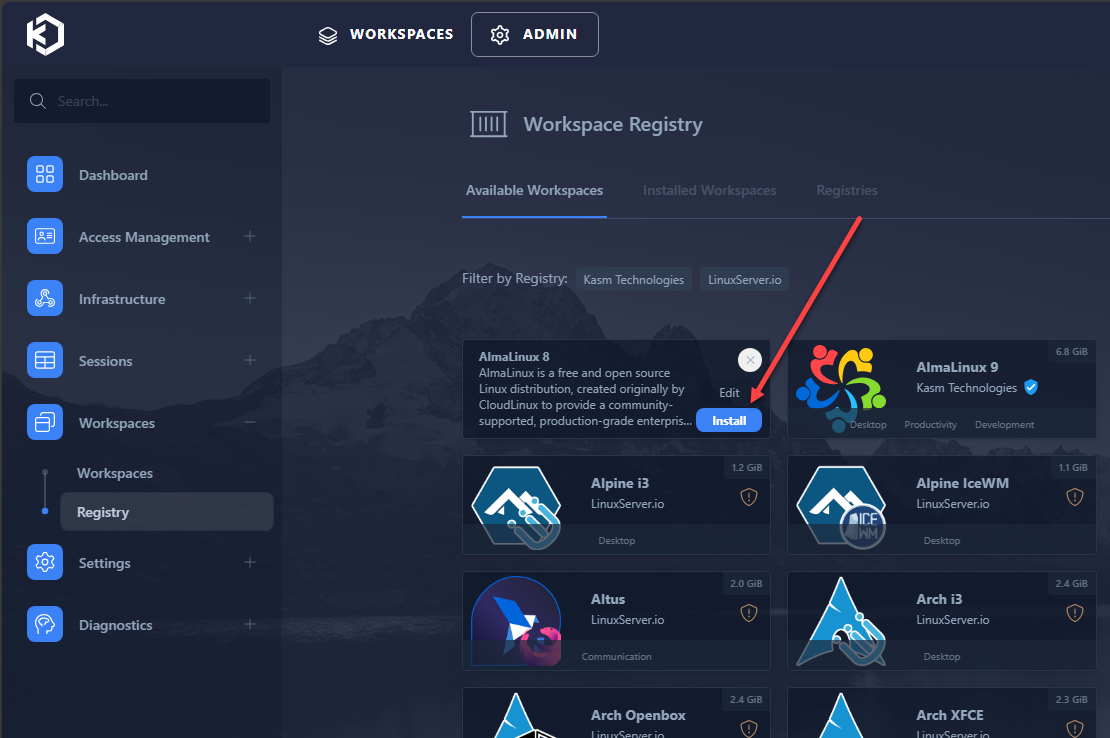
Once you select one of the tiles in the registry, it will give you the option to Install.
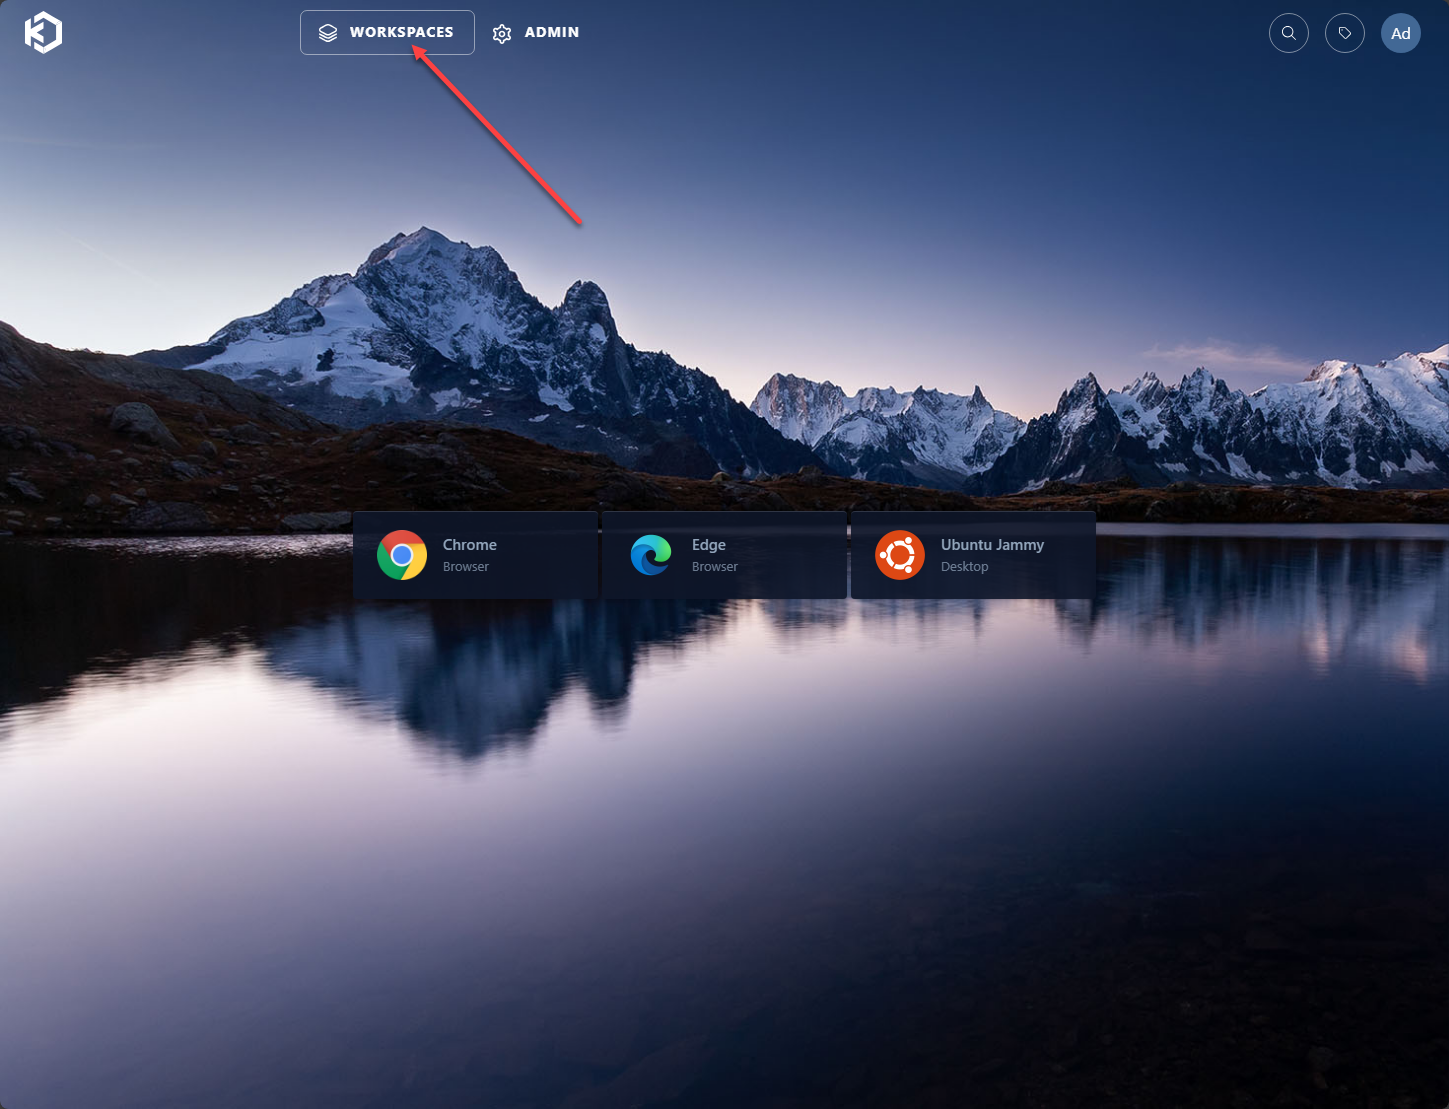
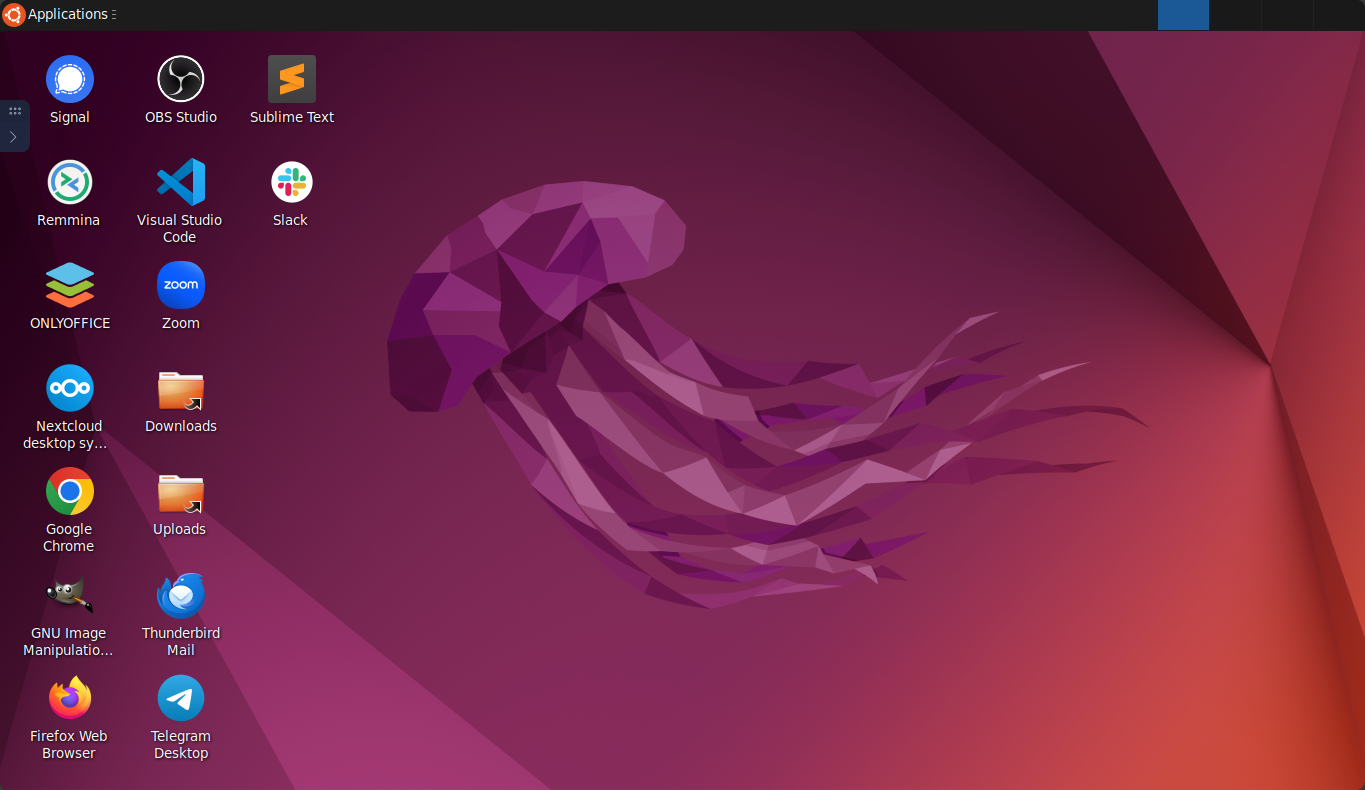
Once you have added workspaces to Kasm, you can flip over to the Workspaces tab and you will see what the end user will see. However, your admin user can have workspaces collections as well as you see below. To launch the workspace, just click the tile. As simple as that!
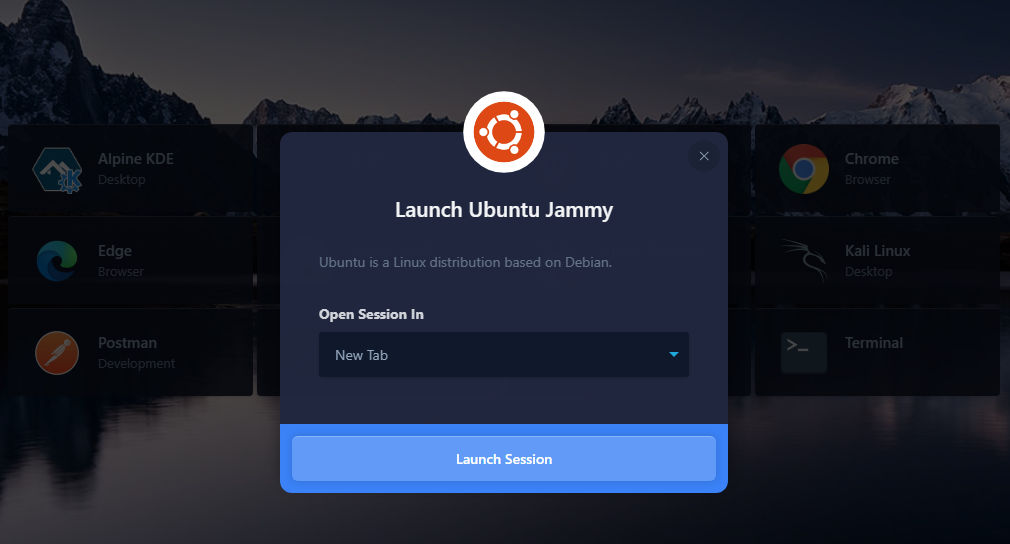
When you click the tile for the workspace, it will prompt you to select how you want to open the session – in the current tab, new tab, or new window.
Below is the
5. Managing workspaces: Resuming, pausing, stopping, and deleting
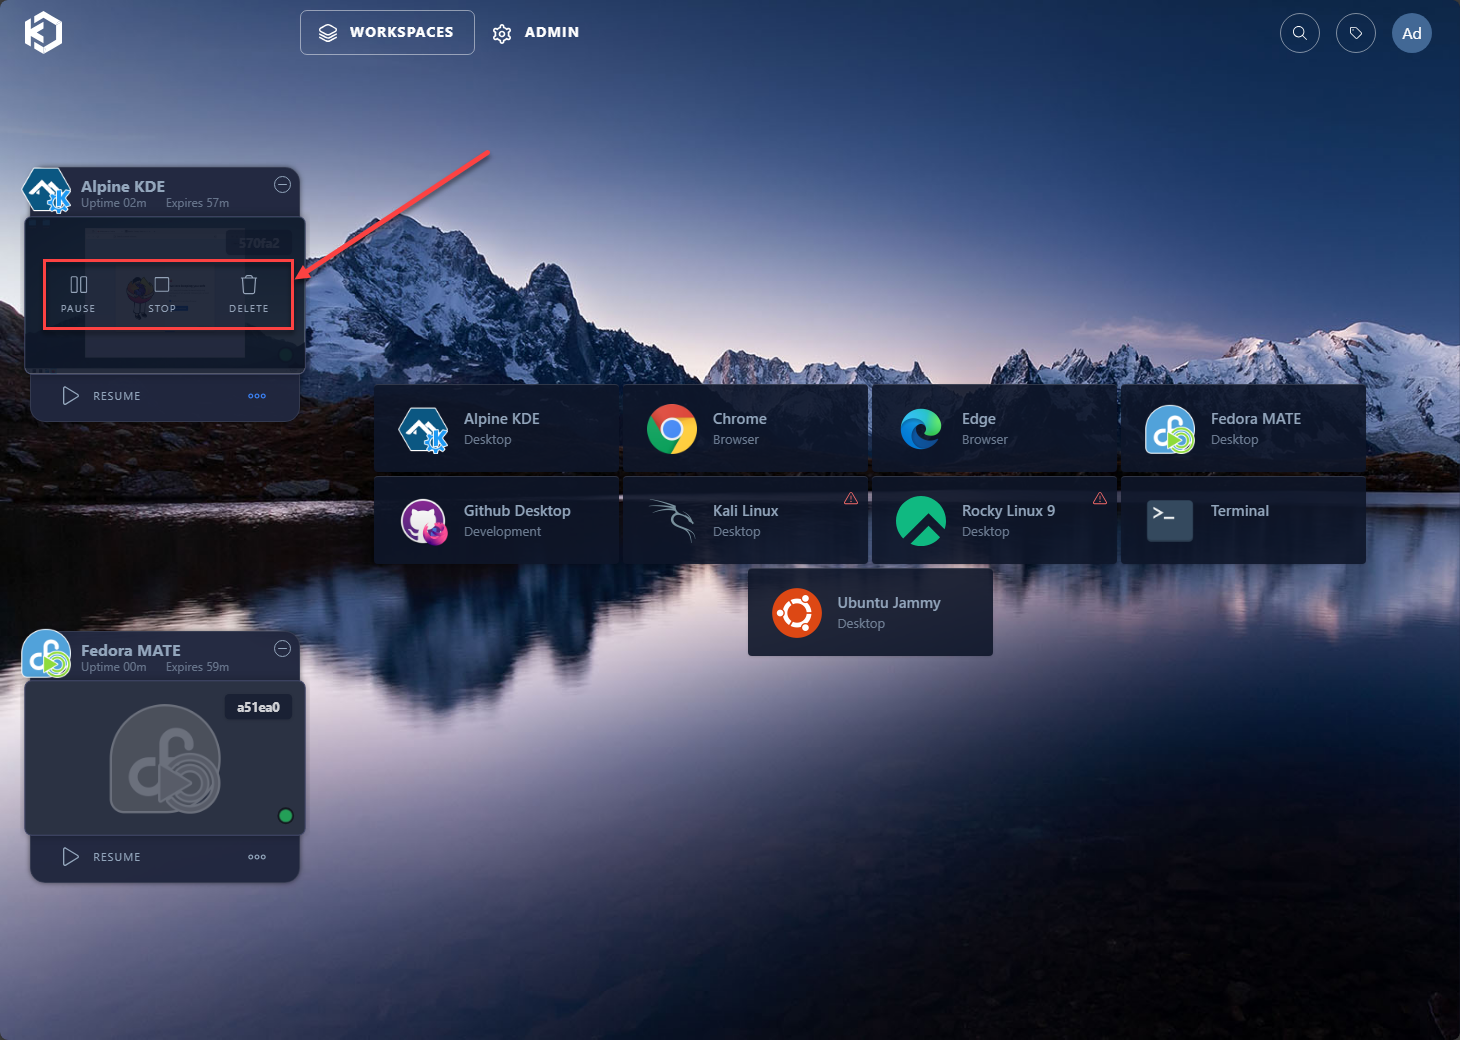
Once you create a new workspace, you can resume, pause, stop, and delete existing workspaces. One of the great things to note is the Kasm workspace can simply be discarded and when you spin up the same workspace again, it will be a pristine copy of the workspace.
As you can see below, I have launched a few workspaces for the admin user and when I navigate back to the workspace dashboard, Kasm asks you what you would like to do with the workspace.
Adding additional registries
One of the other cool things about Kasm Workspaces is you can add additional registries to Kasm. This capability allows you to extend the functionality of the default available workspaces to additonal offerings.
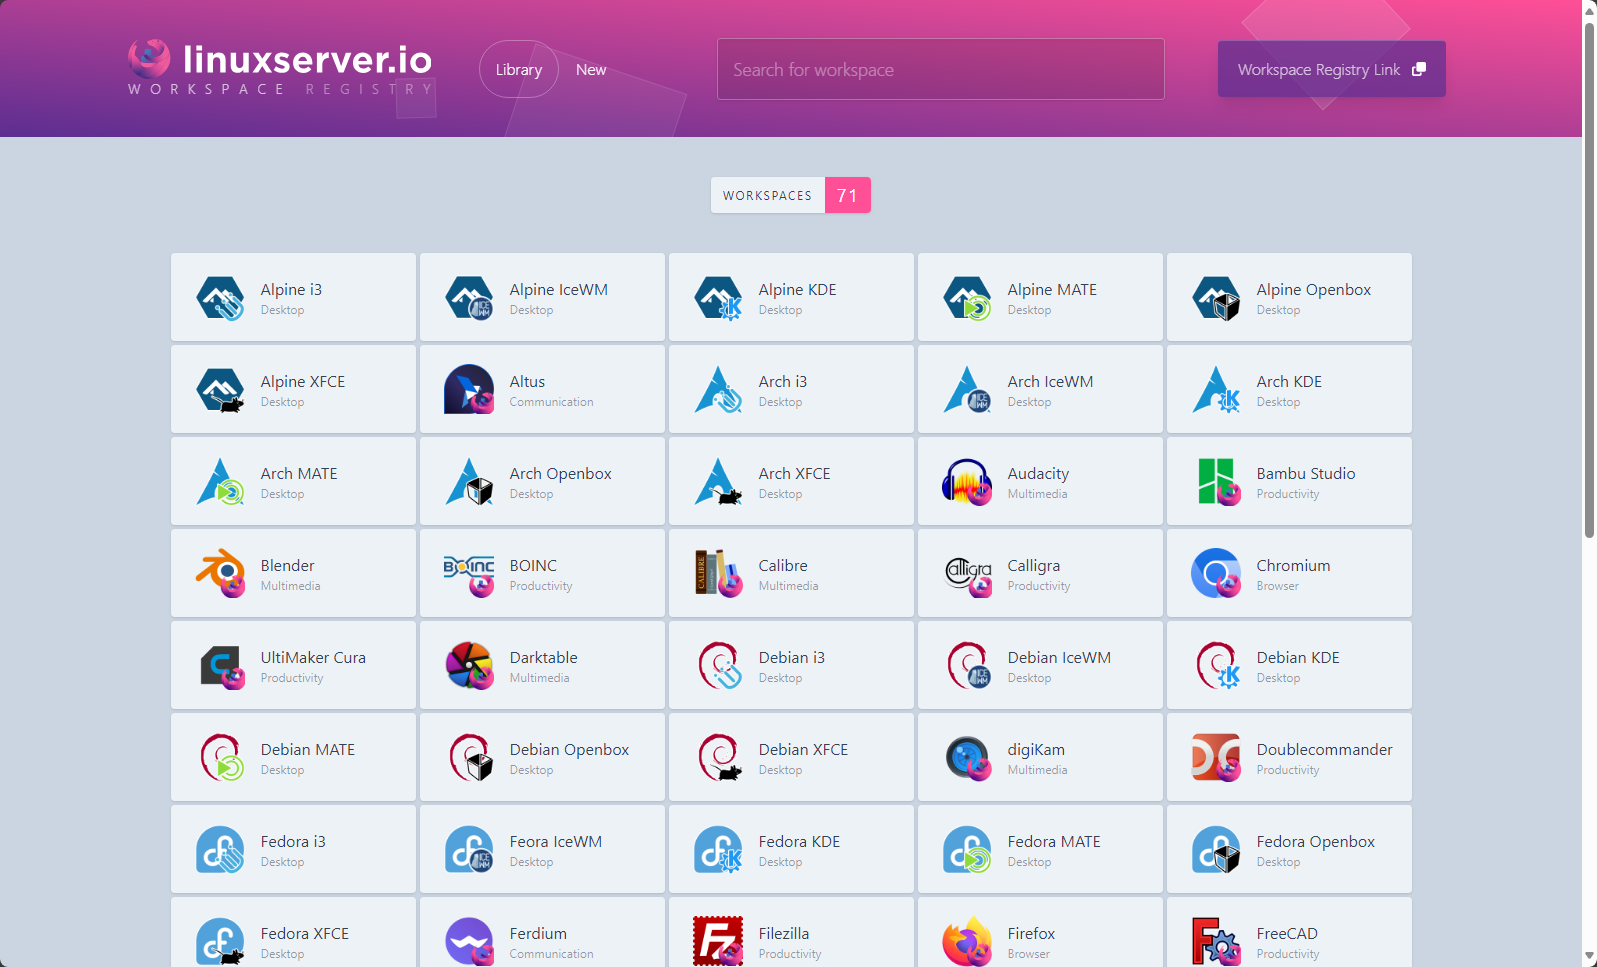
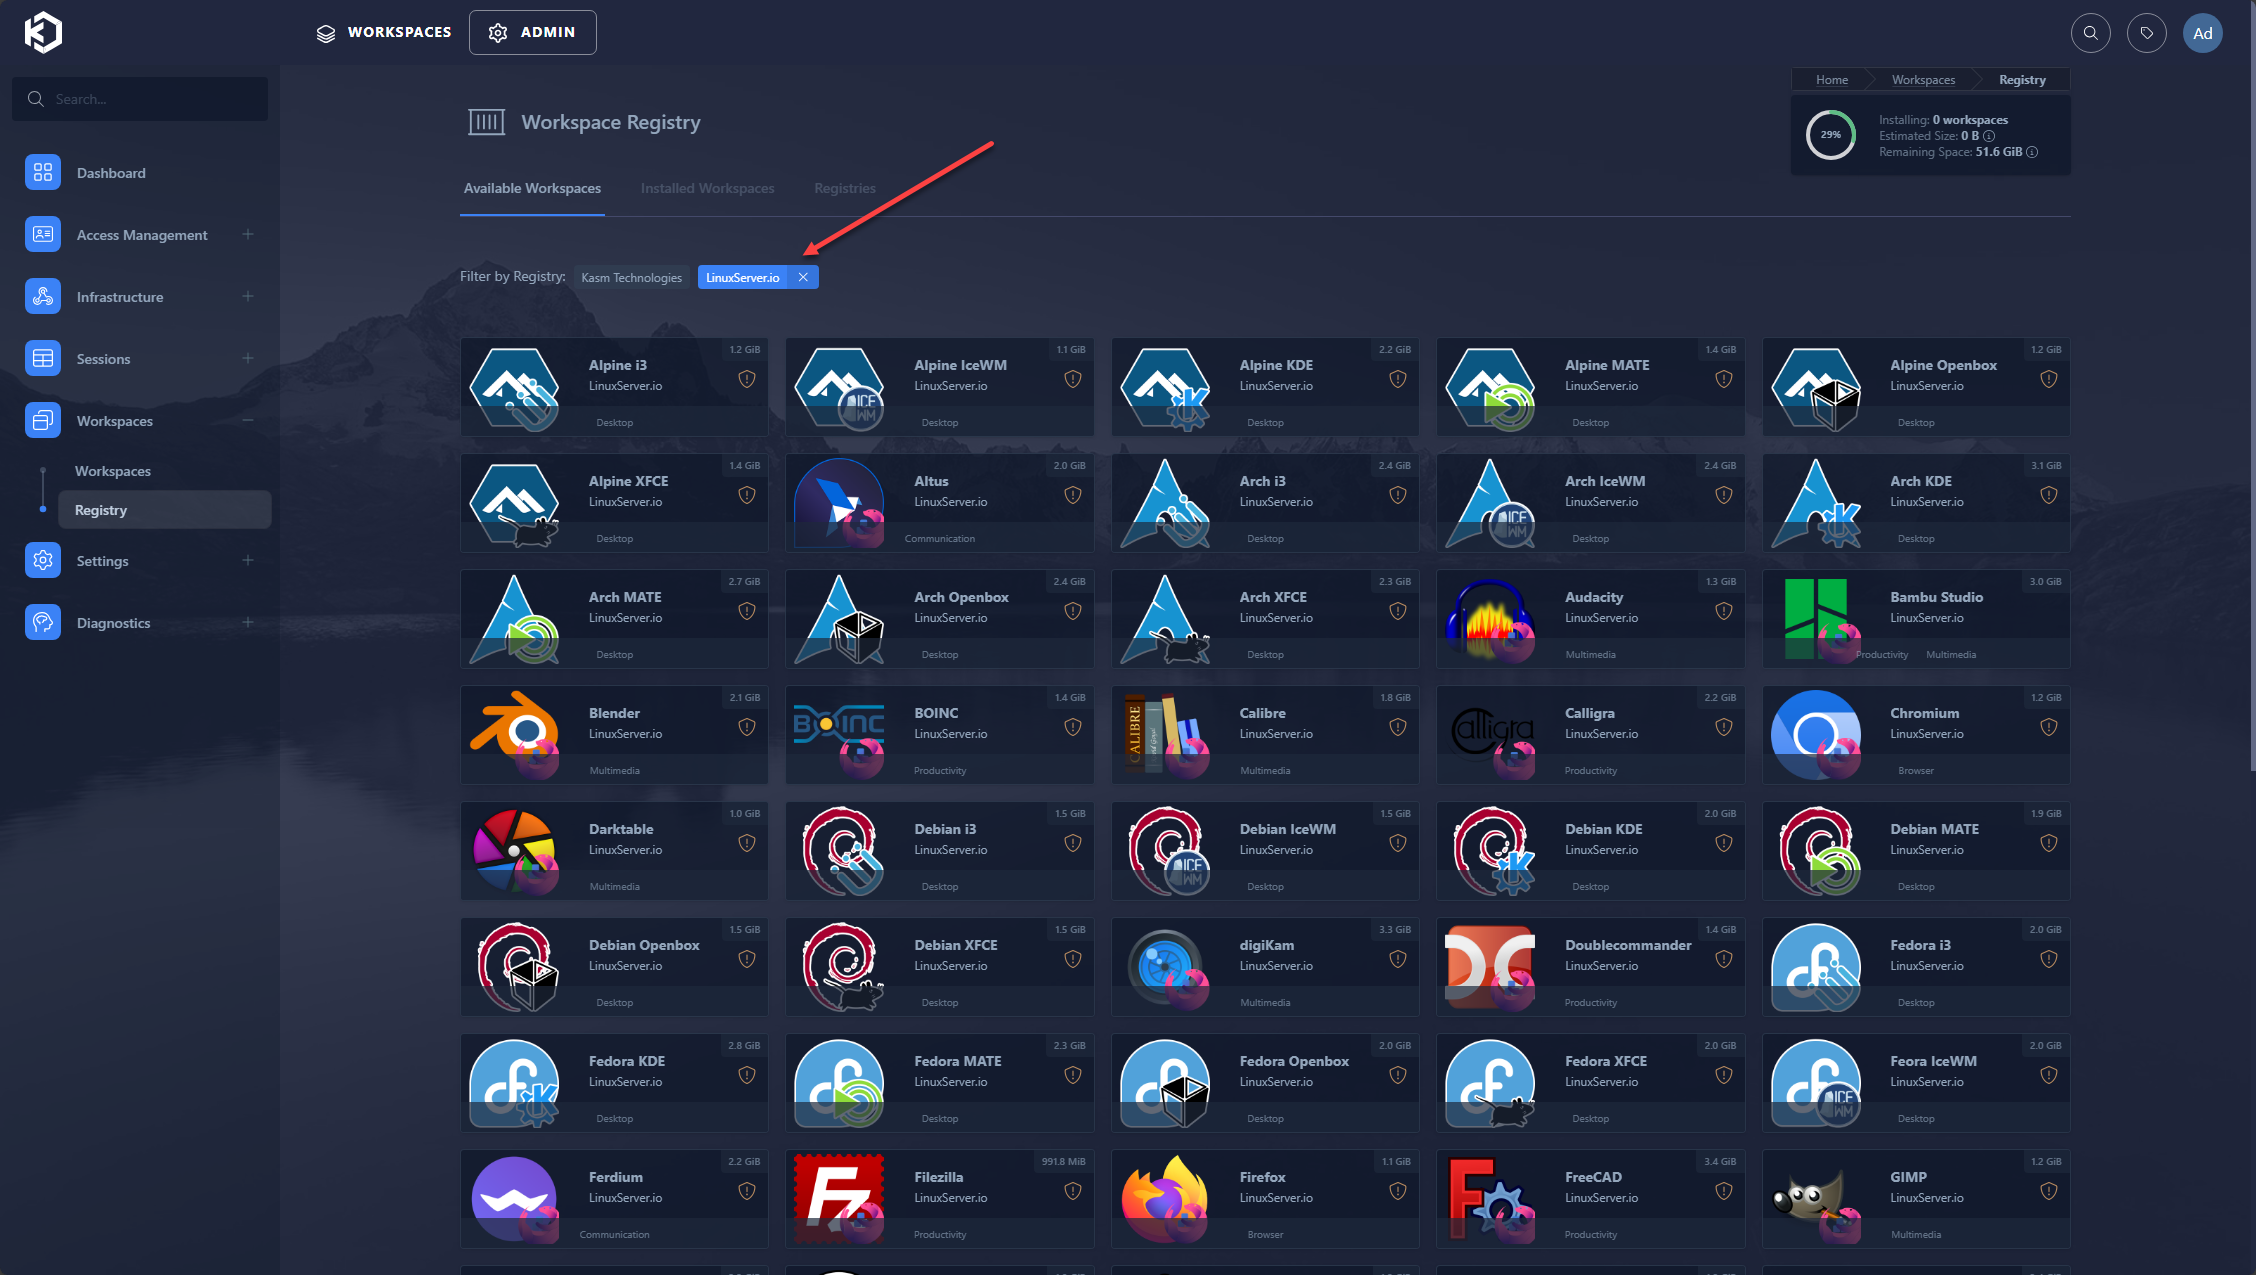
One of the quick and easy ones to add is the Kasm Workspaces from Linuxserver.io. The registry URL is the below:https://kasmregistry.linuxserver.io/
You can see the catalog of workspaces from Linuxserver.io below. It features a few more full desktop Linux operating system workspaces and several more utilities and apps.
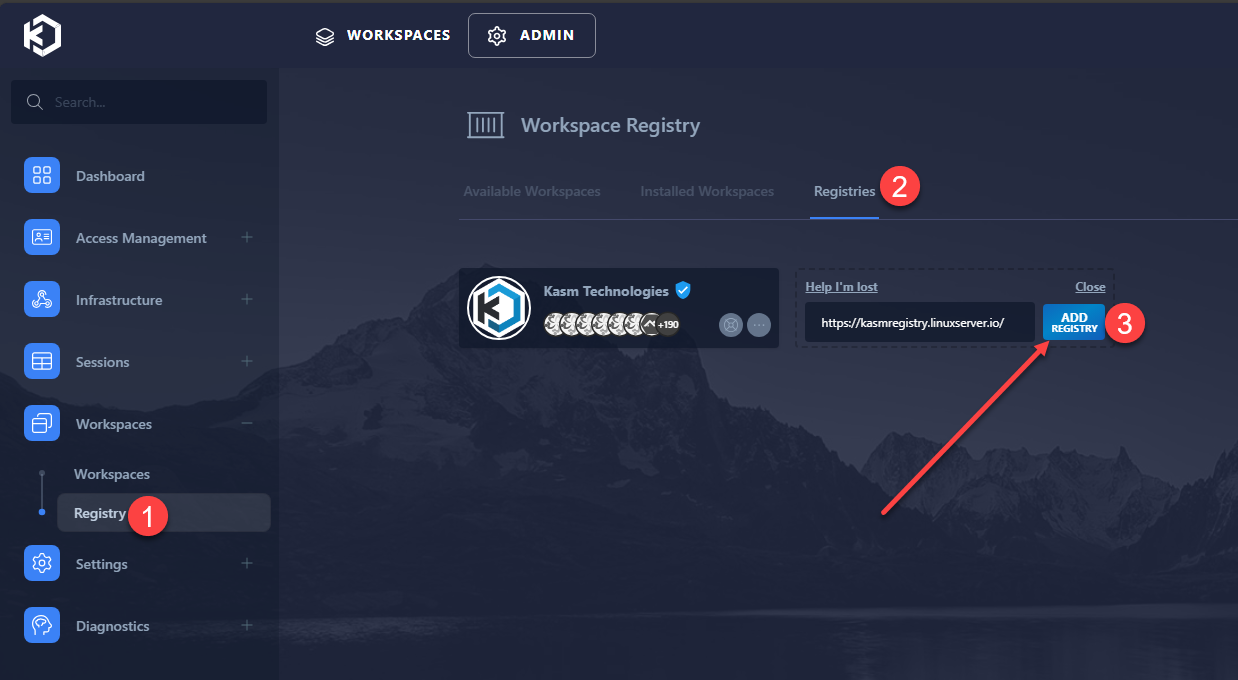
Next, navigat to Workspaces > Registry > Registries > Add Registry. Input the registry URL that we copied from Linuxserver.io and then click the Add registry button.
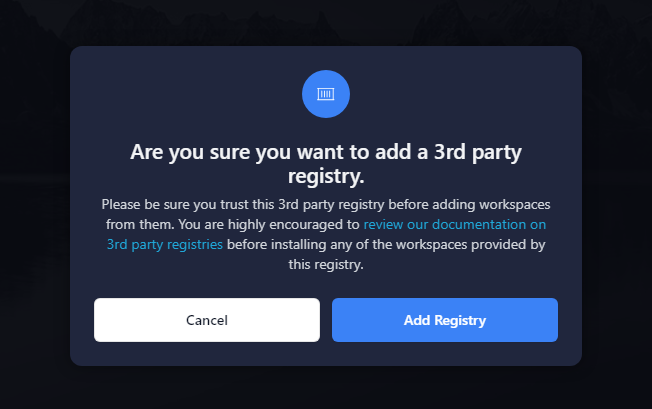
You will see the warning about adding 3rd party registries. Click Add Registry to finish adding the registry to Kasm.
You can filter your workspaces to see the ones available from a particular registry.
Safe browser for safe website browsing and links
A great use case for the Kasm Workspaces platform is browser isolation. You can have a browser Kasm workspace you can use to launch a questionable URL. Think of it like a sandbox for this purpose. You can use them for all web browsing if you want to keep your machine clean and free from malware, PUPs, spyware, and more.
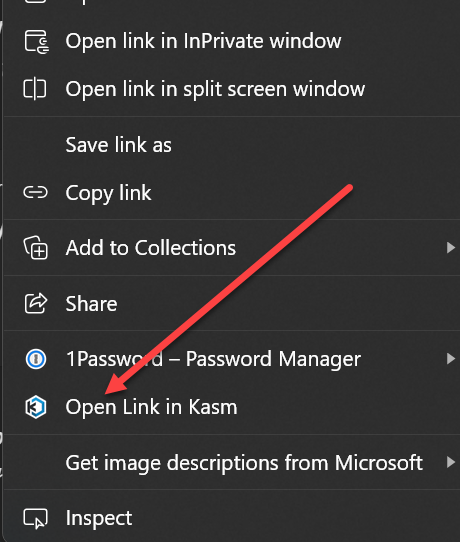
Also, there is a Kasm Open In Isolation browser plugin that you can download for Chrome/Chromium browsers that allows setting up quick and easy “right-click” functionality for a link. It will automatically forward opening the link to your Kasm workspace browser session.
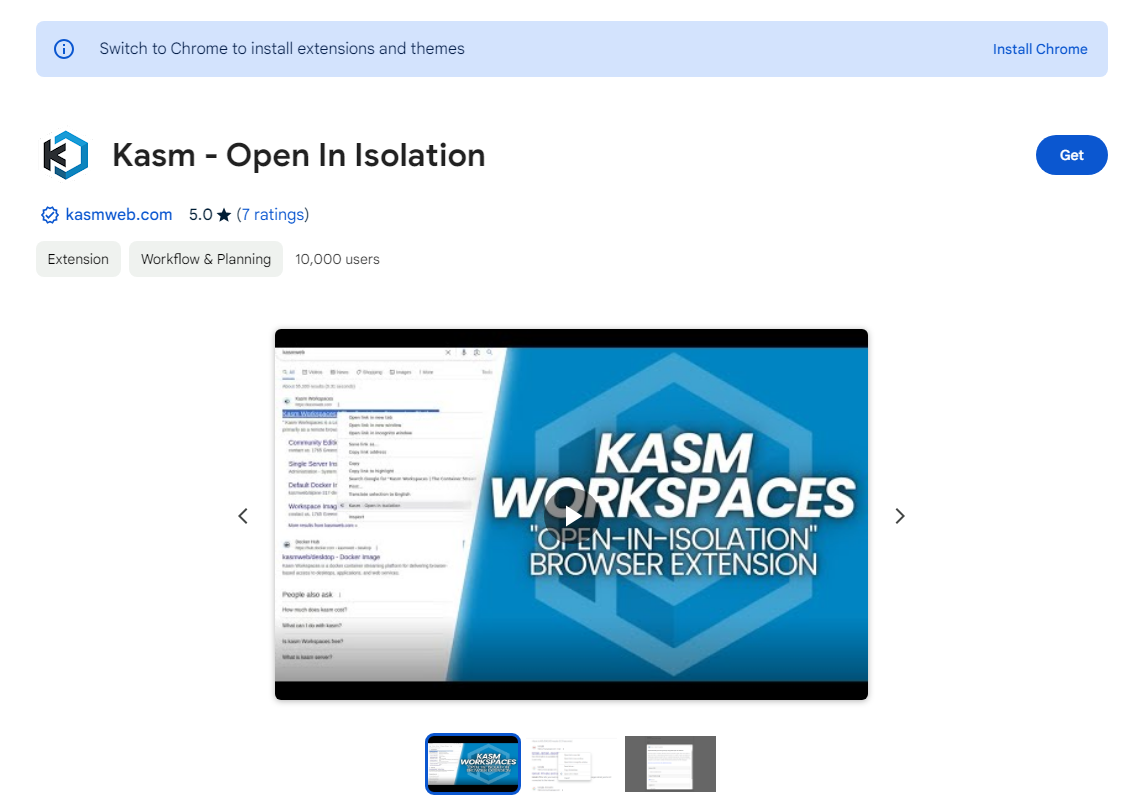
When you install the Kasm Open In Isolation browser plugin, you will then get the following new right-click context menu integration when you right-click on a link:
The isolated browser technology within Kasm Workspaces is an excellent part of the security framework and offers protection against data loss and unauthorized access to your local PC. All browsing sessions are contained within a secure environment and minimizes the risk associated with internet use.
Install software and custom workspace images
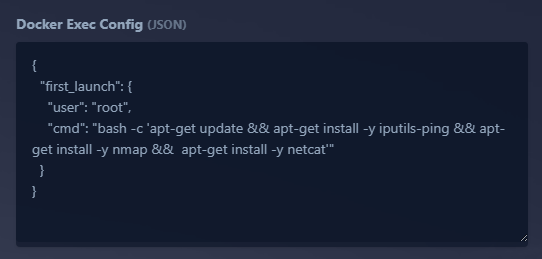
With Kasm workspaces, you can install software inside your Kasm workspace image on first launch. In the properties of your workspace image, you can use the Docker Exec Config box under the properties of your added workspace to install software that you may be missing.
One of the picky things I found with the default Terminal workspace is it is missing the basic ping command. You can install ping, nmap, and netcat with the below:
{
  "first_launch": {
    "user": "root",
    "cmd": "bash -c 'apt-get update && apt-get install -y iputils-ping && apt-get install -y nmap &&  apt-get install -y netcat'"
  }
}One thing to note is the commands will run asynchronously of the terminal spinning up. So if you quickly try to run ping, the command will not be found. But if you wait a few seconds, it will be there.
You can also build and use your own Docker images for Kasm workspaces. You can read the official documentation for that here: Building Custom Images — Kasm 1.15.0 documentation.
Browser-based Access for cloud desktops and apps
The convenience of browser-based access means that you can interact with desktops and applications from any location with security and performance with no client installation needed. This is crucial for those supporting remote work and provides a way to maintain everything in a single location for management.
Businesses are also transforming from traditional VDI solutions to a more cloud-based approach with desktops-as-a-service (DaaS). It allows them to deploy and manage their IT resources and provide flexible, secure, and cost-effective alternative to traditional desktop delivery methods. While we touched on the free community edition, Kasm’s paid offerings allow hosting your resources in their cloud environment.
Single Sign-On, 2FA, and Containerized Workloads
Implementing Kasm Workspaces design supports single sign-on (SSO). This simplifies access management for users and deploying applications and services.
Also, Kasm has 2FA in place and built into the solution. You can integrate with your solution for 2FA and make sure the Kasm resources are locked down and secured appropriately.
KasmVNC
Kasm also provides other products on top of the Kasm Workspaces solution. KasmVNC software deployment is a remote web-based access tool to access a Desktop or application. While it is similar to other VNC programs, KasmVNC differs from others like TigerVNC, RealVNC, and TurboVNC.
KasmVNC deviates from the RFB specification which defines VNC, to support modern technologies and increase security. KasmVNC is accessed by users from any modern browser and does not support legacy VNC viewer applications. It also uses a modern YAML based configuration at the server and user level, allowing for ease of management
Wrapping up Kasm Workspaces
I think most will find Kasm Workspaces to be awesome! It is an excellent solution for the ability to access full desktops, rendering applications, and tools by streaming them in a web browser. I really like the ease in which you can spin up Kasm and register workspaces on the network.
With open-source intelligence apps and services you can have things available at your fingertips. Even though multiple users can access the same Kasm shared host, coworking containers are totally isolated from one another. There are many blog guides to get started with Kasm and other resources on the net that will help you avoid problems configuring your Kasm workspaces. Let me know in the comments if you have used Kasm before? Also, feel free to ping me on the VHT Forums if you need help.
Google is updating how articles are shown. Don’t miss our leading home lab and tech content, written by humans, by setting Virtualization Howto as a preferred source.

