I am always looking for new Kubernetes installations to play around with and check out the viability for running Kubernetes clusters in the home lab and production. A name I have been seeing more and more for Kubernetes is Talos Linux. Let’s check out Talos Linux VMware vSphere installation for Kubernetes and see how you can get up and running with a Talos Linux-powered Kubernetes cluster for running your containerized workloads.
Table of contents
- What is Talos Linux?
- Installing Talos Linux in VMware vSphere Step-by-Step
- 1. Download the tools needed (govc and talosctl)
- 2. Choose a VIP (simple as earmarking an unused IP address from your network)
- 3. Download the cp.patch.yaml file and edit with your VIP
- 4. Generate the machine configs (for controlplane and worker nodes)
- 5. Download the vmware.sh automated installation script and modify environment variables
- 6. Upload the OVA for Talos
- 7. Create the Talos cluster
- 8. Bootstrap the Talos cluster with talosctl bootstrap
- 9. Download the kubeconfig files
- 10. Connect to your Talos Linux Kubernetes cluster
- 11. Configure VMware Tools
- Storage and other considerations
- Wrapping up Talos Linux VMware vSphere installation
What is Talos Linux?
It is a unique purpose-built Linux distribution designed from the ground up to run Kubernetes. If you are like me in the home lab, you may be running Ubuntu Server virtual machines to spin up your Kubernetes nodes, and there is nothing wrong with this.
However, using a full-blown Linux distribution like Ubuntu to host even a small K3S or K0s cluster is not necessarily efficient and it can lead to a pretty wide attack surface since Ubuntu, by default, isn’t built just to run Kubernetes.
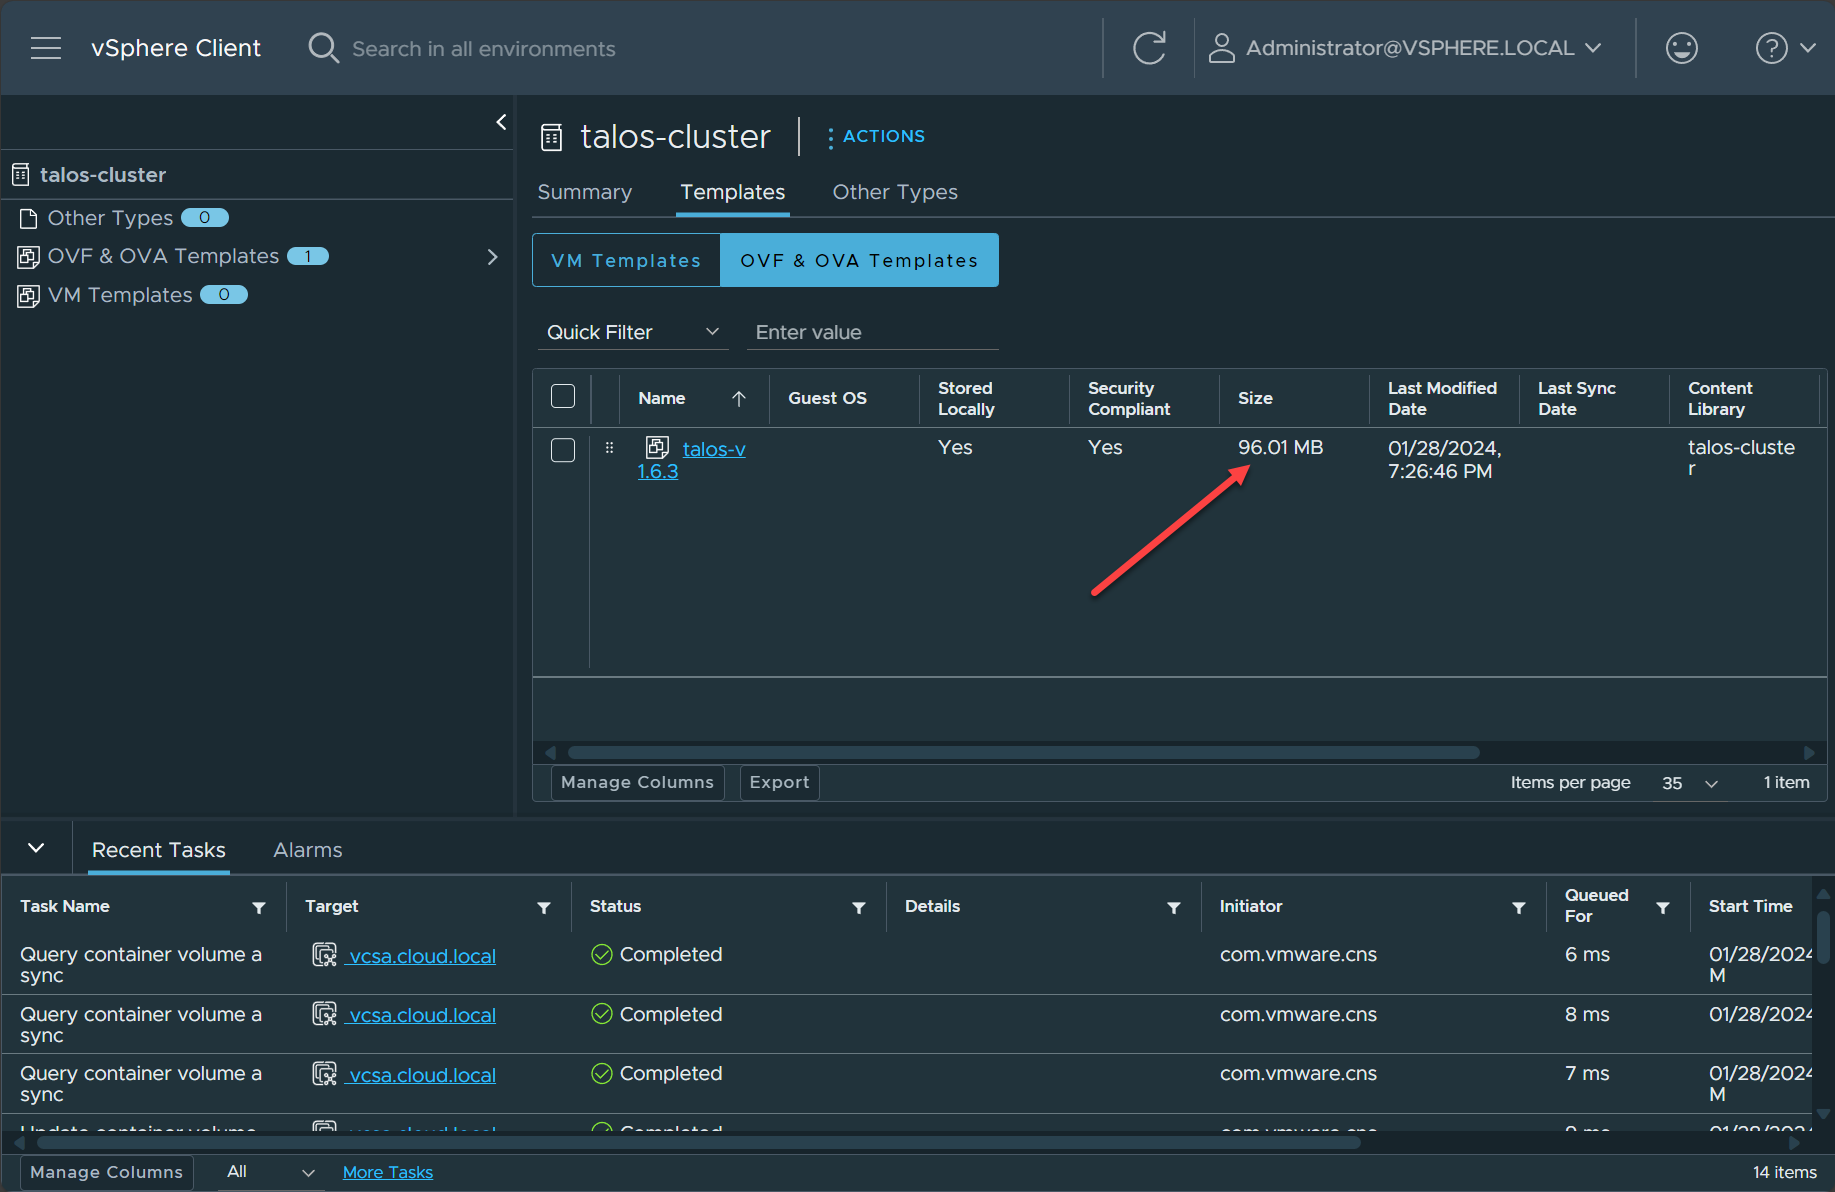
Talos Linux with Talos Kubernetes is different. The OVA file for VMware installation is around 96MB. It uses an API-managed operating system with no SSH needed or enabled. This eliminates the need for direct system interaction and leads to a much more secure (hardened Kubernetes) and immutable infrastructure configuration for Kubernetes by default.
Below is a look at the Talos Linux OVA in the VMware vSphere Content Library. It also minimizes configuration drift definitely bolsters the reliability of your Kubernetes clusters.
It is not just built for compatibility with vSphere, but it can run on many hypervisor platforms, including Proxmox, Hyper-V, KVM, Vagrant & Libvirt, and Xen virtual machine builds.
Installing Talos Linux in VMware vSphere Step-by-Step
For the most part you can go by the official documentation found on the Talos documentation site for running Talos Linux on VMware vSphere. However, I think there are a few things that we can clarify with screenshots as we go along and show my experience with spinning up Talos in the home lab.
Also, I want to mention, if you haven’t already, check out 90DaysofDevOps, with Michael Cade. This past weekend, he posted a video walkthrough of getting Talos up and running in vSphere.
Note the steps:
- Download the tools needed (govc and talosctl)
- Choose a VIP (simple as earmarking an unused IP address from your network)
- Download the cp.patch.yaml file and edit with your VIP
- Generate the machine configs (for controlplane and worker nodes)
- Download the vmware.sh automated installation script and modify environment variables
- Upload the OVA for Talos
- Create the Talos cluster
- Bootstrap the Talos cluster
- Download your kubeconfig files
- Connect to your Talos Linux Kubernetes server
- Configure VMware Tools
1. Download the tools needed (govc and talosctl)
We need the govc and talosctl tools to deploy Talos Linux on VMware vSphere. To download and install them from the official repository, use the following commands.
govc
curl -L -o - "https://github.com/vmware/govmomi/releases/latest/download/govc_$(uname -s)_$(uname -m).tar.gz" | sudo tar -C /usr/local/bin -xvzf - govc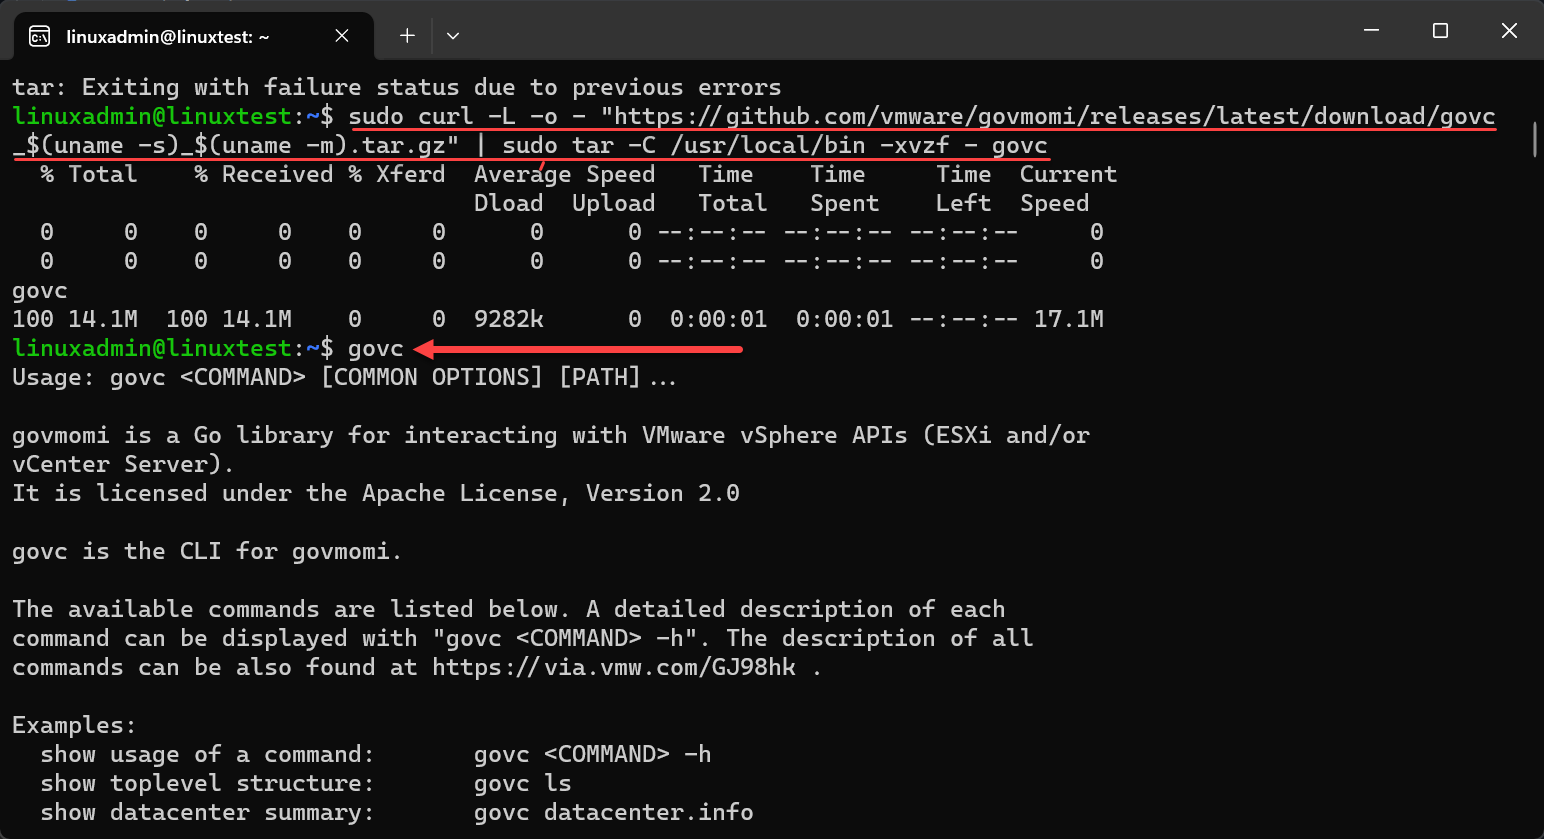
talosctl
curl -sL https://talos.dev/install | sh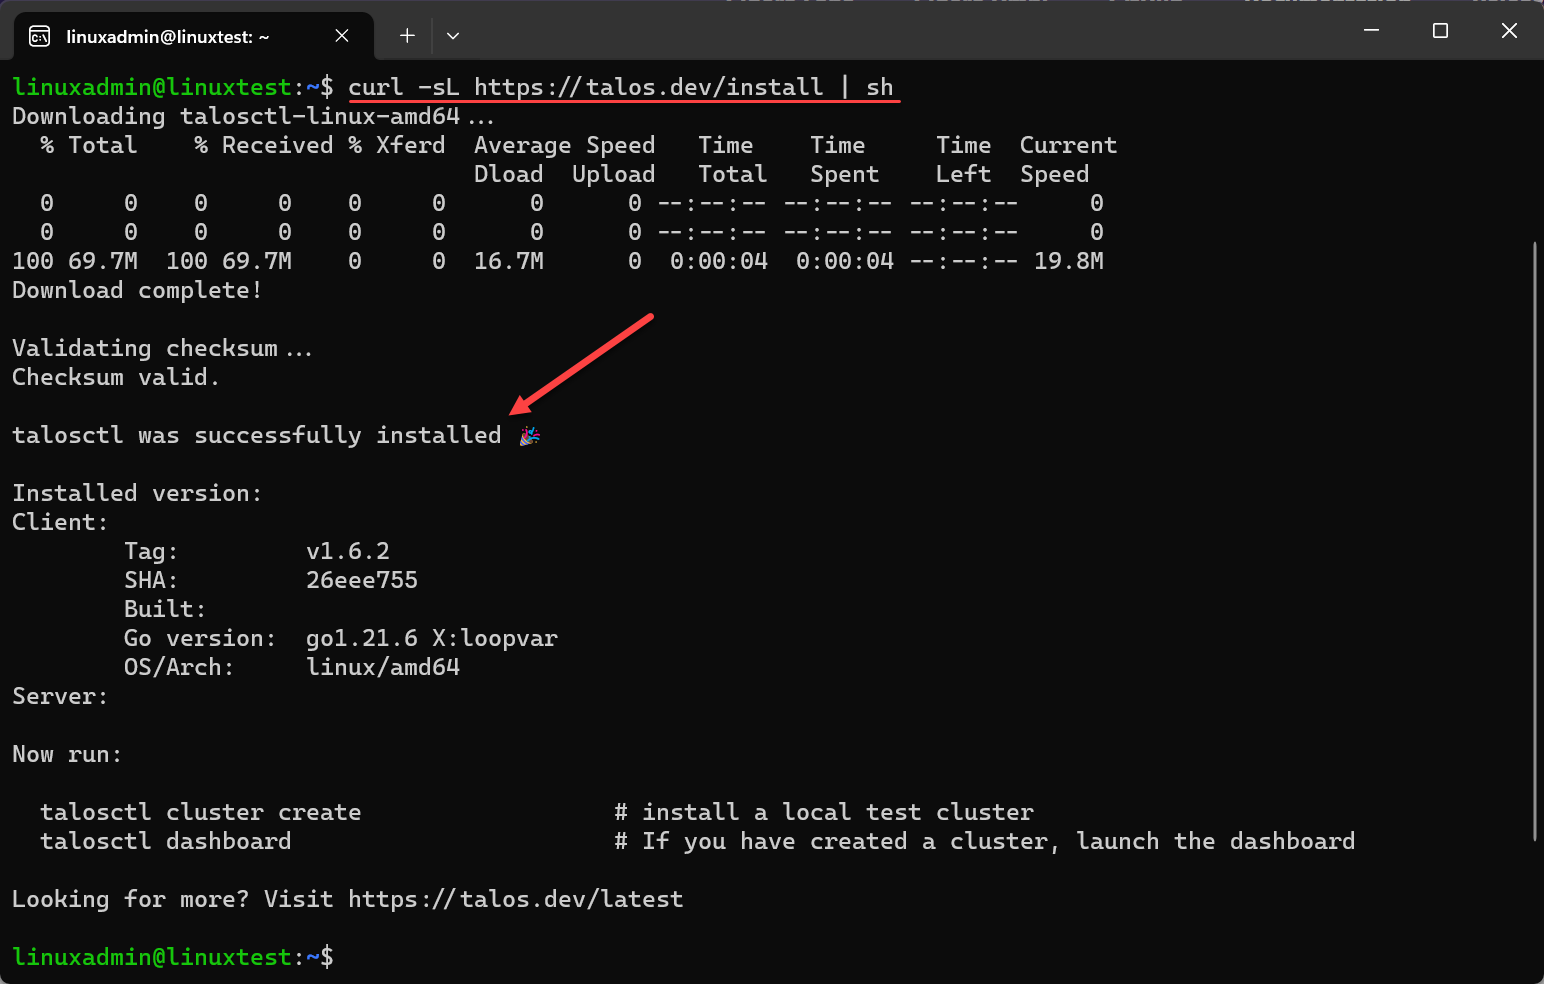
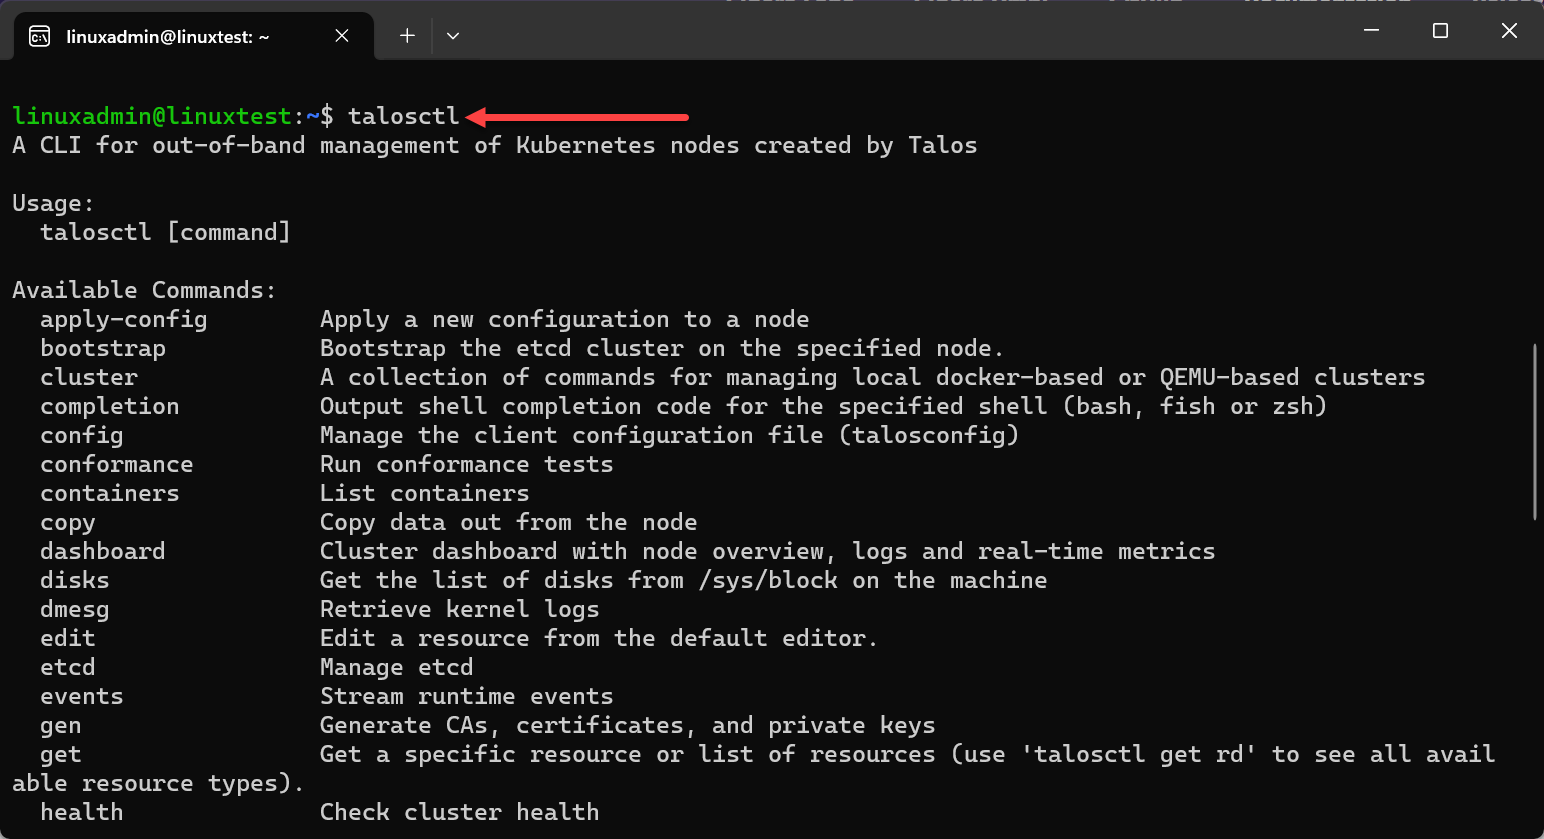
You can run the talosctl command to see the available parameters with the utility.
2. Choose a VIP (simple as earmarking an unused IP address from your network)
Talos makes use of a virtual IP address for the Talos cluster as part of the requirements. In this step, pick out an unused IP address that can be assigned to the VIP of the Talos cluster.
3. Download the cp.patch.yaml file and edit with your VIP
Next, let’s download a patch file needed for VMware Tools daemon set:
curl -fsSLO https://raw.githubusercontent.com/siderolabs/talos/master/website/content/v1.7/talos-guides/install/virtualized-platforms/vmware/cp.patch.yaml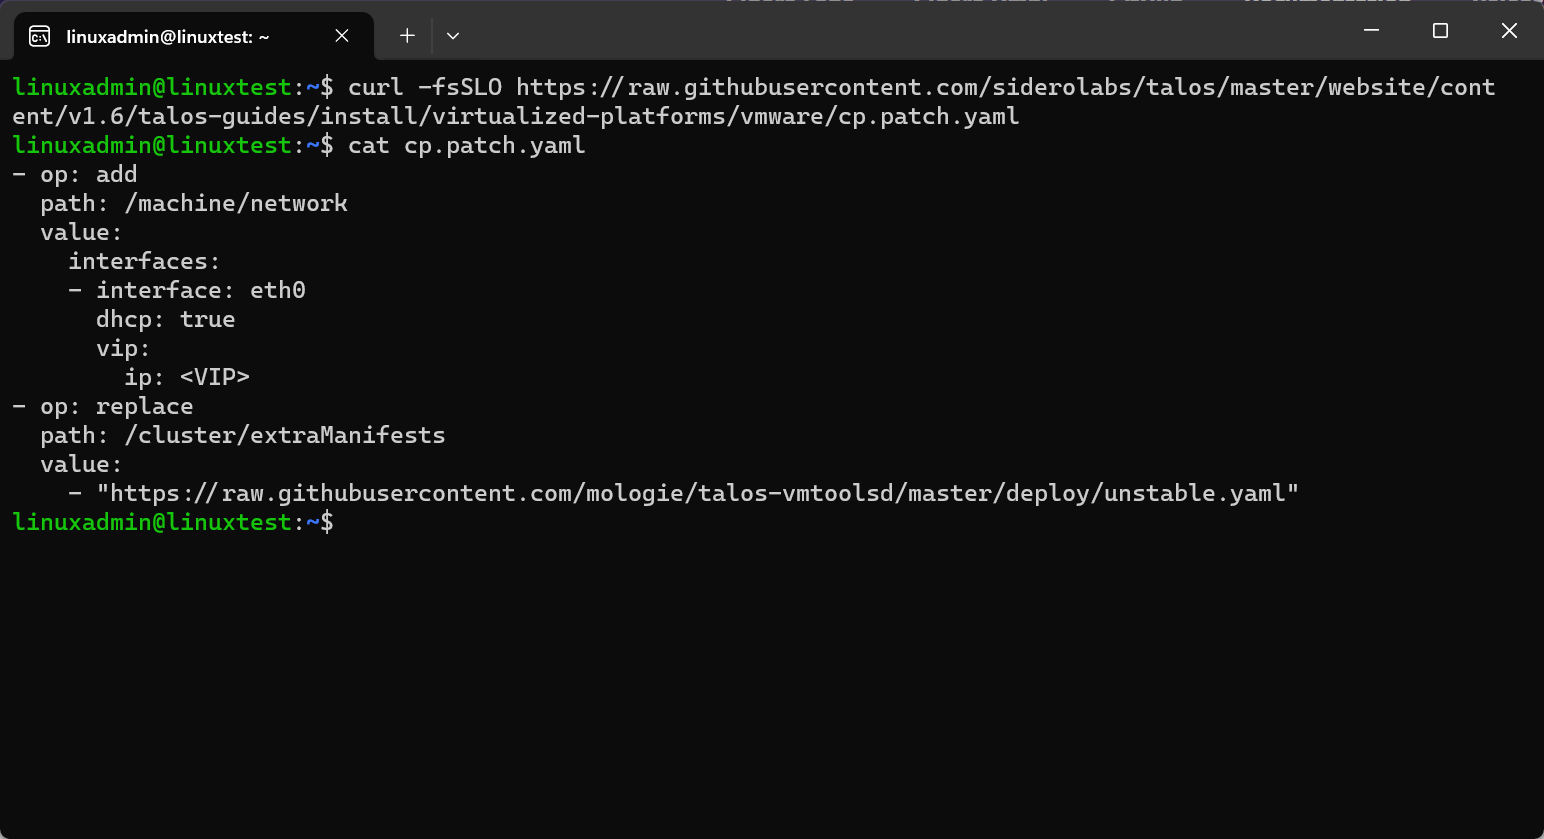
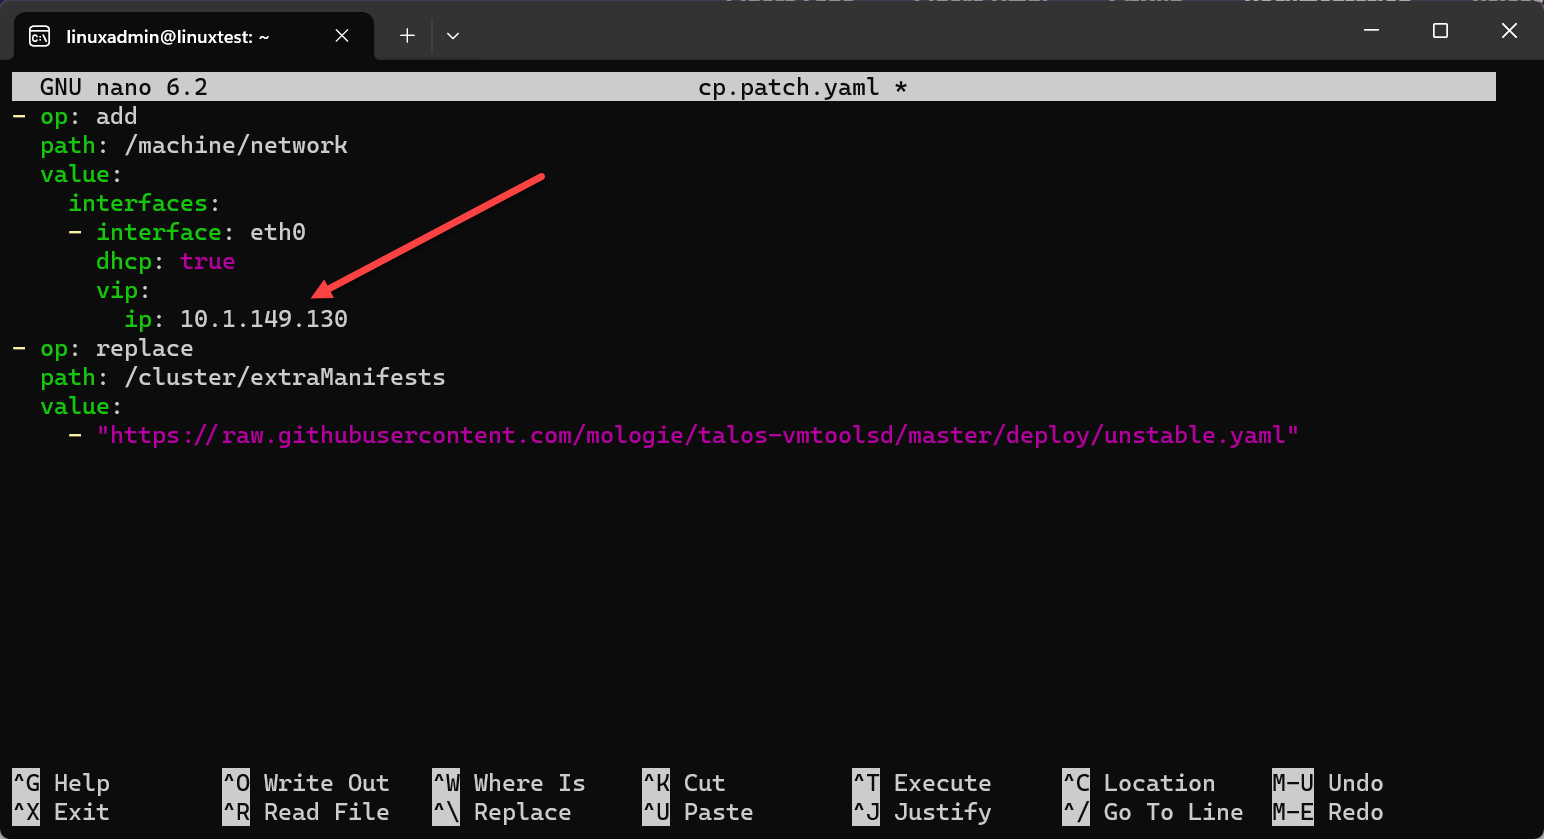
As you can see in the default file above, there is a placeholder for the VIP that we need to update. Edit the cp.patch.yaml file and update the VIP IP with the one chosen for the Talos cluster.
Below, I have chosen the IP address 10.1.149.130 for my test cluster in the home lab. Update this with an appropriate IP address for your network.
- op: add
  path: /machine/network
  value:
    interfaces:
    - interface: eth0
      dhcp: true
      vip:
        ip: 10.1.149.130
- op: replace
  path: /cluster/extraManifests
  value:
    - "https://raw.githubusercontent.com/mologie/talos-vmtoolsd/master/deploy/unstable.yaml"
Below, I have updated my cp.patch.yaml file with the VIP.
4. Generate the machine configs (for controlplane and worker nodes)
Now that we have the cp.patch.yaml file modified with the VIP for the Talos cluster, we can use the talosctl command to create the machine configuration files needed for creating the Talos cluster.
As you can see in the command below, we use the VIP IP and port 6443. Finally, we are passing in the config-patch-control-plane parameter and feeding in the cp.patch.yaml. To overwrite an existing config, use the –force parameter.
talosctl gen config vmware-test https://10.1.149.130:6443 --config-patch-control-plane @cp.patch.yaml
As you can see above, it creates the controlplane.yaml, worker.yaml, and talosconfig files.
5. Download the vmware.sh automated installation script and modify environment variables
While you can run the steps to create the Talos Linux installation for Kubernetes manually, there is an automated script provided that will help make the installation as easy as possible. To use the automated installation, you need to download a vmware.sh script provided by Talos.
curl -fsSLO "https://raw.githubusercontent.com/siderolabs/talos/master/website/content/v1.7/talos-guides/install/virtualized-platforms/vmware/vmware.sh"
Edit the vmware.sh script and uncomment and add, if needed, the following. Note, these are initially commented out in the script and you can manually create the exports from the command line instead of using the script, but I found using the script is the most consistent and easiest way to make sure you have all the required configuration needed.
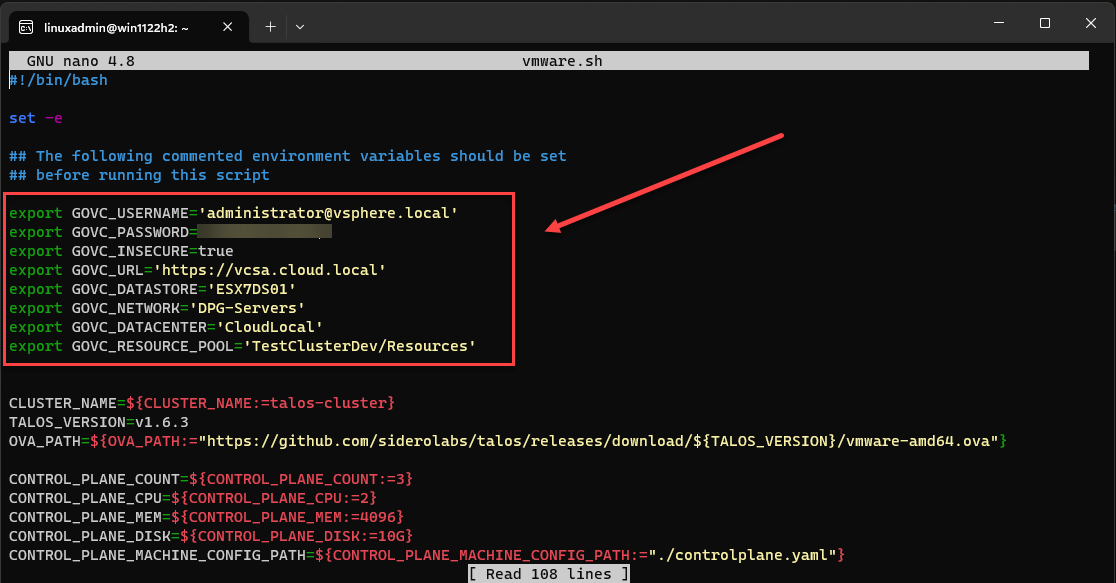
As a note on the above, my deployment is not correctly choosing the vSphere Distributed Switch port group I have configured above, DPG-Servers. When the VMs deploy, they are getting connected to the VM network instead. I had to manually flip them over to the correct port group. I will need to dig into this a bit further and see if there is something else needed for vDS.
6. Upload the OVA for Talos
With the vmware.sh script, there is a built-in parameter that will automatically upload the version of the OVA to your VMware vSphere Content Library.
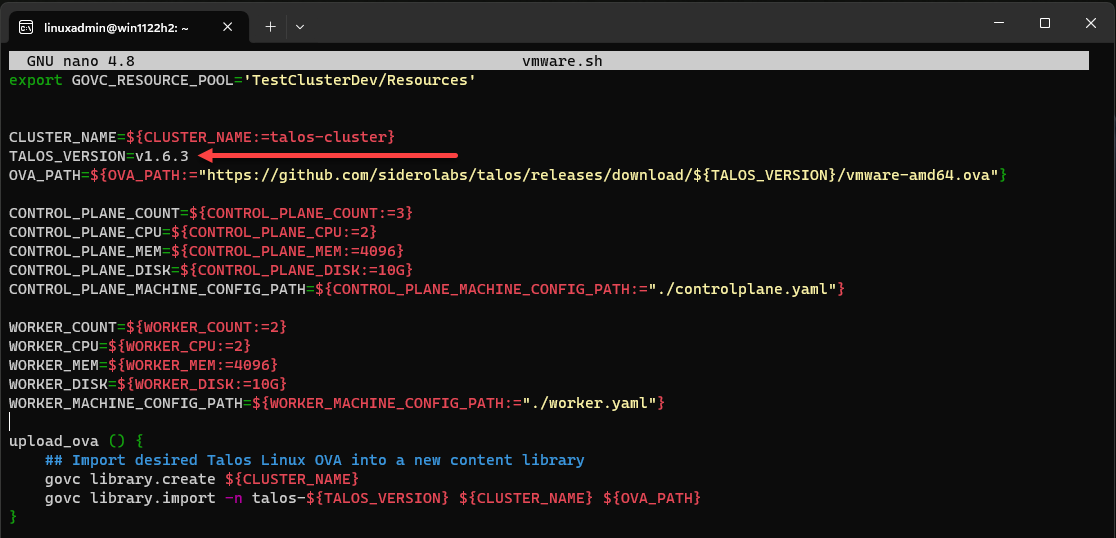
Also, I got this tip from Michael Cade’s walkthrough. Make sure to update the version of talos in the vmware.sh script, as it will include an old version of Talos Linux if you just download the script without any modifications. It would be great if Talos would create the script with logic to pull the latest version automatically here, or allow manual updates.
Below, I have updated to the latest at the time of this writing, v.1.6.3. This is likely an update you will want to make.
To upload the version of the OVA referenced in your vmware.sh script, use the command:
vmware.sh upload_ovaIt will upload the required version of Talos to your vSphere content library. It then will use this OVA to deploy the required control plane and worker nodes.
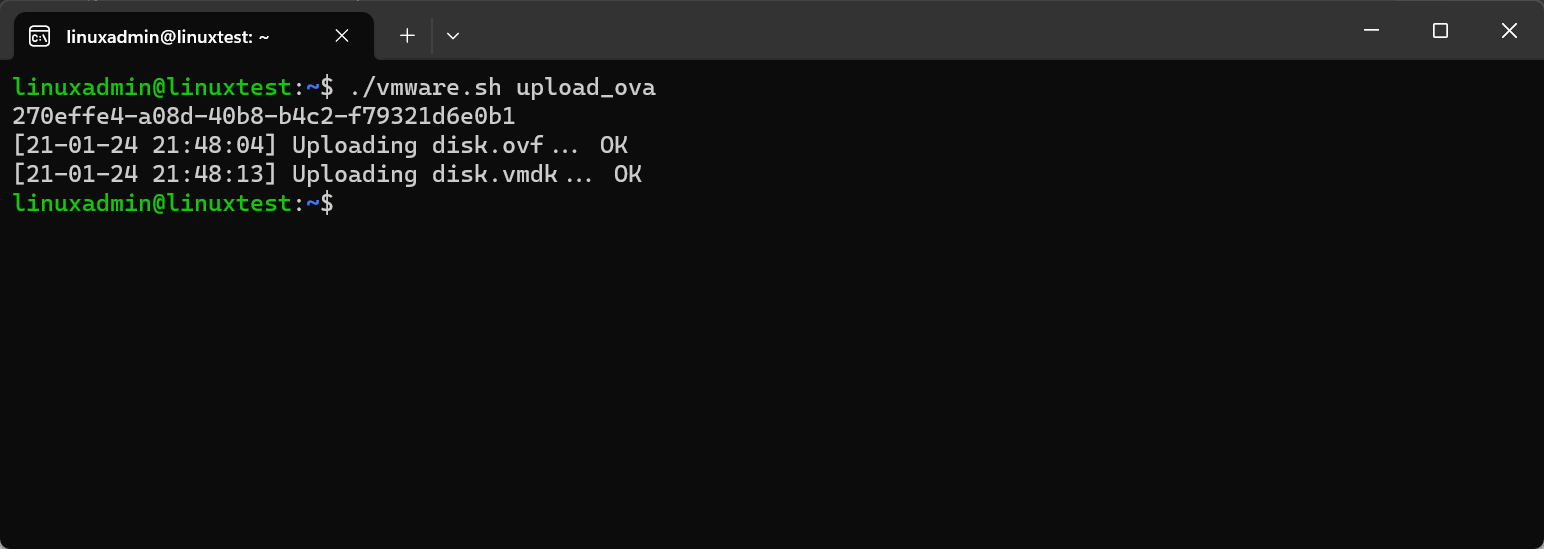
7. Create the Talos cluster
Now, once we have uploaded the OVA using the script command above, we can create the Talos cluster, using the command:
vmware.sh create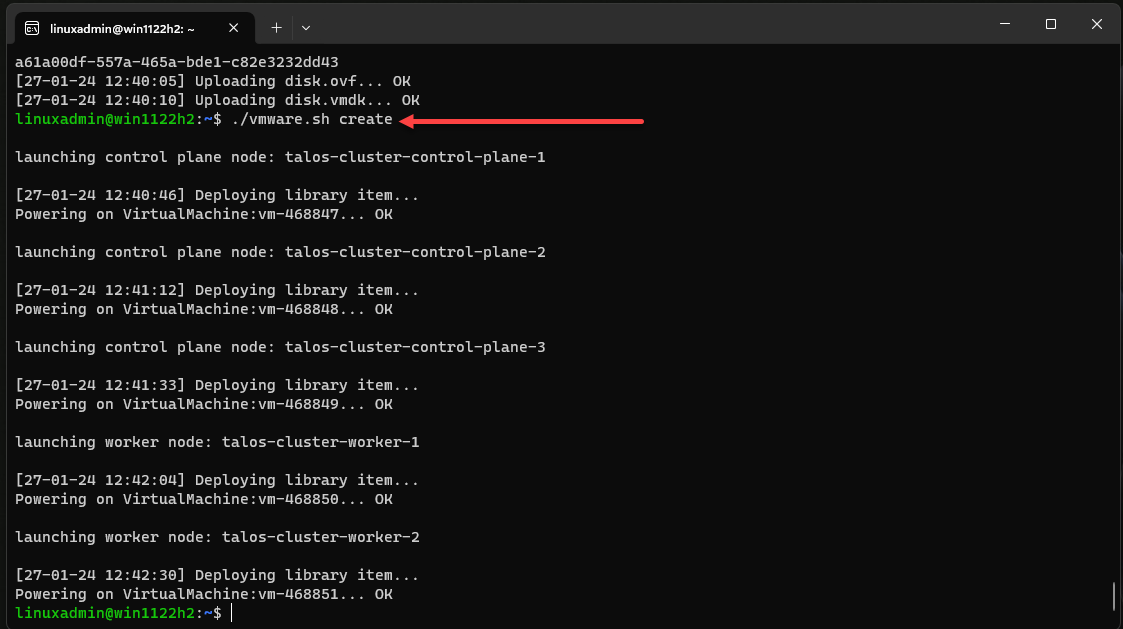
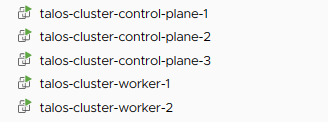
This will spin up your control plane and worker VMs. By default, if you don’t modify the script, it will spin up (3) control plan VMs, and (2) worker node VMs.
8. Bootstrap the Talos cluster with talosctl bootstrap
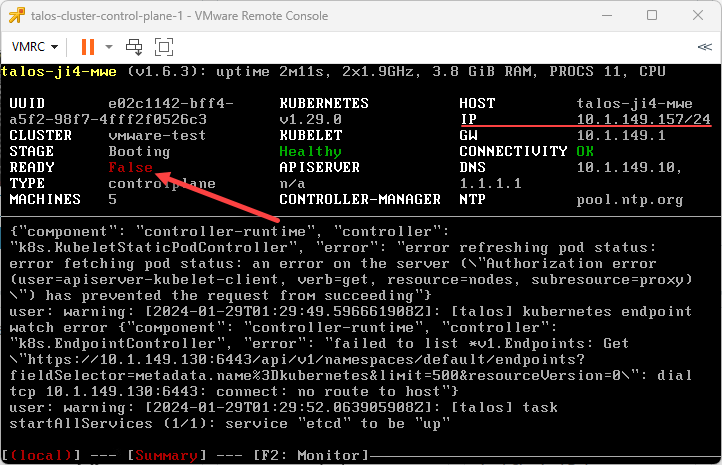
Next, we will bootstrap the Talos cluster. If you connect to any of the control plane VMs, you will see something similar to the following. The READY state will show as False, and you should see your control plane VMs have picked up IP addresses from DHCP server.
We will need this address for the bootstrap command. Make sure your DHCP server configuration IP address pools are configured for DNS and other settings.
Using the Talos bootstrap command, we will pass in this IP address to bootstrap the cluster, replacing with your particular IP address for one of your control plane VMs.
talosctl --talosconfig talosconfig bootstrap -e 10.1.149.157 -n 10.1.149.157Running the bootstrap command below. When successful, the command has no return output and runs quickly.
Error with the bootstrap command
I encountered an error the first time around with the bootstrap command “failed to verify certificate: x509: certificate has expired or is not yet valid: current time 2024-01-27T12:45:36-06:00 is before 2024-01-29T01:27:53Z“.
I quickly googled the error and found a few hits but none applied in my situation. After looking closer at the error, I was using WSL on a Windows box that I regularly “sleep.” After issuing a date command, the WSL instance was a day behind the current date.
A quick kill of the WSL instance and relaunch resolved this issue for me. So, make sure the basic things are covered here like date/time, etc, to avoid SSL errors.
9. Download the kubeconfig files
To interact with the Talos Linux Kubernetes cluster, we need to download the kubeconfig file. To do that, you can use the following commands below to pull the kubeconfig from one of the control plane node:
talosctl --talosconfig talosconfig config endpoint <control plane IP>
talosctl --talosconfig talosconfig config node <control plane IP>
talosctl --talosconfig talosconfig kubeconfig .
Running the talosctl commands to grab the kubeconfig files below.
10. Connect to your Talos Linux Kubernetes cluster
Now that we have the kubeconfig files, we can connect to the Talos Linux Kubernetes cluster using the command:
kubectl --kubeconfig=kubeconfig get nodesBelow, we can see the control plane nodes and workers. If you don’t want to specify the –kubeconfig each time, you can run the command:
export KUBECONFIG=kubeconfig11. Configure VMware Tools
As we mentioned early on, part of what the cp.patch.yaml file does is bring in the VMware Tools configuration for the cluster. Before configuring VMware Tools after the steps above, you can issue the command:
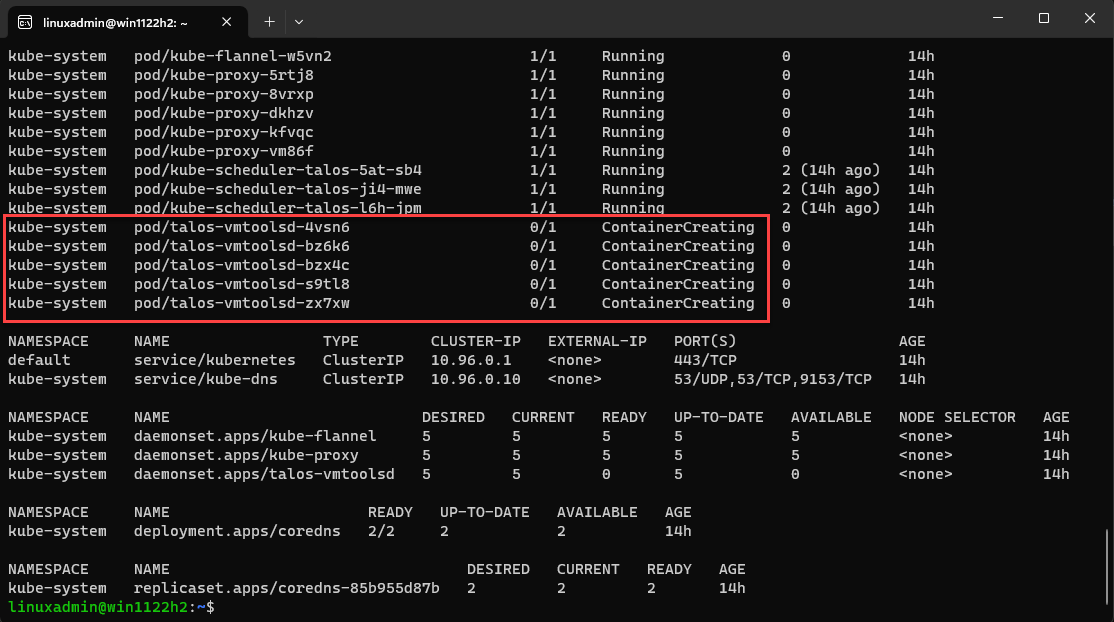
kubectl --kubeconfig=kubeconfig get all -AThis will show the talos-vmtoolsd pods. As you can see, they are in the ContainerCreating state.
They are not running as of yet. We need to run a couple of commands to create a secrets file and then apply that to the VMware tools configuration.
talosctl --talosconfig talosconfig -n <control plane IP> config new vmtoolsd-secret.yaml --roles os:adminIt will create the secret file needed to spin up the pods.
Next, we create the secret for the talos-vmtoolsd-config.
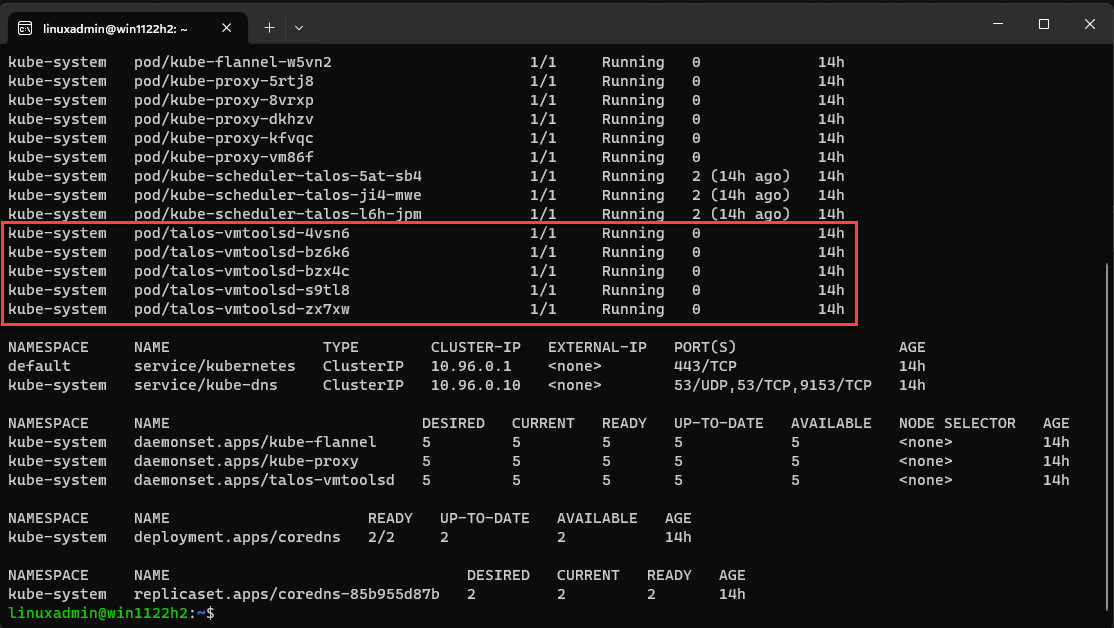
kubectl --kubeconfig=kubeconfig -n kube-system create secret generic talos-vmtoolsd-config --from-file=talosconfig=vmtoolsd-secret.yamlNow, if we view all pods again, we see the talos-vmtoolsd pods are running.
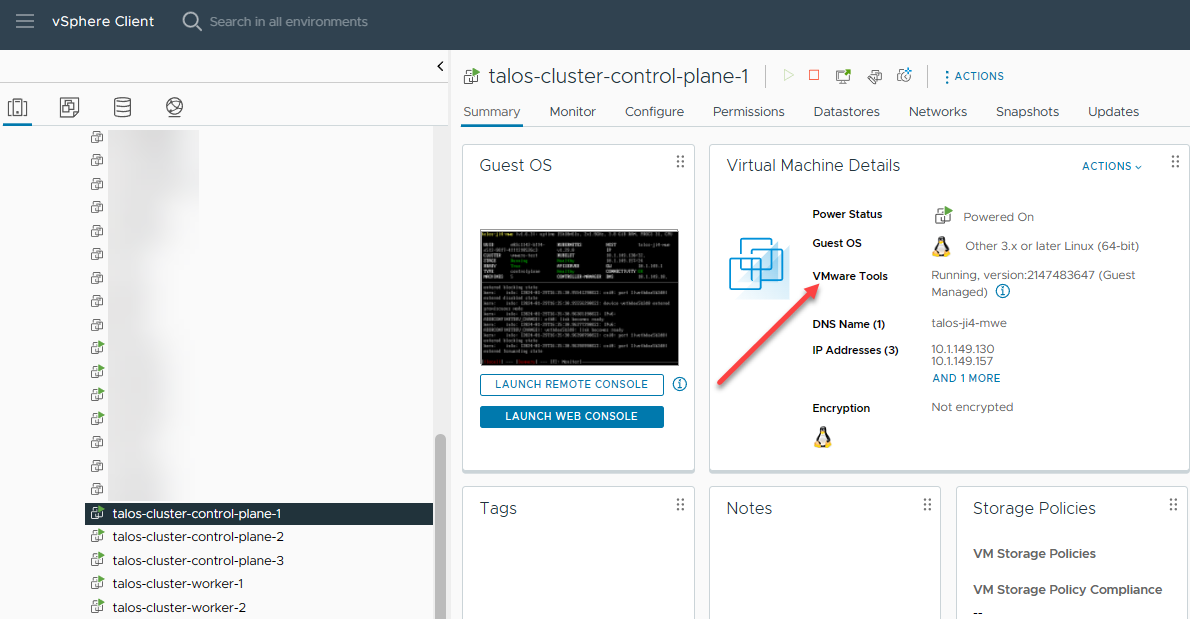
We also see the VMware Tools information now in the vSphere Client.
Storage and other considerations
Keep in mind the Talos Linux Kubernetes installation doesn’t account for things like storage and other requirements. You will still need to consider persistent Kubernetes pod storage, including storage hardware, if needed.
Also, you will need to consider best practices with backup, patches, migration of containerized resources, performance monitoring, and tools for troubleshooting, like any other Kubernetes cluster. However, I think Talos provides an excellent way to get a secure Kubernetes cluster up and running quickly and is one of the easiest/smallest, I have seen.
Wrapping up Talos Linux VMware vSphere installation
Talos Linux is a great way to get up and running with Kubernetes on any platform. With VMware vSphere the script and the available OVA file make it easy to provision the control plane and worker nodes. The immutability of Talos combined with virtualization capabilities of VMware vSphere, makes it secure, stable, and efficient for running Kubernetes clusters. Give this a try in your home lab environment, and let me know what you think in the comments. Check out the VHT forums as well if you run into any issues and would like more detailed help.
Google is updating how articles are shown. Don’t miss our leading home lab and tech content, written by humans, by setting Virtualization Howto as a preferred source.







Hi,
Can you create a video on this topic where you walk thru complete deployment of Talos controlplane+workers?
Also may be deploy a simple app like immich/pihole etc
Hareesh,
This sounds like a great idea and has honestly been a topic idea on my mind for an upcoming video. So, stay tuned. Thanks again.
Brandon