One of the best ways to handle updating your Linux boxes is using automation. Using some type of automation for updates is a great way to make sure these get applied in a consistent way and regularly. If you are running multiple Ubuntu servers, automating updates with Ansible is a great way to install the latest version of updates on your remote server environments and update packages installed. Let’s look at how to update Ubuntu with Ansible to apply the latest features and security updates.
Table of contents
What is Ansible?
Ansible is a free and open-source configuration management tool that is extremely popular in the DevOps world. It is one of the easiest to use and doesn’t require agents to perform configuration tasks on targets.
It can install software, interact with your package manager, update apps, change files, alter operating systems service configurations, and much more. Developers and DevOps professionals often use Ansible in combination with other tools like Terraform to build out development environments.
Installing the Ansible control node
To run Ansible, you need to have a Linux environment of some sort set up as your Ansible manager node. If you don’t have a dedicated Linux environment in the way of a virtual machine or physical Linux box, you can easily use something like Windows Subsystem for Linux (WSL) in a Windows environment. You can also spin up something simple like an LXC container in Proxmox.
This Ansible machine, environment, container, etc, is known as the Ansible control node. Let’s look at how to install Ansible on the control node.
To start, you need to install Ansible on your control node, the central machine from which you’ll manage your Ubuntu servers. Use the following command from a terminal on a Debian-based system like Ubuntu:sudo apt install ansible
This command installs Ansible, ensuring you have the ansible core and all necessary ansible modules at your disposal.
As a note, you may need to meet some prerequisites for installing Ansible, like the following deb package:apt install software properties-common
Configuring the Inventory File
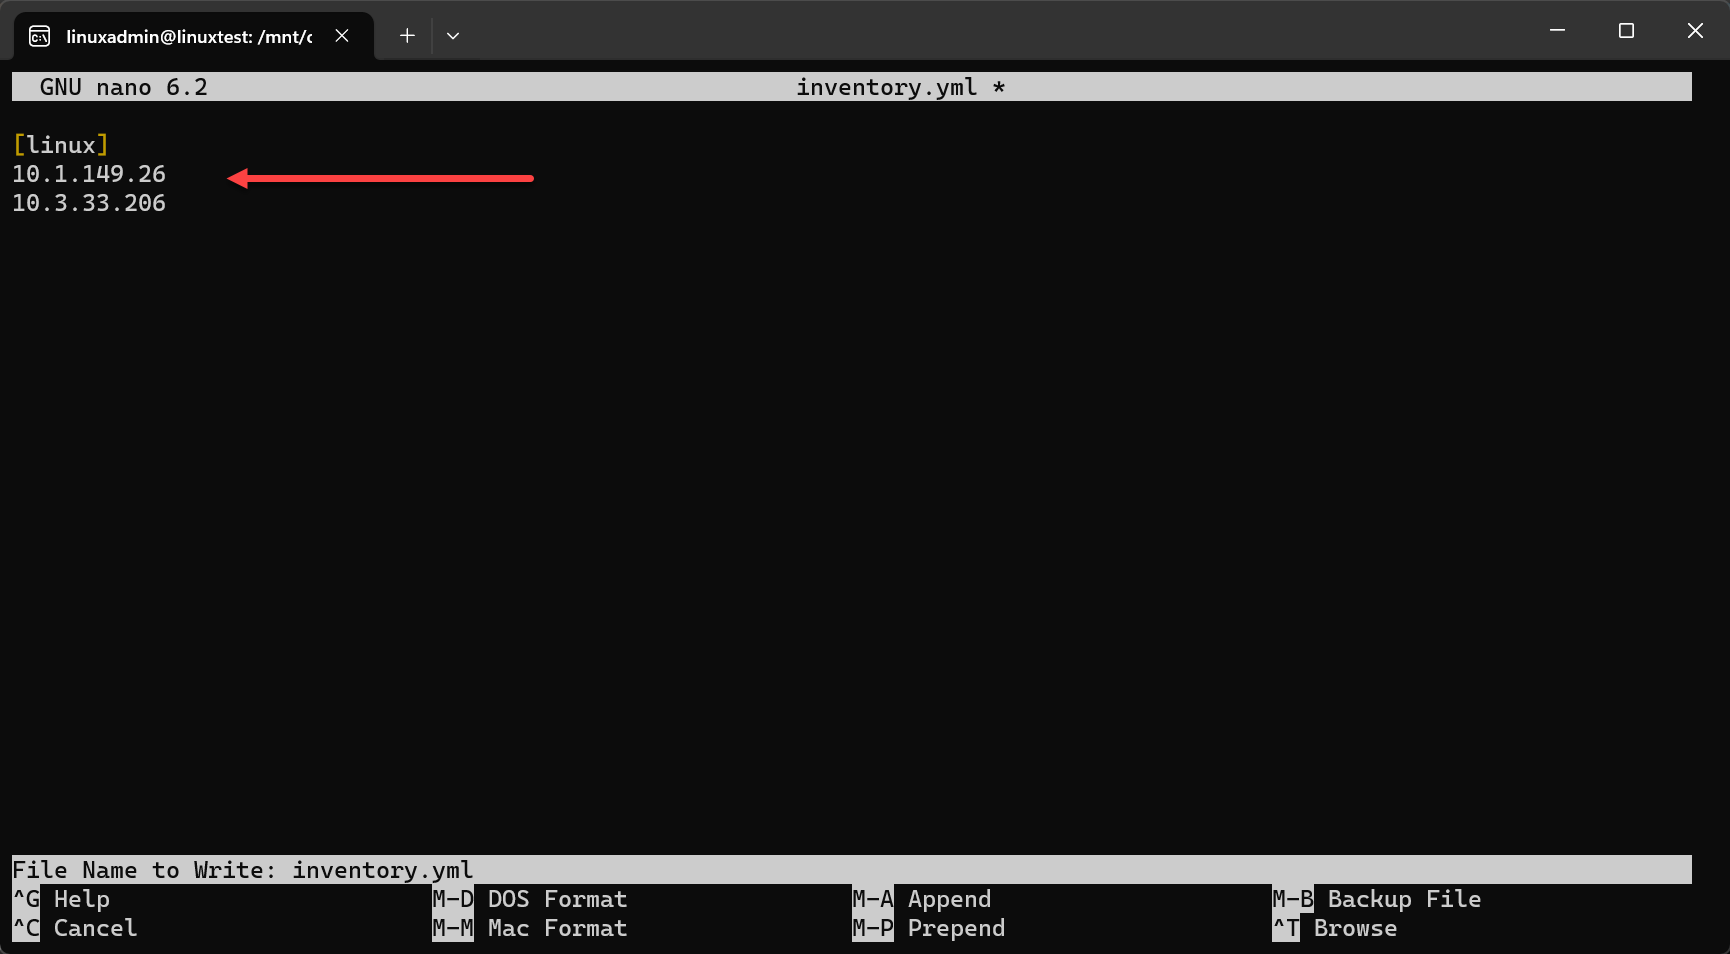
After installation, you’ll need to define your remote servers in Ansible inventory file. Here, you list the IP addresses or hostnames of the Ubuntu servers you plan to manage, defining your remote systems. The Ansible inventory file is an INI formatted file that contains the group of resources you want to connect to and the hostnames or IP addresses.
Handling authentication to Ubuntu remote servers
One of the configuration challenges that we need to solve is the matter of authentication. By default, if you simply try to run an Ansible playbook against your Ubuntu servers, you will run into authentication errors. You may see something like missing sudo password, or authentication failed.
Instead of attempting to use an SSH password, it is actually easier to use SSH publickey authentication for your remote Ubuntu servers.
Configure public key authentication on your Ubuntu servers
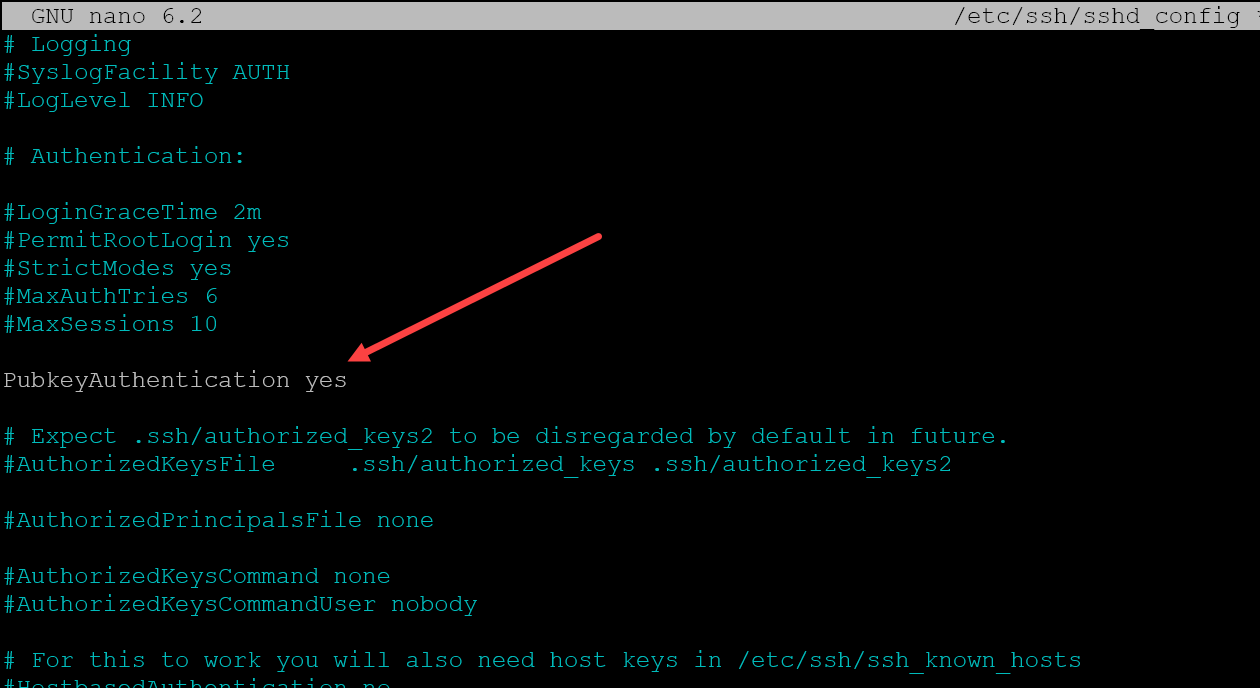
To enable SSH publickey authentication for your Ubuntu instances, you will need to edit the file located here:/etc/ssh/sshd_config
Make sure the line below is uncommented and set to yes.PubkeyAuthentication yes
Generating an SSH keypair and copying the keypair to your Ubuntu server
Now, make sure you have the same user setup on your Ansible control node as you have on your target Ubuntu servers. For me, I am using the user linuxadmin.
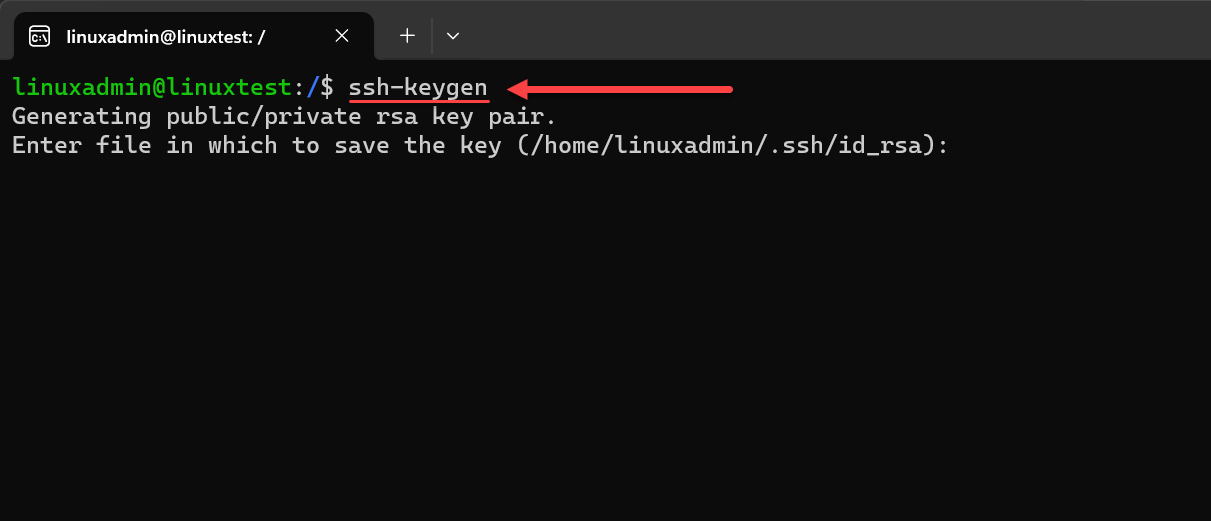
Once you have created this user (can be the user you choose, doesn’t have to be linuxadmin), you need to generate your SSH key pair. To do this, run the command:ssh-keygen
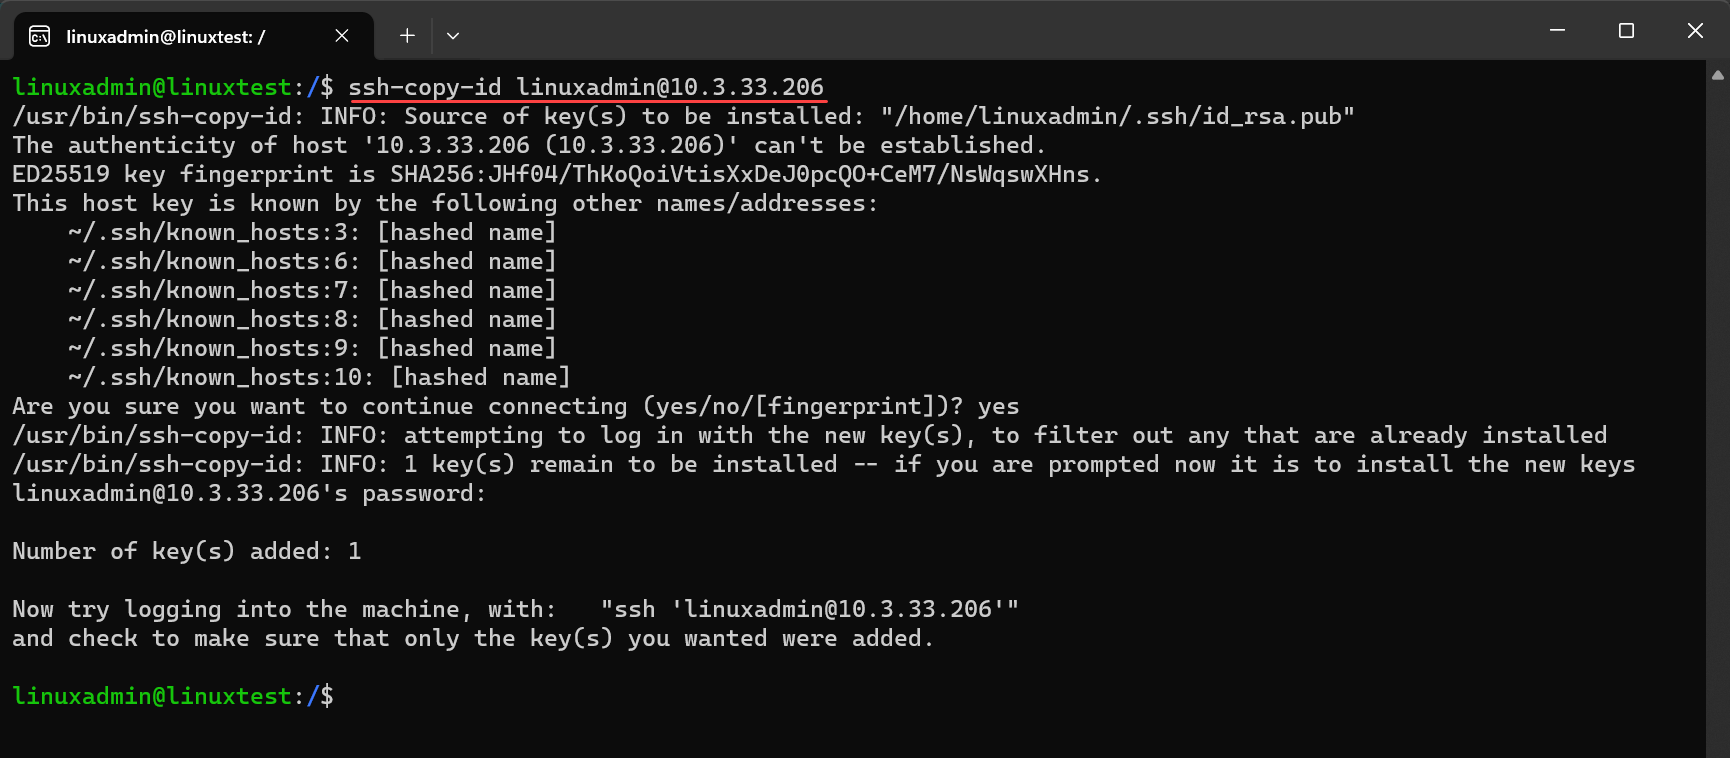
On our Ansible control node, we will use the ssh-copy-id command to copy the public key part of our keypair to the target Ubuntu server.ssh-copy-id
Test your connection
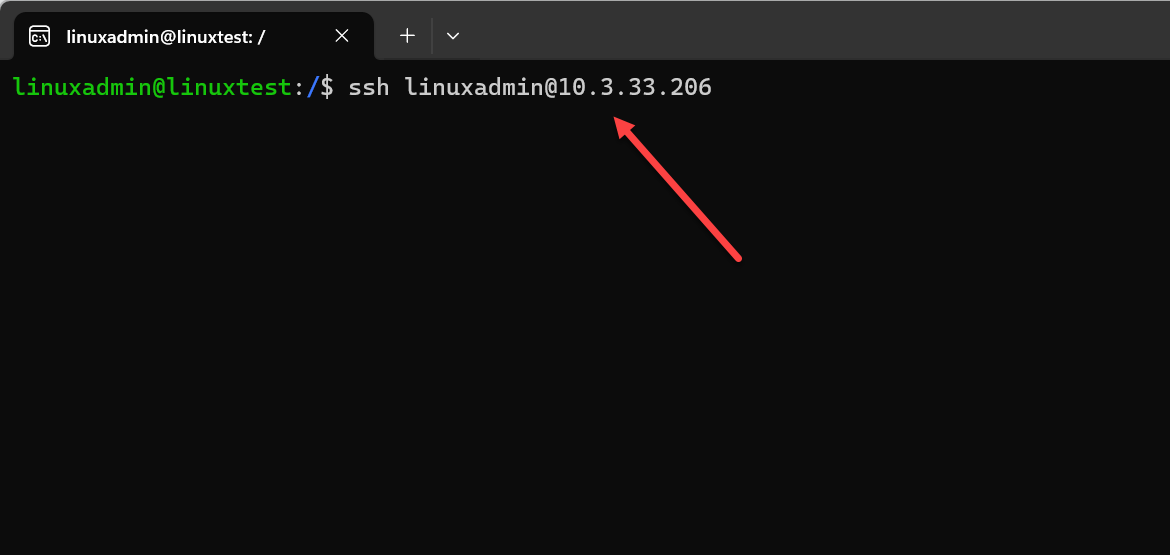
At this point, you should be able to SSH to your target Ubuntu server, without being prompted for a password. You can use the following syntax to connect to your target server from your Ansible control node:ssh <username>@<IP or hostname>
Ansible Playbook to update Ubuntu
An Ansible playbook is a YAML file where you define automation tasks. To update Ubuntu, your playbook will utilize the apt module that manages apt packages on Debian-based systems.
---

- hosts: all
  vars:
    ansible_host_key_checking: false
  become: true

  tasks:
    - name: Update and upgrade apt packages
      apt:
        update_cache: yes
        upgrade: yes
This playbook updates the apt cache and upgrades all the packages to their latest versions, using commands like sudo apt get update and sudo apt get upgrade. It also updates the package cache with the update_cache: yes stanza and performs an apt get dist upgrade in the final code block.
As a note, always check the sources information details in the following path locations on your remote host to make sure of the integrity of your package installation:
/etc/apt/sources.list
/etc/apt/sources.list.d/
Install only selective Ubuntu updates
Ansible tags offer more control, allowing you to execute specific tasks within your playbook for selective updates. You could use something like the following
---
- hosts: all
  become: true
  tasks:
    - name: Update the repository cache
      apt:
        update_cache: yes
        cache_valid_time: 3600

    - name: Install only security updates
      apt:
        upgrade: 'dist'
        update_cache: yes
        force_apt_get: yes
        default_release: "{{ ansible_distribution_release }}-security"
Running the Playbook on Remote Servers
Now that we have the Ansible control node configured,
To execute the playbook and update your remote servers, use:
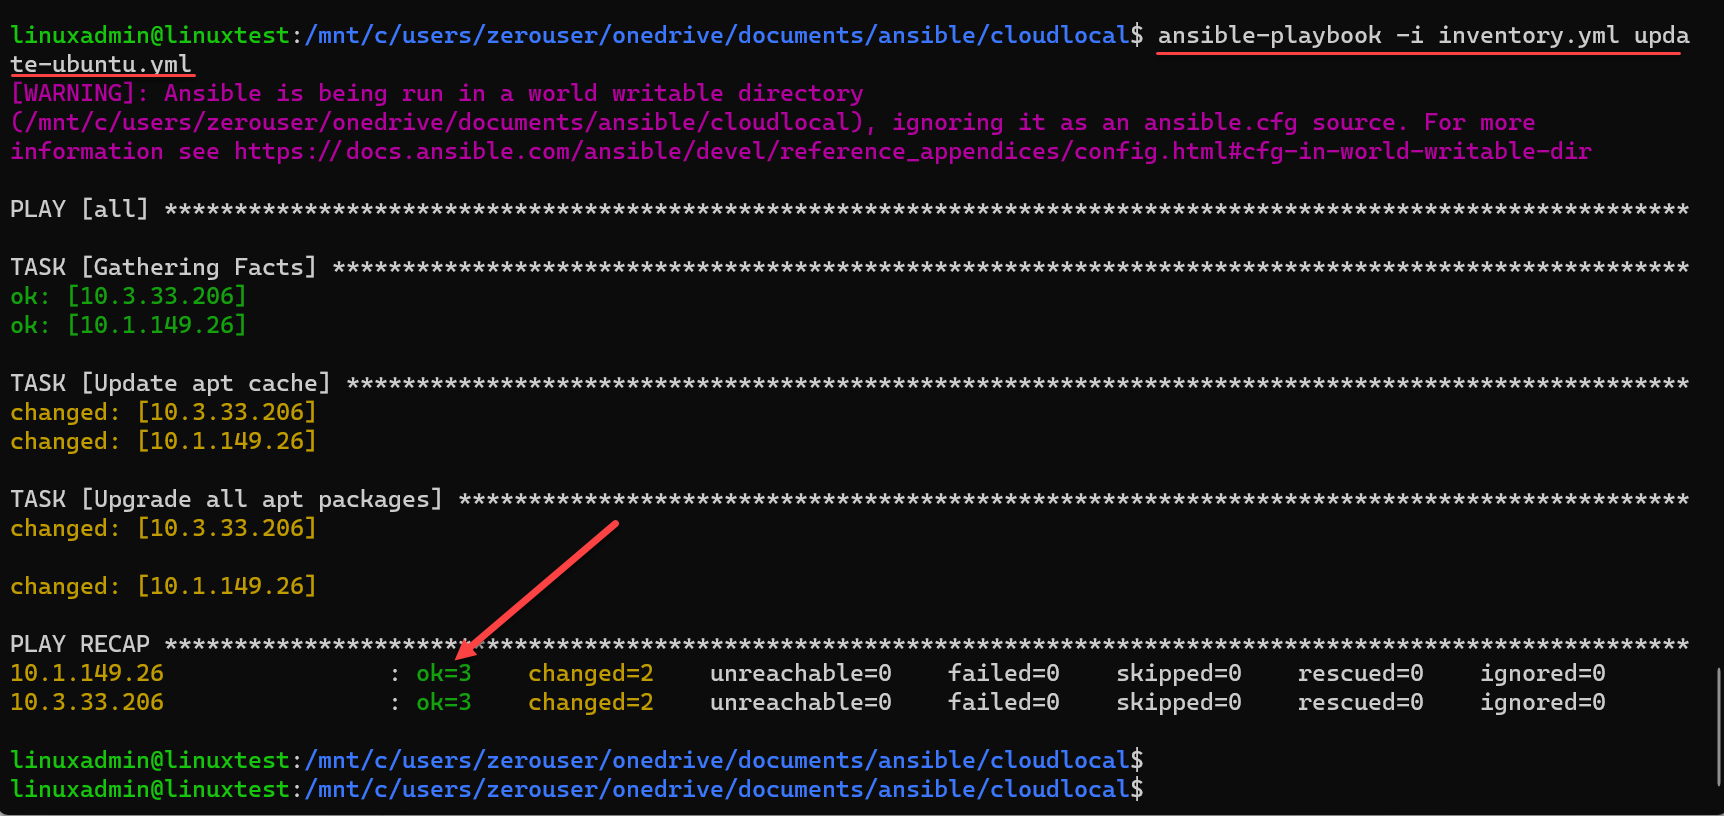
ansible-playbook -i inventory.yml update-ubuntu.ymlThis command will run the tasks on all servers listed in your inventory file. As you can see below, the command is issued and Ansible goes through the process of gathering facts, updating the apt cache, and upgrading all apt package.
We see the playbook recap showing the status of OK on both hosts and the changed status showing the hosts were indeed changed based on the playbook. Note any errors or warnings in the playbook results.
Handling Common Challenges
You may run into a few challenges with connecting to your Ubuntu servers in question. These usually come down to authentication issues. If you don’t use public key authentication, you may see the missing sudo password message.
Dealing with Missing sudo Passwords
If you find your remote servers require a sudo password, you can use the -K flag with your playbook command with your sudo user. It will prompt you for the sudo password during the execution of the playbook.
Errors connecting
Make sure you have general connectivity from your Ansible control node to your target Ubuntu servers, including SSH connectivity, port 22. You may need to add firewall exclusions on the Ubuntu server side or any firewall appliances in between the Ansible control node and the target Ubuntu servers.
For UFW on the Ubuntu side, you can run the following command:sudo ufw allow ssh
GUI version of Ansible with Scheduling
If you are looking for a GUI version of Ansible that makes it easy for scheduling and Git integration, Ansible Semaphore is one of the best solutions you will find. It is free and open-source and provides a slick GUI allowing you to easily schedule Ansible playbook runs, and integrate with your Git code repository.
You can even setup multiple users and privileges for role-based access control. Be sure to check out my walkthrough of using Ansible Semaphore here: Ansible Semaphore: Awesome Open Source Ansible GUI.
Wrapping up how to update Ubuntu with Ansible
Hopefully this overview and walkthrough of how to update Ubuntu with Ansible will help any who want to automate this process configure Ansible and use simple playbooks to automate updates. Using Ansible has many benefits, including reducing time and effort, handling the apt cache, and automatically rebooting servers if needed for any system administrator managing a Debian or Ubuntu system.
Google is updating how articles are shown. Don’t miss our leading home lab and tech content, written by humans, by setting Virtualization Howto as a preferred source.




Thanks for this tutorial! One thing I noticed is that the inventory file is using INI format but is described as being a YAML file, which is not true. This messed me up for a bit. You can use YAML for the inventory file, but the syntax is different.