Terraform Import Existing Resource: Ultimate Guide
One of the commands in the Terraform command set is the terraform import command. It allows the import of existing resources. There are some challenges with the legacy terraform import command. With with the release of Terraform 1.5, Hashicorp has introduced new import functionality. Let’s dive into Terraform import existing resources step-by-step and see how this is done in 1.5 and higher.
Table of contents
What is Terraform?
Terraform is a very popular player in Infrastructure as Code (IaC) solutions developed by HashiCorp. It offers a practical way for DevOps teams to define and manage resources across many cloud providers, including but not limited to AWS, Google Cloud, Azure and VMware vSphere.
Below, we are adding AWS resources using Terraform.
Using the terraform plan and terraform apply commands, Terraform allows teams to plan and apply infrastructure changes. The terraform plan command enables teams to check their configurations and see exactly what actions Terraform will perform when the configurations are applied. It’s an essential step that prevents potential mishaps.
The terraform apply command allows you to align your environment along with the desired state of the resources defined in the configuration files. You use a provider plugins to “talk” with each cloud provider. The action results are then stored in your Terraform state file, which is used for maintaining and modifying the created resources.
What is Terraform import command?
The terraform import module enables teams to bring existing resource objects under Terraform management, marking a significant advantage for mergers and acquisitions or standardization efforts.
However, it had limitations for import operations in legacy versions. This is where Terraform 1.5 has improved things. With a slew of new features like config-driven import, Terraform made the process to import and manage existing infrastructure much easier and less problems with it.
Breaking Down Terraform Import Syntax
The basic syntax of the Terraform import command is quite straightforward:
terraform import [options] ADDRESS IDHere, ‘ADDRESS’ specifies the Terraform state address of the resource to import, and ‘ID’ identifies the specific resource in the existing infrastructure. The optional ‘options’ argument allows for additional flags to fine-tune the import process.
The first way that the import command worked had limitations, mainly that resources had to be imported one by one, the state was immediately modified without a preview, and the configurations were manually written. This has now changed.
The Challenges with Terraform Import Prior to Version 1.5
The previous import command in Terraform had limitations, making importing existing infrastructure cumbersome. There are three limitations to note:
One-by-one Resource Importation
Risk of Accidental Resource Modifications or Deletions
Manual Writing of Matching Resource Code
1. One-by-one Resource Importation
The earlier versions of Terraform only allowed resources to be imported one at a time. This was manageable for small infrastructures or for occasional use. But, with massive environments, this just wasn’t practical and the process became tedious and time-consuming.
2. Risk of Accidental Resource Modifications or Deletions
Another major challenge was that the state was immediately modified after running the import command, with no opportunity to preview the results. This could lead to accidental resource modifications or deletions if an apply operation was executed on the shared state by another team member before the corresponding configuration was added.
Below, working with Terraform version less than 1.5, you will need to understand the limitations and even concerns of using the terraform import command.
Manual Writing of Matching Resource Code
The import command was dependent on the corresponding resource code. It required the matching resource code to be manually written, often leading to a multi-step process of running plans, identifying the required attribute values, and achieving a clean run. This was an extra task, adding to the complexity of the import process and increasing the time taken to onboard resources onto Terraform.
Terraform 1.5 changes imports for the better
Terraform 1.5 was a game-changer for importing existing infrastructure, introducing a config-driven import feature. This feature simplifies bringing resources under Terraform management as Terraform resource objects.
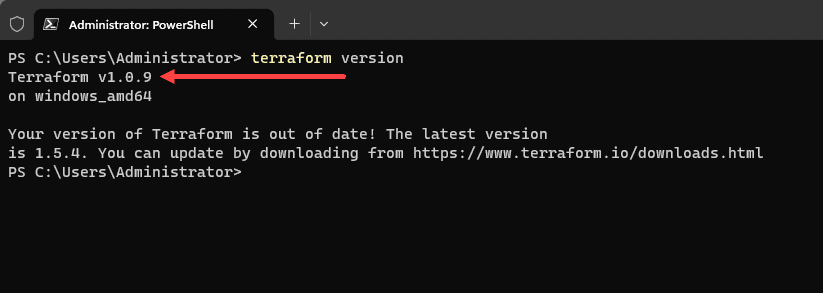
You can check the version of Terraform you are running using the terraform version command:
The config-driven import process introduces an import block in your Terraform code, replacing the previous import commands. The import block takes two parameters: the cloud resource ID and the resource address in the Terraform configuration.
For example, for an Amazon EC2 instance, the import block would look something like this:
import {
     id = "i-abcd1234"
     to = "aws_instance.example"
}
In this example, the id refers to your Terraform configuration’s EC2 instance ID and the destination resource block. By doing so, the EC2 instance is recognized as an AWS resource and can be managed by Terraform.
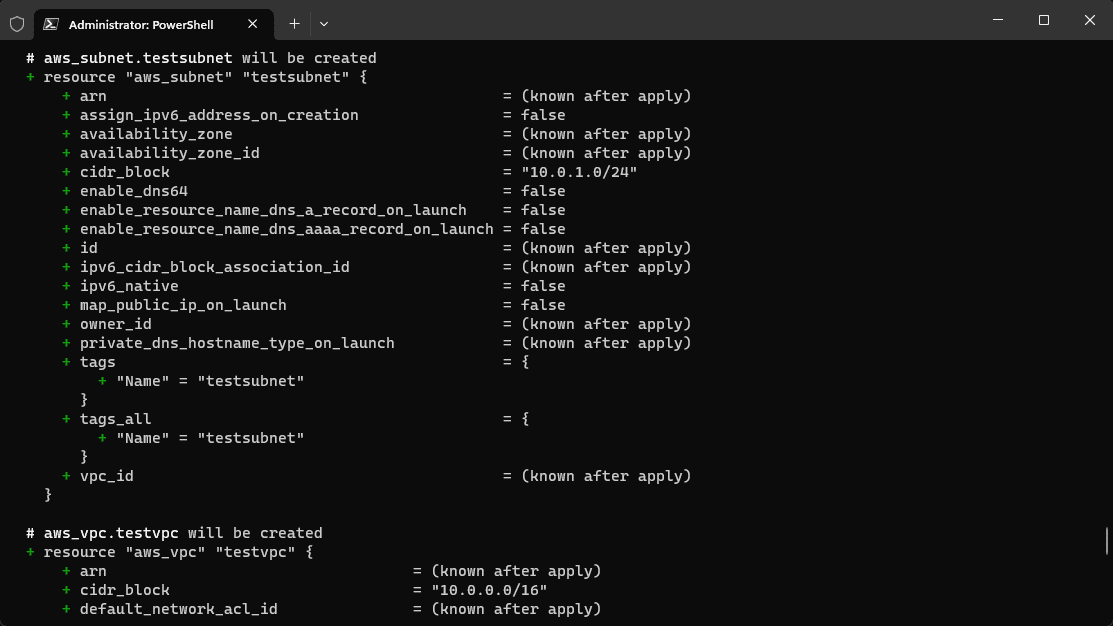
Running the terraform plan command with the -generate-config-out parameter creates a Terraform configuration file with all the attributes of the imported resources. This allows automatic code generation, significantly reducing the need to create the corresponding resource code manually.
Once the Terraform configuration file is generated and reviewed, running a normal apply operation successfully imports the resources into the Terraform state. This results in a successful import that is more manageable and less prone to human errors.
Check Blocks for Enhanced Validation
Along with config-driven imports, Terraform 1.5 introduces check blocks. These blocks offer a more comprehensive validation of the provisioned infrastructure, allowing users to confirm that the final product aligns with their expectations. This top-level construct can reference all resources, data sources, and module outputs in the configuration, offering a more holistic perspective than its predecessors.
Here’s an example:
check "health_check" {
  data "http" "example" {
    url = "https://${aws_lb.example.dns_name}"
  }

  assert {
    condition     = data.http.example.status_code == 200
    error_message = "${data.http.example.url} returned an unhealthy status code"
  }
}
Terraform 1.5 import lab
Ok, so I have created just three resources using some Terraform code to build out a simple AWS environment, with a VPC, subnet, and an EC2 instance.
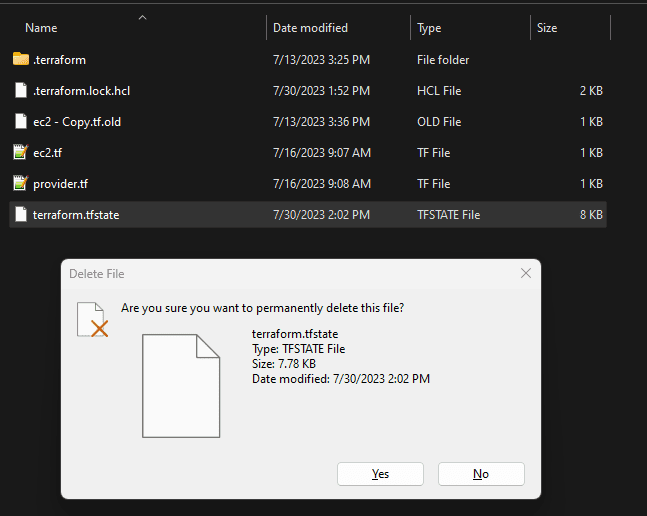
What I’m going to do is create the infrastructure with Terraform and then delete the state data. This will simulate a case where we have infrastructure unmanaged by Terraform. So, below we are deleting the state file.
First, we are going to create an import.tf file that contains the following similar code with the real identifiers in the real code:
import {

     id = "i-1234123412341234"
     to = aws_instance.testec2

}

import {

     id = "vpc-1234123412341234"
     to = aws_vpc.testvpc

}

import {

     id = "subnet-1234123412341234"
     to = aws_subnet.testsubnet

}
If you don’t have a configuration file that matches the import resources you are defining, you will see something like this:
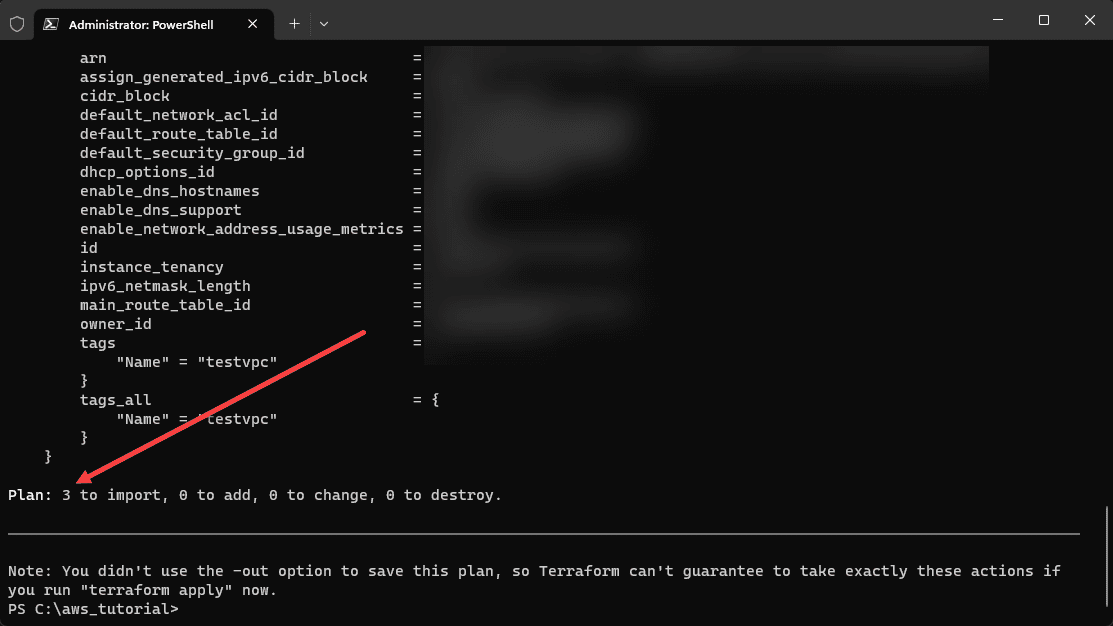
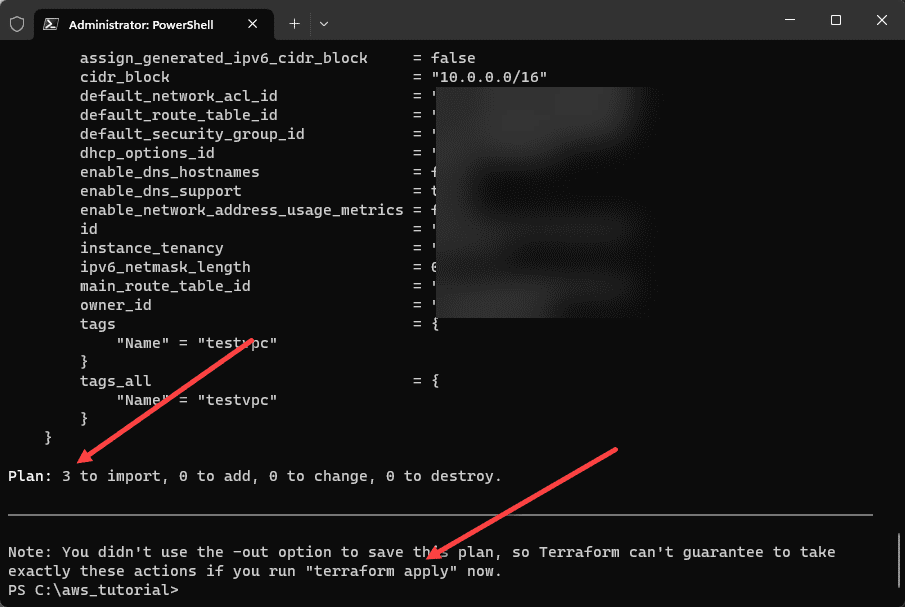
So I do have the configuration file in the example, so let’s just copy back over the .tf file containing the configuration. After copying over the configuration file, running the terraform plan correctly shows that we have 3 to import and 0 to add, 0 to change, and importantly, 0 to destroy.
However, now let’s test out the new config-driven import capabilities. Let’s say we don’t have a configuration file that already contains the configuration which is a likely scenario if you are bringing in existing infrastructure to manage.
Let’s use the command:
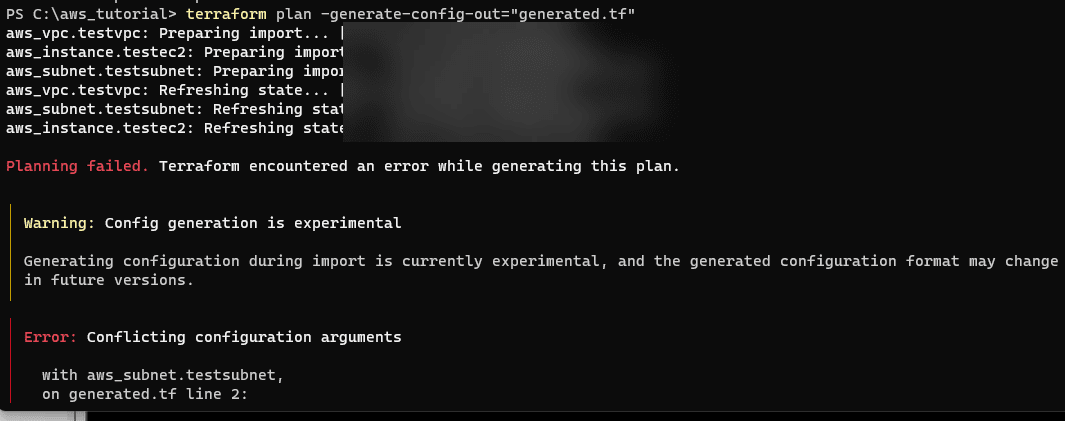
terraform plan -generate-config-out=generated.tfAfter running the command, as you can see below, we had several error messages. After all the function at this point is experimental as noted in the output.
However, after you use the -generate-config-out command, you can now run the terraform plan command to start testing your code after you get to the bottom of the errors in the output above. If you keep running the plan with the -generate parameter, it will keep trying to generate a new file. We want to work with the one we have at this point.
What I was able to do was either comment out missing resource requirements or just delete them out of the generated.tf file. What I would recommend is delete or comment them out one at a time and then run a terraform plan. After getting rid of the errors, the generated.tf code is now good.
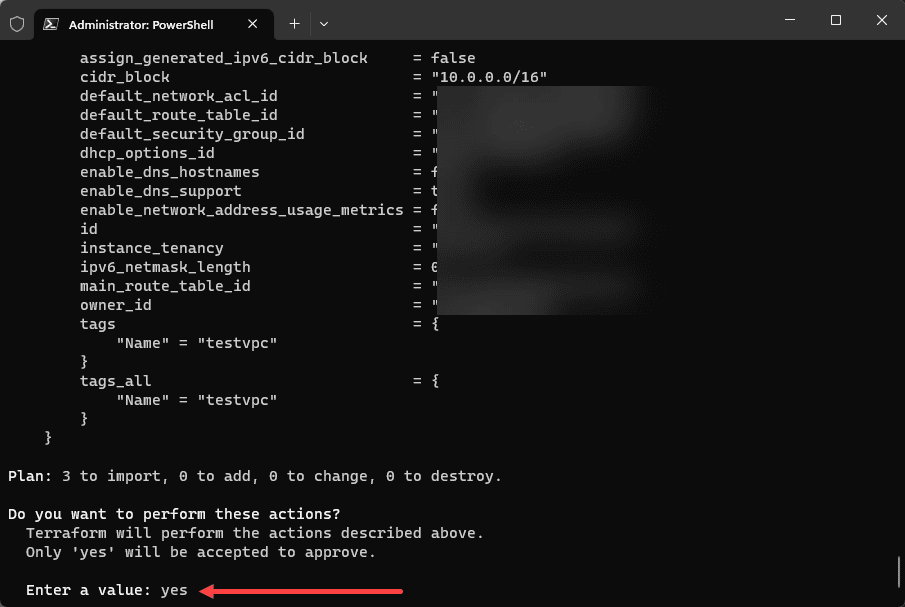
After you have no errors, then you can run a terraform apply. This will actually add the resources into the terraform state data. At this point the process is just like creating new infrastructure for the import process. Type Yes to verify the apply.
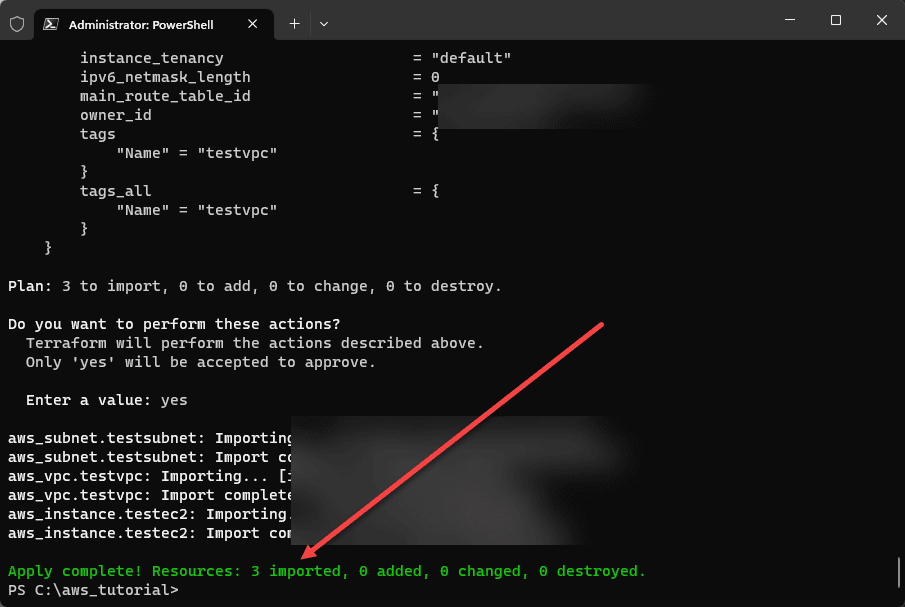
As you can see, we have imported 3 resources as expected, our VPC, subnet, and EC2 instance.
Wrapping up
The new import process with Terraform has really improved the process of bringing in existing infrastructure in your environment. With 1.5, it has config-driven import and checks, have made it even more powerful in managing cloud infrastructure. The next time you need to bring your existing resources under Terraform management, remember that with Terraform 1.5, the process has become a lot easier and safer.


