vSphere Update Manager: Switch to vSphere Lifecycle Manager

As we transition from vSphere Update Manager to this new model of the vSphere Lifecycle Manager, we need to be up on understanding the capabilities of each is vital. Let’s consider vSphere Update Manager vs vSphere Lifecycle Manager and better understand the new vLCM tool.
Table of contents
- What is VMware vSphere Update Manager (VUM)?
- What is vSphere Lifecycle Manager (vLCM)?
- vSphere Update Manager vs vSphere Lifecycle Manager
- Overview of Steps to Migrate to vSphere Lifecycle Manager
- Step-by-Step Migration from vSphere Update Manager to vSphere Lifecycle Manager
- Video overview of 3 ways to upgrade to ESXi 8.0
- Brief comparison of the two
- Wrapping Up
What is VMware vSphere Update Manager (VUM)?
vSphere Update Manager (VUM) is the traditional update tool we have always used in VMware vSphere. It allows you to create a “baseline” for your VMware vSphere clusters and remediate your cluster based on that baseline.
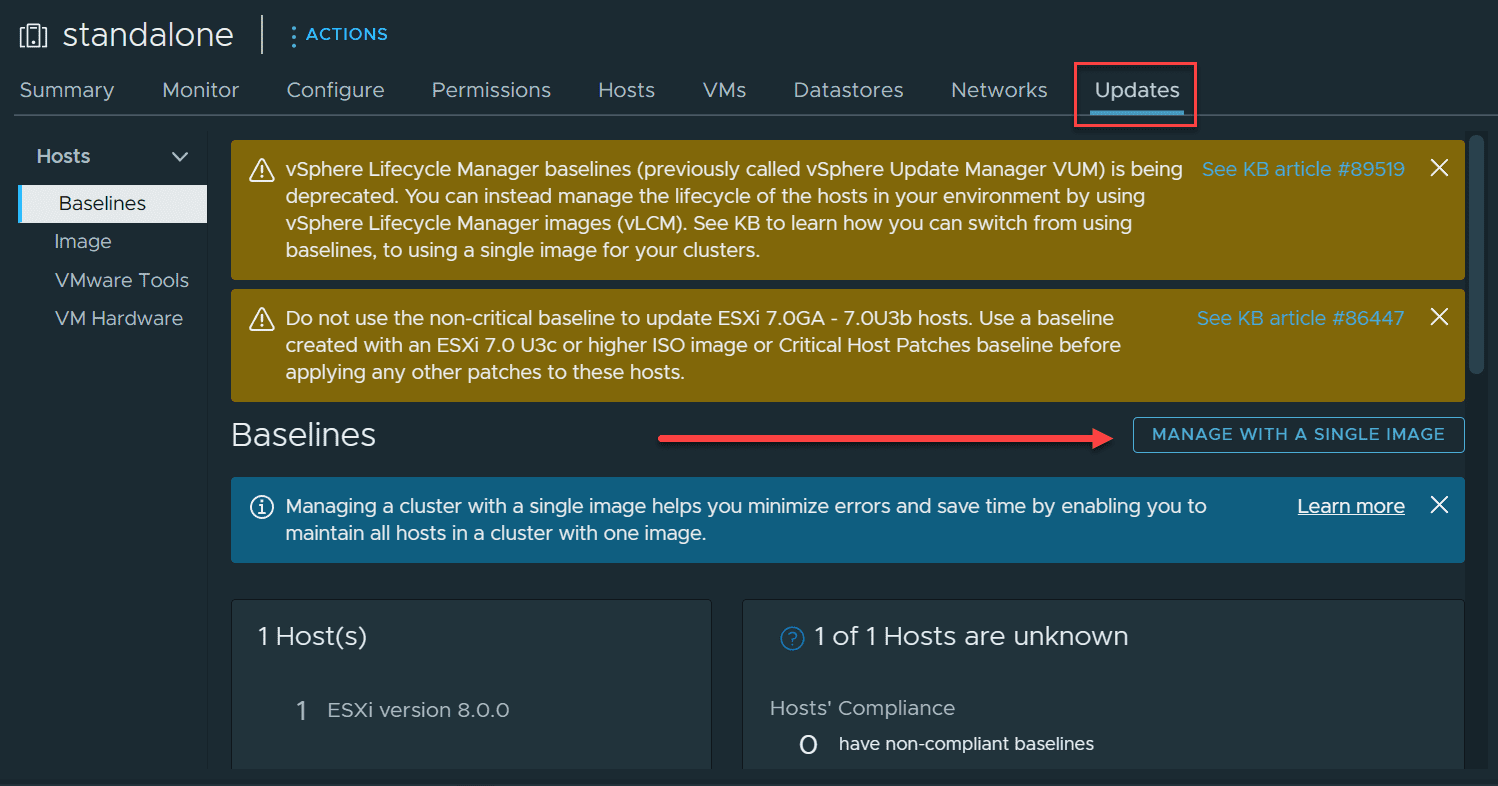
Below is a look at a cluster that is still managed with vSphere Update Manager. If you are looking to transition to the new model, you will note this as you will see the button to Manage with a single image which notes you want to transition to vSphere Lifecycle Manager.
What is vSphere Lifecycle Manager (vLCM)?
vSphere Lifecycle Manager (vLCM) is the new tool introduced in VMware vSphere 7 for updating VMware ESXi. It has a more streamlined approach for vsphere admins, that is declarative, and it is also consistent in its approach to managing the lifecycle of ESXi hosts.
VUM is imperative model (where you instruct exactly what updates or patches need to be applied), while vLCM leverages a desired state model.
The new tool allows you to define the desired state for your ESXi hosts (declarative model), and you can include the ESXi version, firmware, and drivers, and vLCM ensures the hosts match this state.
Also, vLCM extends to being able to manage hardware lifecycle, allowing for firmware and driver updates directly from the vendor’s hardware support manager. It brings all necessary things together in the vSphere Lifecycle Manager depot.
It is also an “image-based” approach that you see once you transition over to vLCM from VUM.
vSphere Update Manager vs vSphere Lifecycle Manager
The key difference between vSphere Update Manager and vSphere Lifecycle Manager is in their approach
- VMware Update Manager operates on an imperative model where the administrator manually sets up baselines and baseline groups for updates, patches, and upgrades. They then need to monitor and remediate non-compliance manually.
- While this offers flexibility, it may also result in inconsistencies across the ESXi hosts due to human error or oversight.
- vSphere Lifecycle Manager uses a declarative model. It means you define the desired end-state, and vLCM takes care of the rest. It not only applies necessary updates and patches but it also makes sure things are consistent in terms ofconfiguration across all hosts within a cluster.
- This approach has many advantages across complex environments
- vLCM brings hardware lifecycle management that is not available with VUM to the degree it is with vLCM. This simplifies updating and managing hardware firmware and drivers, making it a unified tool for full-stack lifecycle management.
Overview of Steps to Migrate to vSphere Lifecycle Manager
Before beginning the migration process, make sure to check VMware Interoperability Matrix. This will help you ensure compatibility between your vCenter Server versions and the new ESXi version you wish to install.
Prepare for the Transition: Before starting, ensure you have a complete backup of your vCenter Server Appliance and all your ESXi hosts. Using backup software is advisable here.
Also, make sure all your hosts have the necessary network connectivity and internet access. If you’re in a secured network, offline bundle of the new ESXi version might be needed.
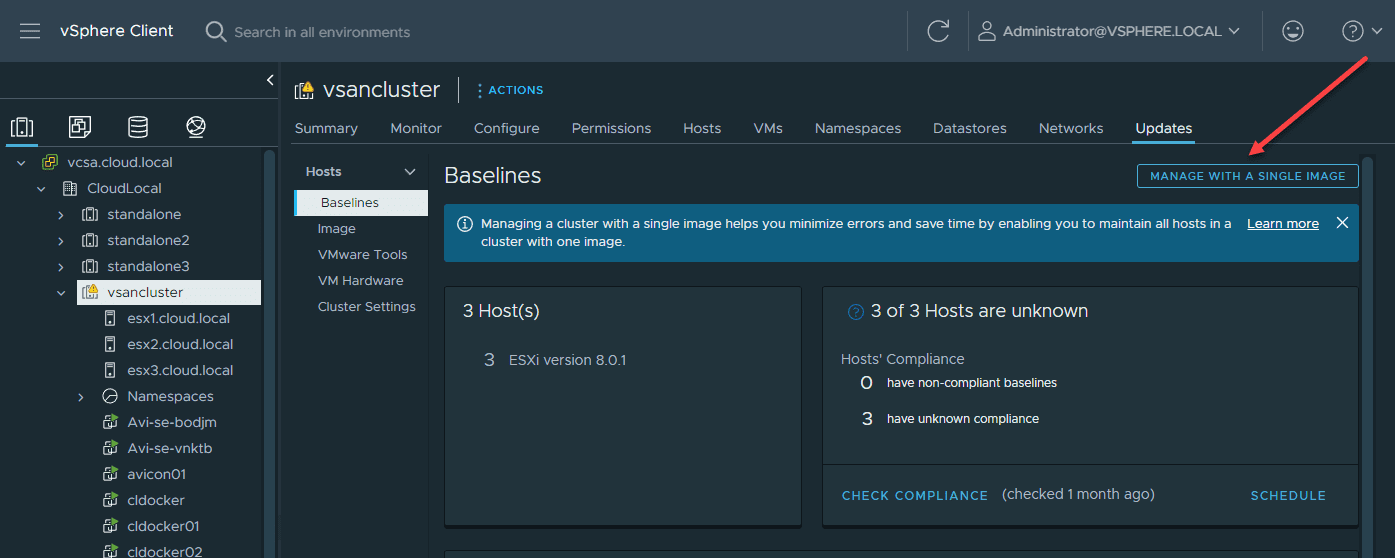
Manage with a single image: Once ready, log into your vCenter Server and navigate to the vSphere Client. Click your vSphere cluster and click the Updates menu. Here, you will find the option to manage with a single image.
Setup image: Choose the image you would like to apply along with vendor addons, firmware and drivers and any other additional components bundles you need.
Convert to image-based updates: After setting up your image, the cluster is transitioned to an image-based configuration.
Perform Image Compliance Check: Perform an image compliance check on the cluster to compare the current ESXi hosts with the desired state defined in the configured image.
Remediation: Once all checks are complete and you’re confident with the setup, initiate the remediation process.
Step-by-Step Migration from vSphere Update Manager to vSphere Lifecycle Manager
Let’s walk through this process on an actual cluster. After clicking the Updates menu, click the Manage with a single image button.
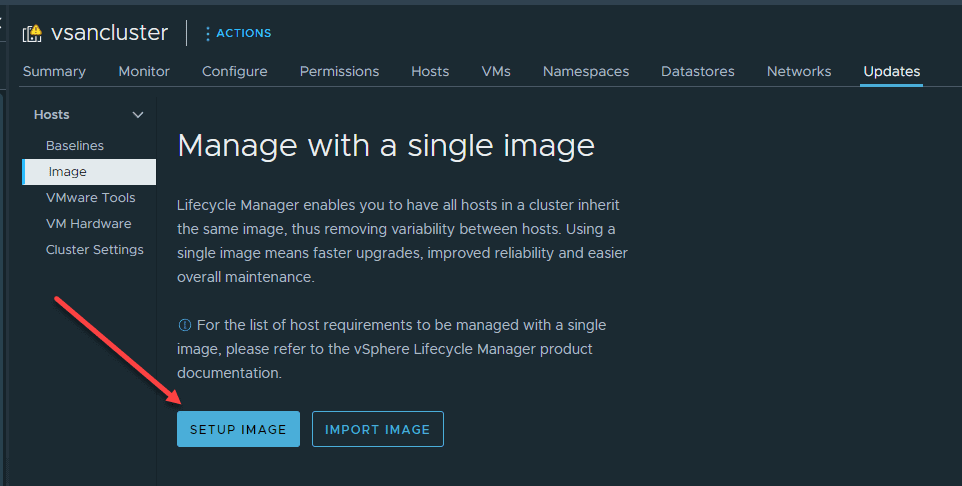
Click the Setup Image button.
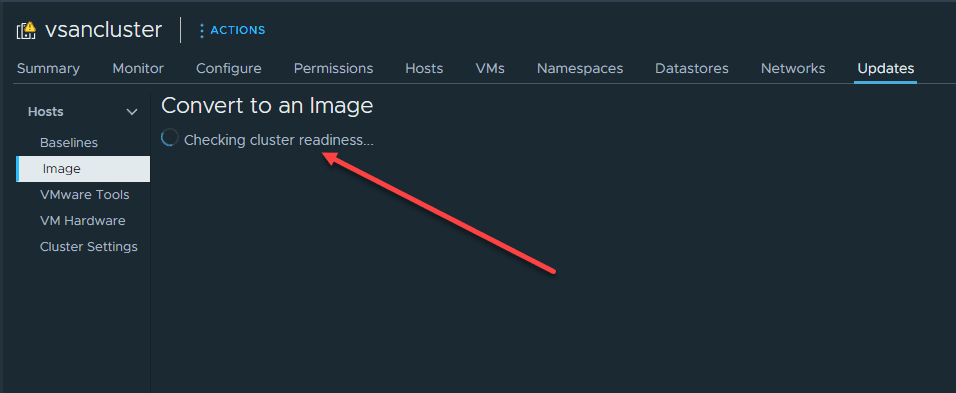
The cluster readiness will be checked.
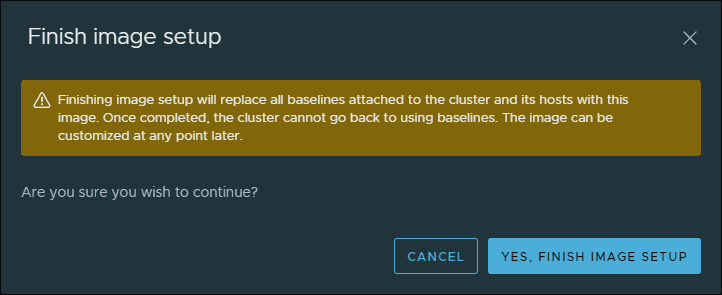
Click the Yes, Finish Image Setup button. You will see the warning along with the dialog box noting that once completed, the cluster cannot go back to using baselines.
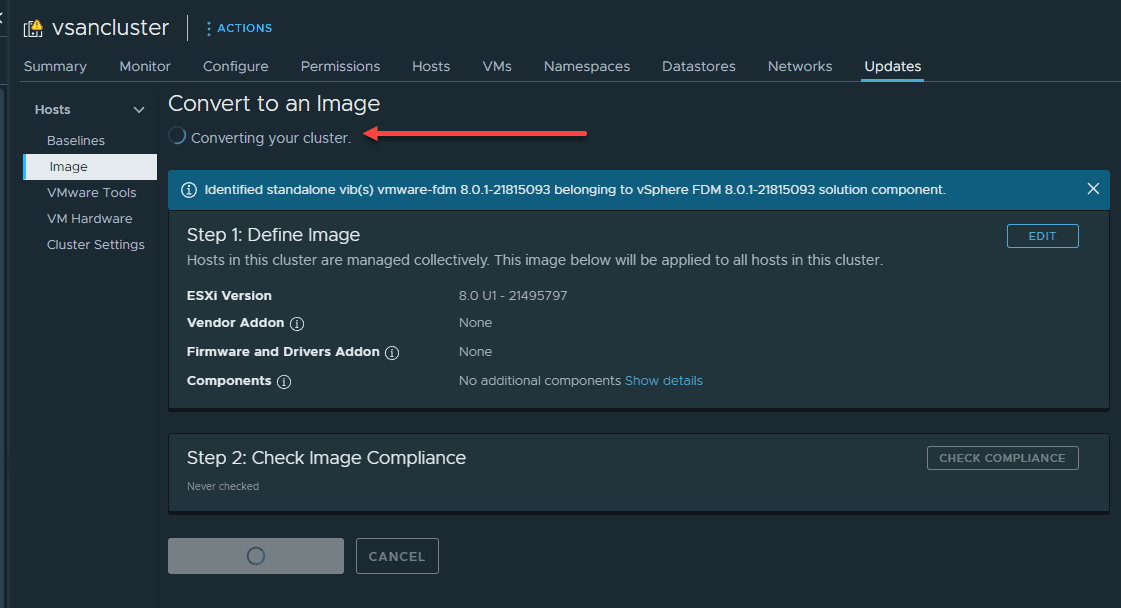
The cluster conversion process begins.
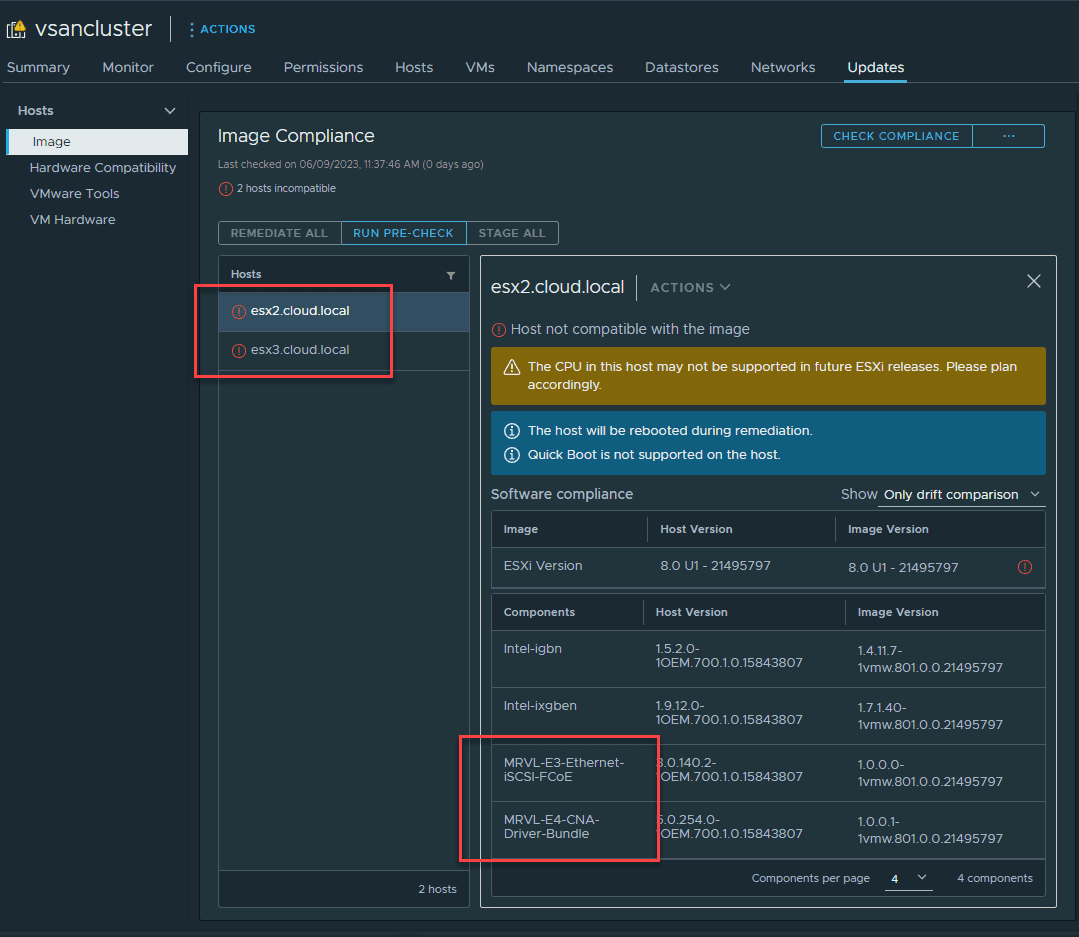
If any problems exist with the image and cluster readiness, these will be noted. Below, you can see VIB files currently exist on the cluster nodes that are not contained in the vLCM image. You must either remove these installed VIBs or include these in the vLCM image.
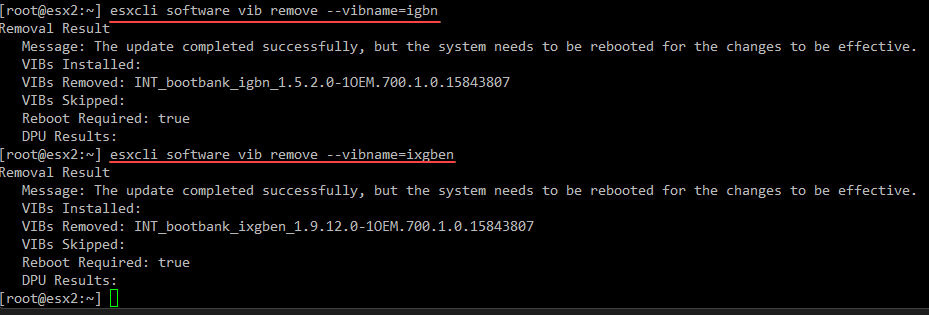
As you can see below, I am removing the problematic VIBs which happen to be driver files.
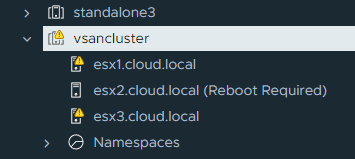
Depending on what you uninstall, you may need to reboot.
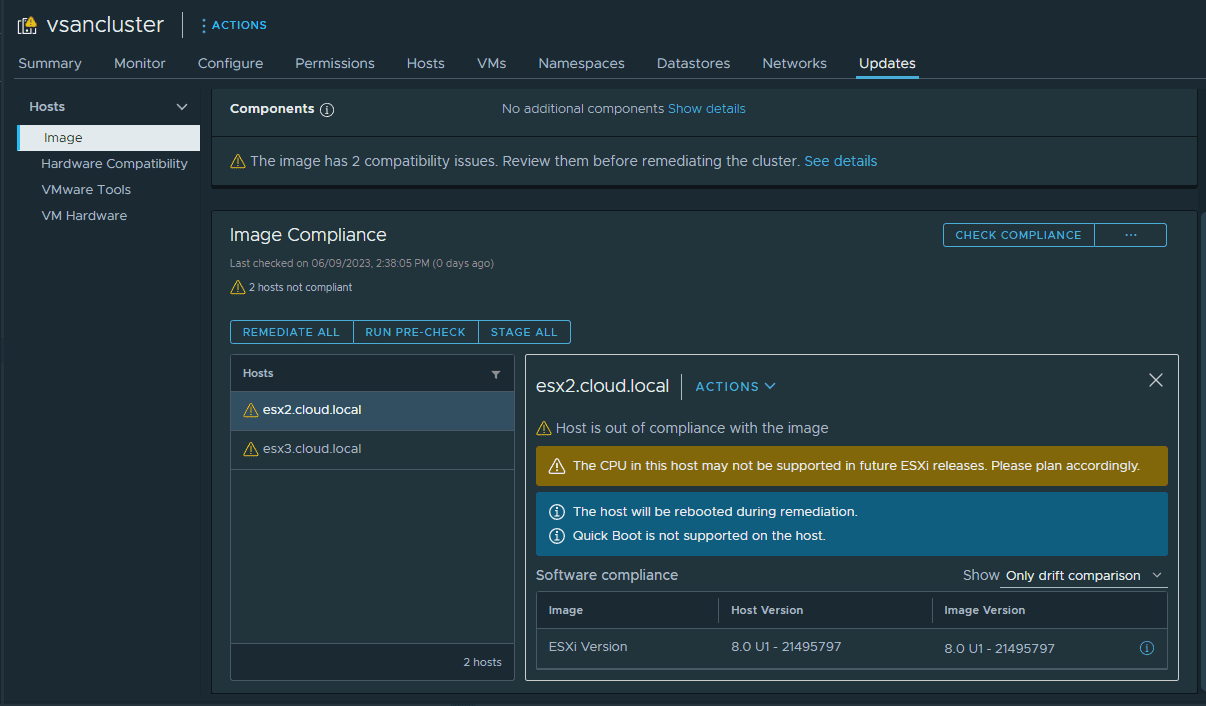
After removing problematic VIBs, the errors simply go to warnings due to “future” unsupported CPUs. You can now click the Remediate all button.
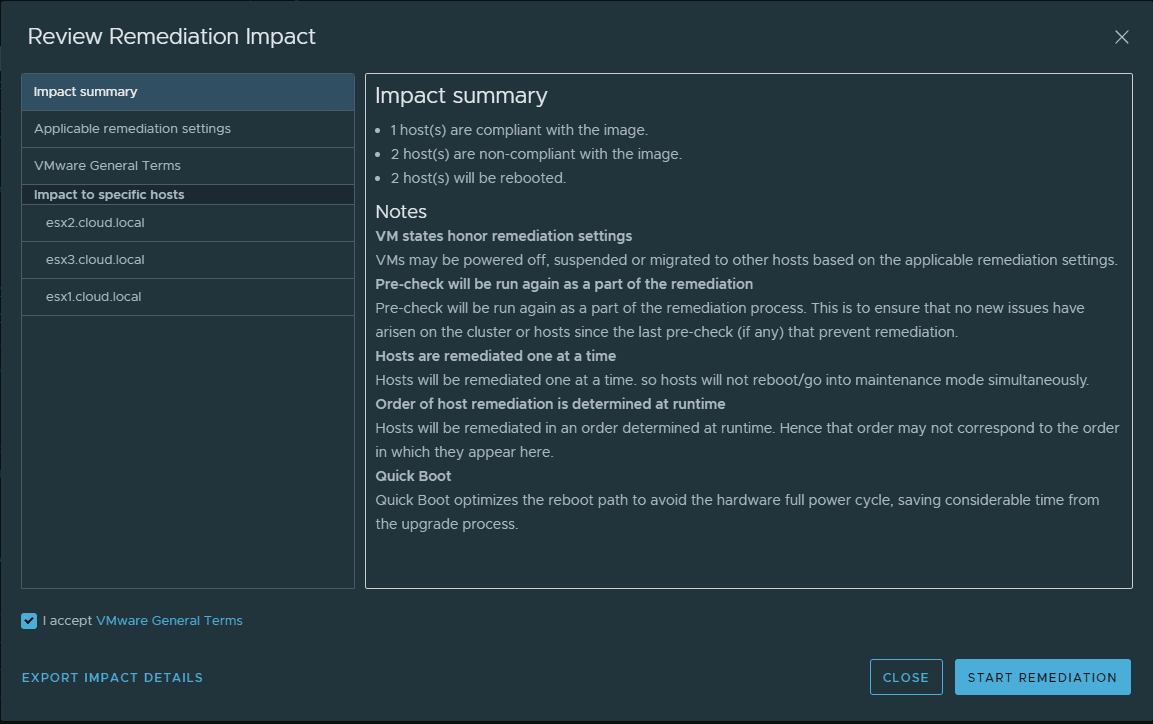
Now, we can remediate the cluster. Click the Start Remediation button.
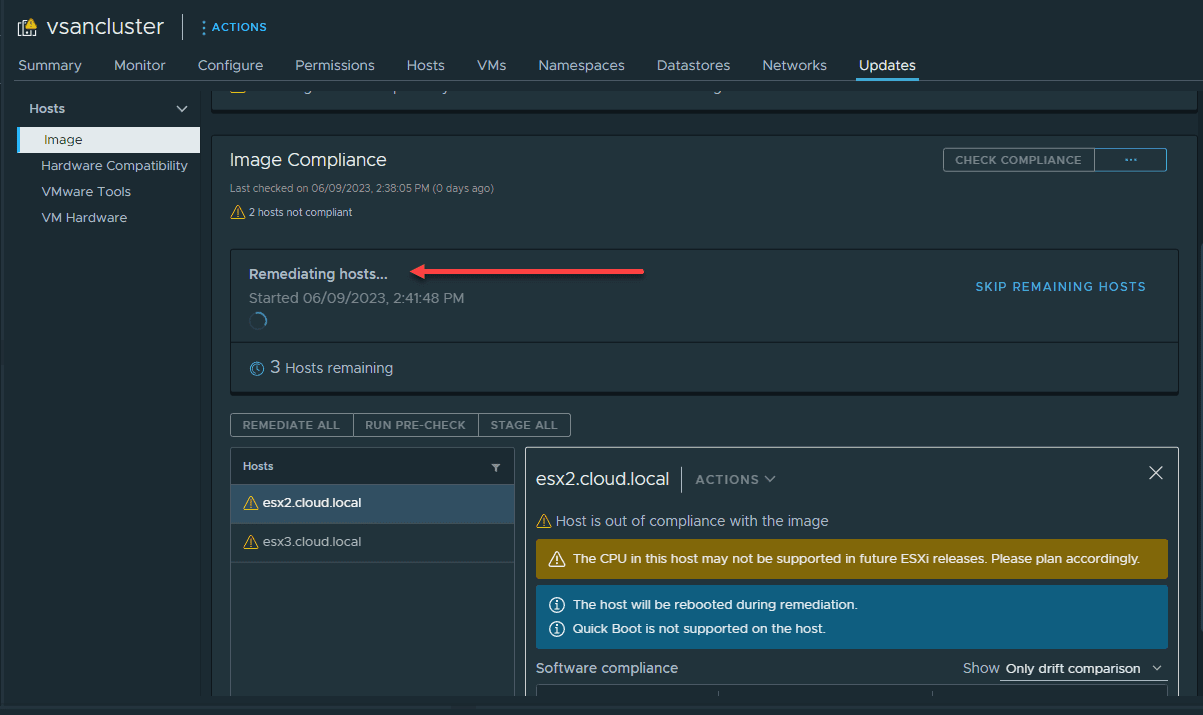
The hosts begin remediating.
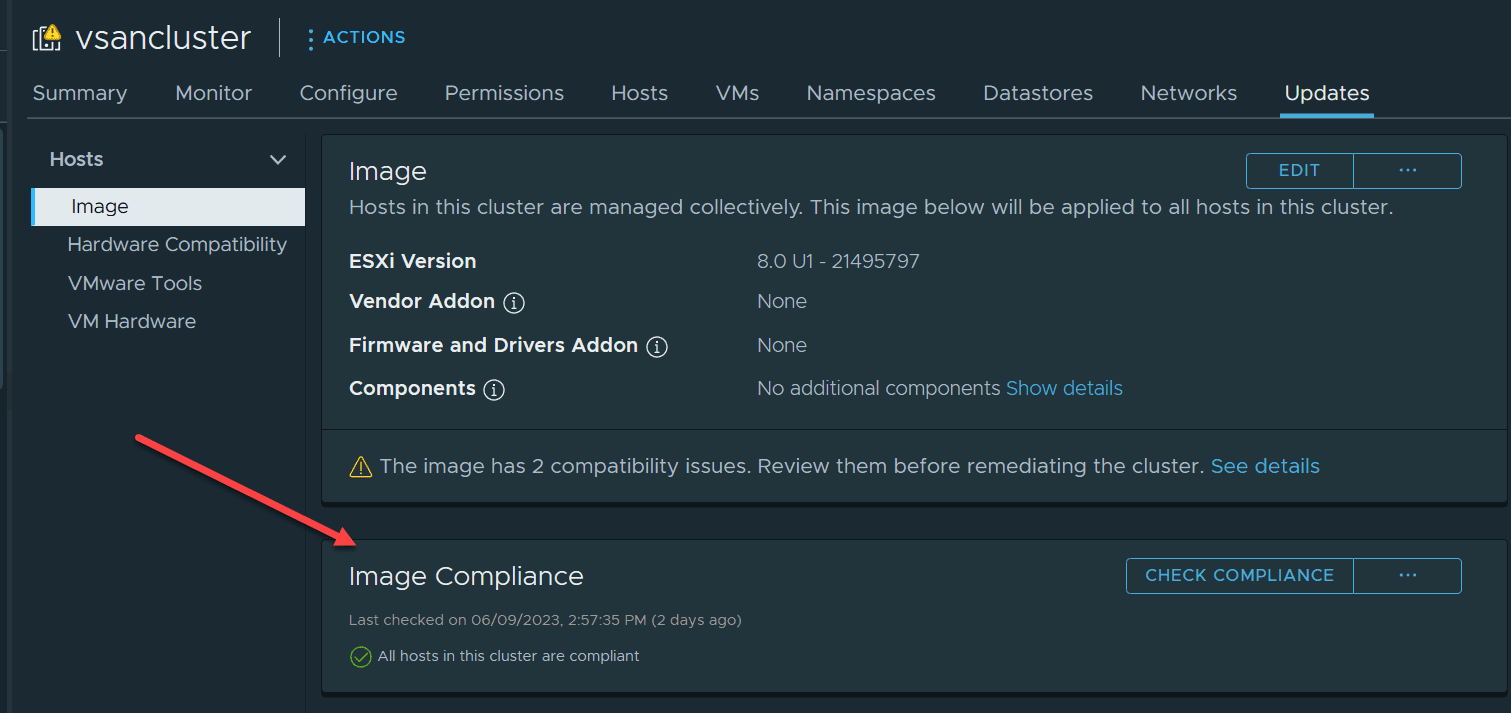
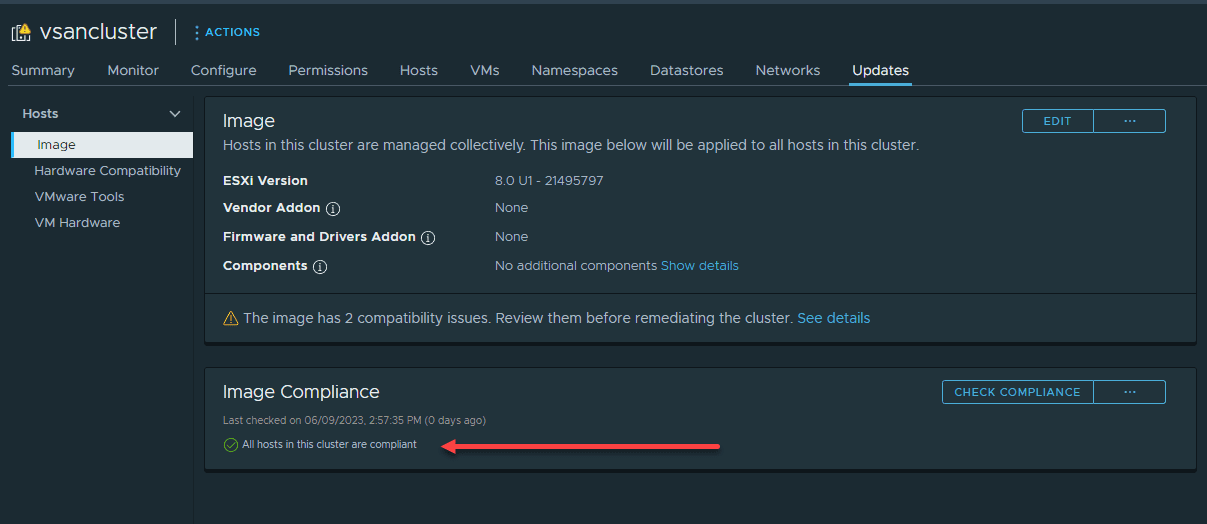
After the remediation process completes, you should see the image compliance message, All nodes in the cluster are compliant.
Video overview of 3 ways to upgrade to ESXi 8.0
Brief comparison of the two
As with any major update or transition, there are a few considerations and potential limitations to keep in mind when switching from vSphere Update Manager (VUM) to vSphere Lifecycle Manager (vLCM):
Cluster-Based Management: The cluster-centric approach of vLCM means consistency across hosts, it does mean that individual host management is not possible. vLCM applies desired images and updates at the cluster level, so it’s less flexible than VUM if you need to manage hosts individually.
Limited Baseline Functionality: vLCM does not support baseline groups like VUM does. This change might require how you’ve managed updates and patches. You can still check compliance against existing attached baselines, but vLCM won’t allow you to create new ones.
Requirement for vSphere 7 or Higher: vSphere Lifecycle Manager was introduced in vSphere 7. So, you can’t use it if you’re running an older version of vSphere. You would need to plan an upgrade of your entire environment to vSphere 7 or higher to take advantage of vLCM.
Hardware Compatibility: vLCM’s ability to manage hardware firmware and drivers is a powerful feature, but it relies on your hardware vendors’ support for this function. If your vendor doesn’t provide a compatible hardware support manager, you may be unable to use this feature.
Stateless Hosts: Stateless ESXi hosts (those installed with Auto Deploy) are not compatible with vLCM.
Wrapping Up
Understanding the transition from vSphere Update Manager (VUM) to vSphere Lifecycle Manager (vLCM) is an important step for any VMware vSphere administrator looking to move forward with their ESXi lifecycle management and using tools that are supported.


