The Proxmox firewall is a powerful part of the Proxmox virtualization solution and can do many things that admins can use to their advantage, such as controlling traffic and making sure certain things like allowing clients or hosts to connect to certain VMs or otherwise.
Proxmox Firewall Rules Configuration
Proxmox firewall is based on the Linux iptables firewall. IPtables filters network traffic at the hypervisor layer. This allows filtering based on the normal firewall capabilities on things like IPs, ports, and those types of network objects.
You can manage the Proxmox firewall using the Proxmox web interface (web GUI) or command-line interface (CLI). These can be used to configure firewall rules and implement cluster-wide firewall configuration in your Proxmox cluster.
Zones configuration
You can divide the firewall into zones. Zones combine network interfaces and IP addresses. By default, notice the four zones available in Proxmox VE.
Input – handles incoming traffic from external networks
Output – handles outgoing traffic to external networks
Forward – handles traffic between virtual machines and containers
Host – handles traffic to and from the Proxmox host
Cluster Wide Firewall Rules
With clustered Promox configurations, you can have firewall rules to apply to all nodes in the cluster. This is done by configuring the underlying iptables rules automatically and using the same firewall configuration files on all nodes. You can also configure a central firewall solution for the entire cluster by creating a firewall cluster.
Proxmox VE Firewall Zones
To manage the firewall, you need to enable the firewall service. Once enabled, you can configure the firewall zones using the web interface or the command line.
You can also assign IP addresses to zones and create firewall rules that allow or block traffic based on the zone.
Enabling the Firewalls
The Proxmox firewall is disabled by default. To enable the firewall service, you can use the following command on the CLI:
pve-firewall enableThis will start the firewall service and load the firewall configuration files.
Ports used by Proxmox
There are a few admin ports to be aware of when working with the Proxmox firewall. These include the well-known ports of SSH, HTTP, and VNC. These are open out of the fox, but you can create firewall rules to block access to these ports if you want to do that for security purposes.
Firewall Rules Configuration Direction
You need to specify the direction of the traffic you want to filter with the Proxmox firewall configuration. You can choose to filter incoming traffic, outgoing traffic, or both.
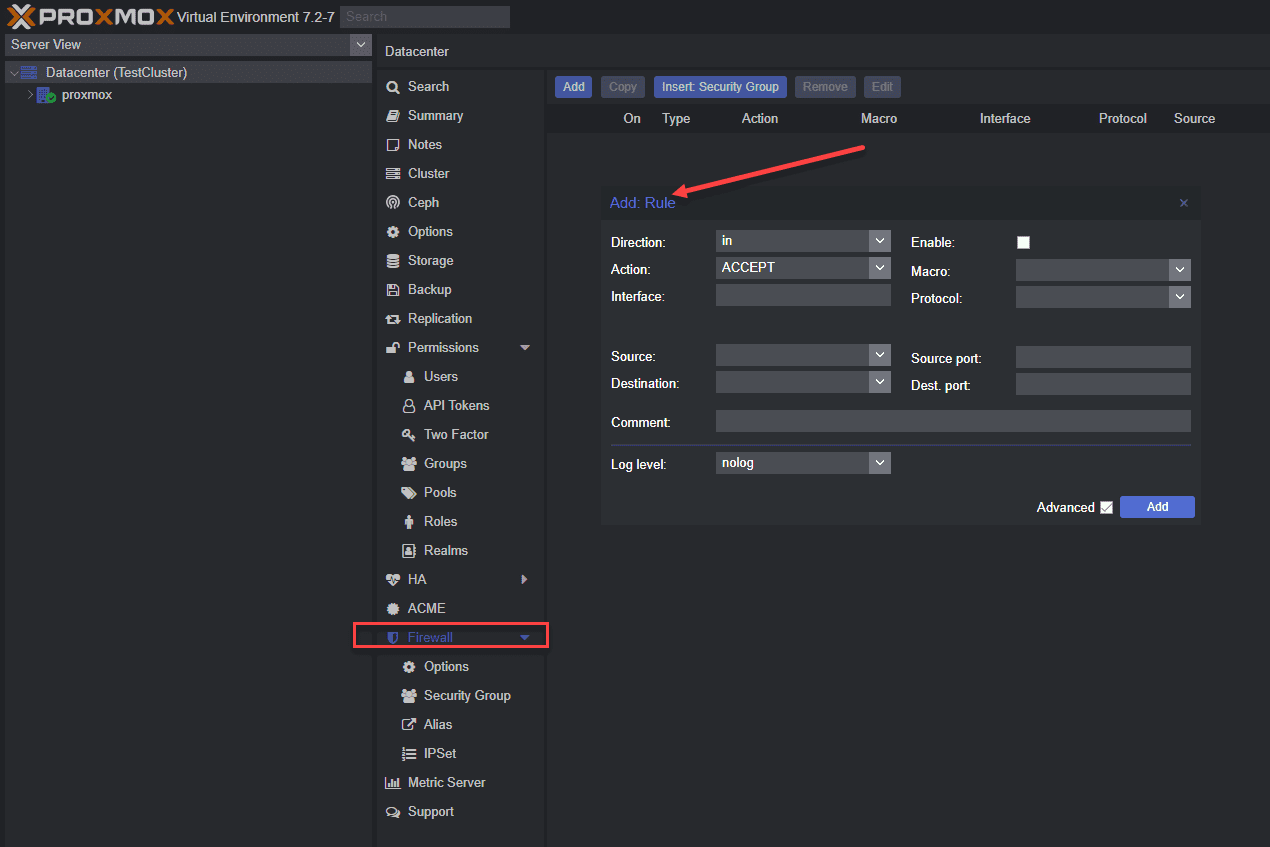
Enable the Firewall Service from the Command Line
You can enable the Proxmox firewall service from the command line with the following command:
systemctl enable pve-firewall.serviceThis will start the firewall service on boot and load the firewall configuration files.
Proxmox VE Firewall Configurations via Files
You can also configure the Proxmox firewall using configuration files. These files are located in the directory found here:
/etc/pve/firewallEnabling the Firewall for VMs and Containers
The firewall is disabled by default for virtual machines and containers. However, you can enable the firewall service for a VM or container. To do this, you must add a firewall configuration file to that VM or container’s directory:
/etc/pve/firewallHost, VMs, and Containers Configuration Files
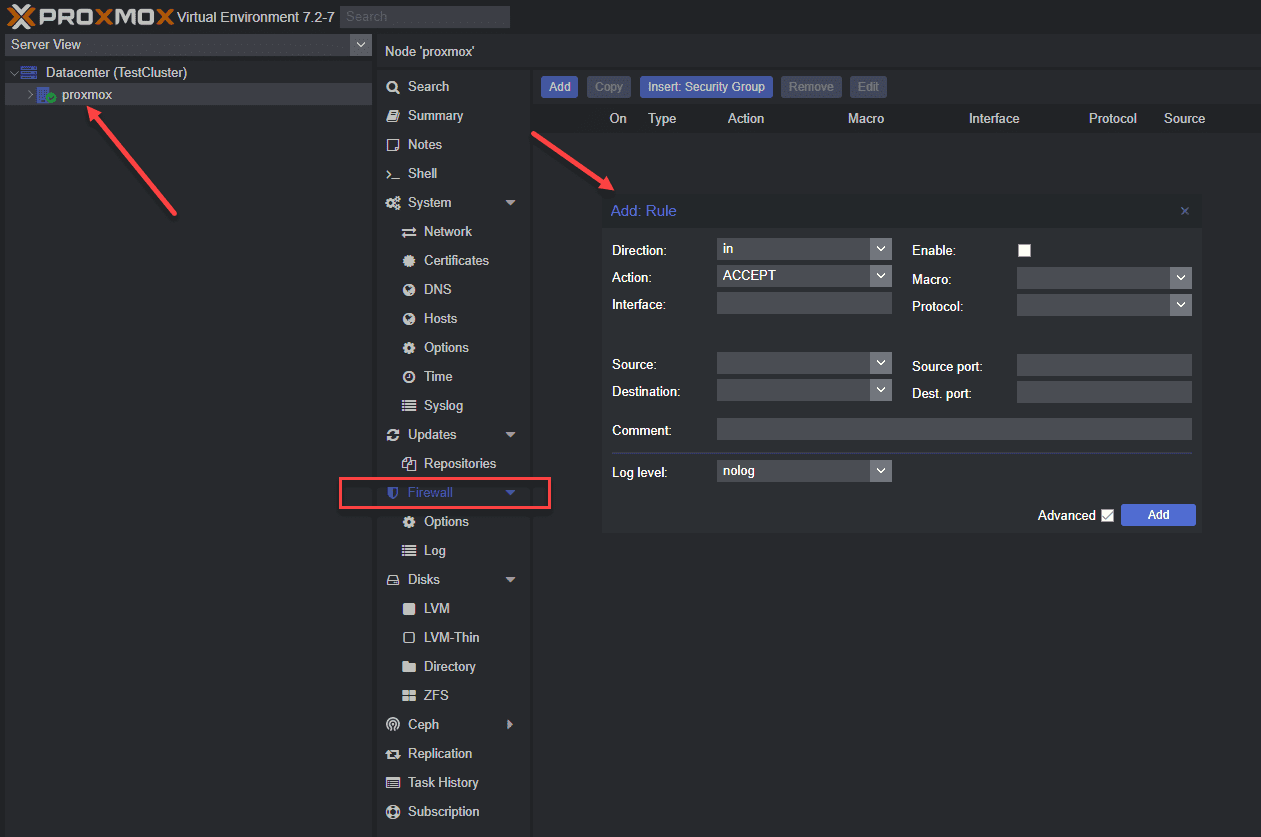
Below is a look at host-specific firewall rules.
See the Generated IPtables Rules
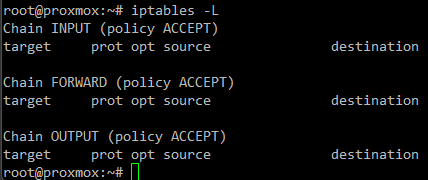
To view the underlying iptables rules generated by the Proxmox firewall:
iptables -LThis will display the current iptables rules managed by the Proxmox firewall service.
Check VM Network Device
You need to know the name of the virtual device when you configure Proxmox firewall rules to filter traffic for a Proxmox virtual machine. You can find this by using the following command:
qm config <VM ID> | grep netThis will display the name of the virtual network device used by the VM.
IP Sets
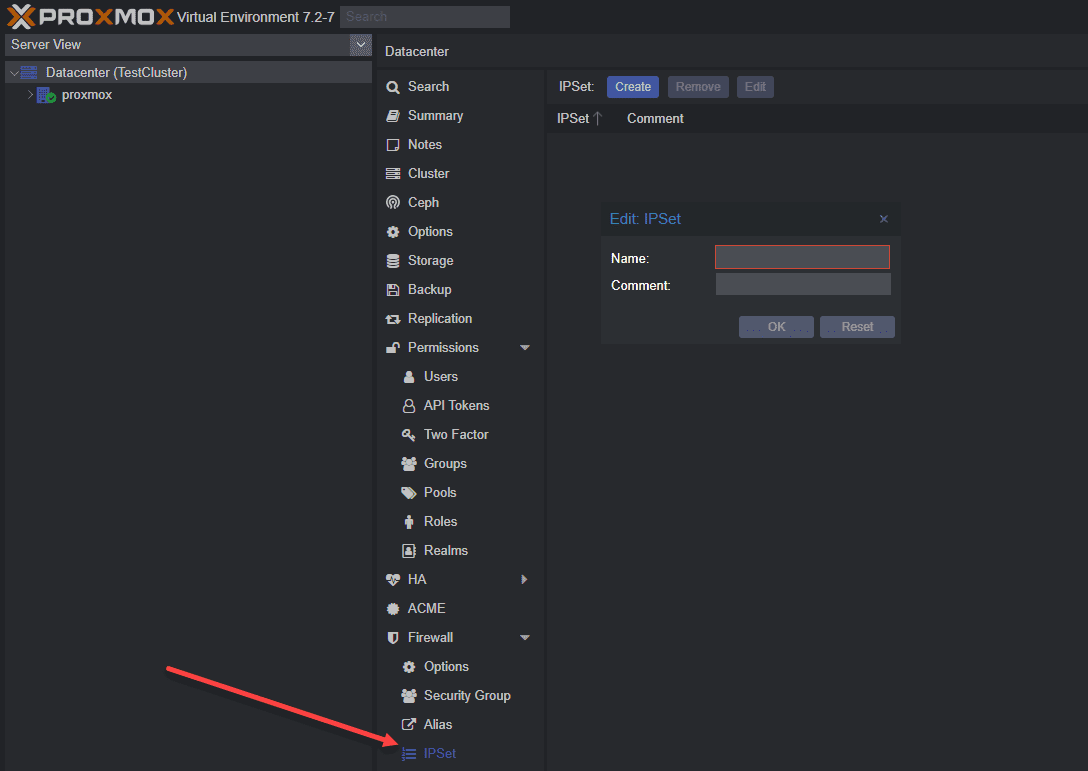
IP sets define a set of IP addresses that can be used in firewall rules.
Default Firewall Rules
A set of default firewall rules out of the box allows incoming and outgoing traffic for certain services. These include traffic types such as SSH and HTTP. You can view the default firewall rules using the following command:
iptables -LStandard IP Alias local_network
An example of the default IP alias is the local_network standard IP alias defined in the Proxmox firewall configuration files. It represents the IP addresses assigned to the Proxmox host and is used in firewall rules to allow traffic between the host and virtual machines/containers.
Adding Security Groups and Rules
Security groups and IP aliases can be used in the Proxmox firewall configuration files. These can then be used in firewall rules to allow or block traffic based on the group or alias.
Note the following to define security groups and IP aliases using the following syntax in the configuration files:
group <group name> { <ip addresses> }

alias <alias name> { <ip addresses> }
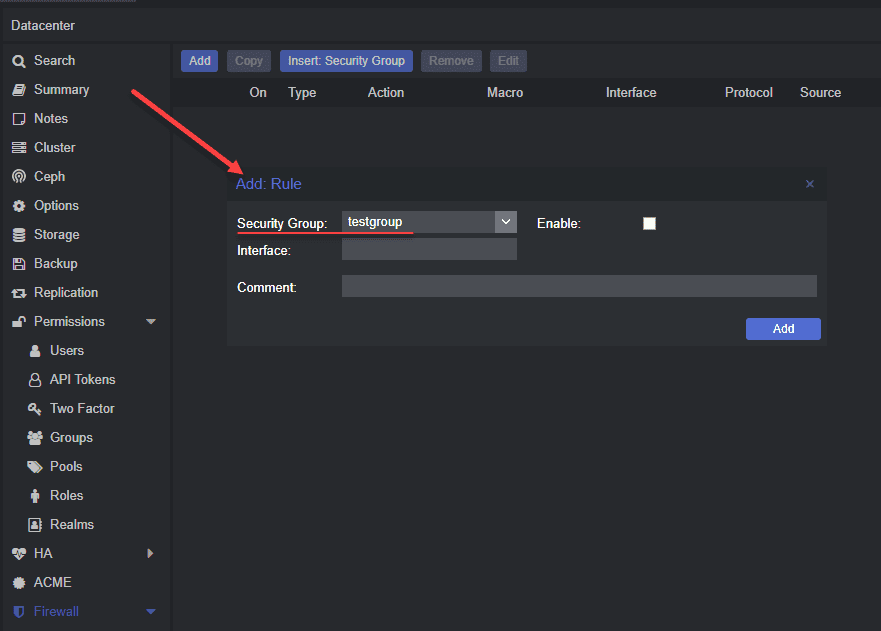
Below is a look at creating security group-based firewall rules.
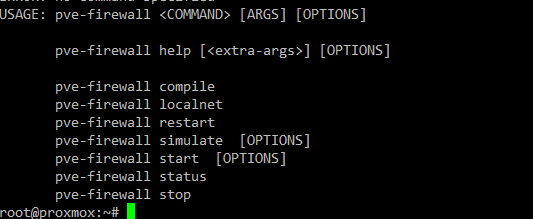
Proxmox Firewall CLI Commands to Know
Several CLI commands are useful when configuring the Proxmox firewall:
pve-firewall enable – Enables the firewall service
pve-firewall disable – Disables the firewall service
pve-firewall status – Displays the current status of the firewall service
pve-firewall reload – Reloads the firewall configuration files
pve-firewall log – Displays the firewall log
Adding a Proxmox Firewall Rule
You can add a Proxmox Firewall Rule using the command:
iptables -A <zone> -p <protocol> --dport <port> -s <source address> -d <destination address> -j <action>PVE Firewall Status
You can also check the status of the Proxmox PVE firewall service using the command:
pve-firewall statusDefine Rules
The syntax for adding a firewall rule is as follows with the command that admins can run:
iptables -A <zone> -p <protocol> --dport <port> -s <source address> -d <destination address> -j <action>PVE Firewall Stop
To stop the Proxmox firewall service use the command:
pve-firewall stopCLI Commands
Several CLI commands can be used to manage the Proxmox firewall service, such as
pve-firewall enable

pve-firewall disable

pve-firewall status

pve-firewall reload
Remote IPs
You can manage access from remote IP addresses to bolster security. You can configure firewall rules for remote IPs using the
remote.fw file located in the directory:
/etc/pve/firewallCluster Specific Firewall
Using a Proxmox cluster, you can configure a cluster-specific firewall using the /etc/pve/firewall/cluster.fw configuration file.
Corosync Cluster Traffic
You can manage traffic for Corosync cluster traffic. You can configure firewall rules for Corosync cluster traffic using the file corosync.fw file located in the directory:
/etc/pve/firewall HTTP Traffic
You can also filter HTTP traffic in your Proxmox environment. You can configure firewall rules for HTTP connections using the file http.fw located in the directory:
/etc/pve/firewallCreate Rules
When creating a firewall rule you need to edit the appropriate configuration file in the /etc/pve/firewall directory. The syntax for creating a firewall rule is as follows:
iptables -A <zone> -p <protocol> --dport <port> -s <source address> -d <destination address> -j <action>Wrapping up
The Proxmox firewall is a tool that admins can use if they need to filter or block or otherwise channel the traffic coming into the Proxmox VE host or virtual machines. Security often starts by scoping down which clients and servers can connect to and from other clients and servers. As shown, it is easy to work with the Proxmox firewall and filter traffic as needed. Let me know in the comments if you guys work with the Proxmox firewall to scope traffic down or are you using something else.
Google is updating how articles are shown. Don’t miss our leading home lab and tech content, written by humans, by setting Virtualization Howto as a preferred source.



“these are open out of the Fox,”
Maybe should be out of the Box?