When it comes to the day-to-day management of VMware ESXi hosts, there are many activities a VI admin may need to carry out with ESXi hosts in the environment. While changing the hostname of an ESXi host in the environment is most likely not a daily occurrence or activity, it is a good idea for VMware admins to understand how this is accomplished. As it turns out, no special tools are needed to do this as you can perform an ESXi change hostname operation via the vSphere web client, vCenter Server, the host client, and with the command line as we will detail further.
Why perform an ESXi change hostname?
First of all, what are some scenarios that may lead to needing to change the name of your ESXi host in production, lab, or another environment? Changing the ESXi hostname may be needed to align with a new corporate naming policy, an M&A with a buyout, or another reason.
Maybe you inherited a vSphere cluster where you want to bring in the hosts using the DNS configuration instead of an IP address as they are currently configured? The ESXi hostname may not have been configured correctly or not using the fully qualified domain name. So, you need to change the hostname after ensuring you have the hostnames configured on the DNS server.
Considerations before going through an ESXi change hostname process
If your management network on each VMware ESXi hostname is running on a vSphere Distributed Switch, you will want to migrate the network to a vSphere Standard Switch. Once the name is changed, you can migrate back to the vSphere Distributed Switch for the management network connectivity.
If your ESXi host is part of a VSA cluster, you don’t want to remove the host from inventory. What is a VSA cluster? A VSA cluster is a cluster of hosts running the vSphere Storage Appliance solution. There are some considerations to be made here from the cluster perspective.
Another consideration needs to be made with nodes in a vSAN cluster. With vSAN, even if a node is in maintenance mode, it can still be earmarked for primary or backup nodes in the vSAN cluster. You will want to drag the ESXi host out of the cluster to remove it from the cluster.
Steps that need to be performed before all methods of changing the ESXi name
If the ESXi host is part of a cluster, first enter the Maintenance mode to remove it from the cluster.
If VirtualCenter/vCenter Server manages the ESXi host, disconnect and remove the ESXi host from the vCenter Server.
Ways to perform ESXi change hostname operation
Since most customers I know are not still running VMware ESX, we won’t cover those steps here. However, VMware does document the process of performing a name change. Also, since VMware has deprecated the vSphere flash based client, we won’t cover that here also. However, note the following ways to perform an ESXi change host name process. None of the listed ways require additional software; all are built into the vSphere solution.
- HTML5 host client
- HTML5 vSphere web client
- Using the command line
- Direct Console User Interface
HTML 5 Host Client
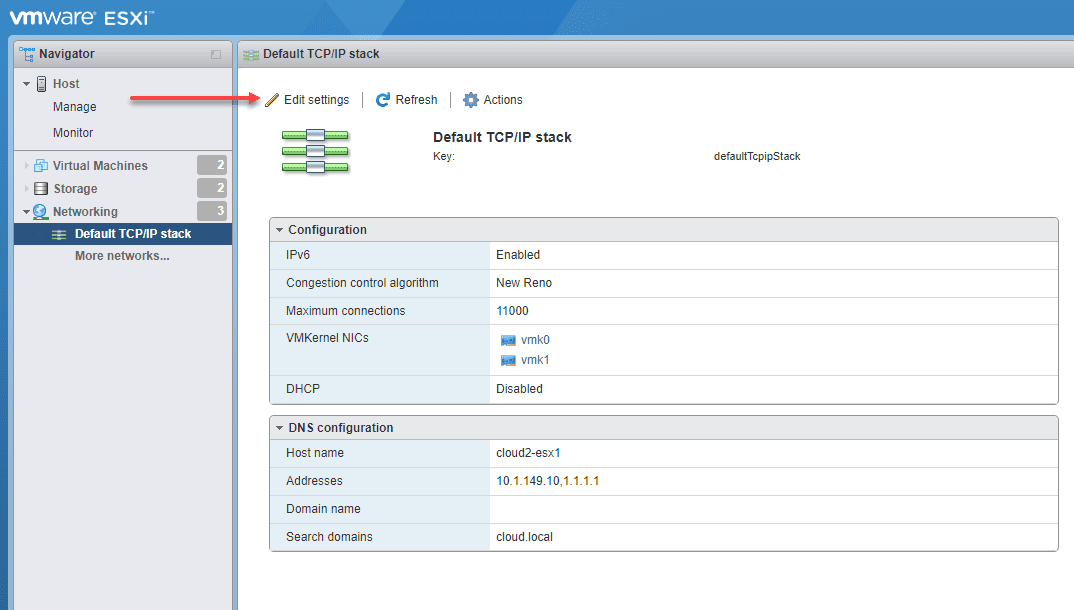
The first way we want to consider changing the ESXi host name is to use the integrated ESXi host client to perform the name change. To change the ESXi host name, log into the ESXi host client and navigate to Networking > Default TCP/IP stack and Edit settings.
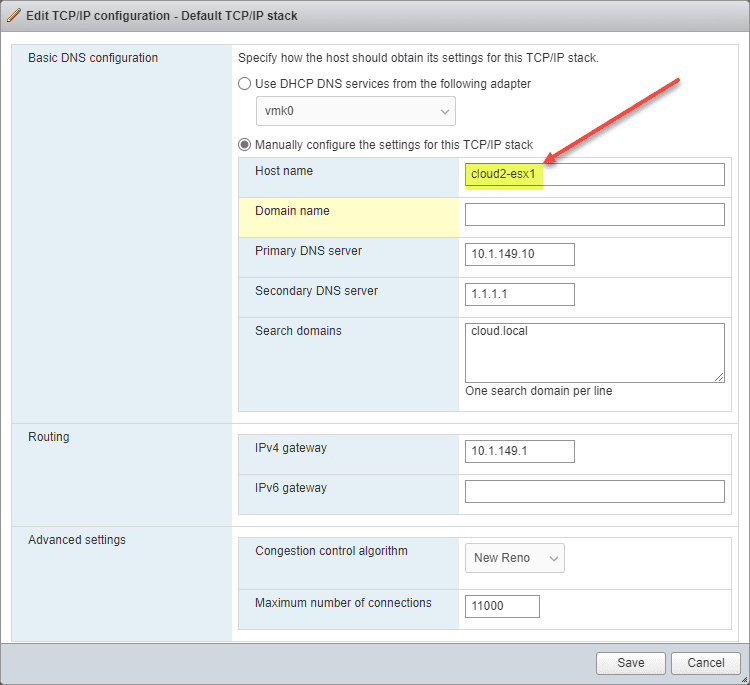
On the Edit TCP/IP configuration – Default TCP/IP stack, you will see the host name field where you can enter a new hostname.
HTML5 vSphere web client
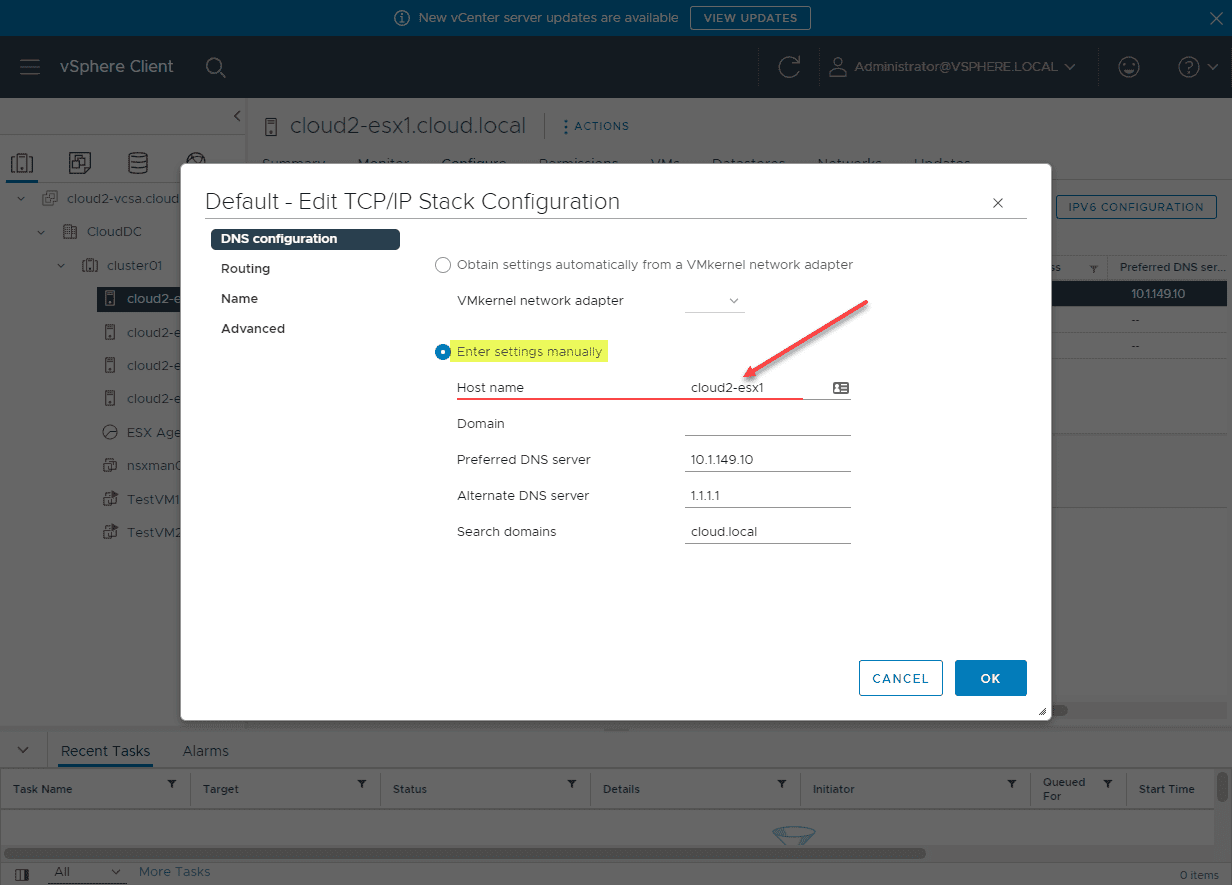
Similar to changing the ESXi host name using the ESXi host client, you can also configure the host name of the VMware ESXi server using the HTML5 vSphere Client when logged into your vCenter Server.
Configuring the ESXi hostname using the vSphere web client
Log into the vSphere web client, highlight your ESXi host in inventory. Navigate to Configure > Networking > TCP/IP configuration > Default. Click Edit. In your vSphere Client, you will see the following configuration.
Using the command line
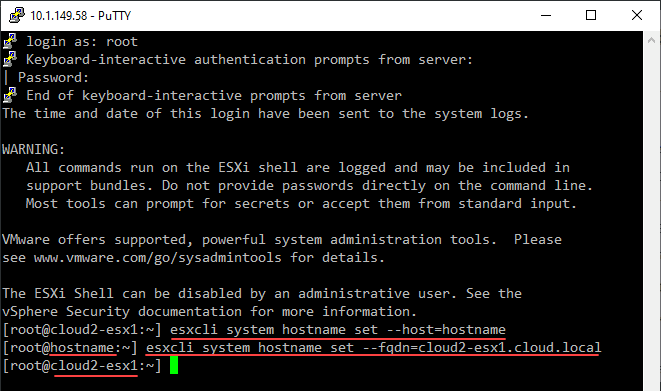
Instead of using the vSphere Client, you can also use the command line. There is a built-in tool in ESXi, that doesn’t require an additional VIB or other additional VIB installation. Again make sure you have the host out of your cluster and you have your DNS configuration in place. You can use the following command to configure the ESXi host name.
Running the commands
esxcli system hostname set –host=hostname
esxcli system hostname set –fqdn=fqdn
Direct Console User Interface (DCUI)
Outside of the vSphere Client and the command line with the esxcli system hostname command, you can use the Direct Console User Interface (DCUI) to configure the hostname of your ESXi host.
Launching the DCUI and changing the ESXi hostname
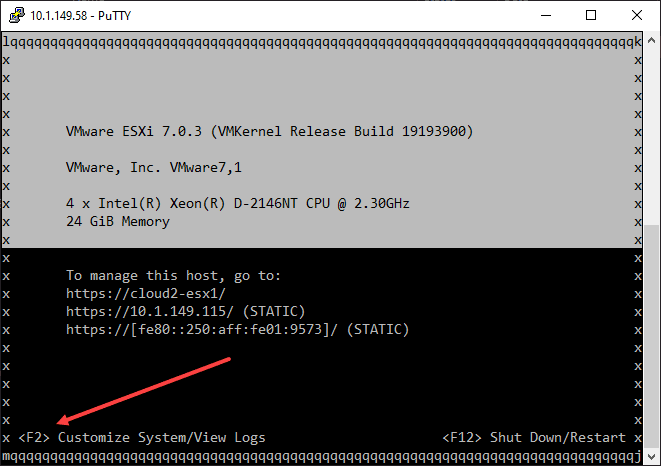
The Direct Console User Interface is built into ESXi, and you can access directly at the console session, or you can actually run the utility by logging into the ESXi host using SSH.
If you want to access the DCUI remotely, you can SSH in, and type dcui at the SSH prompt.
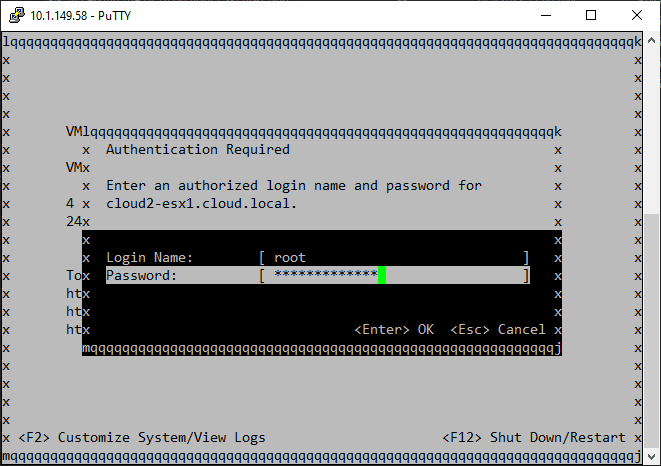
You will be prompted to login:
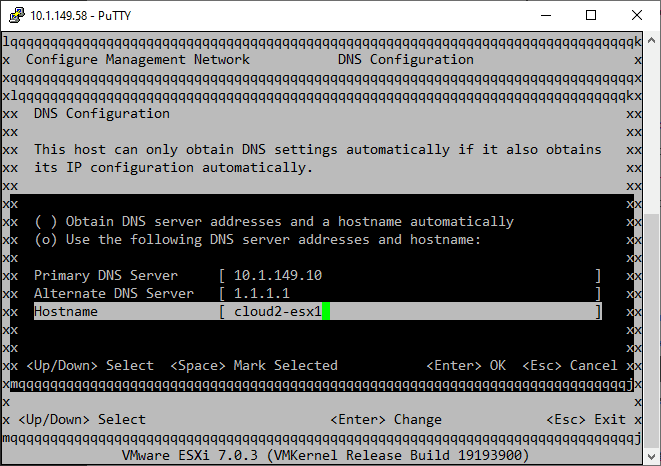
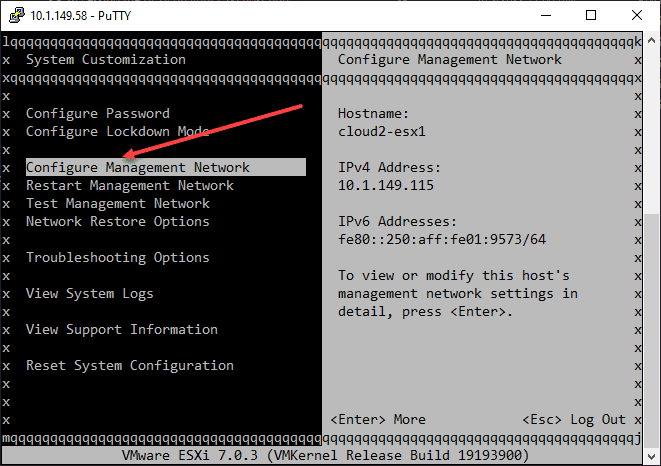
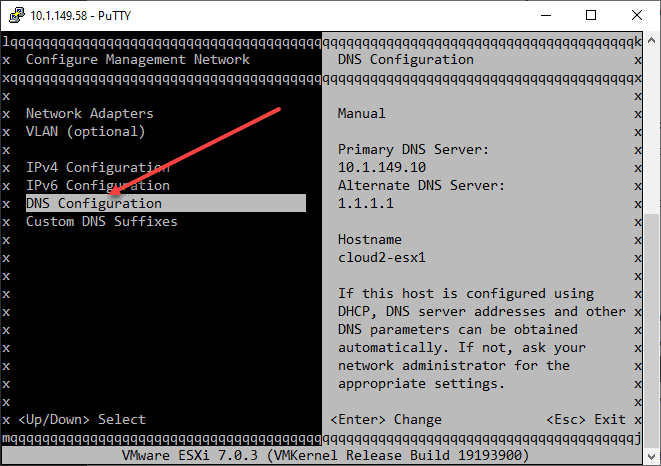
Navigate to the configure management network.
Choose DNS configuration:
Next, you will configure the ESXi hostname in the Configure Management Network settings:
After configuring the ESXi hostname, you will restart the management network.
Wrapping Up
The process of changing your ESXi hostname is straightforward. There are considerations to make for your vSphere cluster and other solutions you may be using in the environment, such as VSA and vSAN. Also, you want to take the host out of a vSphere cluster before performing the steps. However, following the steps as documented allows successfully changing the ESXi hostname.
Note the following official documentation from VMware for reference:
Google is updating how articles are shown. Don’t miss our leading home lab and tech content, written by humans, by setting Virtualization Howto as a preferred source.



Thank you so much for that very nicely explained and detailed guide. I really appreciate the effort and the help this brings.
Craig,
So glad this was helpful! Are you running ESXi in the home lab or in production, both?
Brandon