One of the challenges with working with plain Kubernetes is the number of low-level management tasks that must be handled using the command line, specifically with the kubectl command. While I am a huge fan of the command line and the power of configuration using it, there are certainly times when GUI management is nice and makes life much easier. Especially in corporate environments, if you are the K8s admin, you probably don’t want developers interacting with the cluster low-level using kubectl. They are going to be consuming resources in other ways. Having a GUI provides an answer to this challenge. It can also be helpful for other admin tasks. Rancher is a great solution for creating and also managing existing Kubernetes clusters. Not too long ago, Rancher 2.x was released with a new dashboard experience. Let’s take a look at Rancher connect to existing cluster and see how to install rancher and import your existing cluster.
What is Rancher?
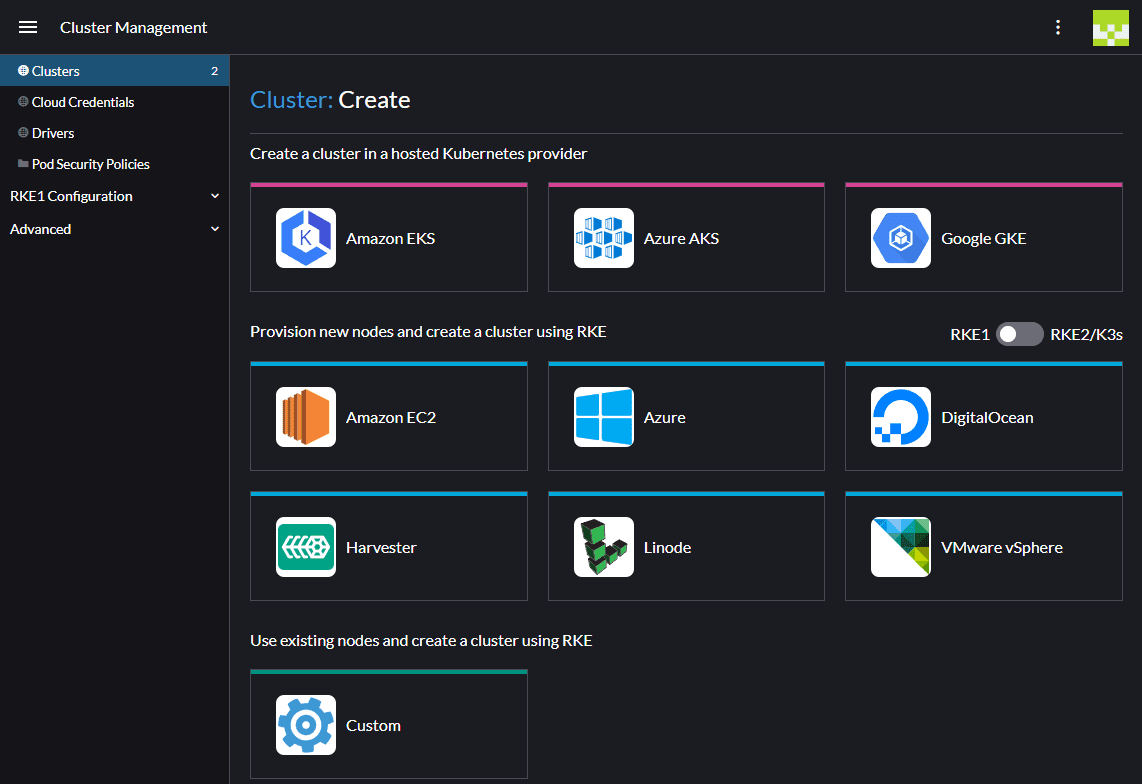
Rancher is a complete software stack for teams adopting containers. As mentioned at the outset, Rancher provides a management GUI for managing your Kubernetes clusters and provides a management solution that allows managing multiple Kubernetes clusters, not just one. So you can use Rancher to spin up and provision new clusters and manage existing clusters. It provides a wide range of options for provisioning new clusters including:
Hosted Kubernetes providers
- Amazon EKS
- Azure AKS
- Google GKE
Provisioning new nodes and creating a cluster using RKE:
- Amazon EC2
- Azure
- Digital Ocean
- Harvester
- Linode
- VMware vSphere
- Custom
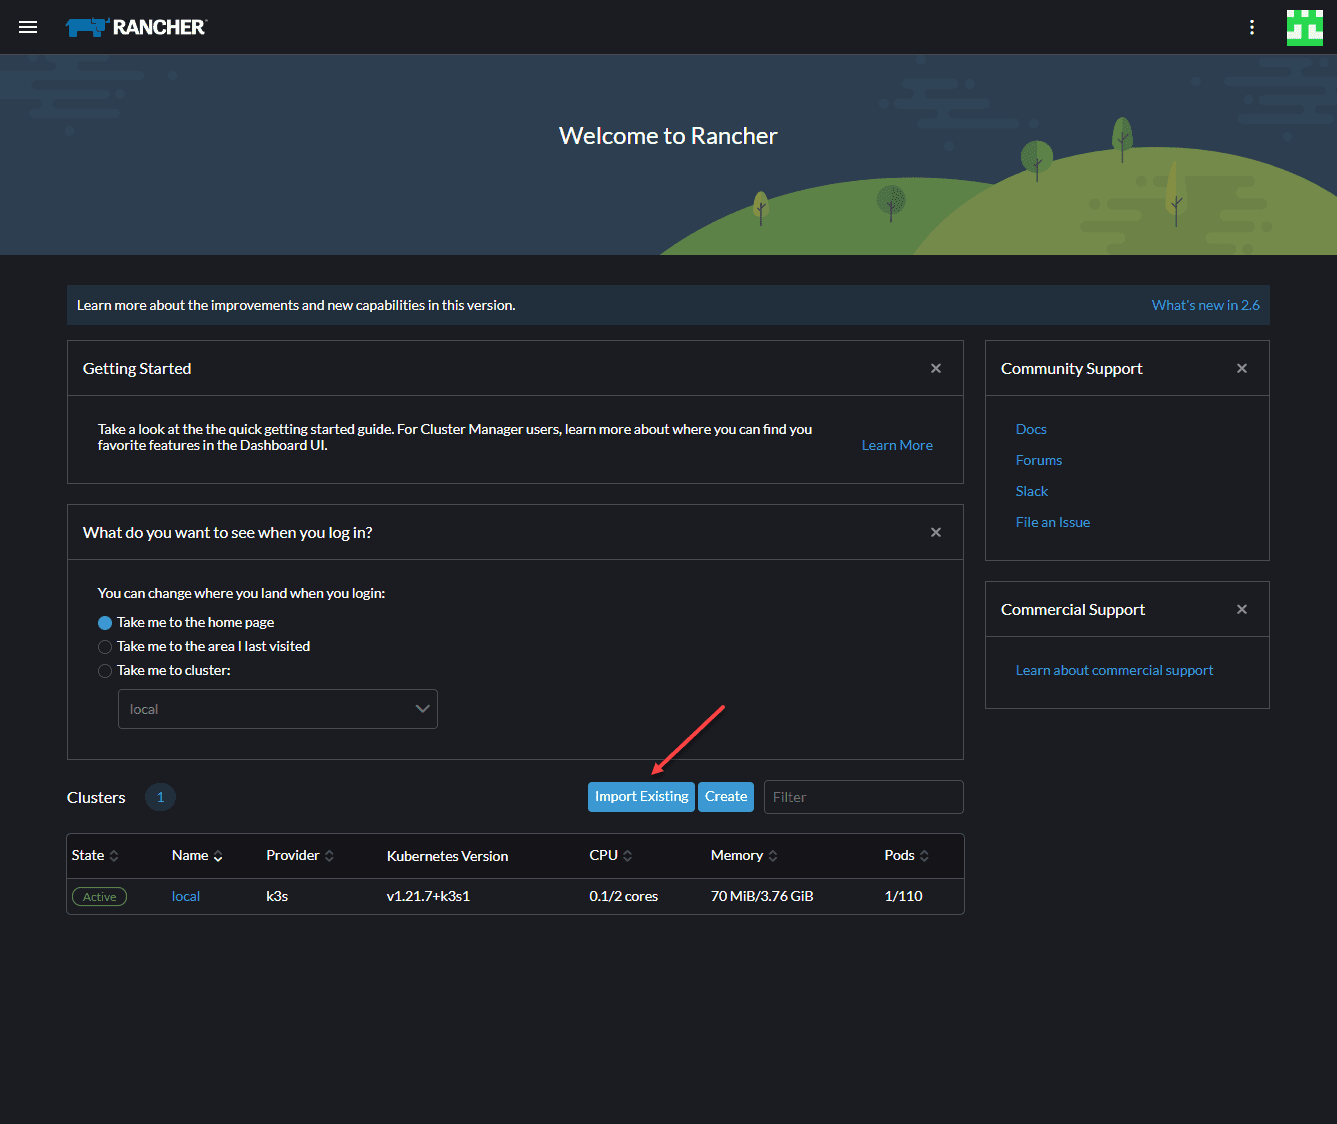
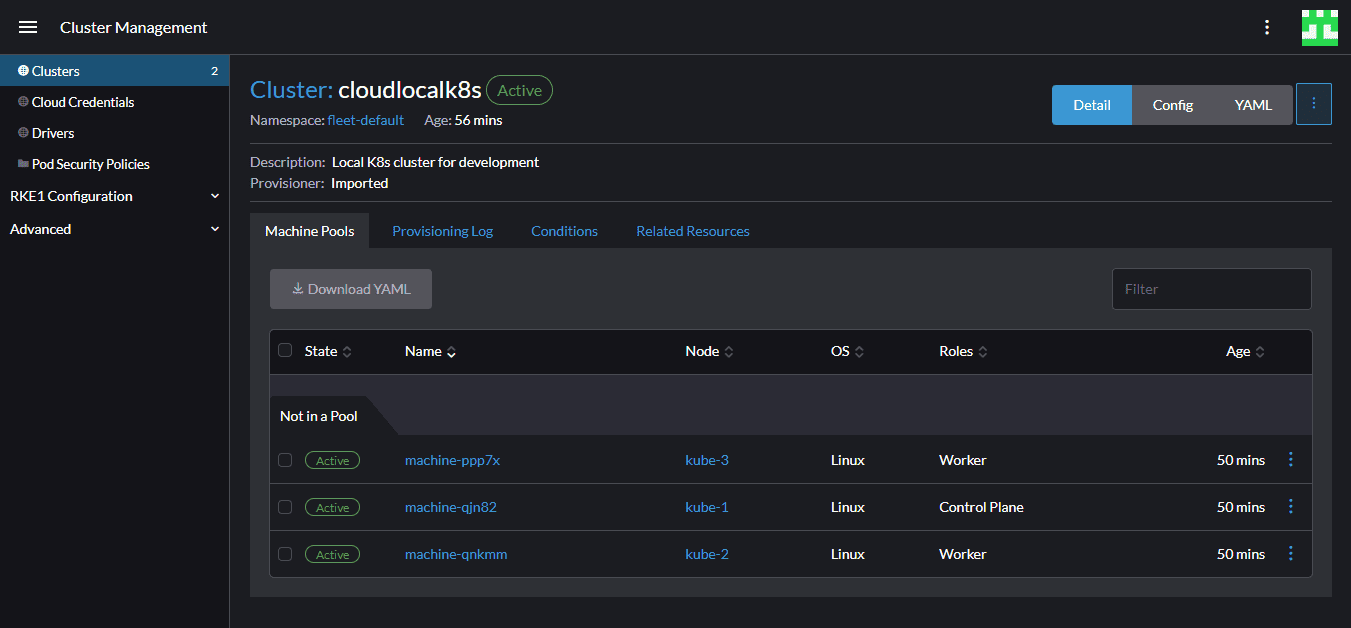
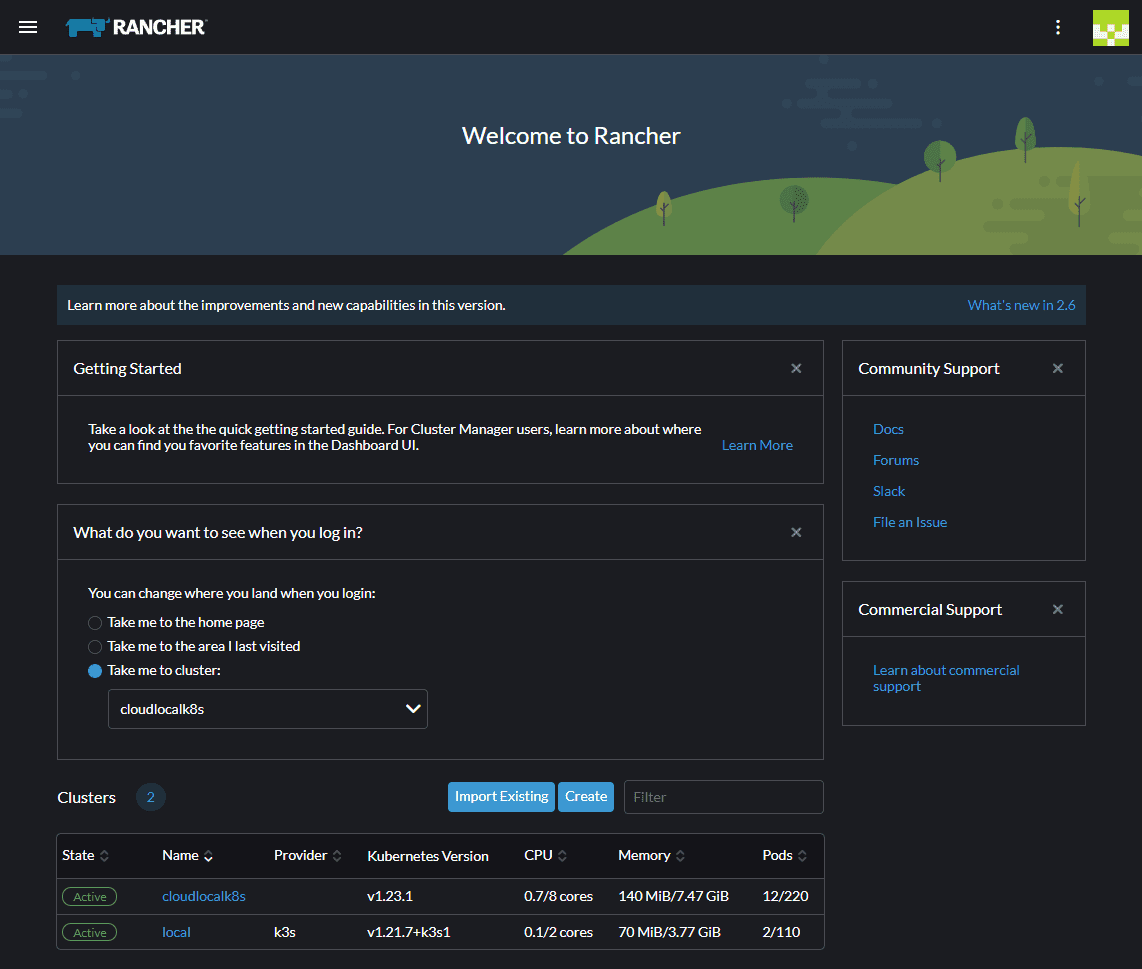
As you see below, we have a remote Kubernetes cluster joined (cloudlocalk8s) as well as the local managed Kubernetes cluster that is provisioned by Rancher.
It provides the GUI workflow that makes working with Kubernetes on a daily basis, extremely easy.
Key features
What key features are provided by Rancher for Kubernetes management?
- 100% free and open source
- Unified multi-cluster management
- Hybrid & multi-cloud support
- Centralized app catalog
- Consistent security policy and compliance
- Accelerate Develops adoption
- Freedom to innovate
Installing Rancher
Installing Rancher is simple. In my lab environment, I have Rancher running on a simple one-node configuration. For production, you will want to use a high-availability configuration which you can read more about here:
On an Ubuntu 20.04 box, I installed Docker, using the officially supported version for Rancher. At the time of this writing, the Docker 20.10 Rancher script is used. You can find the currently supported version of Docker here:
After you install Docker, you can install Rancher. You can do that with the command:
sudo docker run --privileged -d --restart=unless-stopped -p 80:80 -p 443:443 rancher/rancherRun the docker ps command to see your running containers:
docker ps
Rancher connect to existing cluster
Now, let’s look at Kubernetes Rancher 2 Cluster Management. Once you have Rancher up and running and are logged into your Rancher host, you will see the below dashboard presented. Click the Import Existing button.
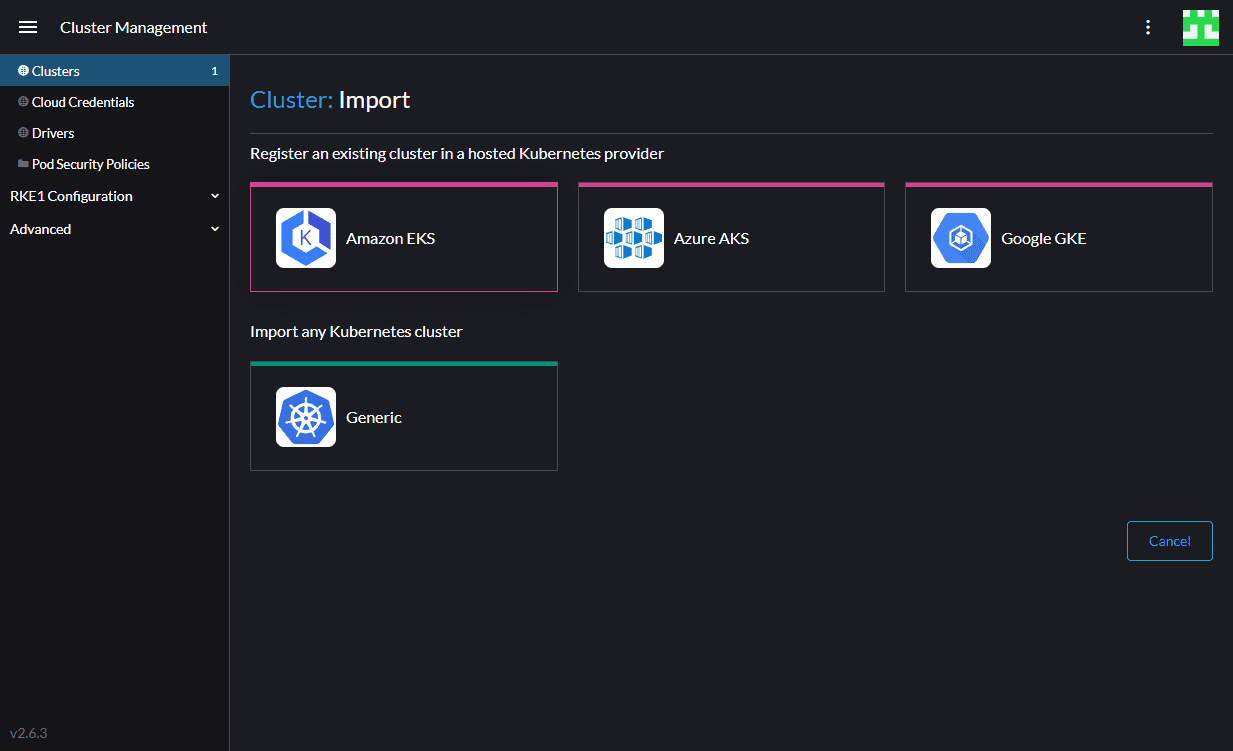
I have a vanilla Kubernetes cluster running as virtual machines inside my VMware vSphere home lab environment. You can read about how to spin up your own Kubernetes cluster using Ubuntu VMs and view my Terraform scripts here:
For the purposes of adopting my Kubernetes cluster, I am choosing Generic here since it fits my environment and I am not using one of the Kubernetes providers in the cloud.
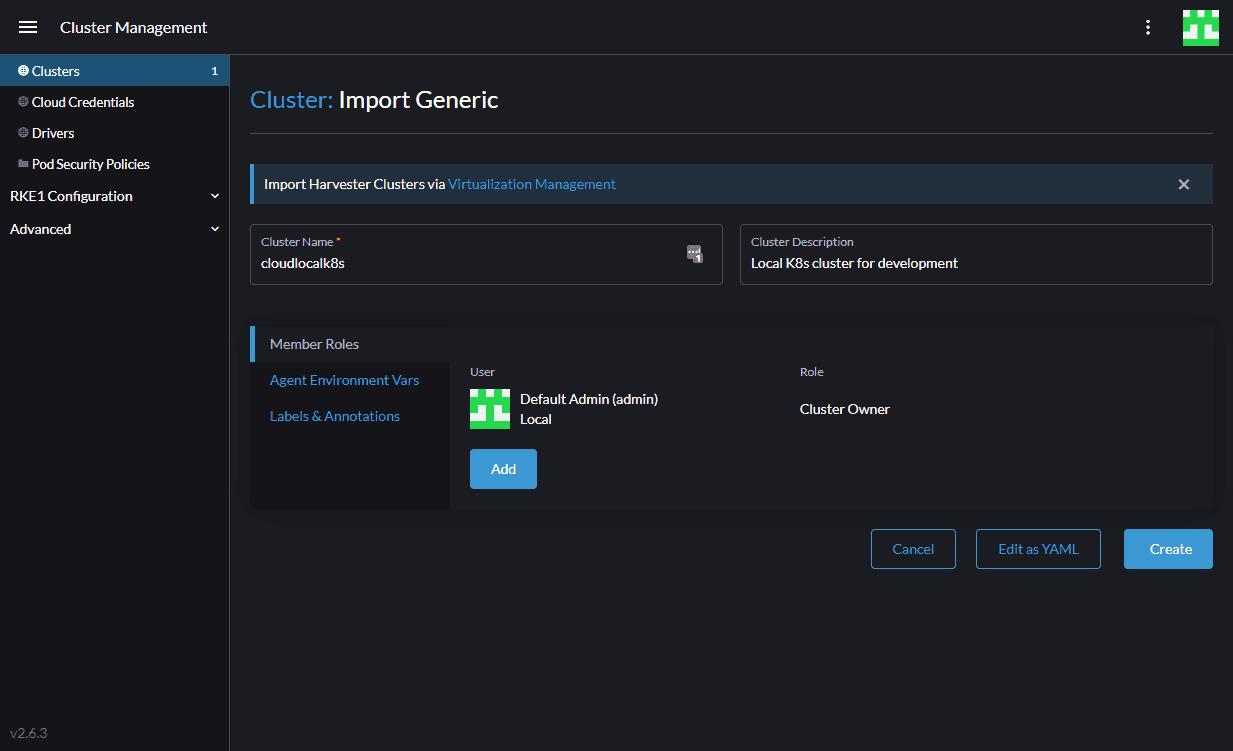
On the import Generic wizard, name your Kubernetes cluster. This is just a friendly name that you will see the K8s cluster referenced as in your Rancher dashboard. Click Create.
Once you click Create, you will see the registration commands displayed for you to copy and run on your existing Kubernetes cluster. For most who are using self-signed certificates in their labs, you will need to use the second command listed. Rancher has accounted for self-signed, untrusted SSL connections and provide the option for using a command to get around the insecure warnings.
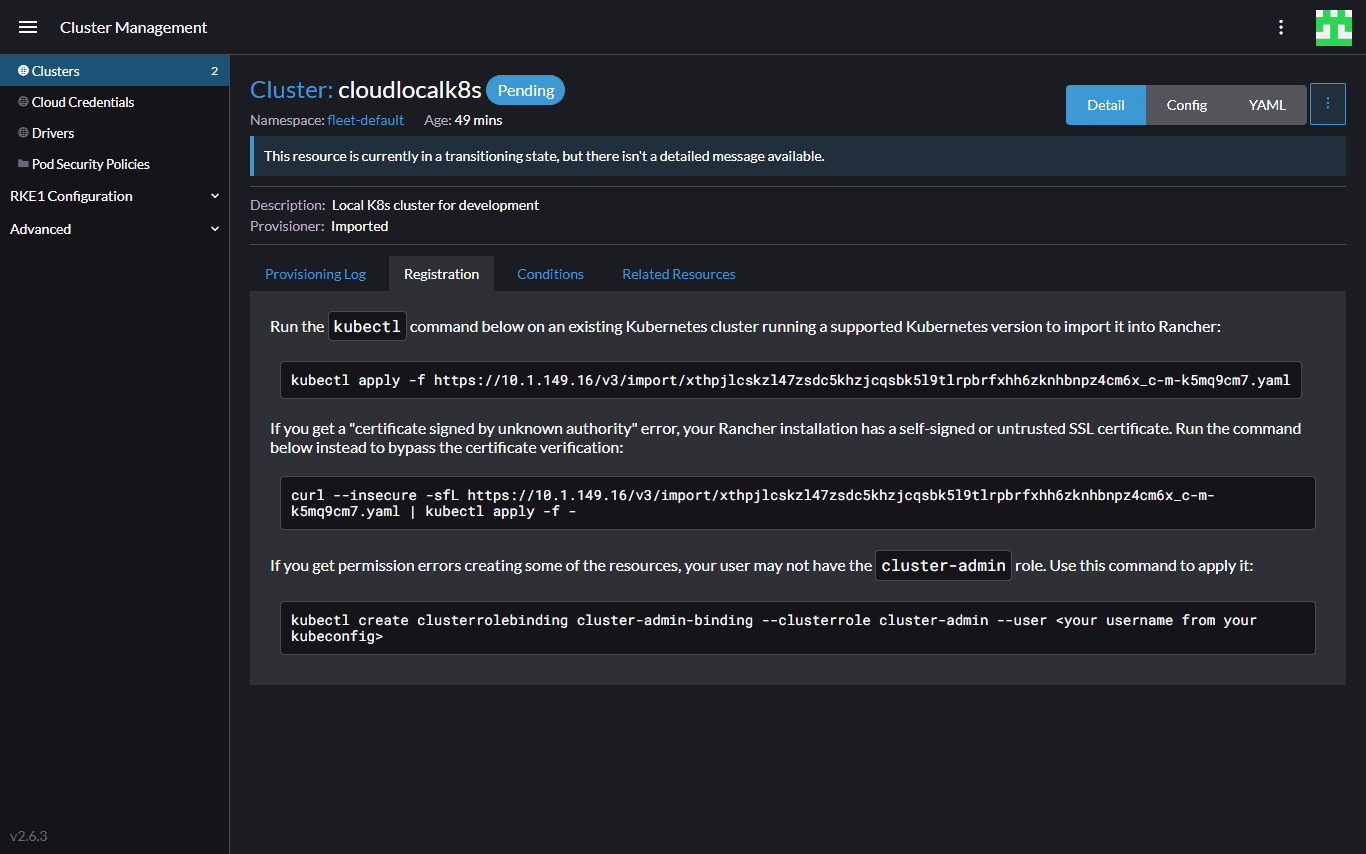
Below, I am using the insecure option on my Kubernetes cluster.

After running the command on the Kubernetes cluster, the cluster is imported successfully.
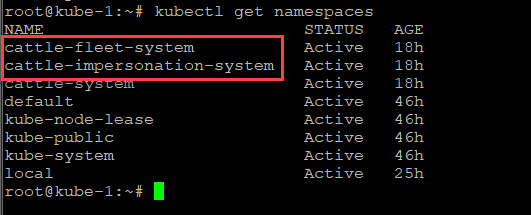
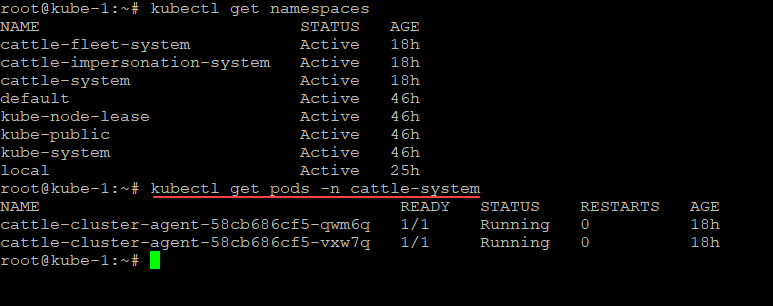
In case you are wondering what it does on your Kubernetes cluster, it installs the cattle-fleet-system and cattle-impersonation-system namespaces.
It also provisions Rancher pods in the namespaces. You can think of these as agents that run inside your Kubernetes cluster.
Wrapping Up
With Rancher connect to existing cluster, you can manage your existing Kubernets clusters in your environment. It provides many key features, including multi-cluster Kubernetes management and it is 100% free. Stay tuned for more Rancher content coming through the pipes early in 2022. Be sure to check out more about Rancher and learn how to download it here:
Google is updating how articles are shown. Don’t miss our leading home lab and tech content, written by humans, by setting Virtualization Howto as a preferred source.




Hi Brandon, good tutorial, almost achieved importing RKE2 cluster, but it evicted my import, probably due to security reasons ?
kubectl get pods -n cattle-system
NAME READY STATUS RESTARTS AGE
cattle-cluster-agent-d446544d-7r2m8 0/1 Evicted 0 2m12s
cattle-cluster-agent-d446544d-jcgv4 0/1 ContainerCreating 0 2m12s
cattle-cluster-agent-d446544d-k42fm 0/1 Evicted 0 2m12s
cattle-cluster-agent-d446544d-mp4n7 0/1 ContainerCreating 0 2m22s
Rupi,
Thank you for the comment. Do you have any additional error logs to share with this one? Any other issues to note?
Brandon