Windows Server 2022 Install with MDT
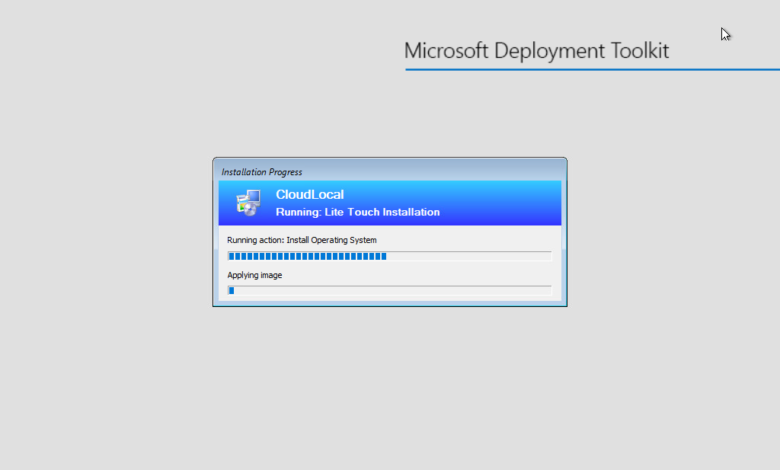
There are many ways to install Windows Server 2022 in the enterprise. However, for most, you will want to have an automated deployment of the Windows Server 2022 operating system that allows quickly spinning new servers in your environment when needed. Microsoft Deployment Tools (MDT) has been used by many organizations over the years to build and capture operating system images for automated deployments using PXE boot. In this walkthrough, we will take a quick look at a Windows Server 2022 install with MDT.
Why use Microsoft Deployment Tools MDT for Windows Server 2022 install
With the many tools available to deploy Windows Server 2022 using an automated process, such as Terraform, why would organizations choose to use Microsoft Deployment Tools (MDT)? Well, the reasons can be widely varied from organization to organization. However, MDT is widely used and may already be used heavily in the environment.
Often, businesses will want to go with what they currently are using for their automated builds and deployments. If MDT is already used, it provides a known platform that IT admins are familiar with and are already using in the environment to install Windows Server 2022.
Deploying the components for Microsoft Deployment Tools (MDT)
In this post, I will not be detailing the steps to deploy the components for Microsoft Deployment Tools (MDT) and Windows Deployment Services (WDS) for answering PXE requests. However, check out my previous post on the process to get Windows Deployment Services stood up with MDT integration as well:
Windows Server 2022 Install with MDT
Let’s look at the high-level steps for the Windows Server 2022 install with MDT.
- Import the Windows Server 2022 operating system
- Create a Task Sequence
- Run the Build and Capture process
- Windows Server 2022 Install with MDT captured image
1. Importing the Windows Server 2022 operating system
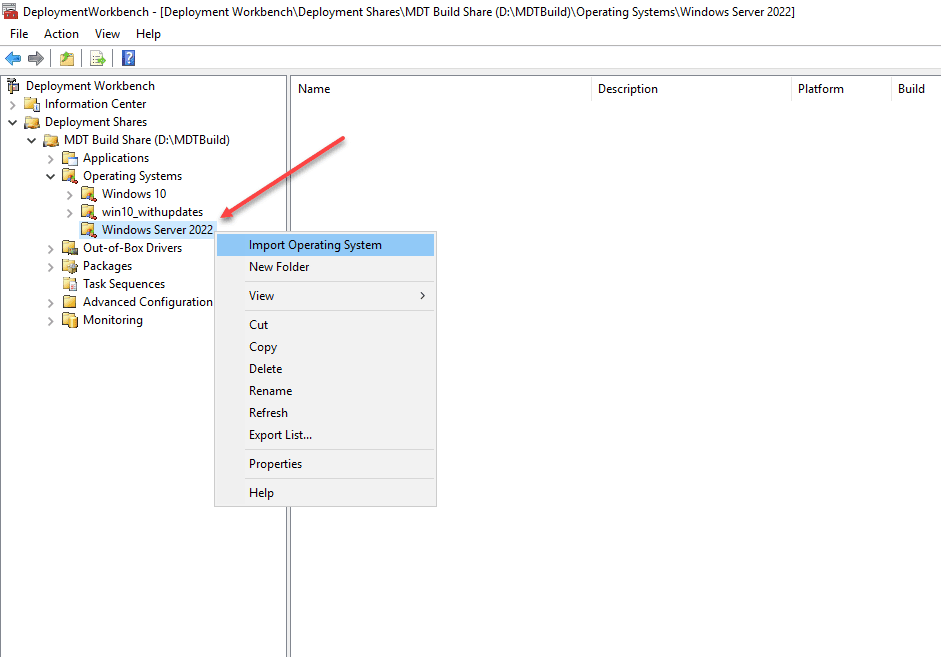
After you have MDT loaded, in the Deployment Workbench, create a new folder under Operating Systems, then right-click the folder and select Import Operating System.
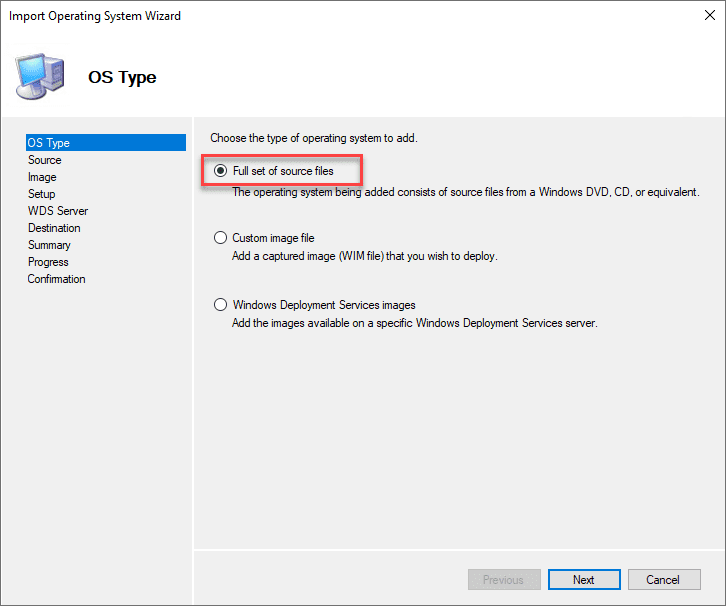
After selecting the Import Operating System option, select the Full set of source files.
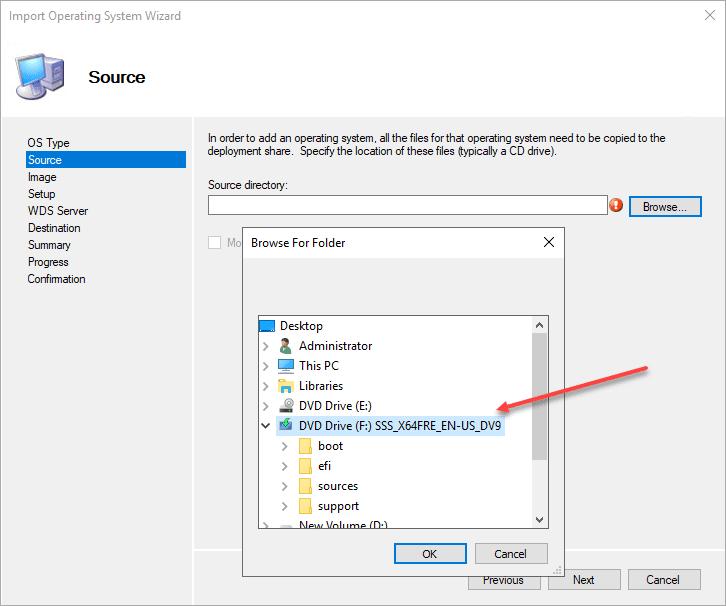
Before you can choose the installation path, you will need to have the Windows Server 2022 ISO file downloaded on your MDT server and mounted to virtual media. As you can see below, I am browsing to and selecting the virtual DVD Drive (F:).
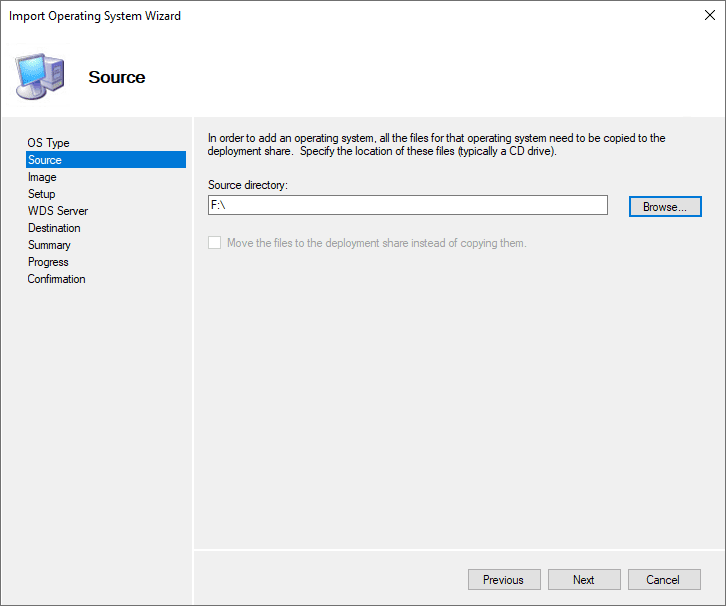
Confirm the source directory for the OS installation files.
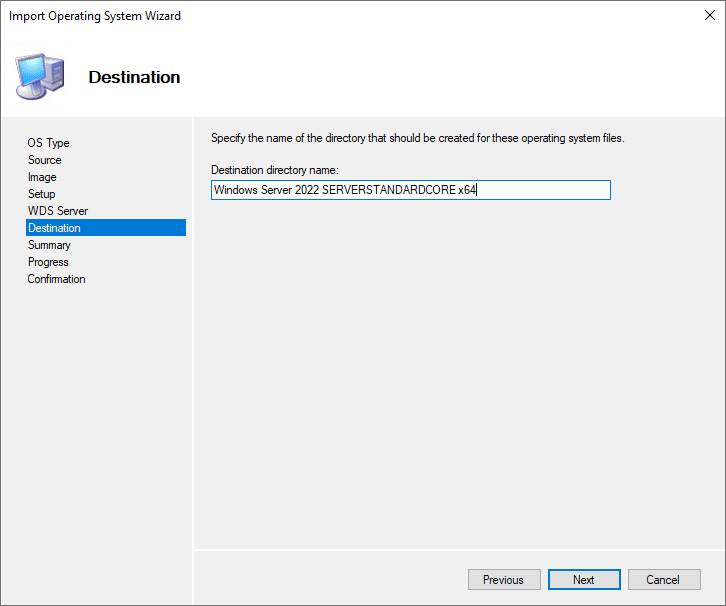
Select the Destination directory name for the Windows Server 2022 import.
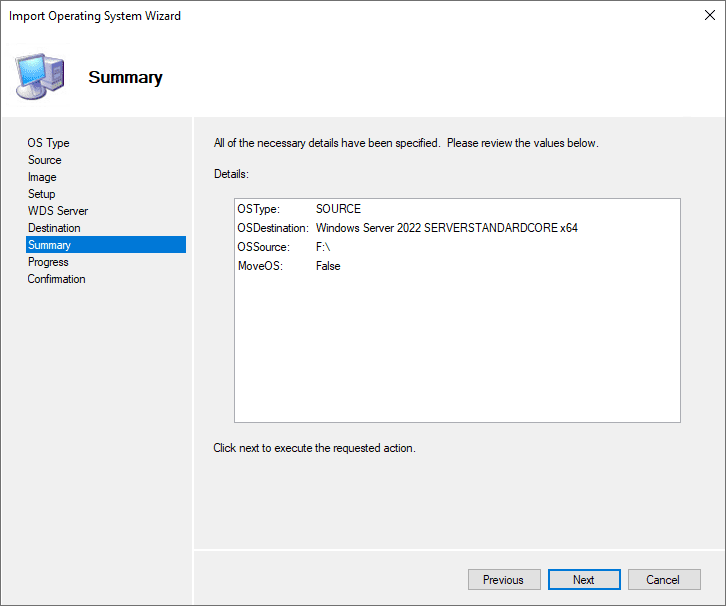
Verify everything on the summary screen.
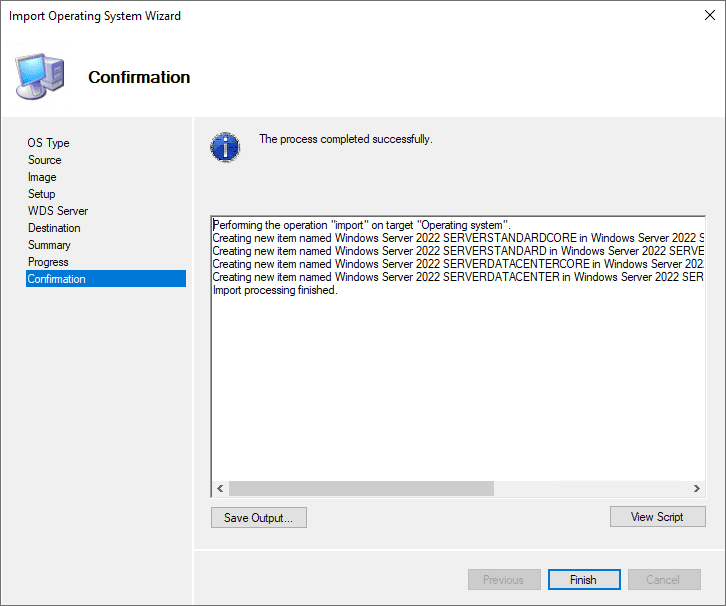
Confirm and finish the OS import of Windows Server 2022.
2. Create a Task Sequence
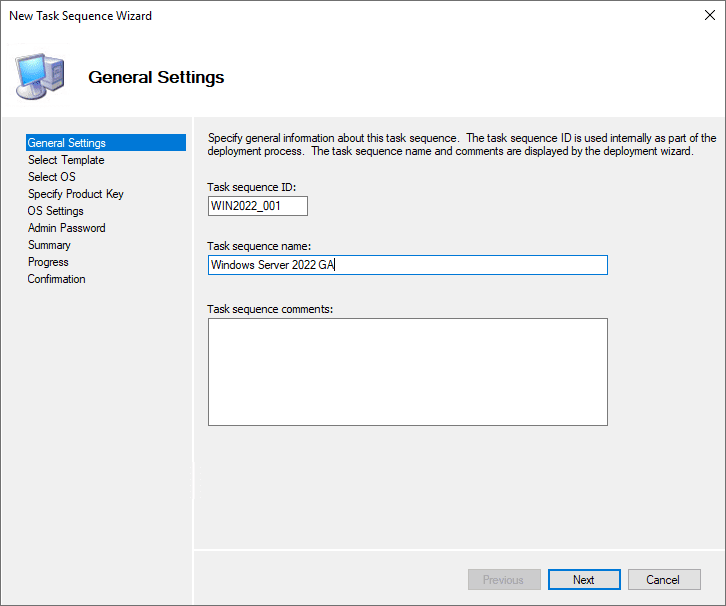
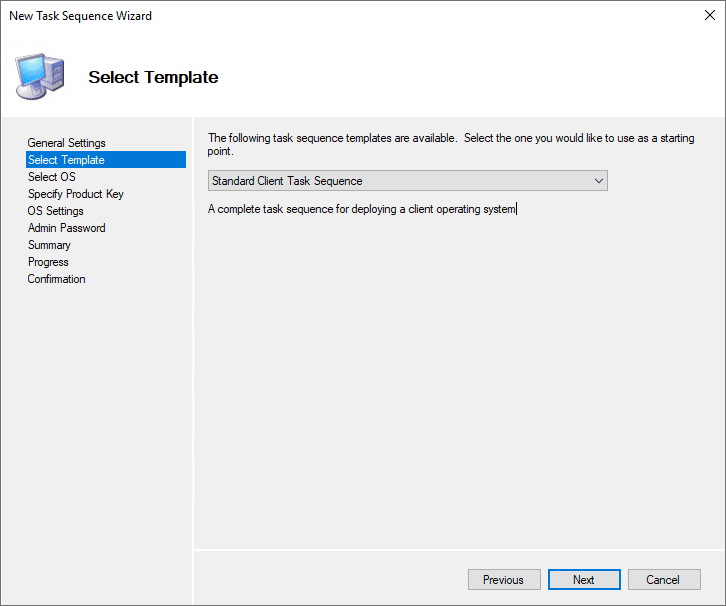
Next, after importing the Windows Server 2022 operating system files, we need to create a task sequence. A task sequence is a set of instructions that tell MDT how to create or deploy an image. First you need to create a Task sequence ID and Task sequence name.
Select the task sequence template you want to apply to the task sequence.
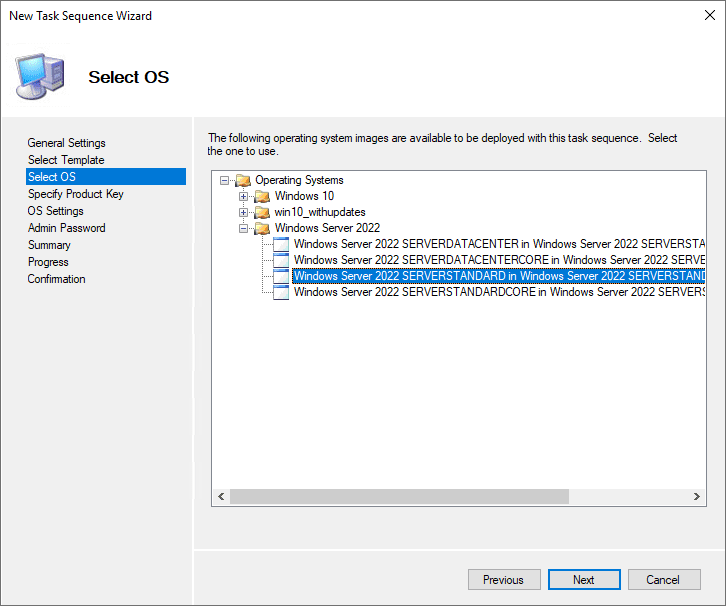
Select the operating system. If you imported the official Windows Server 2022 media, you will most likely see multiple images listed as below as the media contains multiple images.
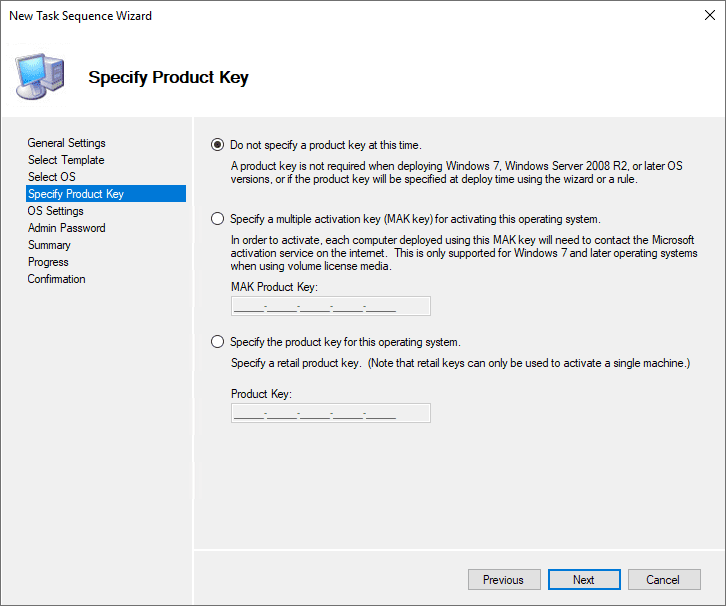
Choose how you want to handle the installation of the product key.
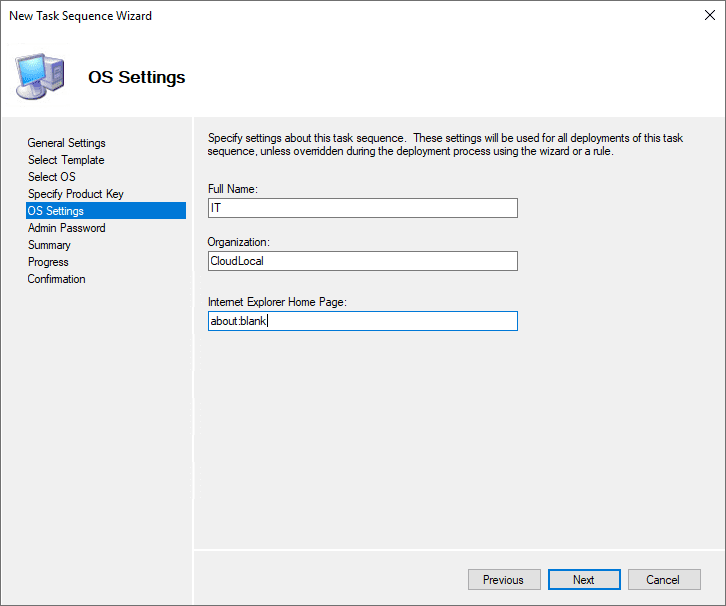
Customize the OS with full name and organization information.
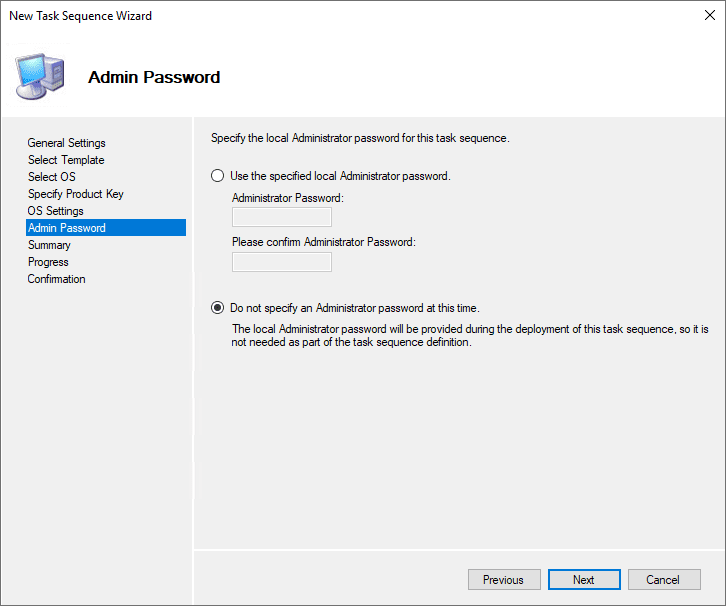
Choose how you want to specify the local administrator password.
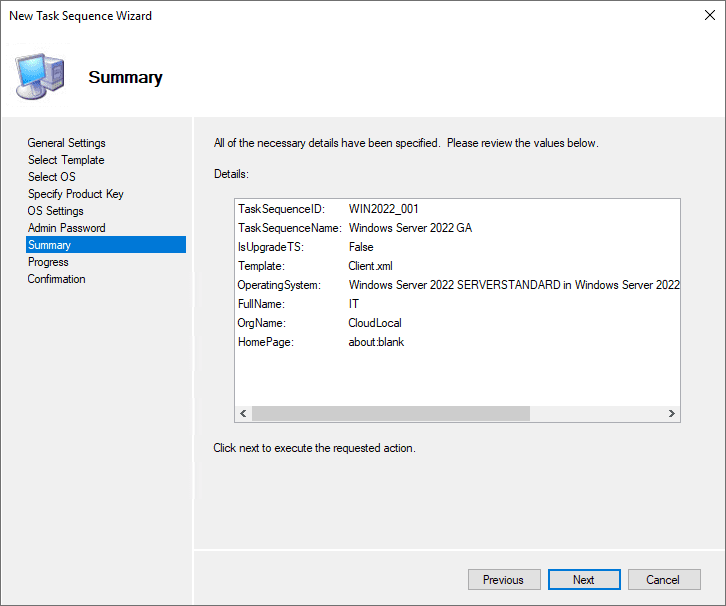
Review the summary screen information.
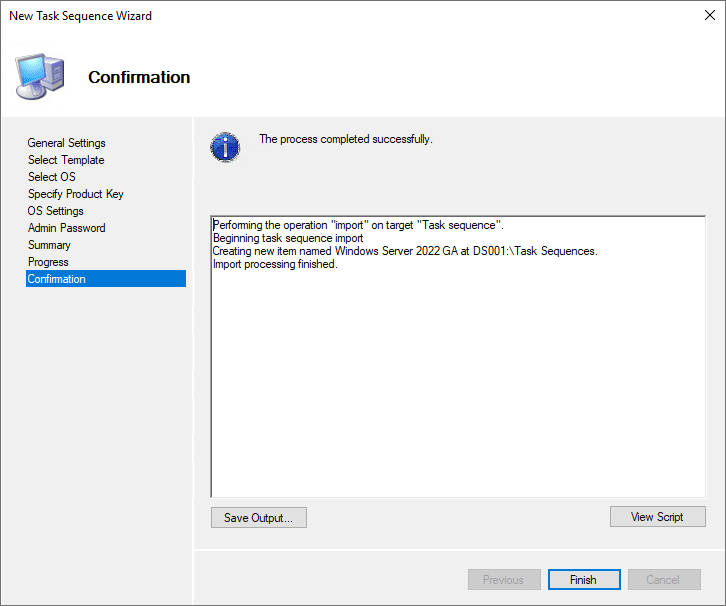
Confirm and create the task sequence.
3. Run the build and capture process
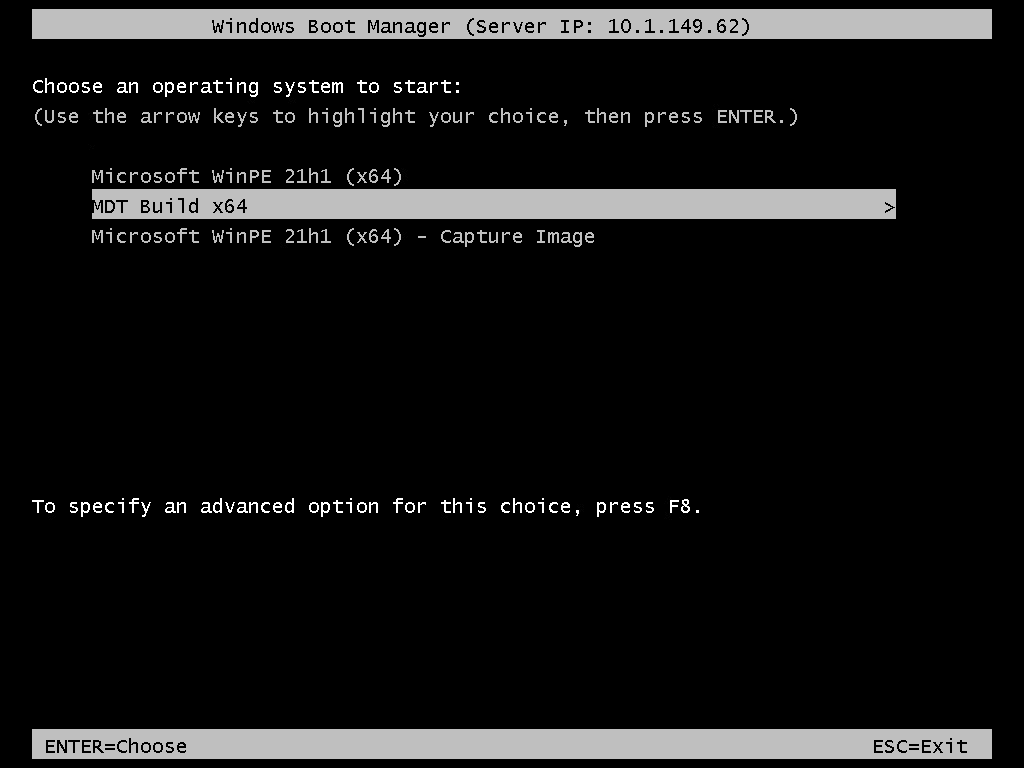
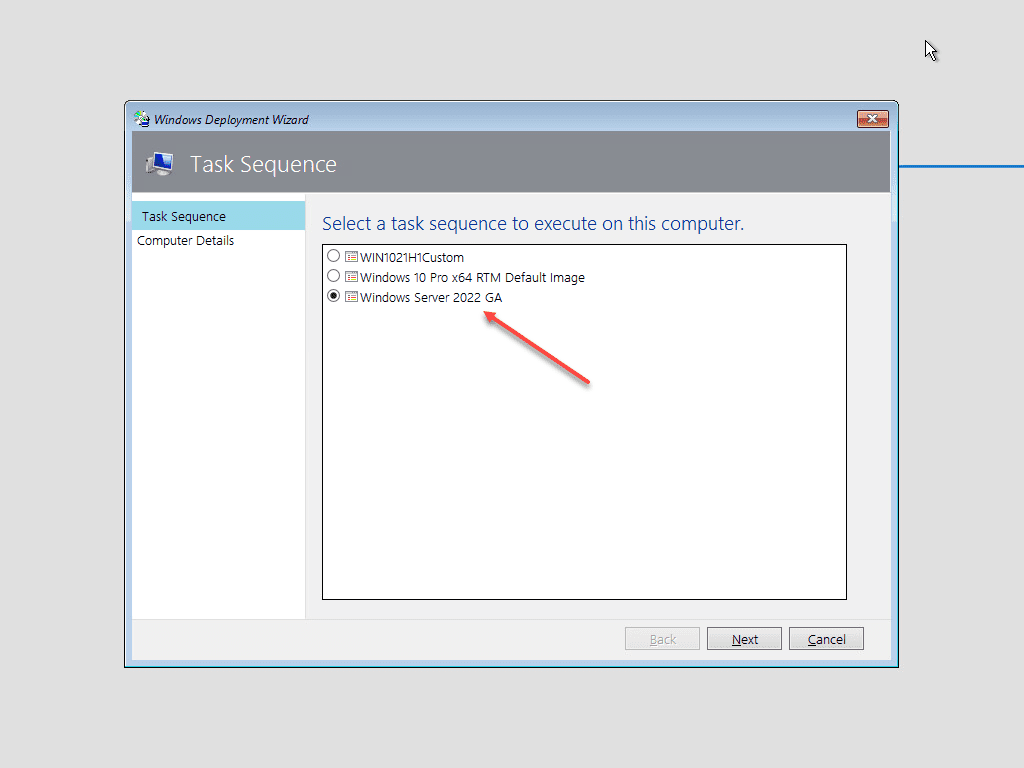
After importing the OS and creating the task sequence, we are ready to run the “build and capture” process to capture a Windows Server 2022 image. This process is fairly straightforward. You boot your “reference VM” for Windows Server 2022 from PXE and select the MDT Build LiteTouch image.
You should see the Windows Server 2022 task sequence we created earlier.
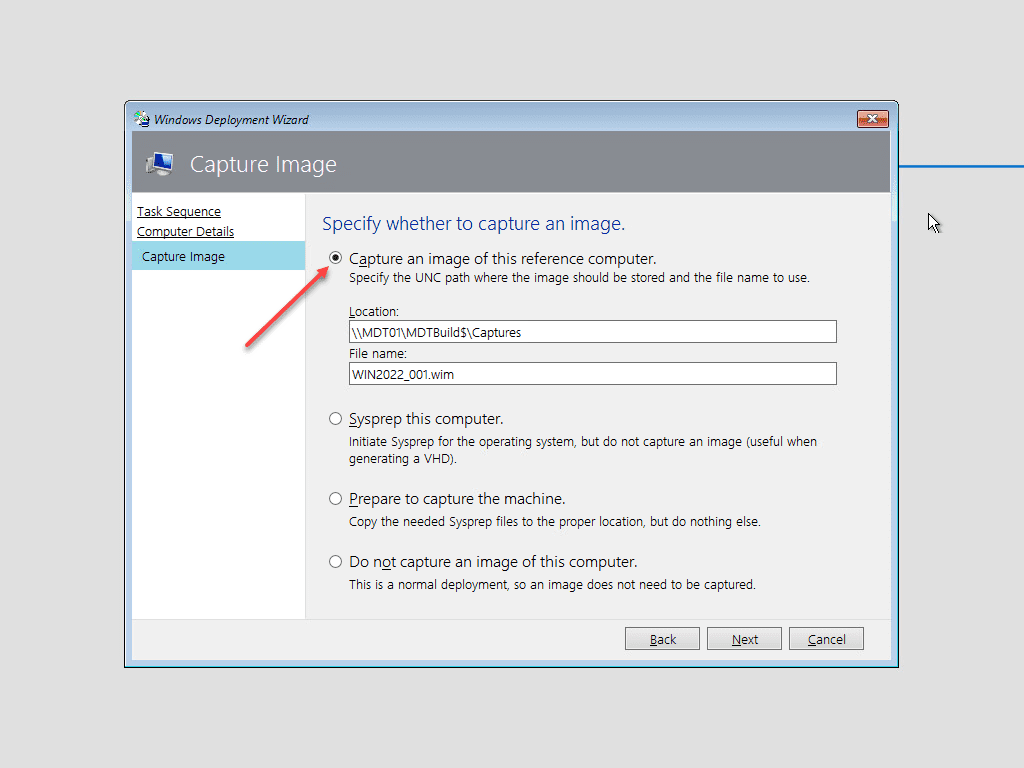
Choose to Capture an image of this reference computer.
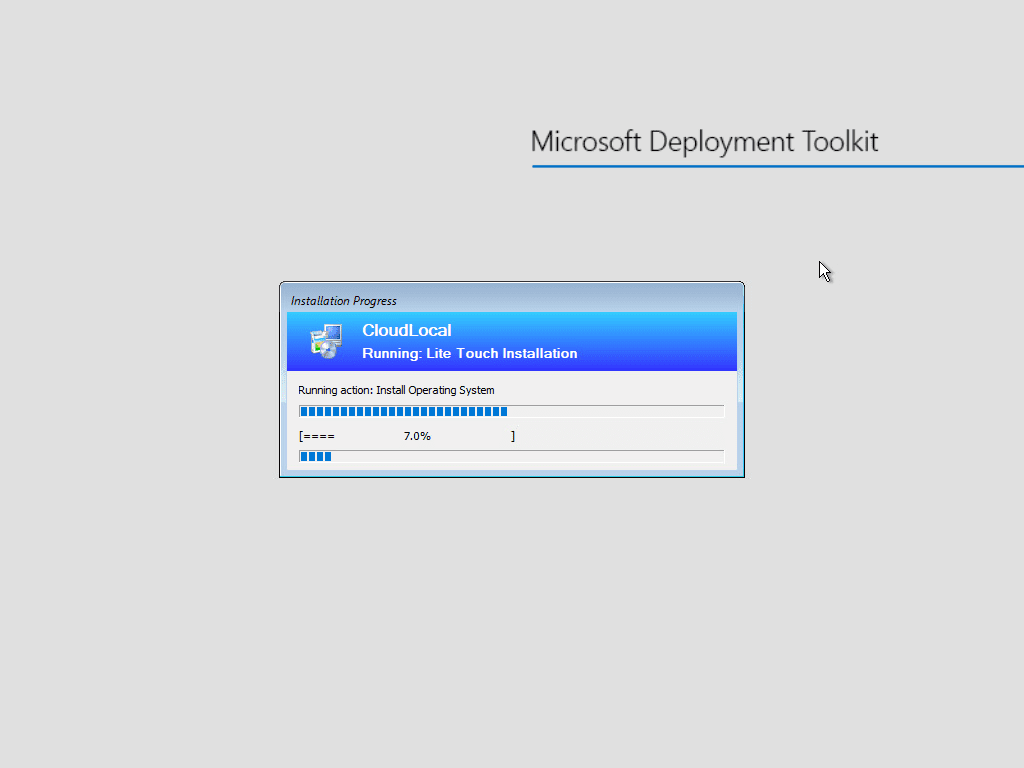
The build and capture process should run in a fully automated way to install Windows Server 2022 and then capture an image of the reference VM.
4. Windows Server 2022 Install with MDT captured image
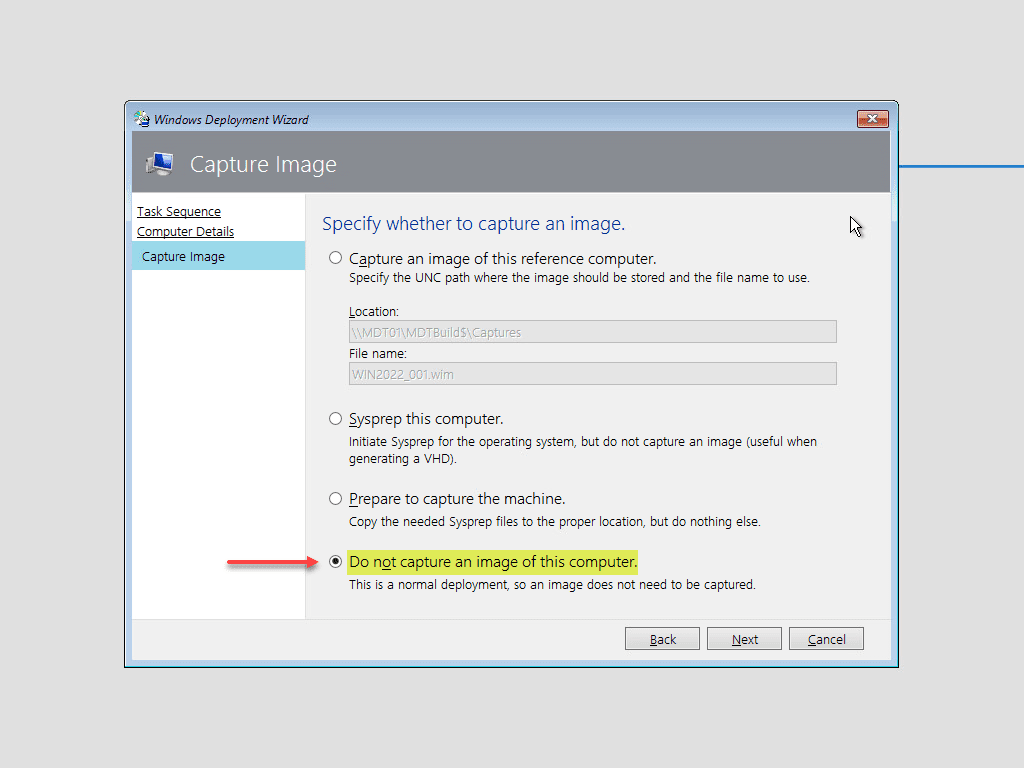
After the Windows Server 2022 reference image is captured, it can be used to install Windows Server 2022, booting from PXE. Select the Windows Server 2022 task sequence once again.
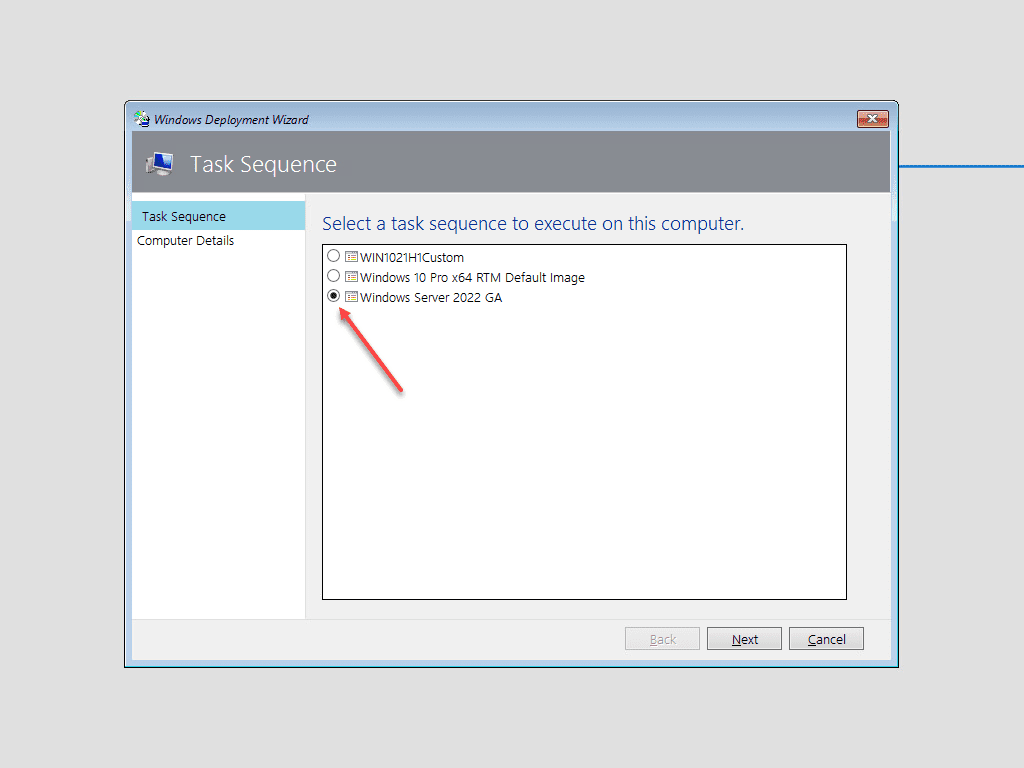
Instead of capturing the image, select Do not capture an image of this computer. When this option is selected, as shown below, it is a normal deployment so an image does not need to be captured first as during the build & capture process. Rather, the image is simply applied for a normal deployment.
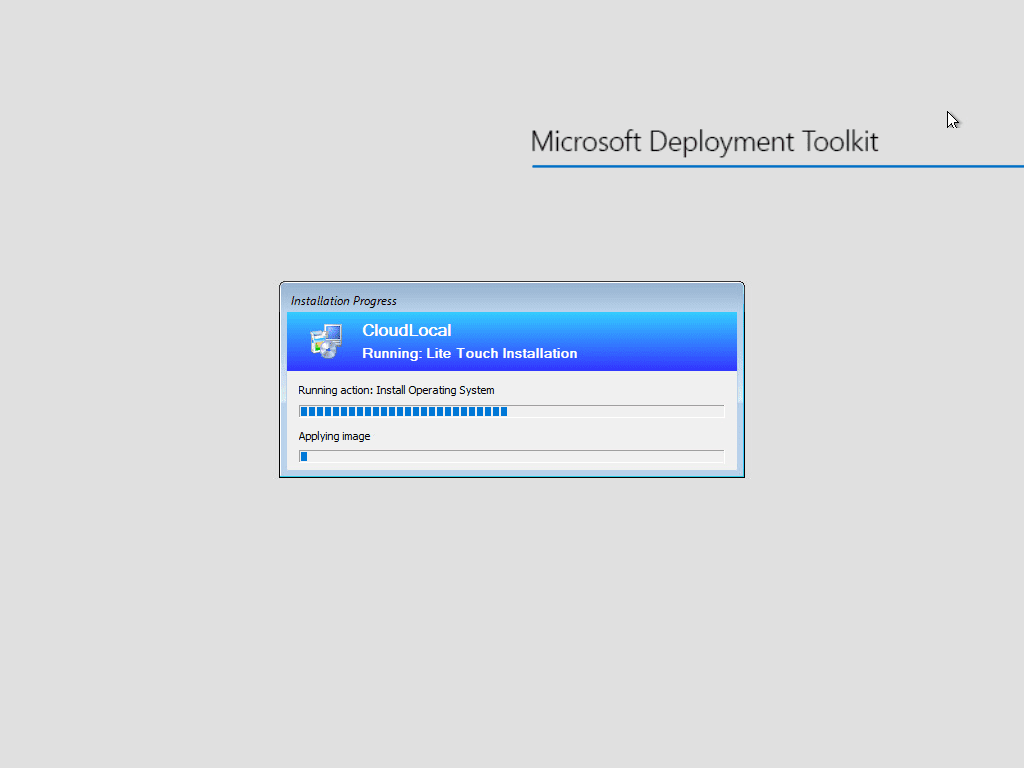
The image is deployed to the target VM booted via PXE.
Wrapping Up
The Windows Server 2022 Install with MDT is straightforward. After importing the Windows Server 2022 installation files, creating a task sequence, and running the build & capture, the image is ready to deploy to a new Windows Server 2022 installation. The steps shown above are basic steps. For most enterprise environments, most will want to heavily customize the installation with custom settings and configuration for their particular environments.


