vSphere 6.7 vSphere Client IP Pools
Things have changed when it comes to using the new vSphere Client to perform administration tasks. Workflows have been updated and certain functionality is found underneath different tabs than they used to be. IP Pools are one of those features and configuration items that you don’t setup every day but that you are required to configure for various vApps and appliances. Most of the documentation out there at the moment is out-of-date when it comes to showing where in vSphere 6.7 vSphere Client IP Pools are configured. In this post, we will take a quick look at where to configure this in vSphere 6.7.
Why Are IP Pools Needed?
As mentioned in the outset, you need IP Pools configured so you can use certain appliances, vApps, etc. In fact, when you try to power on certain appliances, these may look for the IP Pool to be in place.
You may see an error such as Network <Network name> has no associated network protocol profile.
This error means that you do not have an associated network protocol for the virtual network. Now in the new vSphere Client, IP Pools are found underneath the Network protocol profile section. Where is that?
Where are vSphere 6.7 vSphere Client IP Pools?
Unlike the older versions of the vSphere “Fat” Client and even the vSphere Web Client, there is no IP Pools tab when you click on the Datacenter node and look at available tabs you have in the new HTML 5 vSphere Client.
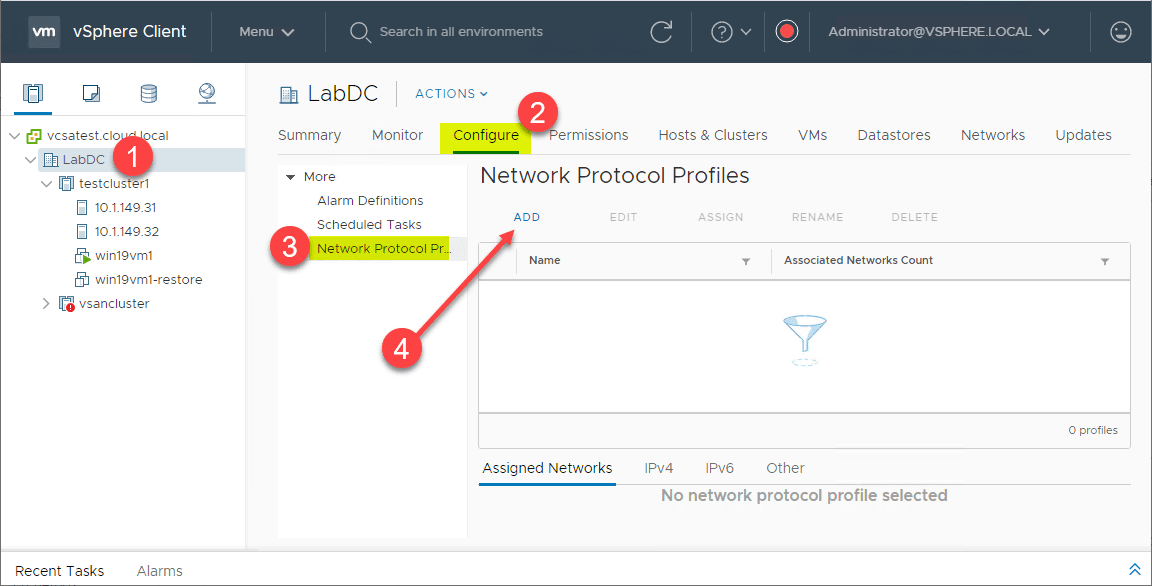
To create an IP Pool, you create a Network Protocol Profile. To get to this area, click on your datacenter in the hosts and clusters view. Click Configure > Network Protocol Profiles > Add.
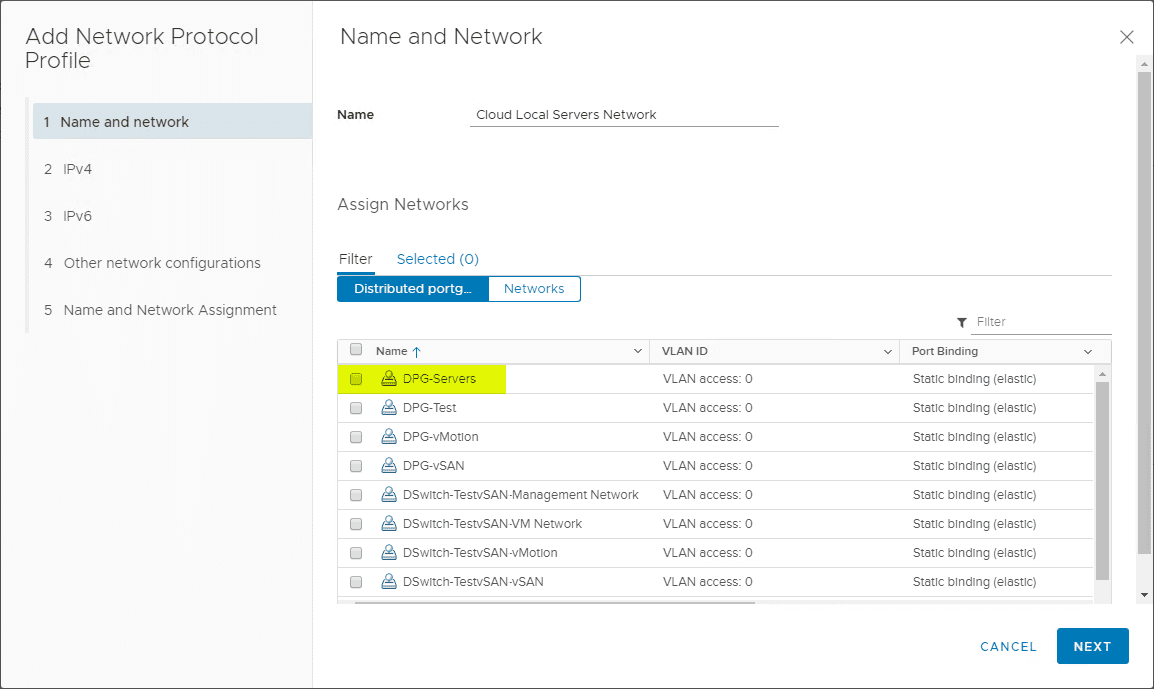
This starts the Add Network Protocol Profile wizard. The first step in the wizard is to select the network you want to be associated with your Network Protocol. The “network” here being the vSwitch portgroup, either vSphere Distributed Switch port groups or vSphere Standard Switch portgroups can be attached.
The tabs for choosing your virtual networks are not that intuitive on this screen as there is a tab for Distributed portgroups which is obviously for VDS. However, the tab for VSS networks is simply Networks.
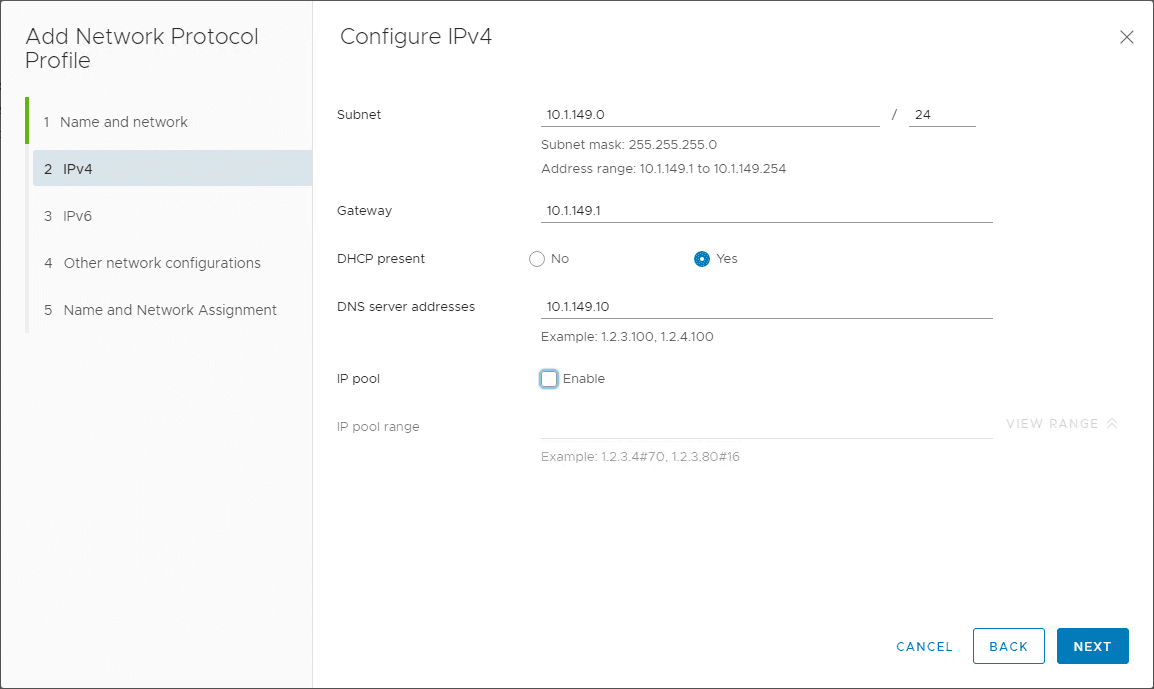
Next, configure your IPv4 settings. This includes:
- Subnet
- Gateway
- DHCP present – You can define whether DHCP is running
- IP pool – Enable or leave it uncheck
- If you enable an IP Pool, you can enter the IP range you want to use
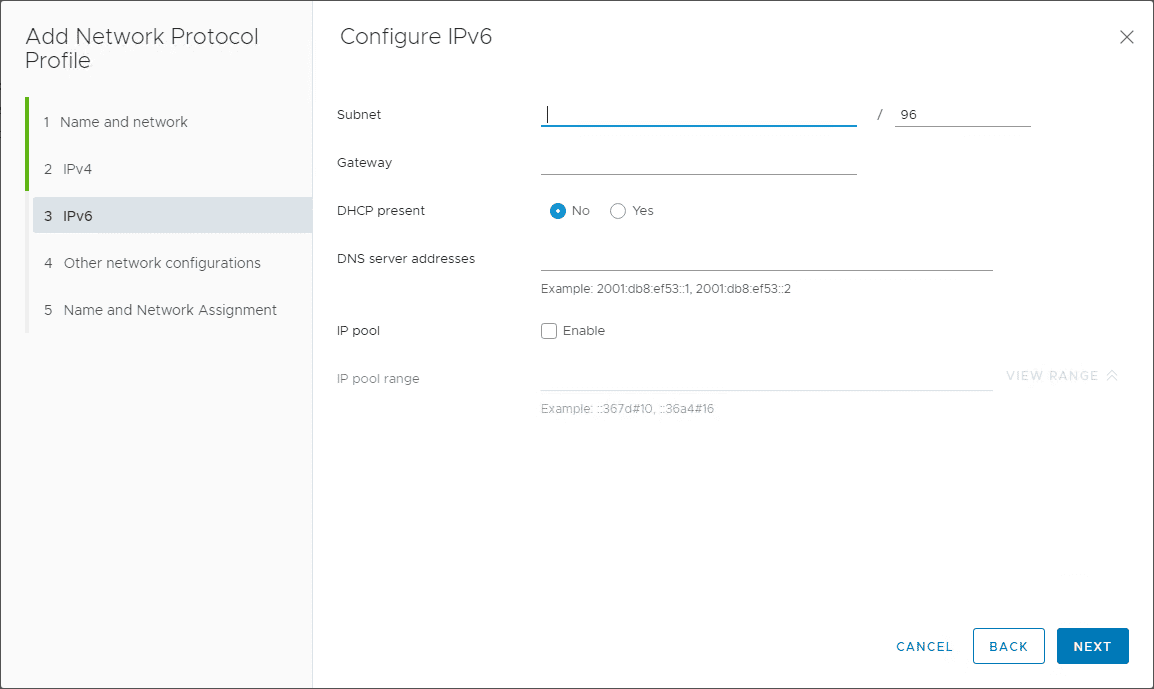
Configure your settings for IPv6 if applicable.
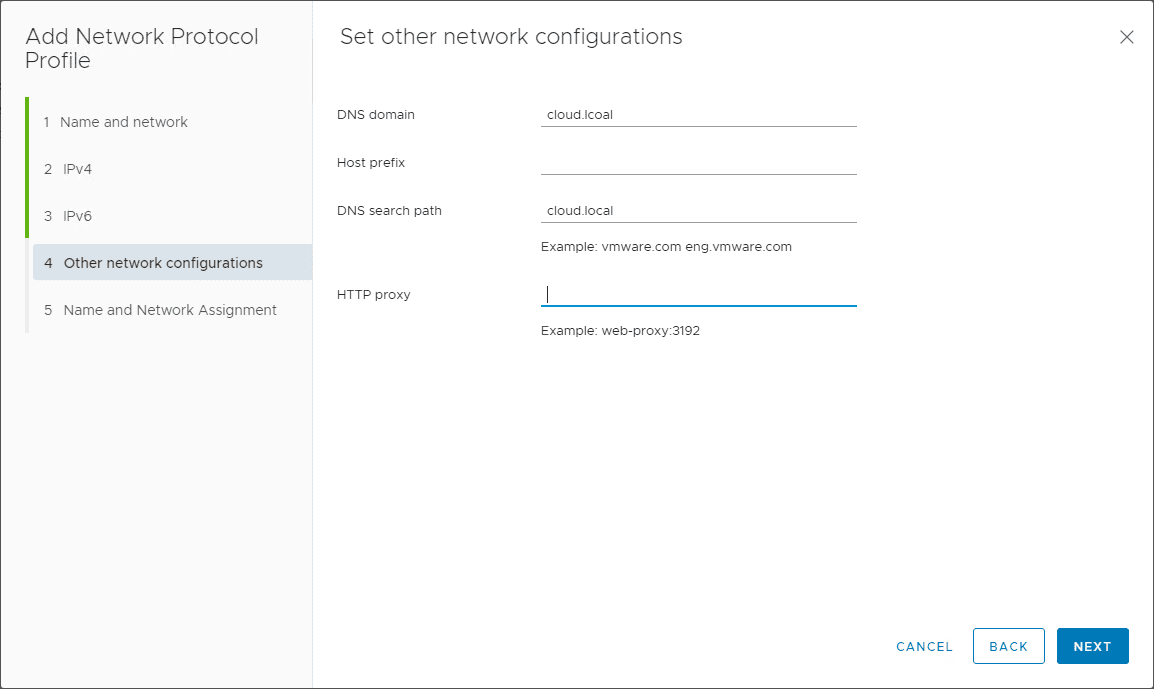
Set other network configurations like DNS domain, Host Profile, DNS search path, and HTTP proxy.
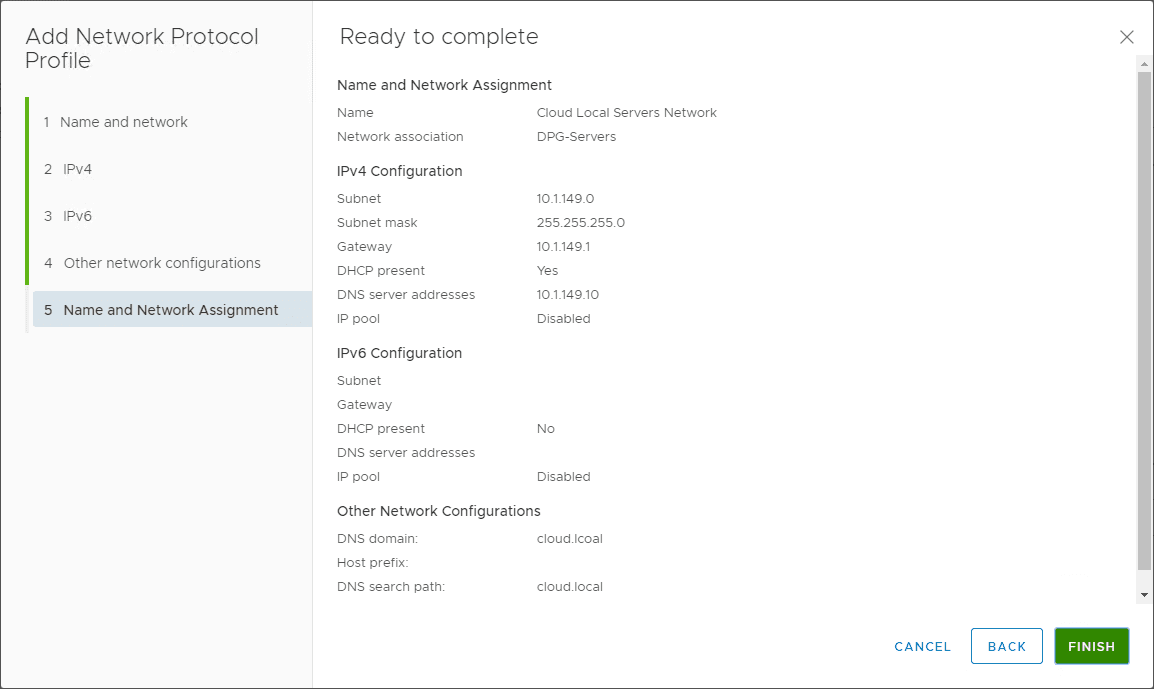
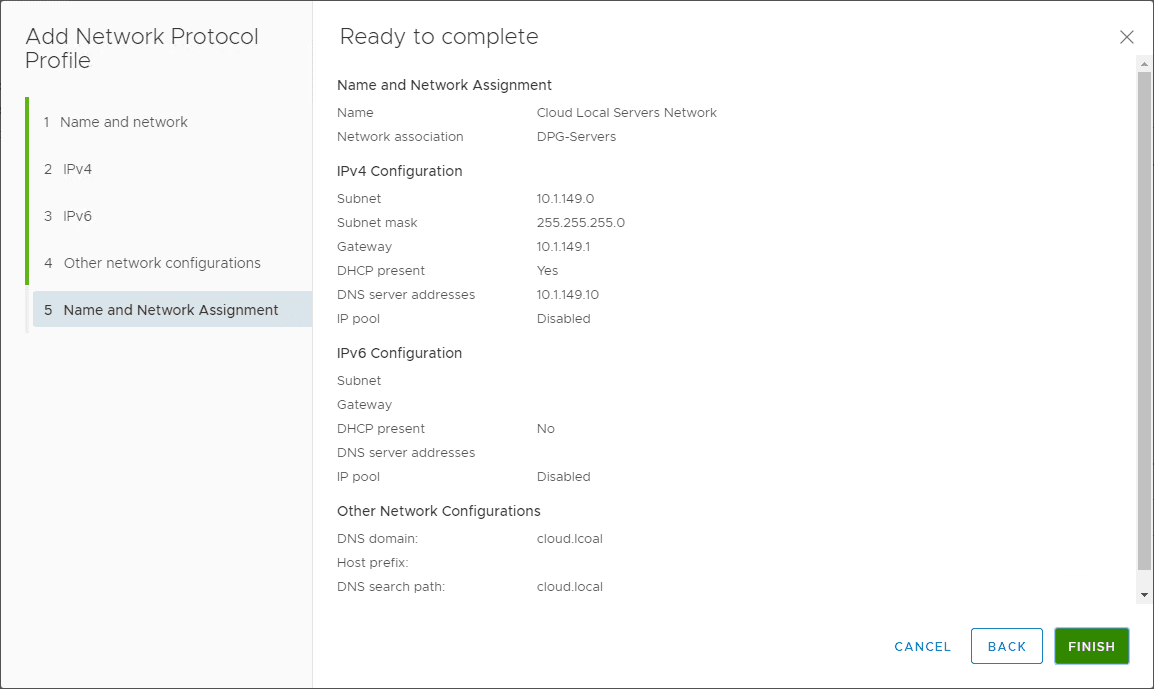
Finish out the configuration of the Network Protocol Profile.
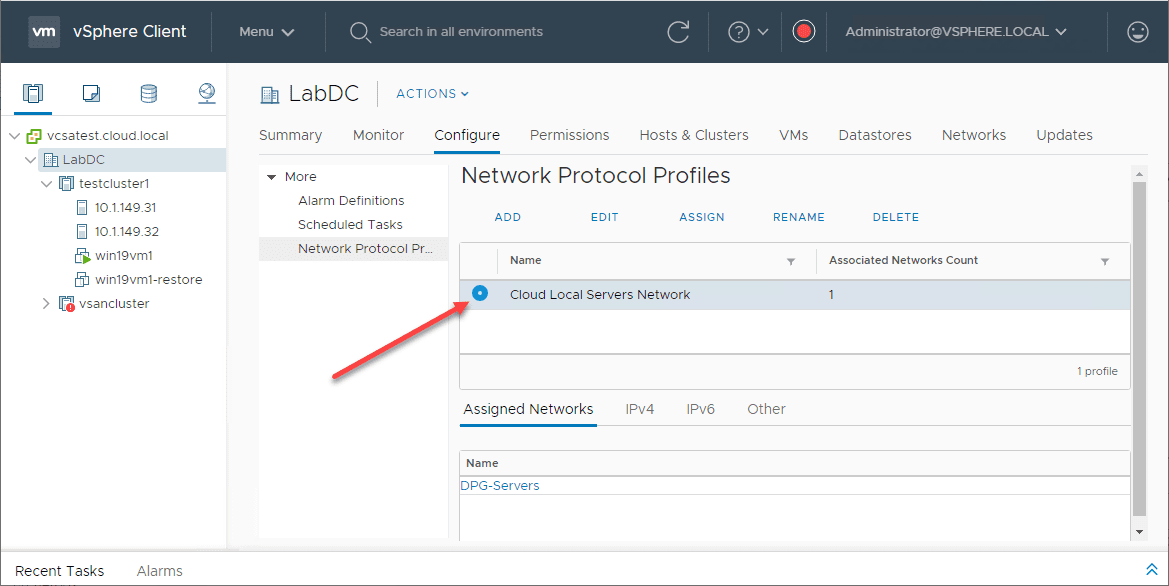
After clicking Finish, you should see your new Network Protocol Profile listed and ready.
Wrapping Up
Creating vSphere 6.7 vSphere Client IP Pools amounts to creating a new Network Protcol Profile that allows configuring your IPv4 and IPv6 configuration settings and specifying whether or not you want to enable an IP Pool. The nice thing about the Network Protocol Profile is that you don’t really have to create an IP Pool, but rather just specify that DHCP is available.
If you run into the no associated network protocol profile error you will know in the vSphere 6.7 vSphere Client where you create the network protocol profile to specify the IP Pool if needed.


