Migrate 2-Node VMware vSAN to 3-node Configuration
One of the upgrades that I have had planned for the home lab environment has been to migrate my 2-node VMware vSAN configuration to a 3-node configuration. Since I wanted to add more compute strength and resources to my vSAN cluster, this was a logical move in the home lab environment. As it turns out the process to migrate 2-node VMware vSAN to 3-node configuration is not difficult at all. There are a few steps to complete, however, most of these you will find easy to accomplish and you will be running on a new 3-node configuration in no time. I wanted to bring you along in my journey by way of screenshots on the process to get this done.
Prerequisites to Accomplish on the New ESXi Host
There is a bit of prep work that you need to accomplish before actually scaling out your vSAN cluster from 2-node to 3-node configuration. I had the third host built up with VMware ESXi, however, you want to make sure of and accomplish the following:
- Install VMware ESXi and bring the host up to the exact build of the other two VMware vSAN ESXi hosts in your 2-node stretched cluster.
- Configure the networking of the “soon to be” third host in your vSAN cluster. For me this involved adding the ESXi host to vCenter Server as a standalone host and getting my distributed switch configuration added to the host. This included my VMware vSAN and vMotion VMkernel ports/IP addresses
- You want to verify connectivity between your third host and the VMkernel ports of the other ESXi hosts.
What about the existing 2-node configuration?
Things You Will Need to Do on your 2-Node cluster
As an overview, you will do the following:
- I suggest disabling HA and DRS as you don’t want weird things to start happening when configuring and “touching” hosts in the cluster. You want to have total control over this in a manual fashion.
- Disable stretched clustering
- Delete the fault domains
- Bring in the third host
- Resynchronize objects on the third host
Migrate 2-Node VMware vSAN to 3-node Configuration
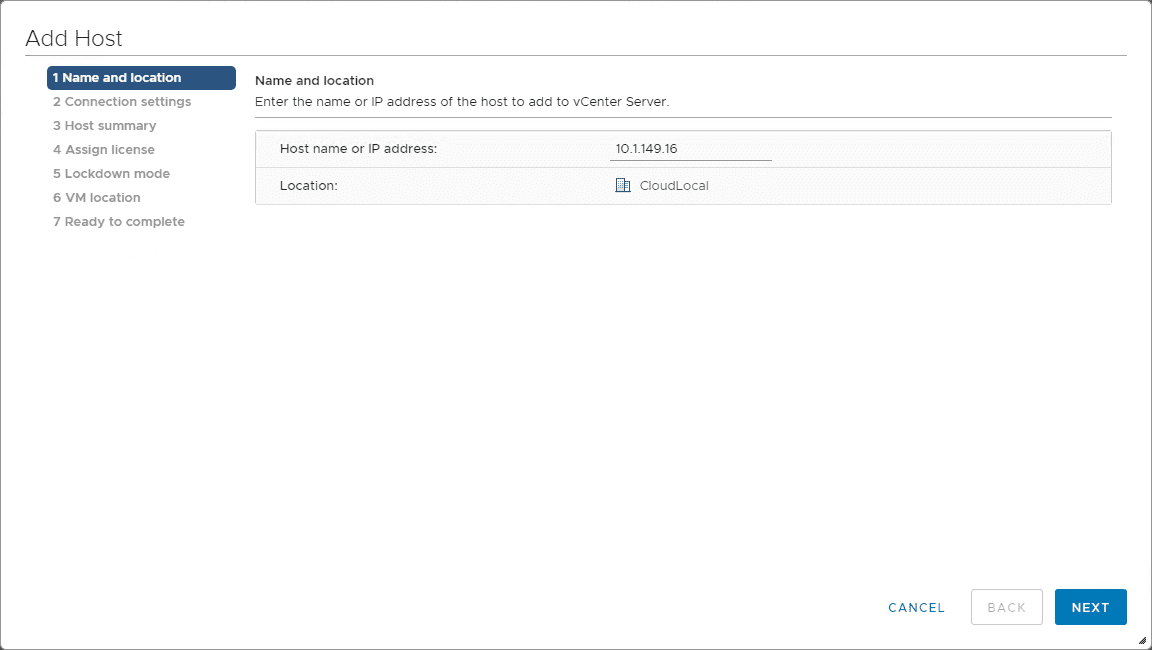
Below are high-level screenshots of the process in the home lab environment. All hosts are VMware ESXi 6.7U3b. First thing that I do is add the new VMware ESXi host into the vSphere environment by simply adding the new ESXi host to vCenter Server as a non-cluster host.
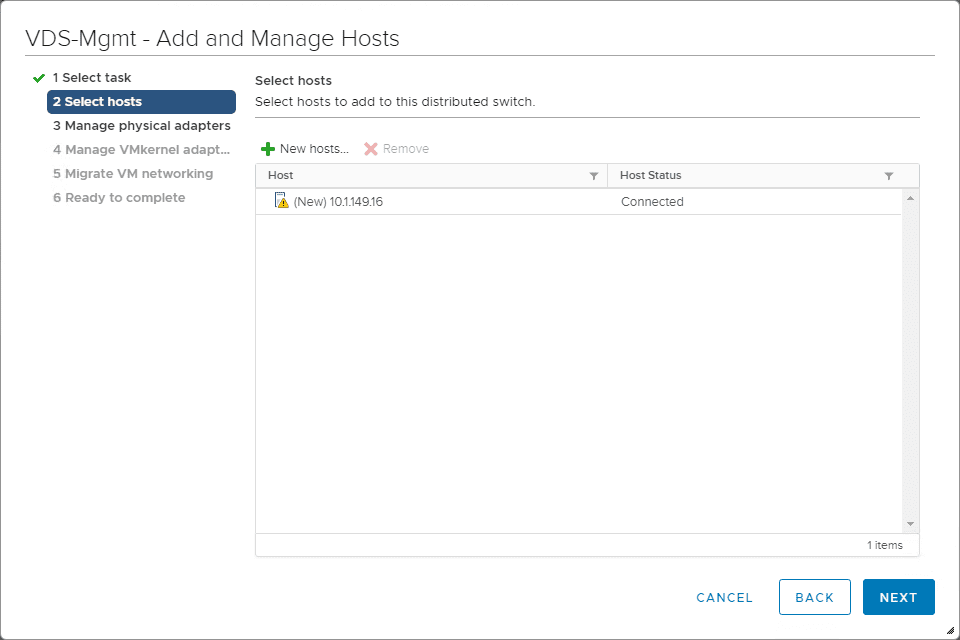
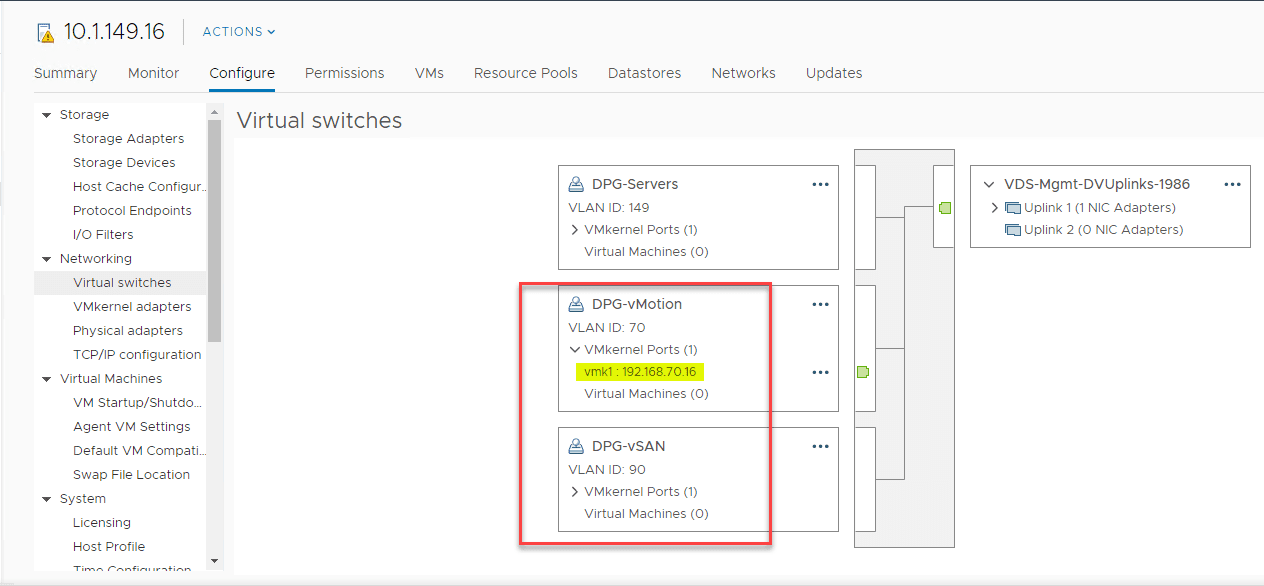
The next step in the configuration process is to get the networking configured on the new ESXi host so it can communicate correctly with the other two vSAN hosts. Here I am adding the host to the vSphere Distributed Switch.
After adding the host to the VDS, I added VMkernel ports/IPs to the new VMware ESXi host.
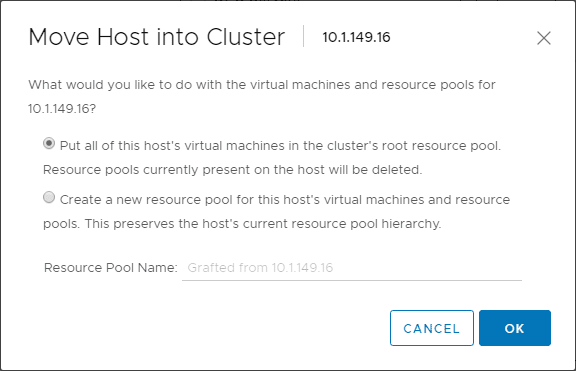
Next, I move the new VMware ESXi host into the 2-node vSAN cluster.
As you can see below, the new host is now a part of the 2-node vSAN cluster in vSphere, however, the host is in maintenance mode and I have not yet created disk groups on the new host.
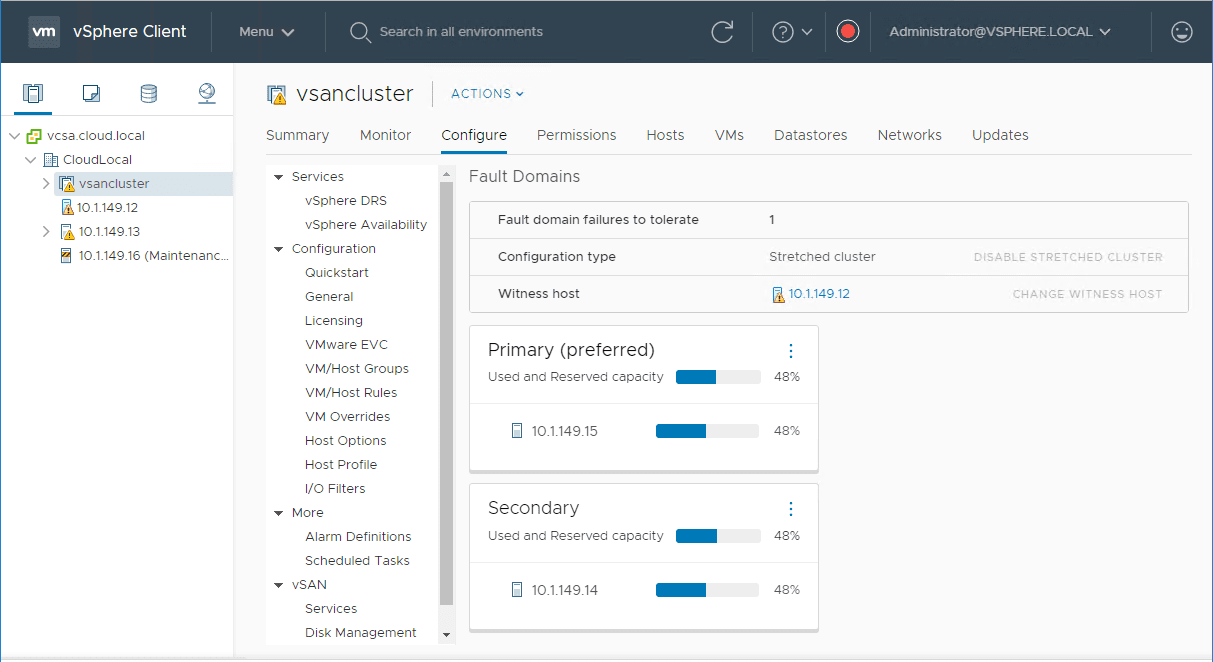
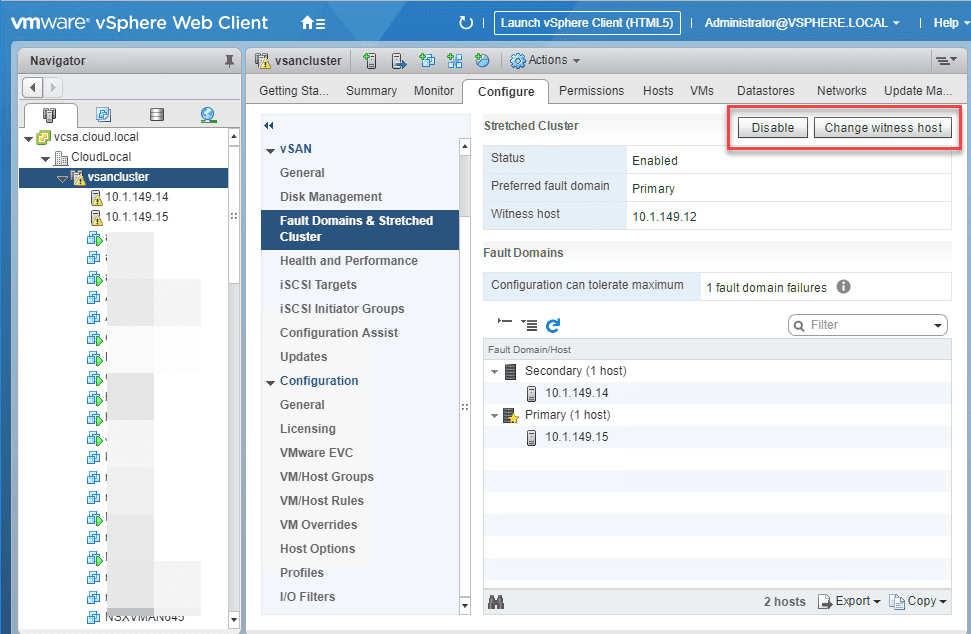
The next step is to disable stretched cluster. I ran into a weird little bug/issue where the Disable/Change witness host option buttons were greyed out in the vSphere Client. I even tried incognito browser, etc, and same results. Not sure what to make of this weird little issue. However, quickly trying the “flex” client, I was able to disable the stretched cluster.
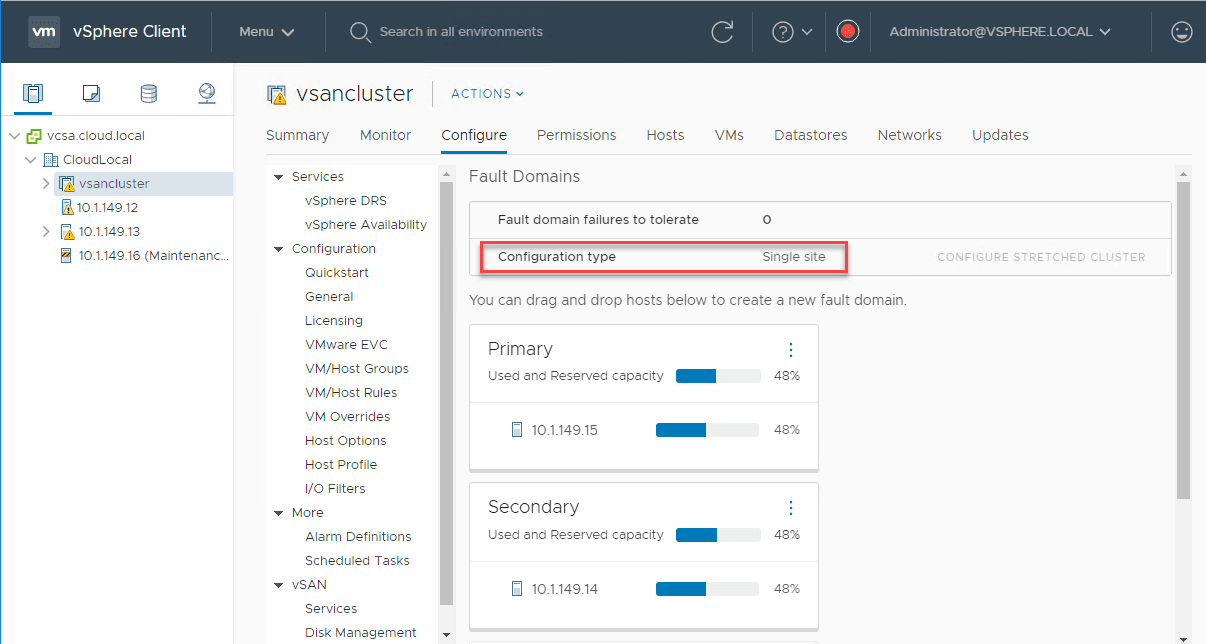
Flipping back over to the vSphere Client, the configuration type now shows single site instead of stretched.
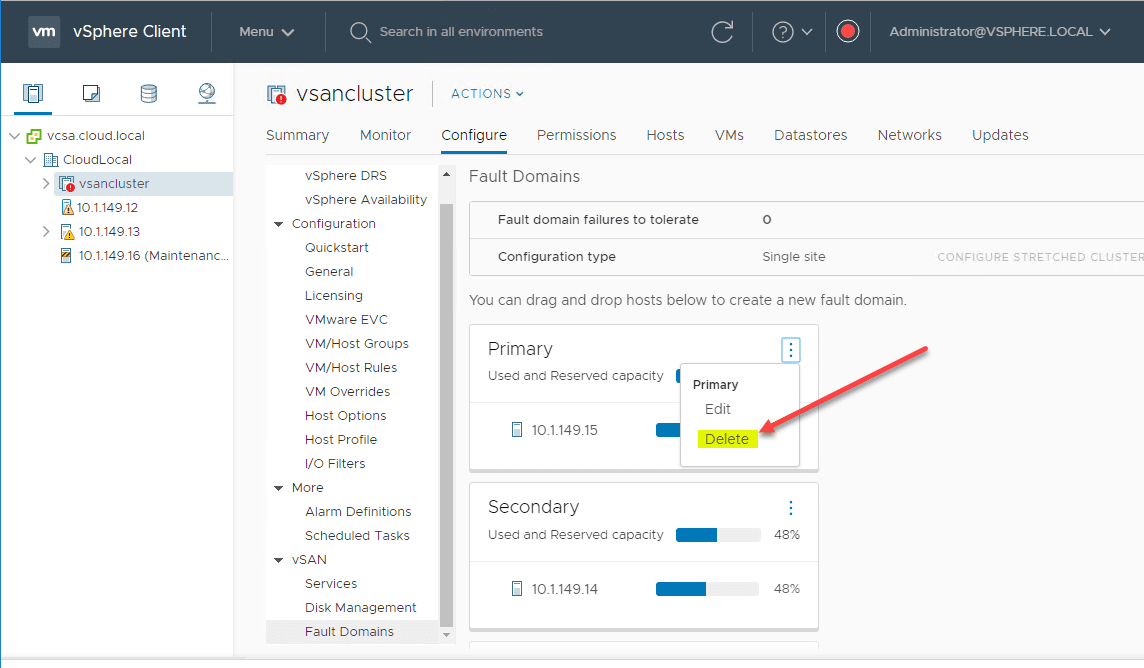
Now, I can delete the Fault domains. These are no longer needed in the 3-node vSAN configuration. Click the elipse button on both the Primary and Secondary fault domain and delete them.
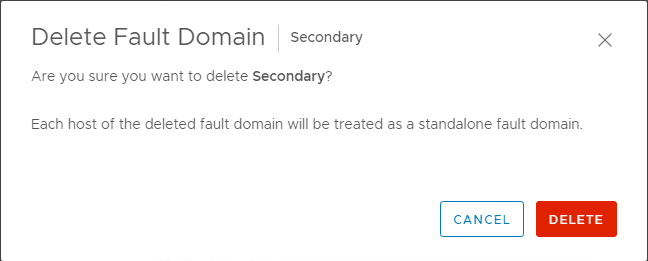
You will need to confirm this operation.
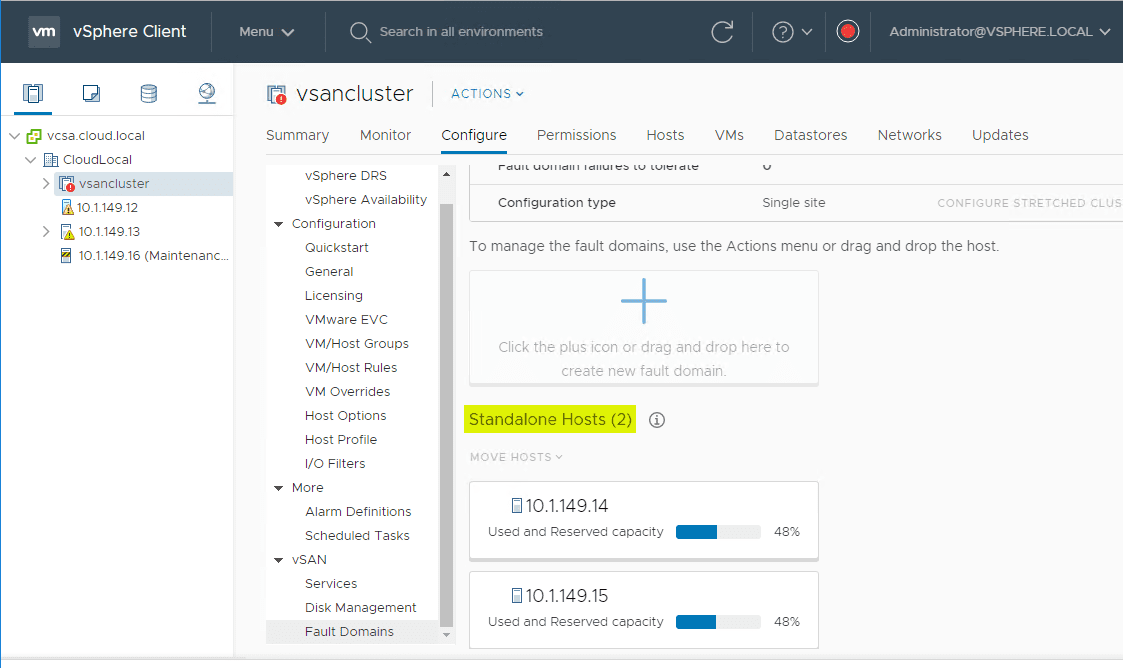
After deleting the fault domains, I now see both hosts listed under the Standalone hosts.
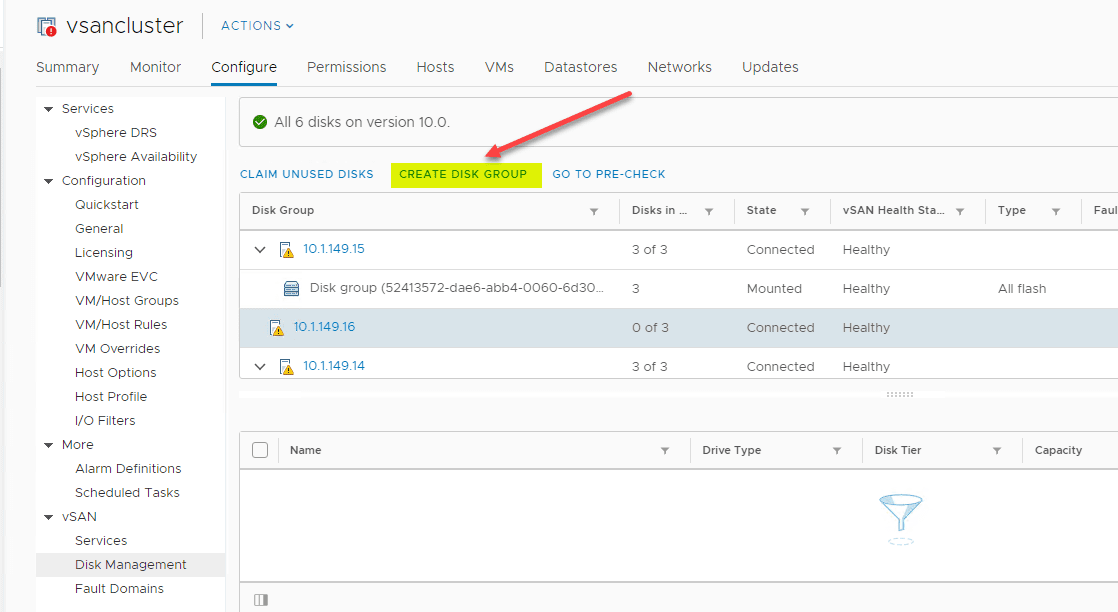
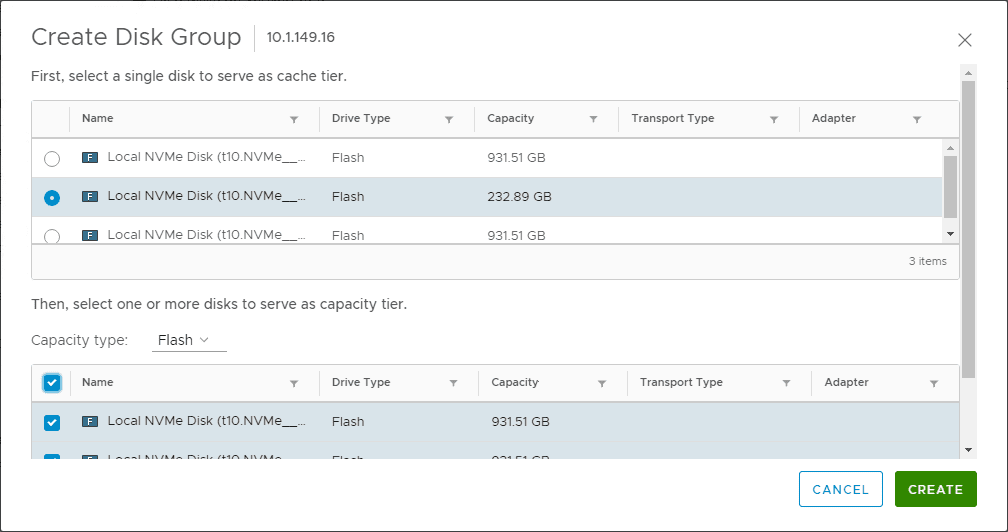
Now, I create the disk group on my new VMware ESXi host that will serve as the third-node on the 3-node vSAN configuration.
Normal stuff here, but selecting disks that will serve as cache and capacity disks.
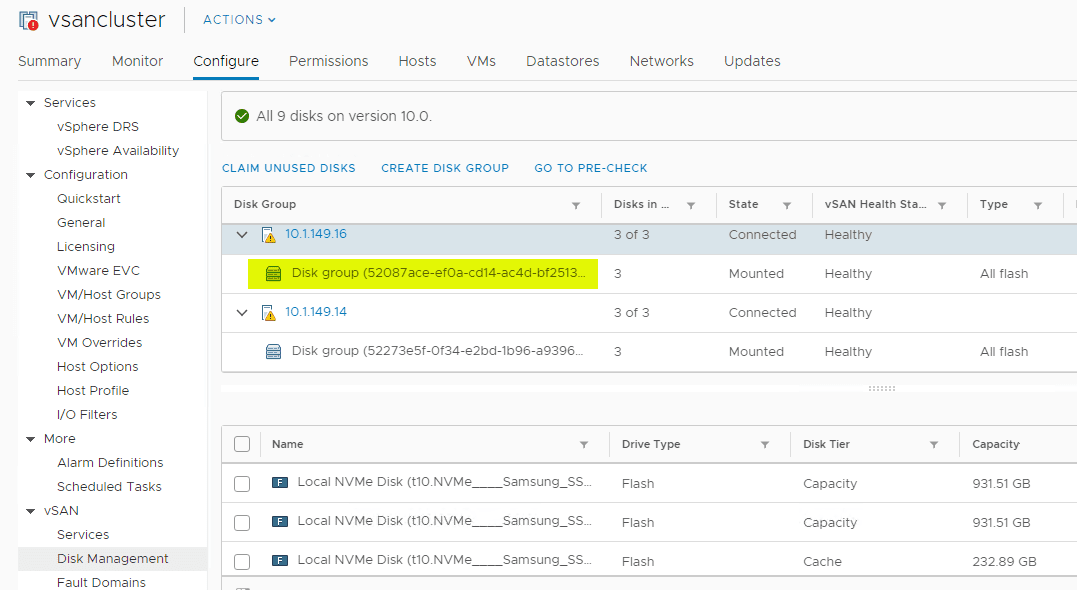
Disk group is created and healthy on the new third-node in the 3-node vSAN configuration.
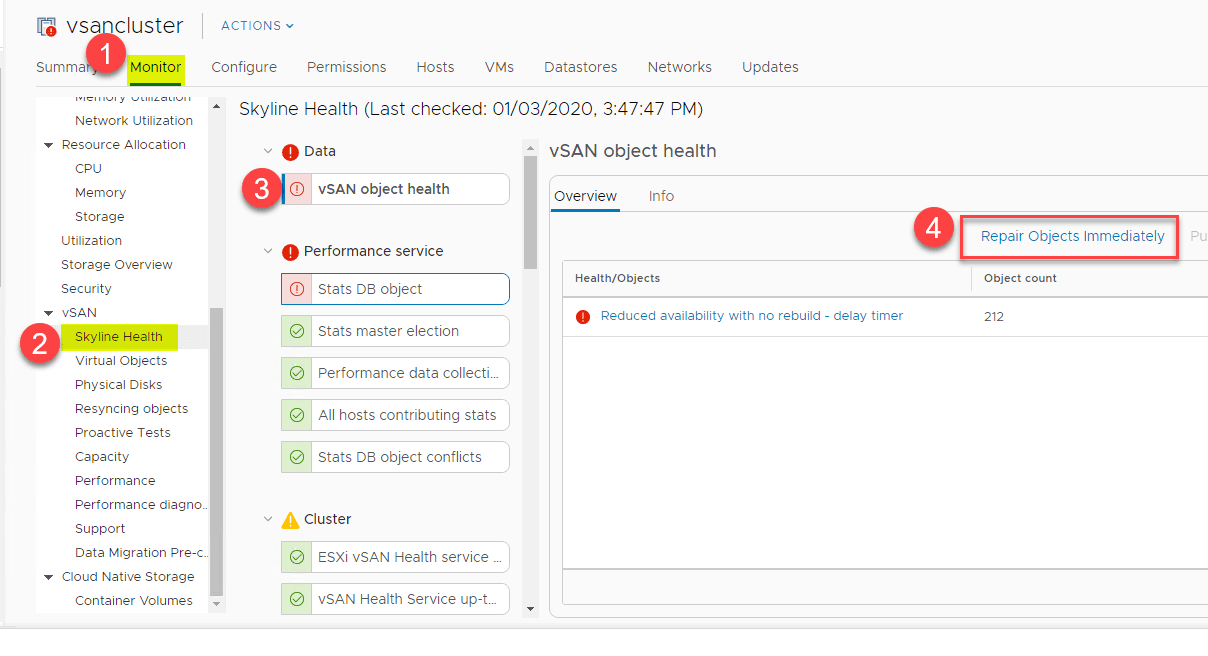
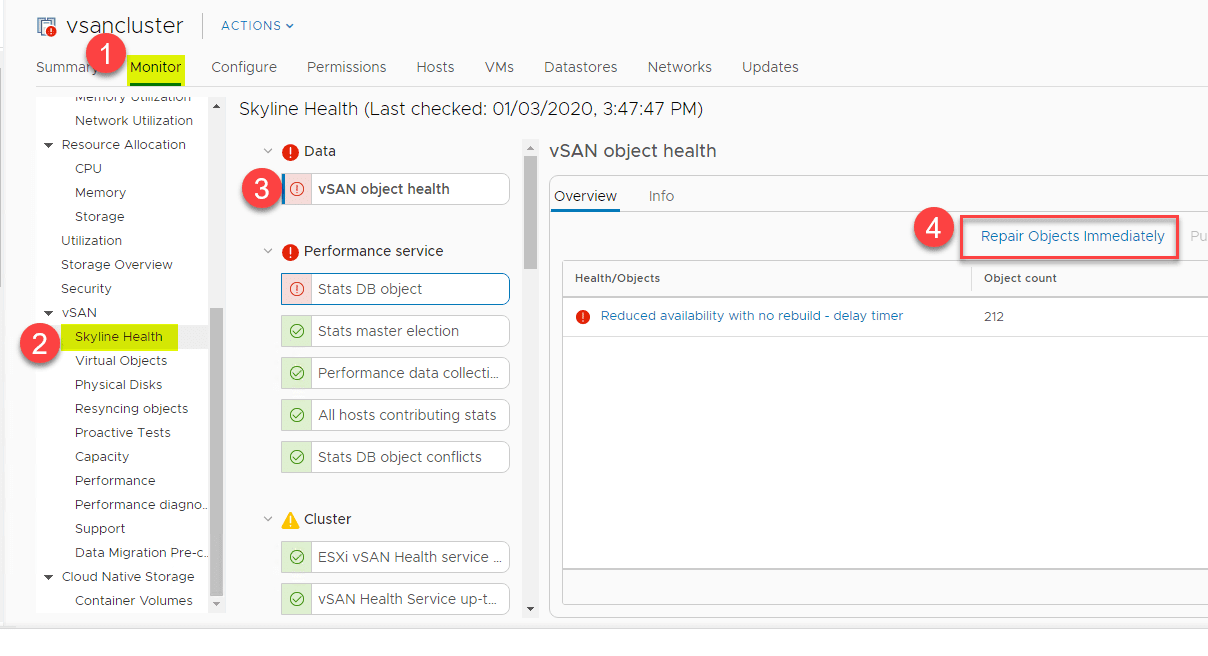
Now, all I have left to do is make sure the objects are rebuilt. Since we deleted the stretched cluster and removed the witness host, the witness component needs to be rebuilt. You can navigate to the Monitor > Skyline Health > vSAN object health > Repair objects immediately to kick off the objects repair immediately.
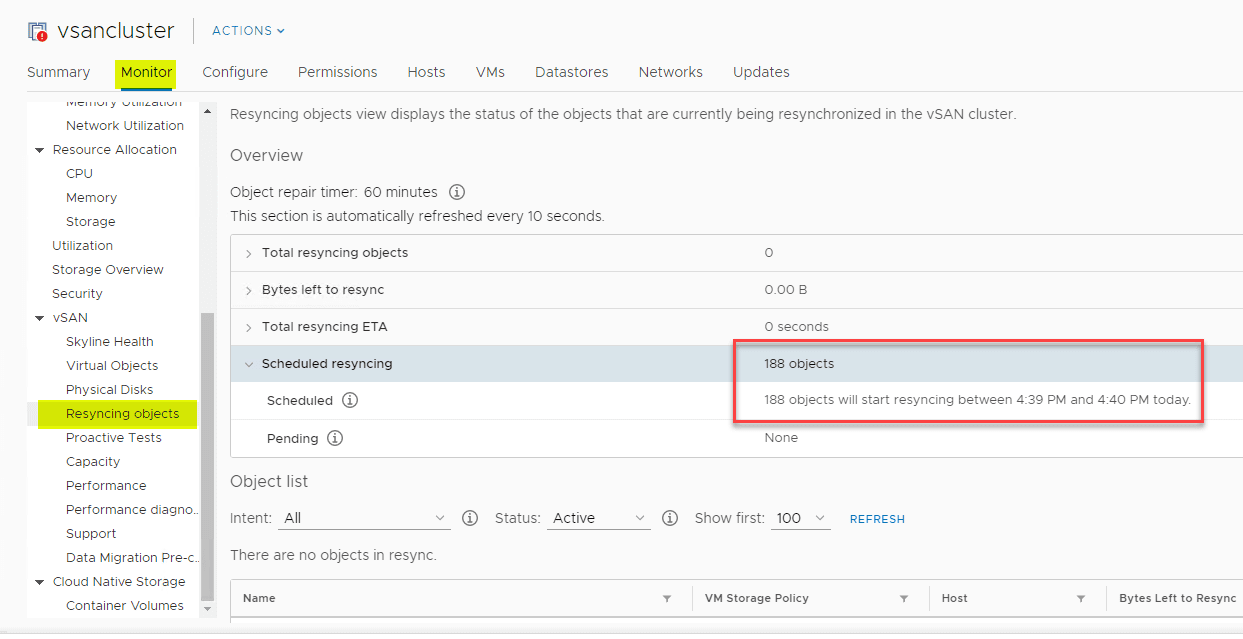
You can continue to monitor the object repair status and you should see the scheduled resyncing objects continue to decrease after you refresh the page.
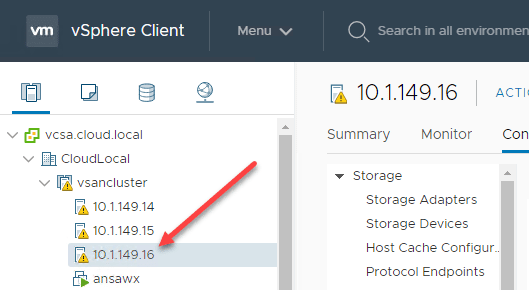
After the objects are repaired, you should see the “red bang” go away on your vSphere vSAN 3-node cluster.
Concluding Thoughts
If you have a 2-node configuration in an edge or nano-edge environment, or even a lab/home lab environment, the process to migrate 2-Node VMware vSAN to 3-node configuration is straightforward and surprisingly painless.
With only a few basic steps, you bring in your new VMware ESXi host, disable stretched clustering, and resynchronize your objects across your hosts. Depending on the number of objects, you will be up and running with a healthy 3-node vSAN configuration in no time.


