How to Manage the NSX-T N-VDS Virtual Switch
NSX-T has a type of virtual switch that is different than the other types of virtual switches that have been used in vSphere previously. The NSX-T Virtual Distributed Switch (N-VDS) is this special virtual switch used with NSX-T that is utilized for NSX-T overlay services. Since NSX-T is not coupled with vCenter Server it is not managed with the vSphere Client tools that you would normally manage vSphere hosts and NSX-V network virtualization. In this post, we will take a look at how to manage the NSX-T N-VDS virtual switch and see how that is different than managing the other types of virtual switches in vSphere.
NSX-T Virtual Switch Architecture Differences
Before looking at how to manage the NSX-T N-VDS virtual switch, let’s think first about how NSX-T is fundamentally different than NSX-V and how this changes management of your virtual switch infrastructure.
If you recall, NSX-T is not specific to VMware vSphere. So, this means that you do not have to have vCenter Server to deploy NSX-T. In fact, you can deploy NSX-T to ESXi without having a vCenter Server.
If you have worked with NSX-V, you know that NSX-V services are only supported on the vSphere Distributed Switch (VDS) and not the vSphere Standard Switch (VSS). The vSphere Distributed Switch is only available if you have vCenter Server in your environment. It is created in the vCenter Server and then configuration is pushed down to the ESXi hosts via a synchronization process.
As you would imagine this process by necessity must be changed to account for managing, creating, configuring, virtual switches outside of the vSphere interface since NSX-T encompasses more than just vSphere. Let’s see how to manage the NSX-T N-VDS virtual switch, where you do this, and what it requires.
How to Manage the NSX-T N-VDS Virtual Switch
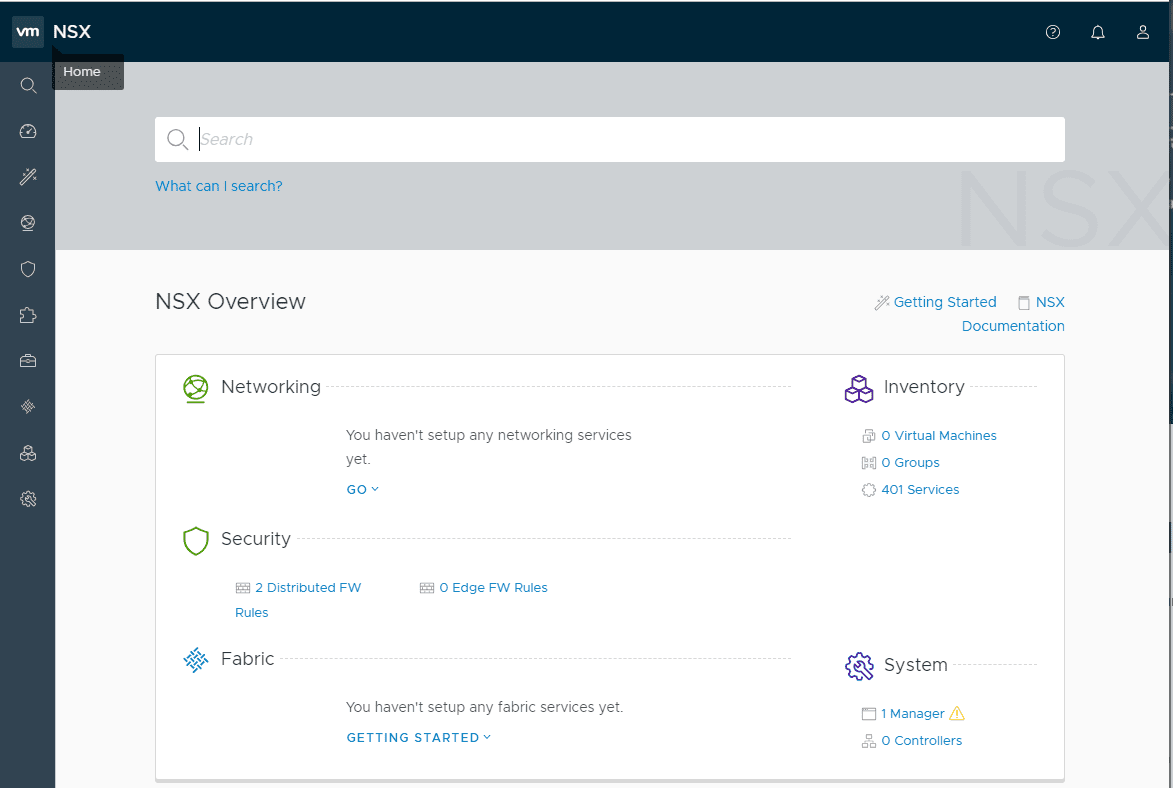
The NSX-T N-VDS virtual switch is not managed using vCenter Server. So, how is it managed? The NSX-T N-VDS virtual switch is managed with the NSX-T manager/controller converged appliance.
Much like vCenter Server that keeps a centralized configuration of the vSphere Distributed Switch (VDS), the NSX-T manager appliance is where the configuration of the NSX-T N-VDS virtual switch is housed. The N-VDS switch in the NSX-T manager.
NSX-T Transport Zones
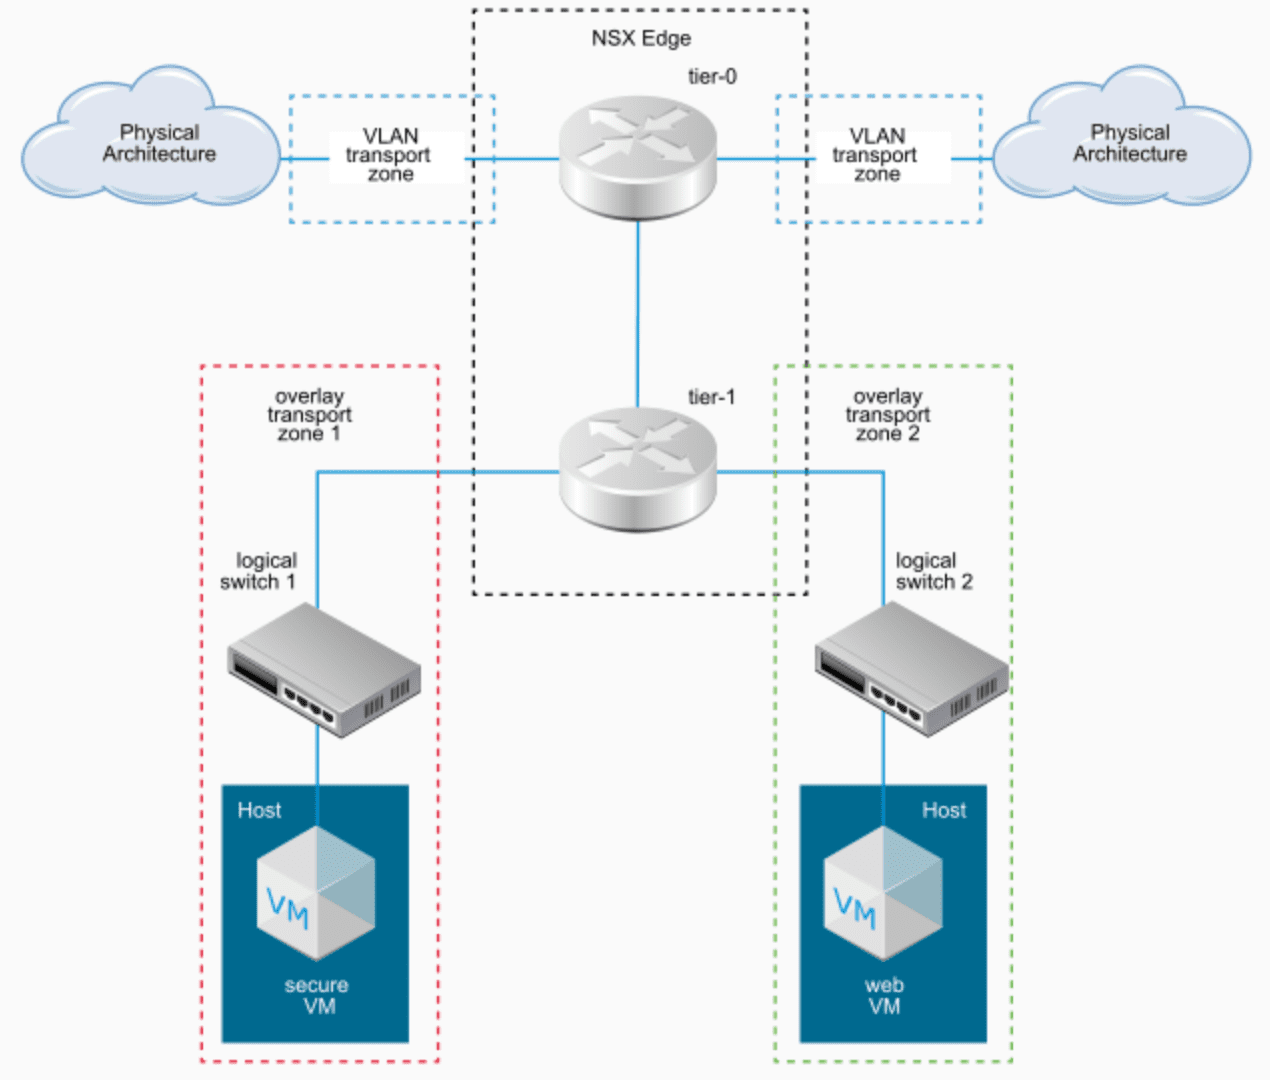
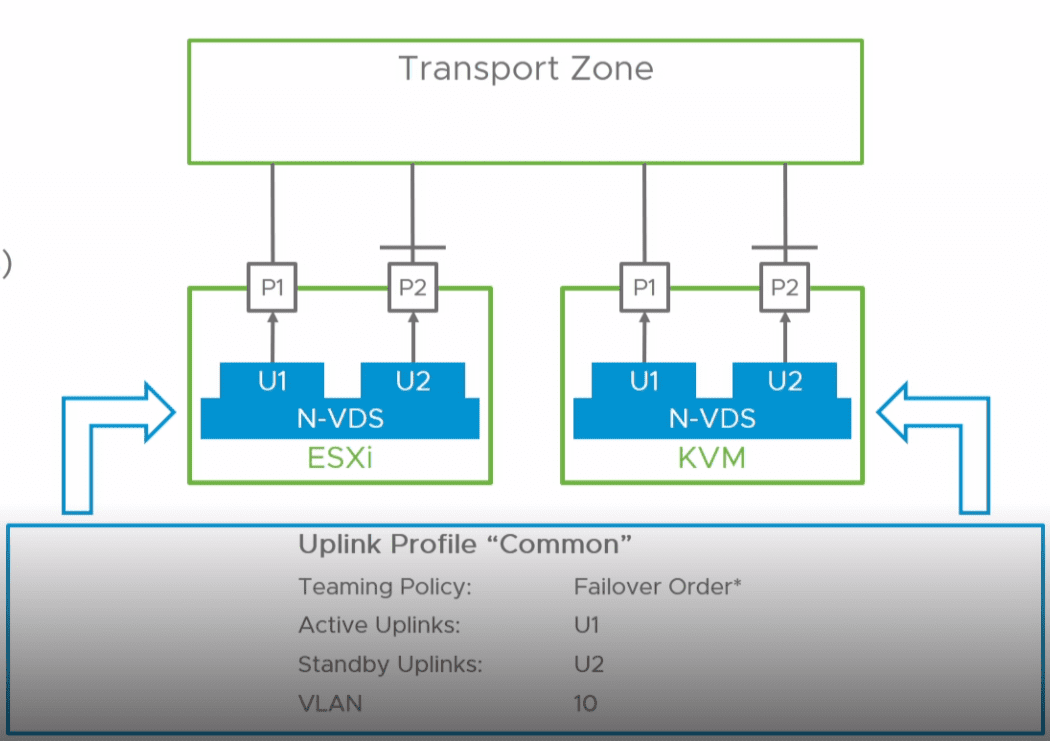
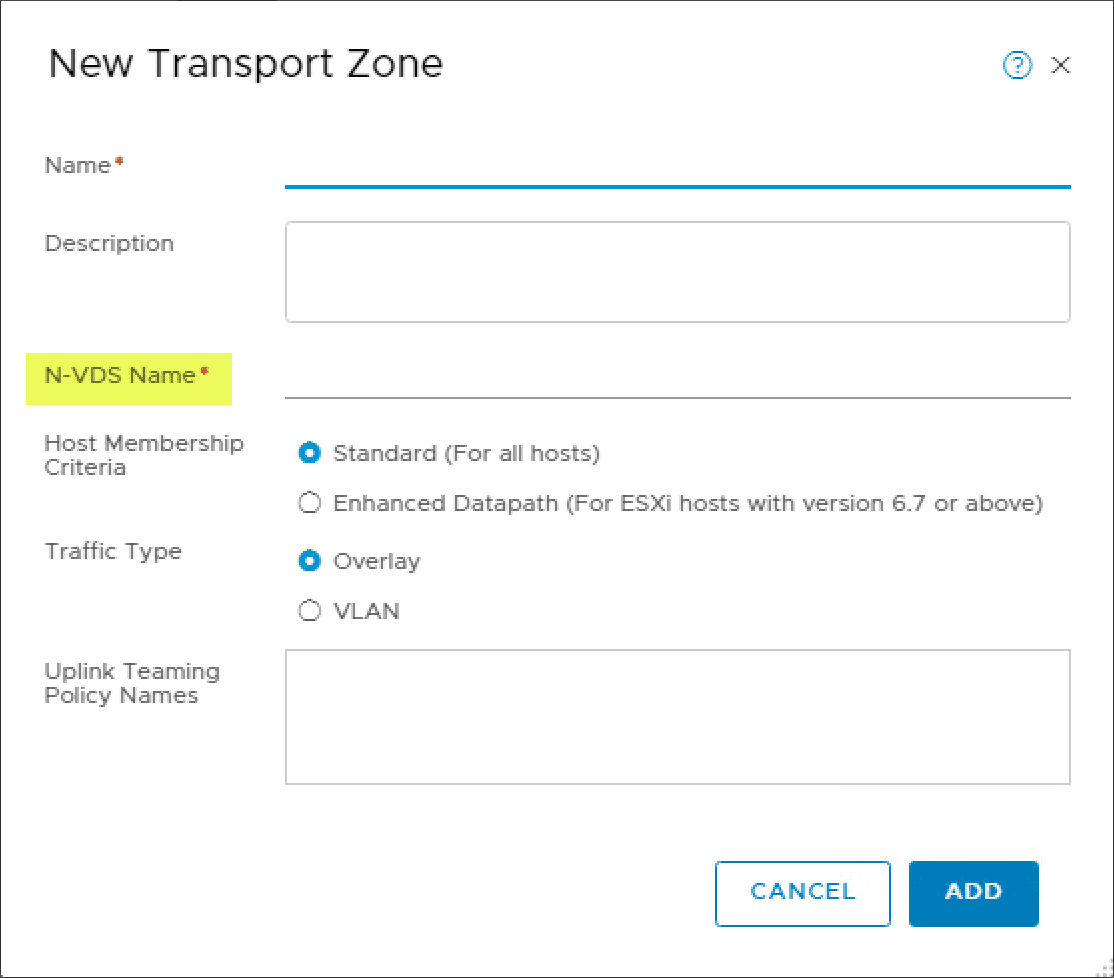
When you add a transport node to a transport zone, the N-VDS associated with the transport zone is installed on the transport node. Each transport zone supports a single N-VDS. An enhanced datapath N-VDS has the performance capabilities to support NFV (Network Functions Virtualization) workloads, supports both VLAN and overlay networks, and requires an ESXi host that supports enhanced datapath N-VDS.
A transport node can belong to:
- Multiple VLAN transport zones.
- At most one overlay transport zone with a standard N-VDS.
- Multiple overlay transport zones with advanced datapath N-VDS if the transport node is running on an ESXi host.
When you create your transport zones, you create your N-VDS switches.
NSX-T Uplink Profiles
An uplink profile defines policies for the links from hypervisor hosts to NSX-T Data Center logical switches or from NSX Edge nodes to top-of-rack switches.
The settings defined by uplink profiles might include teaming policies, active/standby links, the transport VLAN ID, and the MTU setting.
Uplink profiles allow you to consistently configure identical capabilities for network adapters across multiple hosts or nodes. Think of an uplink profile as a logical container of physical network properties. Instead of configuring individual properties or capabilities for each network adapter, you can specify the capabilities in uplink profiles, which you can then apply when you create NSX-T Data Center transport nodes.
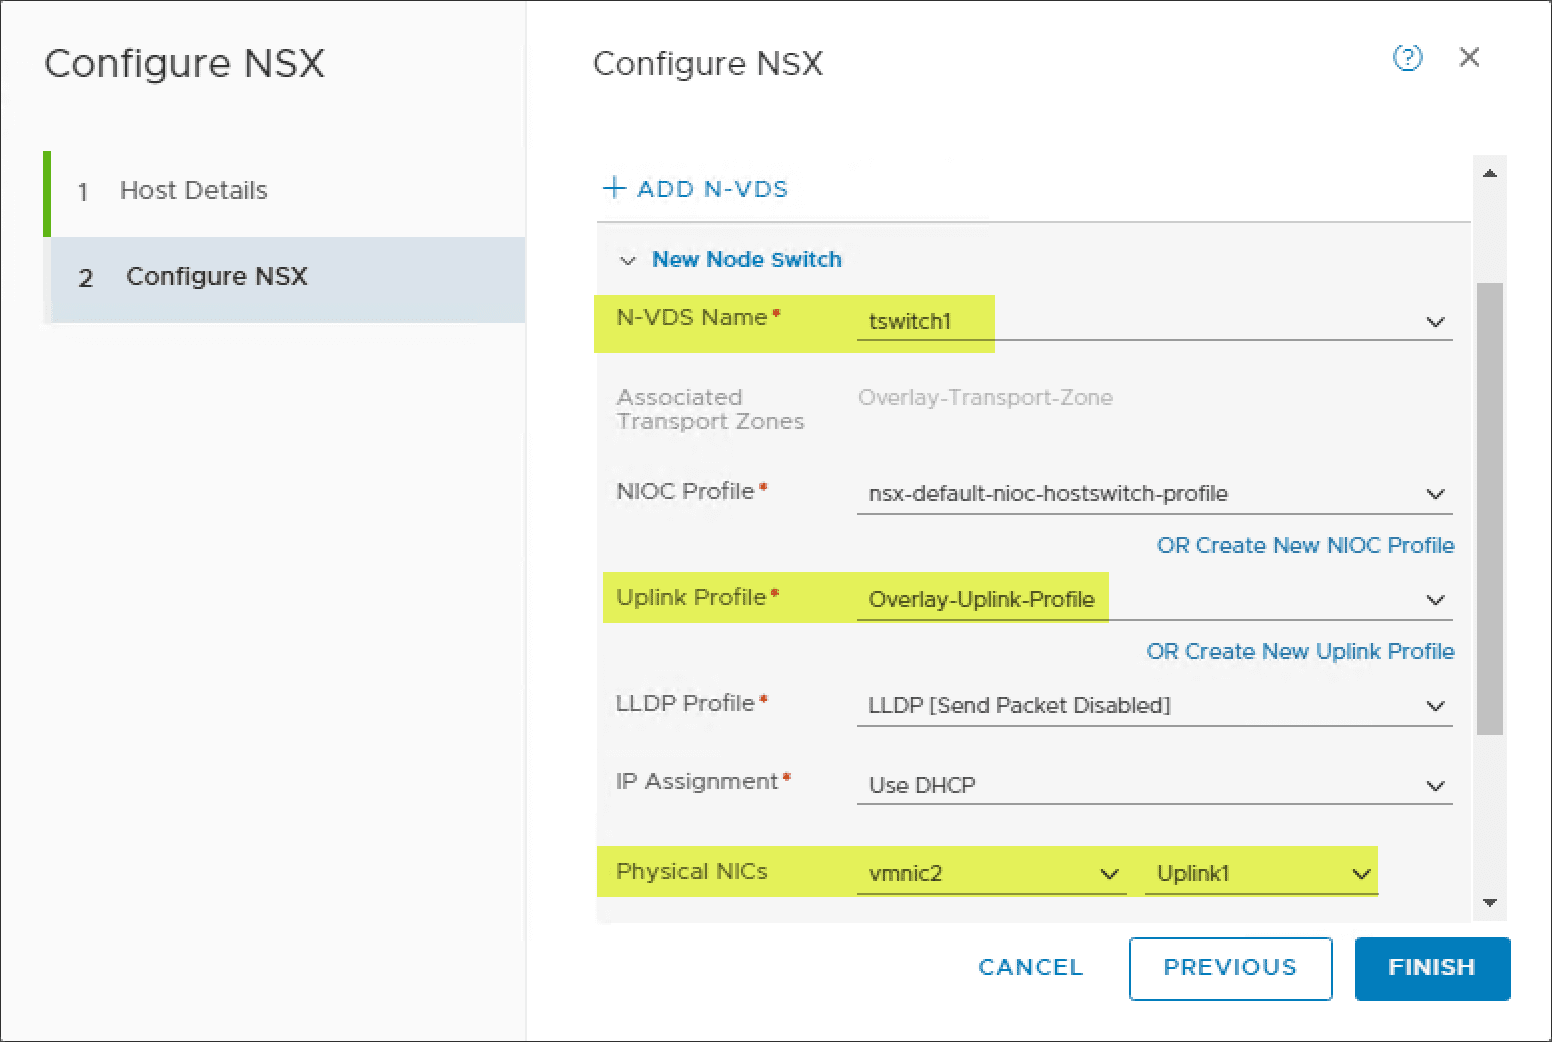
When you configure NSX on the transport node, you create and/or associate an uplink profile to the host. Then you associate a physical adapter from your transport node to the uplink profile uplinks.
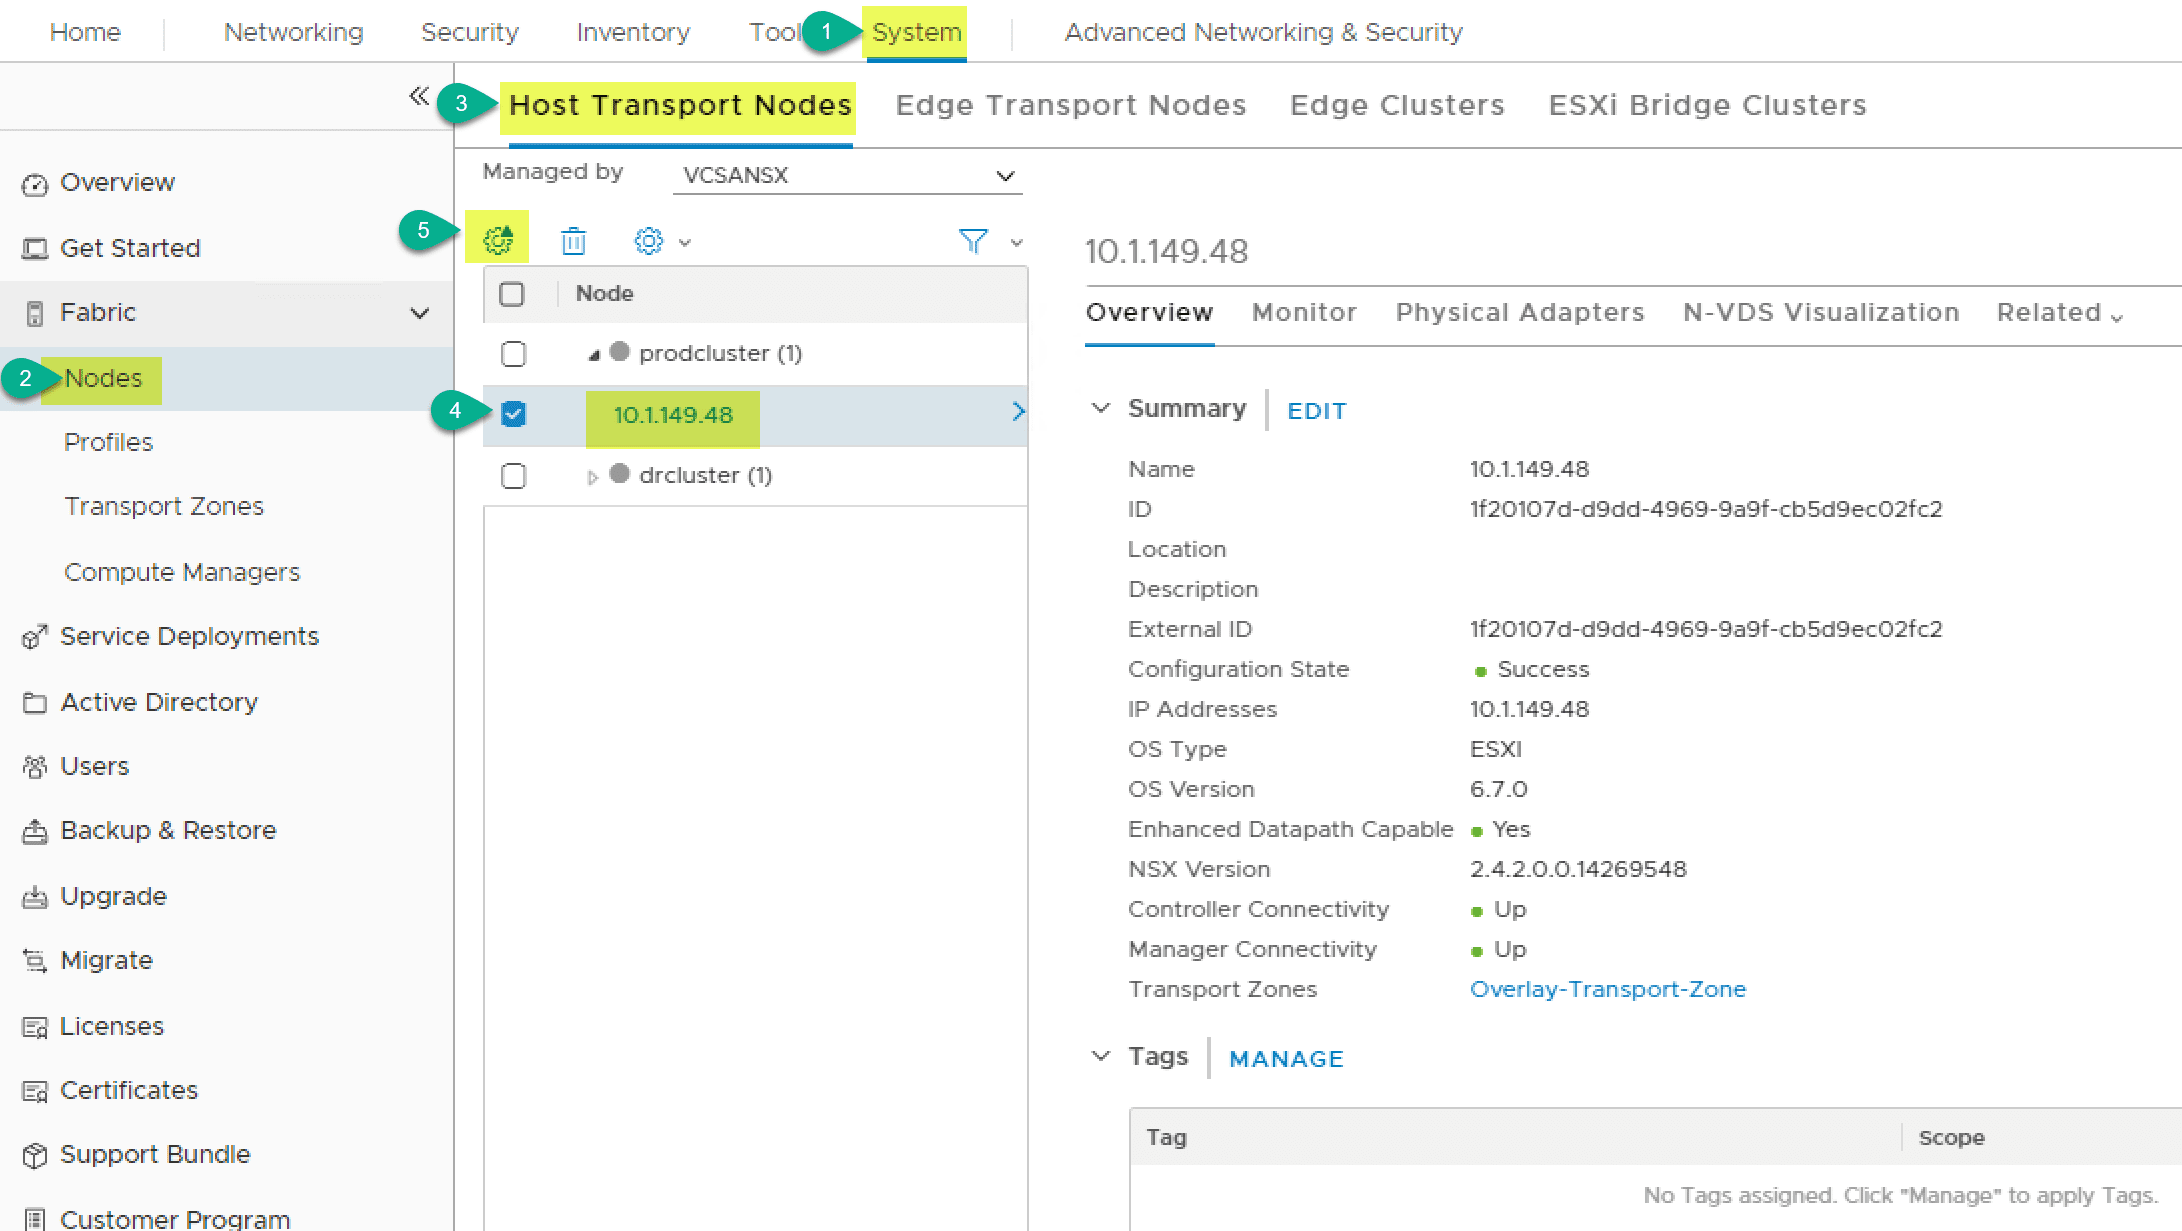
To manage your physical NSX-T network adapters navigate in the NSX-T manager to System > Fabric > Nodes > Host Transport Nodes > click host > click Edit to bring up the NSX configuration on the transport node.
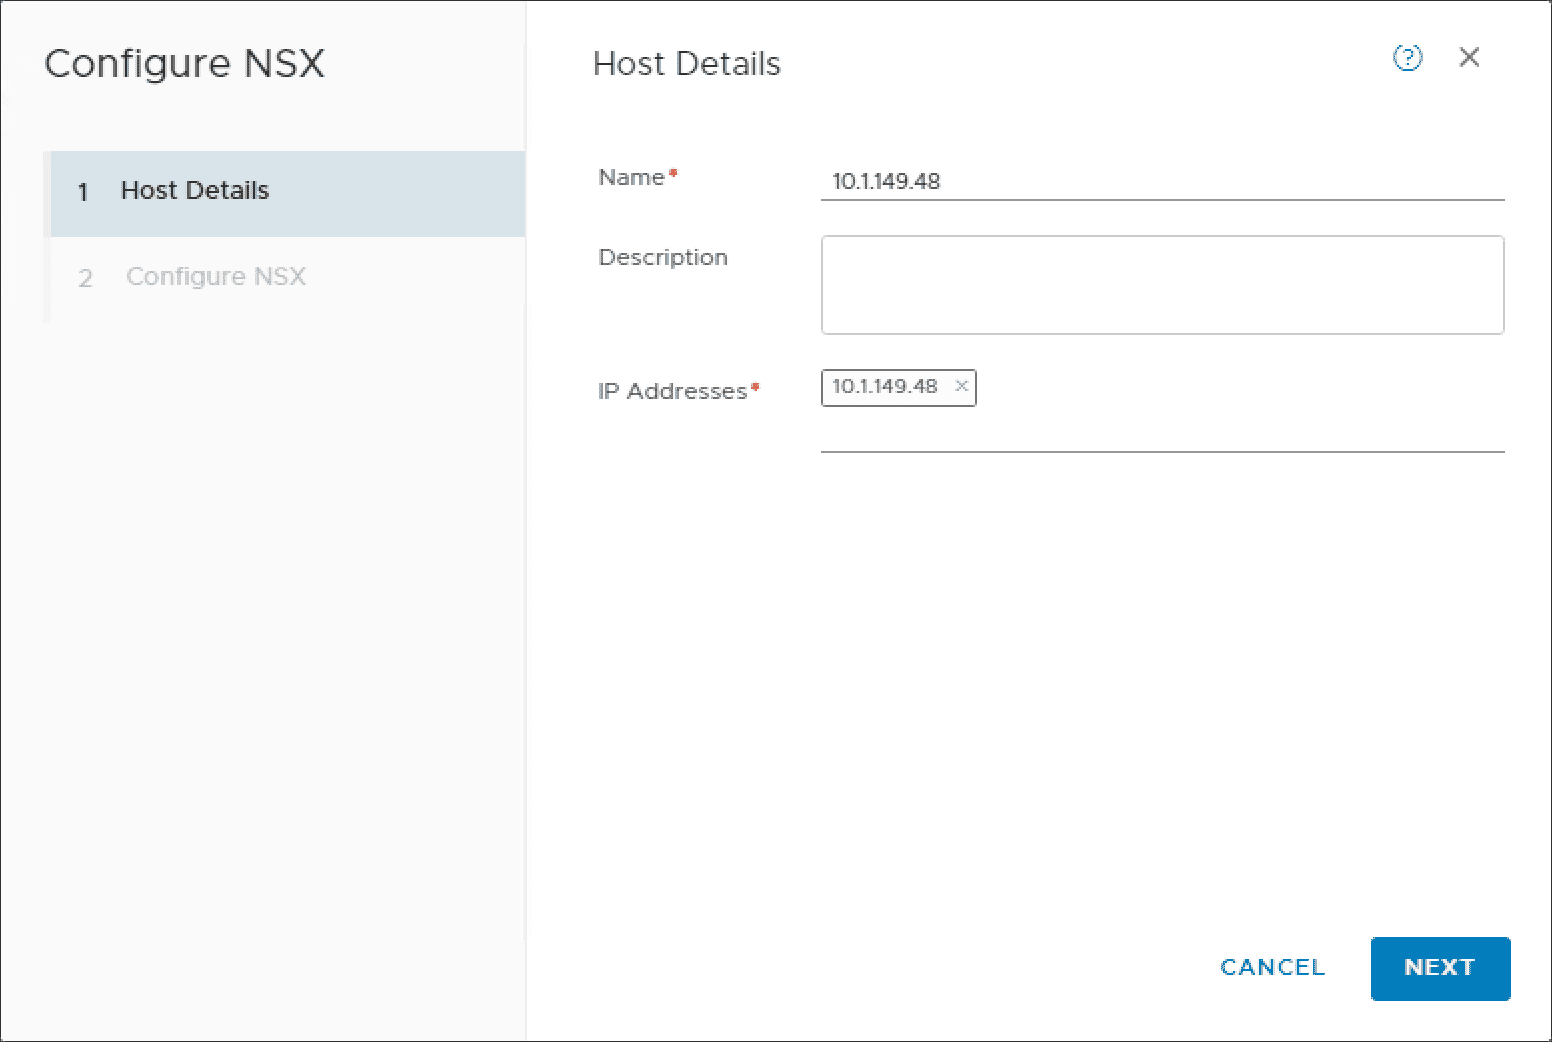
The two-step Configure NSX wizard launches. The first screen of the wizard is to verify the host details.
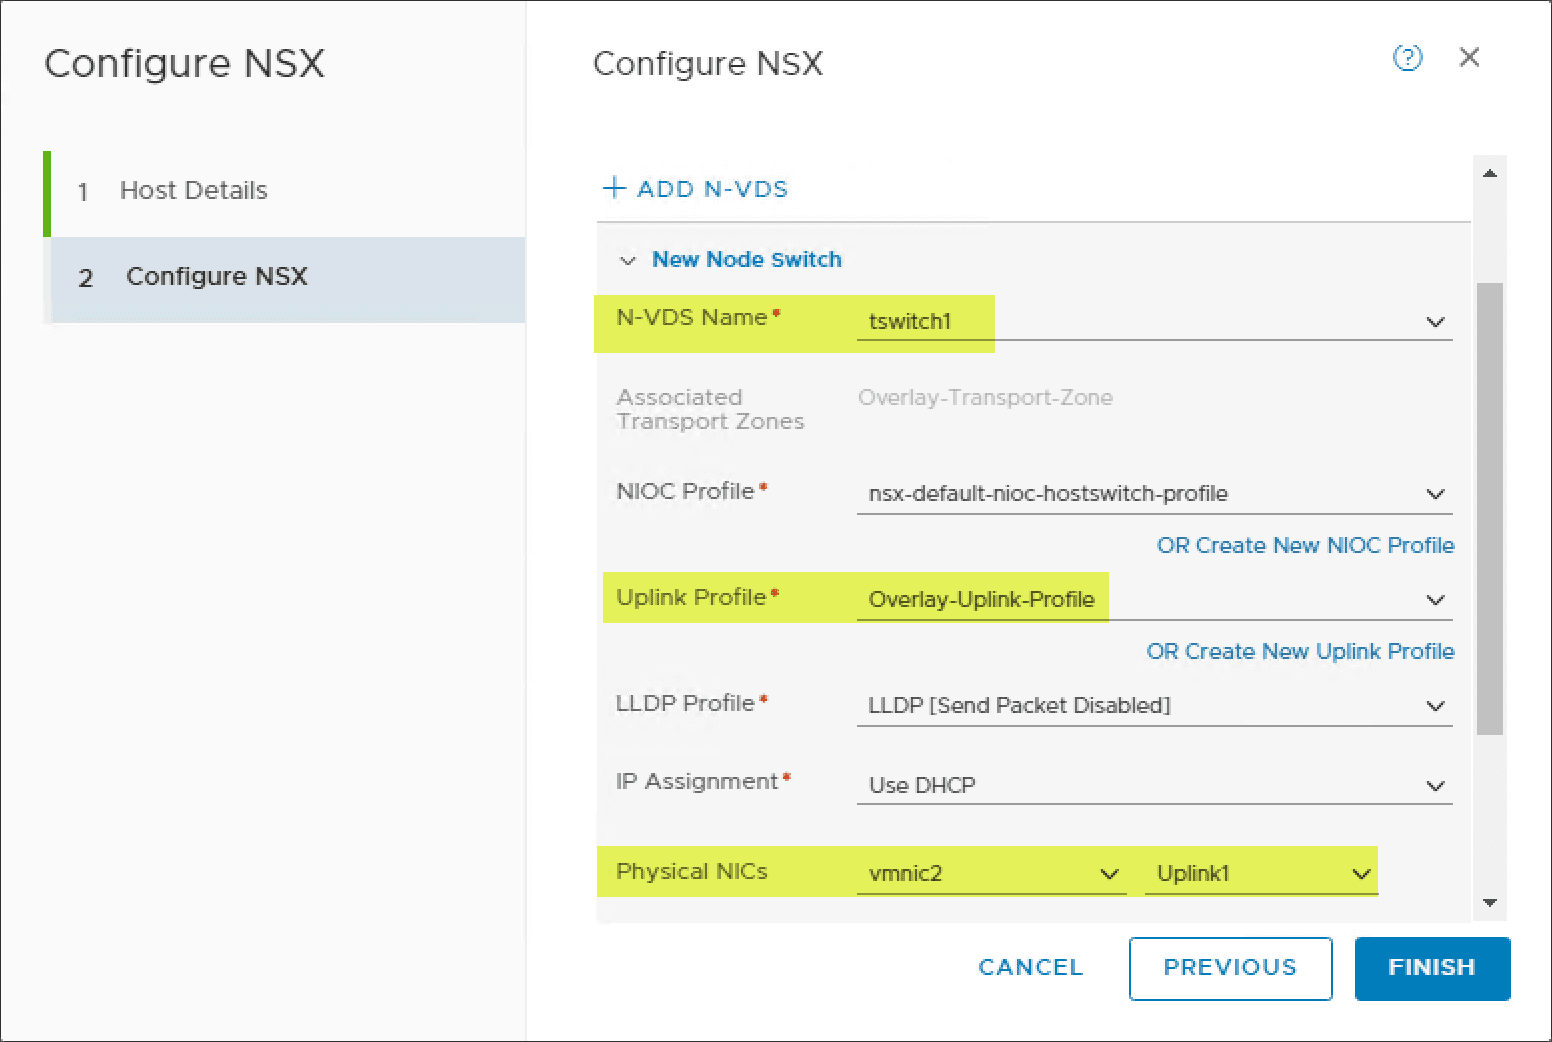
The next, Configure NSX screen has you create/choose the Transport Zone, N-VDS name, Uplink Profile, and physical NICs to associate with the uplinks of the Uplink profile.
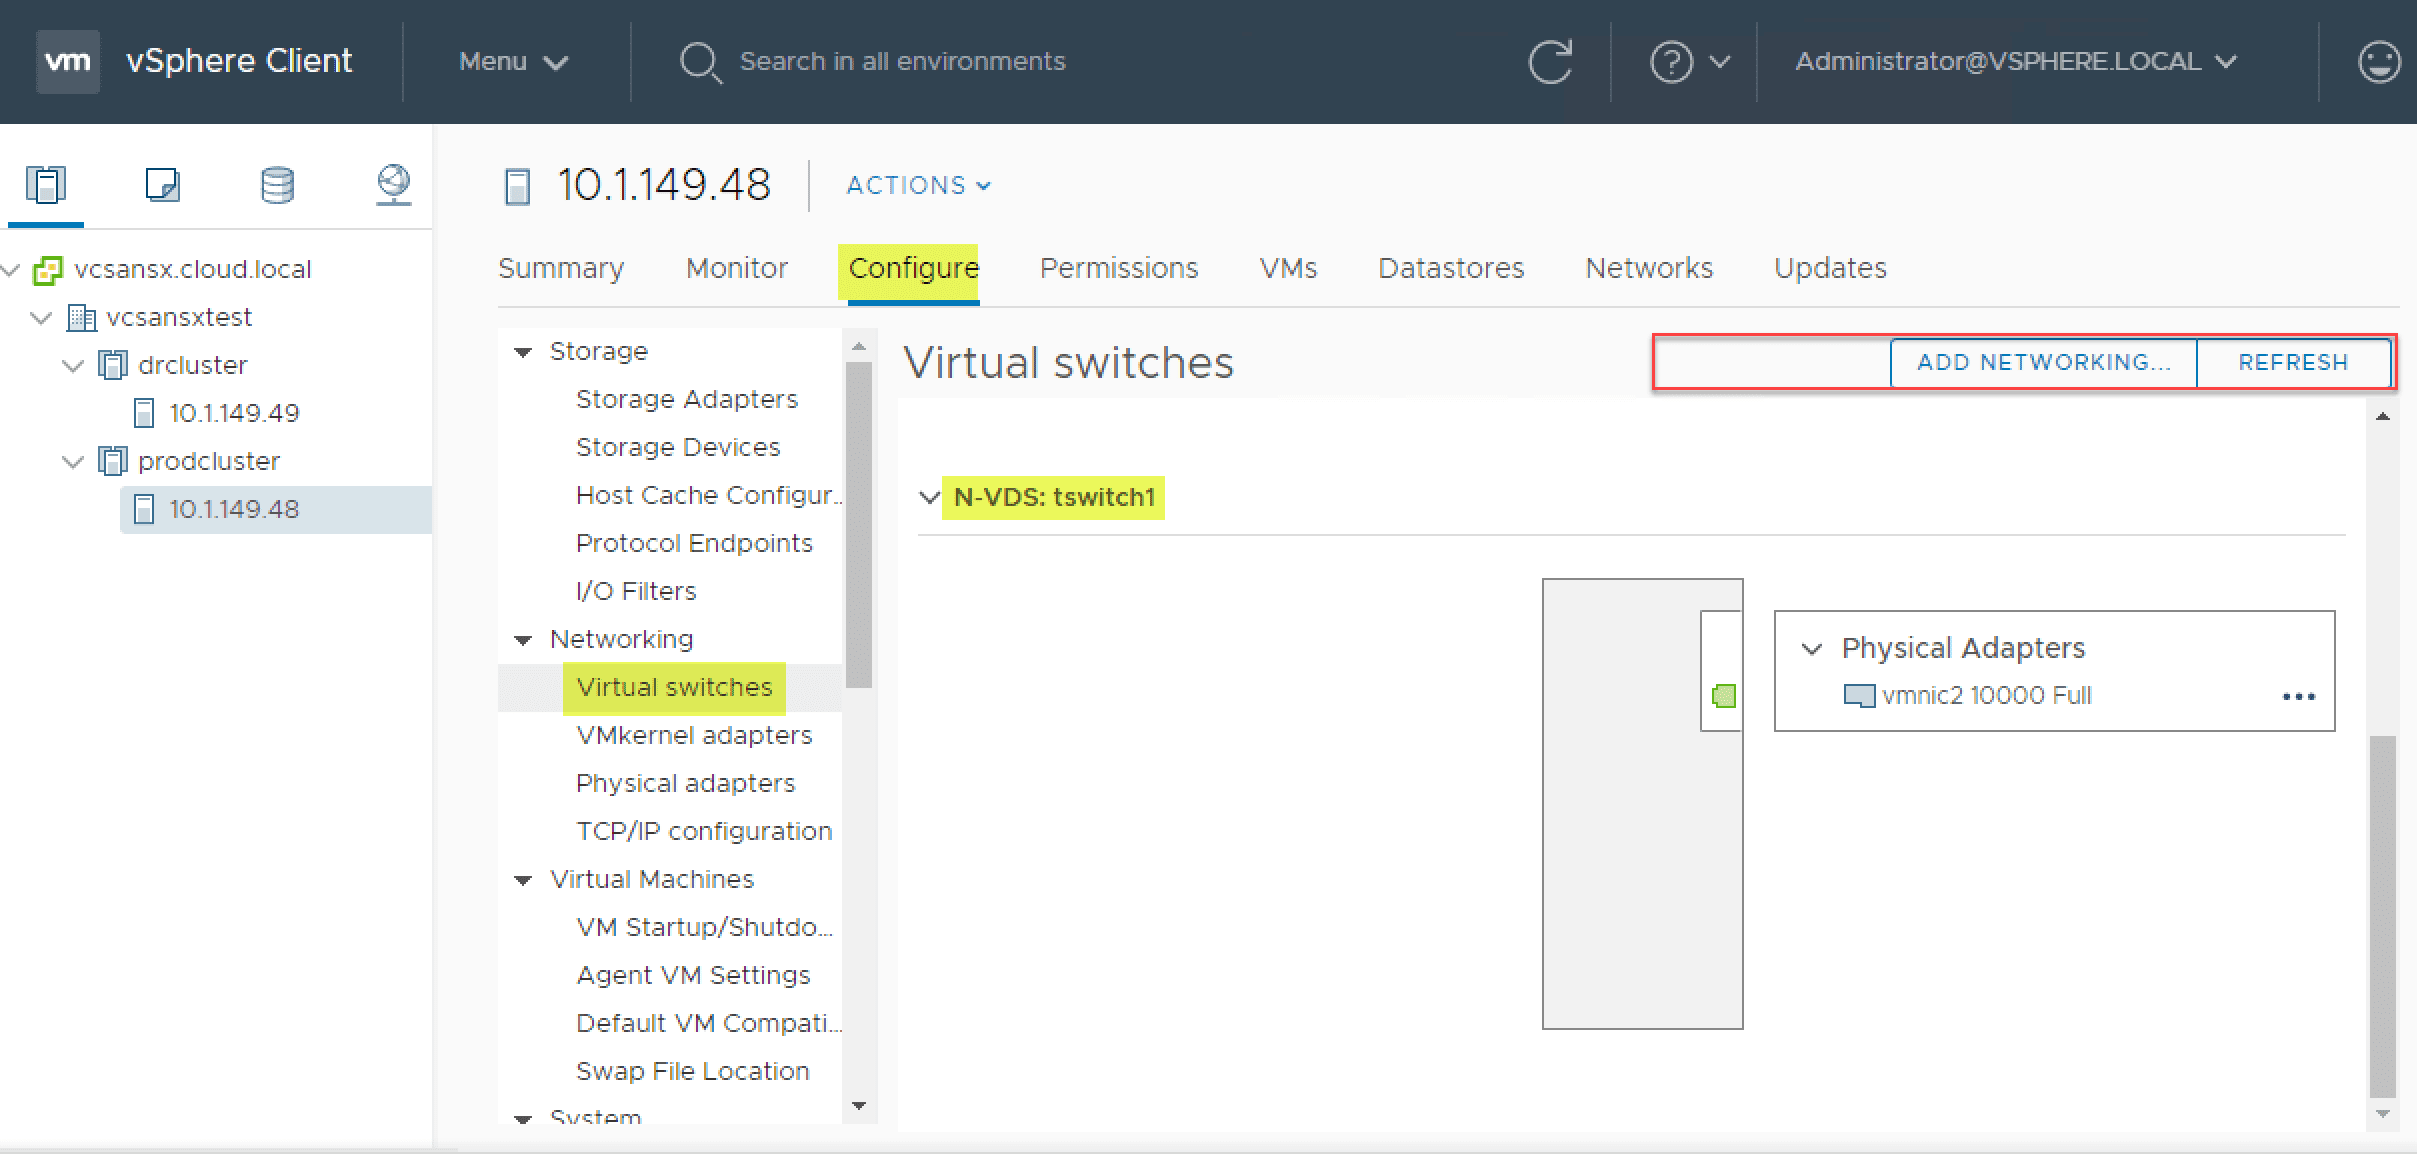
Compared to other switch types in vSphere Client, you will find the NSX-T N-VDS virtual switch is very limited in management features from a vSphere Client perspective. You will note that you can do little more than look at the switch and see what NICs are assigned to the N-VDS. You cannot actially manage the physical transport node network adapters, etc.
Wrapping Up
NSX-T Data Center contains some new ways of thinking when it comes to the management of your virtualized network environment. Instead of being vSphere-centric, NSX-T allows you to manage your virtual networking outside of vCenter Server.
VMware vCenter Server steps back as simply a supported platform that interacts with NSX-T rather than the central management plane for your virtual switches as it is with NSX-V.
As you get familiar with NSX-T, understanding the concepts and workflows with the N-VDS virtual switch is key to understanding how virtual networking is configured in NSX-T.


