PowerShell makes working with various core services extremely easy and allows quickly and easily performing tasks that are labor intensive with relative ease. Recently, I ran across the need to copy a DNS zone from one lab to another lab to mass copy a large number of DNS records. Recreating everything manually would not be fun. In steps PowerShell to the rescue. However, I ran into a little issue of sorts which I will describe below. Let’s take a look at Export and Import DNS zone with PowerShell from one server to another and see the steps involved with this process.
Export and Import DNS Zone with PowerShell
Microsoft provides a slew of DNS commands to interact with DNS Server and work with zones, records, and other types of operations. The first command that caught my eye with my use case of exporting a DNS zone from one lab environment and importing the zone in another lab environment was the Export-DnsServerZone cmdlet. The syntax and parameters of the Export-DnsServerZone cmdlet includes the following:
Export-DnsServerZone [-FileName] <String> [-Name] <String> [-ComputerName <String>] [-PassThru] [-CimSession <CimSession[]>] [-ThrottleLimit <Int32>] [-AsJob] [-WhatIf] [-Confirm] [<CommonParameters>]
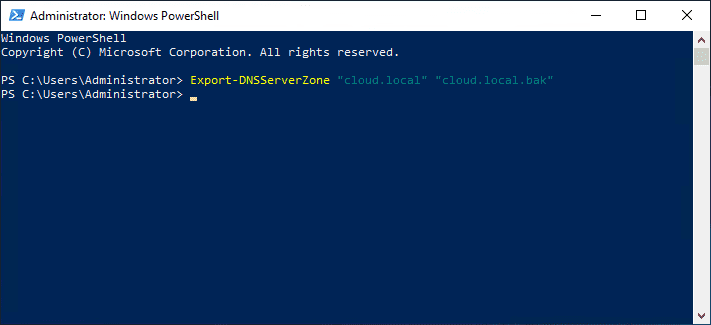
Using PowerShell to export the DNS zone is painless and easy. It can be done using the following:
Export-DNSServerZone "<zone name>" "<zone file name>"
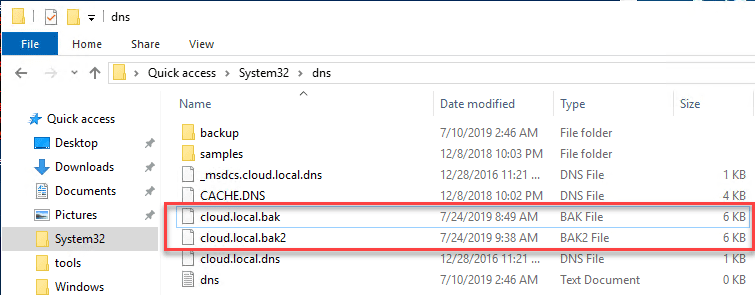
An important point to note, the zone file name doesn’t seem to accept a full file path. You simply can enter the file name you want to use without a path. The file that you create during the export is created in the DNS folder located at C:WindowsSystem32dns.
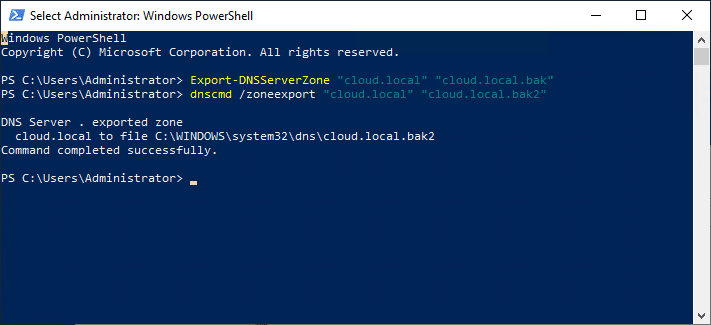
This is essentially the equivalent of the DNSCMD command that is as follows:
dnscmd /zoneexport "<your zone name>" "<zone file name>"
The DNSCMD command like the PowerShell command doesn’t like a file path entered for the resulting exported DNS file. As you can see below, the resulting file sizes using both commands is the same (below, BAK is PowerShell, and BAK2 is DNSCMD).
Export and Import DNS Zone with PowerShell No Import-DNSServerZone cmdlet
Very surprisingly, PowerShell has no Import-DNSServerZone cmdlet. This is surprising since there appears to be no equivalent or similar cmdlet to do what you would think would be the logical workflow/matching cmdlet to Export-DNSServerZone.

There is a cmdlet that references “Import” functionality called the Import-DnsSkerverResourceRecordDS that I thought might possibly work with the exported file. However, when pointing to the exported file, the cmdlet didn’t like the backup file. This is not the purpose of this cmdlet, but I thought I would give it a shot anyway. No go.
What are the options without an Import PowerShell Cmdlet?
Without an official “Import-DNSServerZone” cmdlet, what are the options to work with the zone file that gets exported using the Export-DNSServerZone cmdlet? Well, there are a couple of options that I was able to test and see work effectively.
- Copy the exported DNS zone file to the C:WindowsSystem32dns directory on the destination server.
- Rename it to have a .dns extension
- Use DNSCMD to import the file created using PowerShell
- Use the DNS Management Console GUI to point to the .dns file that you create with the backup process
The thing I don’t like about the above is that it doesn’t use PowerShell which is the whole expressed desired tool for accomplishing this. For me, DNSCMD was the only way I was able to get a scriptable approach to work on the import side using the below command to point to the exported DNS zone file.
dnscmd <dns server name> /zoneadd "yourzone.com" /primary /file yourzone.com.dns /load
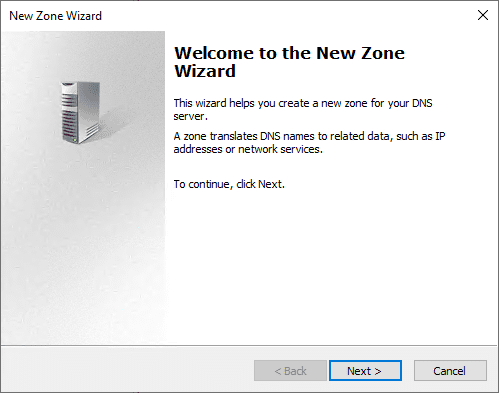
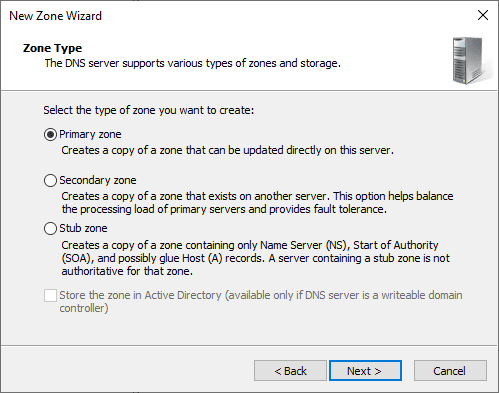
Using the GUI, you can follow the below steps to create a new zone and point it to the DNS file that you created with the export. Right-click your Forward Lookup Zones folder and choose to create a New Zone. This will launch the New Zone Wizard.
Choose Primary zone. A box to note below, although I am using a standalone server for this walkthrough, if you are importing your backup onto a DNS server running on a domain controller, you will need to uncheck the Store the zone in Active Directory… checkbox for it to allow you to point to a zone file. After you import the backup, you can then go in and flag the zone to be Active Directory integrated.
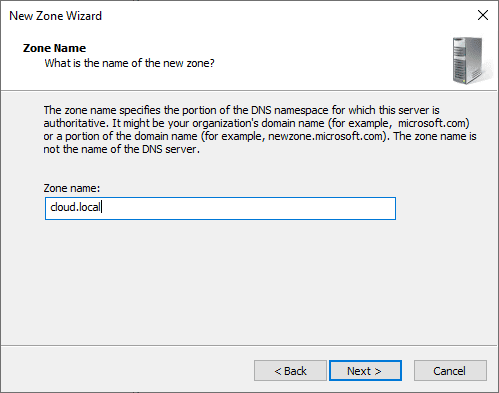
Enter the name of your new DNS zone.
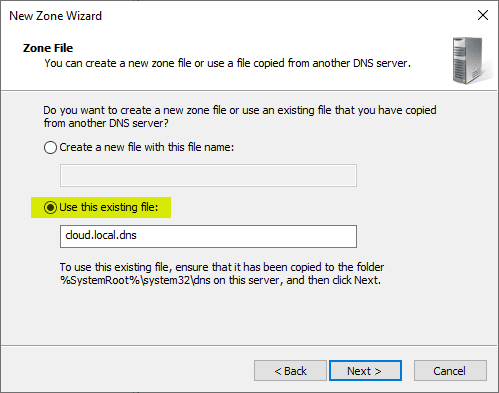
On the Zone File screen, this is where you choose Use this existing file. It will by default be looking in the C:WindowsSystem32dns folder. Make sure you have your backup file copied here and renamed with the .dns extension.
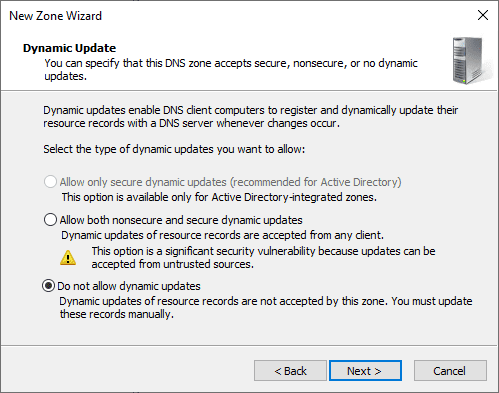
On the Dynamic Update screen, choose your dynamic update setting of choice.
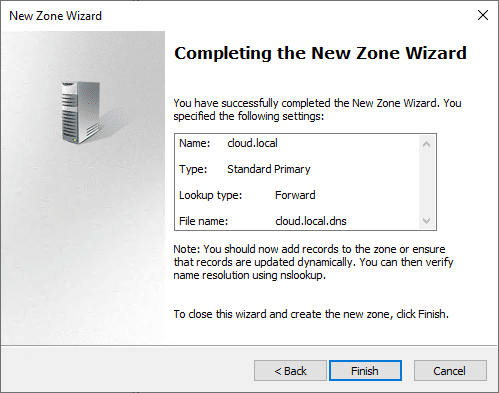
Completing the new zone wizard.
Wrapping Up
Even though I ran into a snag due to lack of cmdlets with how to Export and Import DNS Zone with PowerShell from One Server to Another, PowerShell does provide an easy way to export your zone file. You can then use either the GUI or DNSCMD to import the file. You may ask, why would I use PowerShell to export and then import with DNSCMD when I can export with DNSCMD in the first place? Good question.
When I started this exercise, I assumed it could all be done with a simple export and import cmdlet. However, it did shed light on the lack of this capability with a native PowerShell DNS cmdlet. There are probably ways to extract the data and read it from a file into DNS using Powershell. I didn’t explore doing this since I was wanting something quick and easy. Let me know if you have found a better way.
Google is updating how articles are shown. Don’t miss our leading home lab and tech content, written by humans, by setting Virtualization Howto as a preferred source.





Hi, the command to do this with PowerShell is:
Add-DnsServerPrimaryZone -Name “yourzone.com” -ZoneFile “yourzone.com.dns” -LoadExisting
Gonzalo Parra,
Nice thank you for that!
Brandon