VMware ESXi Error No Space Left On Device Installing NSX-T Components
I have been getting NSX-T components up and running in the home lab as I have been wanting to get a feel for the installation and various components and differences with NSX-V. Recently, I ran into an issue when installing NSX-T components on a nested ESXi host that was running in the home lab environment. When adding the NSX-T components from the compute manager to the ESXi host, I received the “No space left on device” error. This caused the installation of NSX-T components on the nested ESXi host to fail. I wanted to post briefly the workaround used to get the components installed on the ESXi host. Let’s look at VMware ESXi Error No Space Left On Device Installing NSX-T Components.
VMware ESXi Error No Space Left On Device Installing NSX-T Components
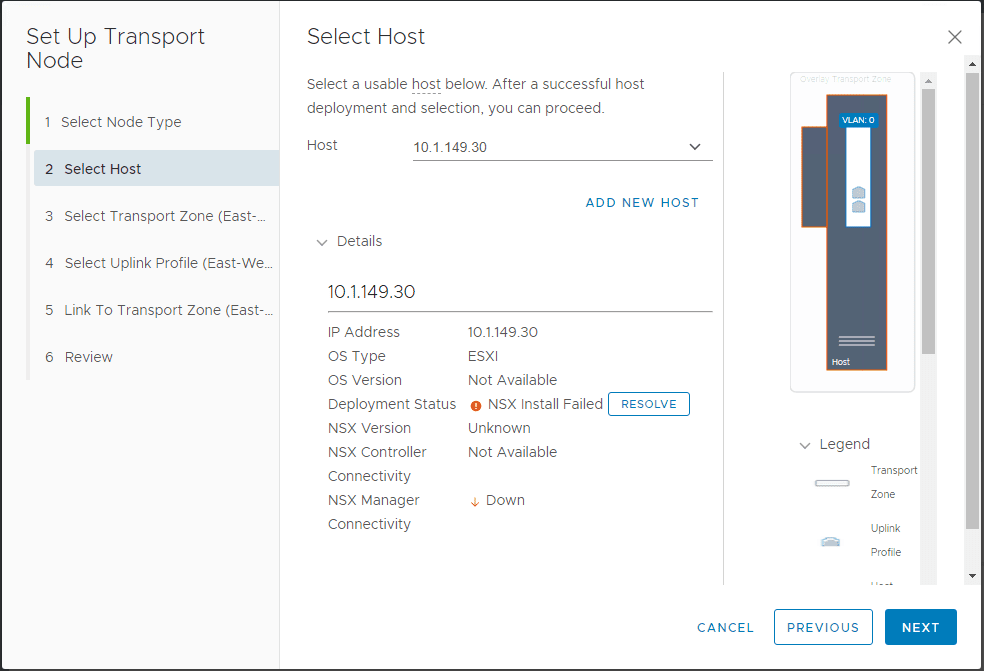
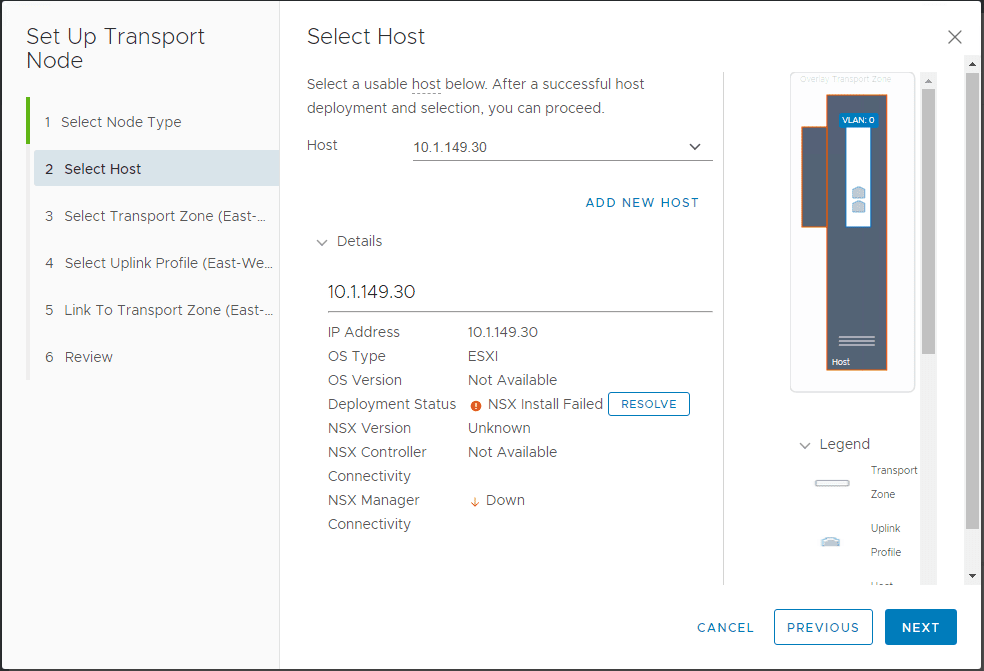
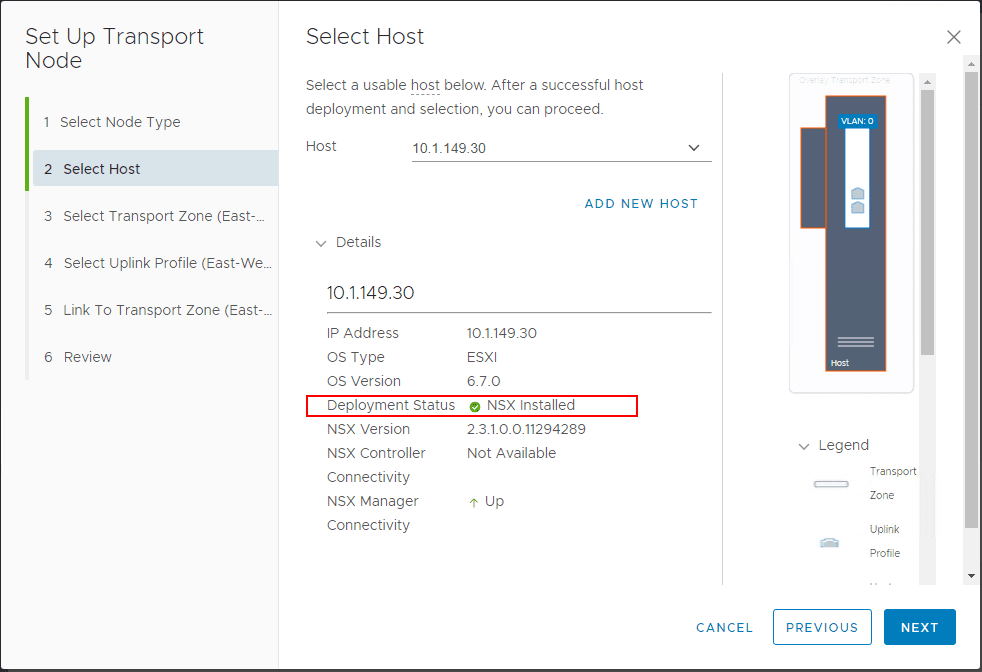
In installing the NSX-T components on a host, the installation of the components failed as you see below – “NSX install Failed“.
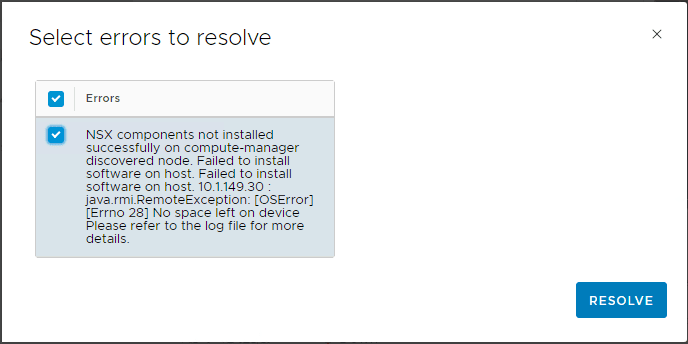
In hitting the Resolve button on the screen above, you see the underlying reason for the failure of the process. “NSX components not installed successfully on compute-manager discovered node. Failed to install software on host. Failed to install software on host. 10.1.149.30. java.rmi.RemoteException: [OSError][Errno 28] No space left on device. Please refer to the log file for more details.
Looking at the esxupdate.log on the ESXi host itself, I saw the following in the log:
2019-01-29T16:37:43Z esxupdate: 2101264: HostImage: DEBUG: installer BootBankInstaller failed: [Errno 28] No space left on device. Clean up the installation.�
2019-01-29T16:37:43Z esxupdate: 2101264: HostImage: ERROR: Failed to send vob install.error: [Errno 12] Cannot allocate memory�
2019-01-29T16:37:43Z esxupdate: 2101264: vmware.runcommand: INFO: runcommand called with: args = 'localcli system visorfs ramdisk list | grep /stageliveimage && localcli system visorfs ramdisk remove -t /tmp/stageliveimage', outfile = 'None', returnoutput = 'True', timeout = '0.0'
VMware ESXi Error No Space Left On Device Resolution
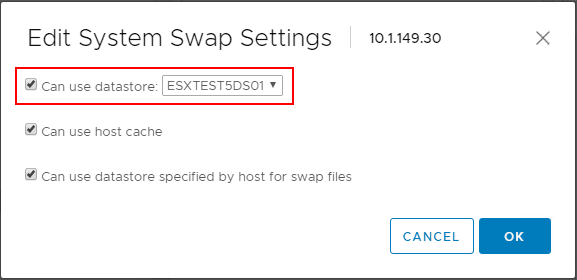
The resolution in my case was to allow the System swap file location to use a local datastore on the ESXi host. To do that, under the context of the host, navigate to Configure > System Swap > Edit.
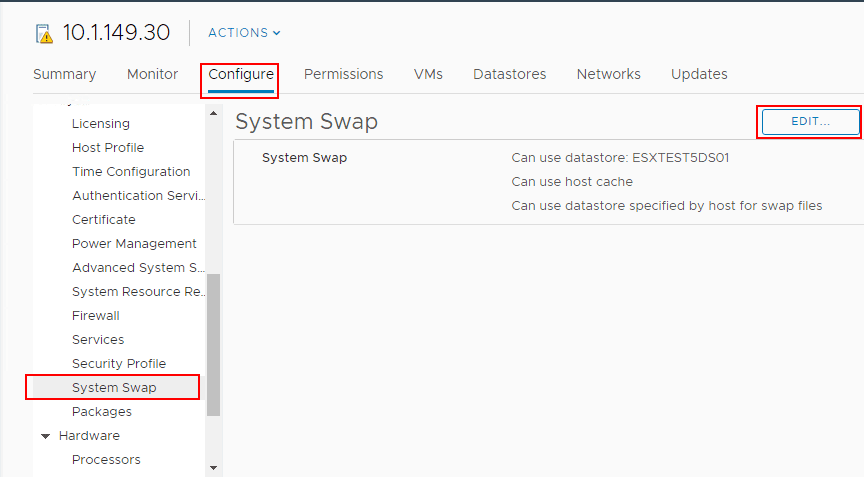
Under the Edit System Swap Settings select the checkbox to Can use datastore:<your datastore> and choose the datastore you want to use. After doing this, I rebooted my nested ESXi host to ensure the settings were correctly recognized.
General Information Regarding VMware ESXi Swap File Location
In case you are interested in information on the VMware ESXi swap file location, VMware has a KB covering this topic called About System Swap located here: https://docs.vmware.com/en/VMware-vSphere/6.7/com.vmware.vsphere.resmgmt.doc/GUID-56608D3C-3C93-4D03-B565-172C08478EA3.html
What is the System Swap anyway? Per the KB:
-
System swap is a memory reclamation process that is used to take advantage of any unused memory that may be available across the entire system.
-
System swap allows the system to reclaim memory from memory consumers that are not virtual machines. When system swap is enabled you have a tradeoff between the impact of reclaiming the memory from another process and the ability to assign the memory to a virtual machine that can use it. The amount of space required for the system swap is 1GB.
-
Reclaimed memory is written to background storage after it has been taken out of memory. Of course reading from background storage is much slower than reading from memory, so you must be careful when and where swapping is used from background storage.
-
The Preferred swap file location is where ESXi determines automatically where the system swap is to be stored . This decision can be aided by selecting a certain set of options. The system selects the best possible enabled option. If none of the options are feasible then system swap is not activated.
The available locations are:
-
Datastore – Uses the datastore specified. Please note that a vSAN datastore or a VVol datastore cannot be specified for system swap files.
-
Host Swap Cache – Allow the use of part of the host swap cache.
-
Preferred swap file location – Allow the use of the preferred swap file location configured for the host.
Final Thoughts
If you are perhaps having issues with pruned down, nested ESXi host instances in a lab environment and you are having disk space errors, the swap file could very well be the culprit. In my case, the VMware ESXi Error No Space Left On Device Installing NSX-T Components was indeed related to the swap file location being the “preferred swap file location” instead of utilizing a datastore. Once I swapped over to using the datastore, I was able to successfully install the NSX-T components.


