With many today either upgrading or planning on upgrading their VMware vSphere 6.0 generation clusters to 6.5 Update 1, most are probably starting to form a game plan to get clusters upgraded. Of course, the first thing that has to happen as with every vSphere upgrade, you have to get your vCenter Server 6.5 server in place. For most this will mean upgrading their VCSA 6.0 appliance to a VCSA 6.5 U1 appliance. We have detailed the upgrade process here. We have covered upgrading ESXi 6.0 to ESXi 6.5 as well in this post. Today, however, I want to cover a few concepts of things to do and look for when we Upgrade Dell VMware ESXi 6.0 cluster to 6.5 U1 with VUM.
Backup Dell VMware ESXi Host Configuration
It is always smart to backup your host configuration before you begin running the upgrade process. Yes, we can simply reload a host if the worst happens. However, recreating configuration, especially if we are using Standard vSwitches can be a pain.
We can backup Dell VMware ESXi host configuration by using PowerCLI. Using the commandlet Get-VMHostFirmware we can extract the configuration and save it off to a safe location. If something bad happens with the upgrade to ESXi 6.5 update 1, we can easily reload the host and then restore the configuration we extracted.
Use the syntax:
- Get-VMHostFirmware -VMHost <Host IP or FQDN> -BackupConfiguration -DestinationPath <Destination directory>
Use official Dell VMware ESXi 6.5 Update 1 Media
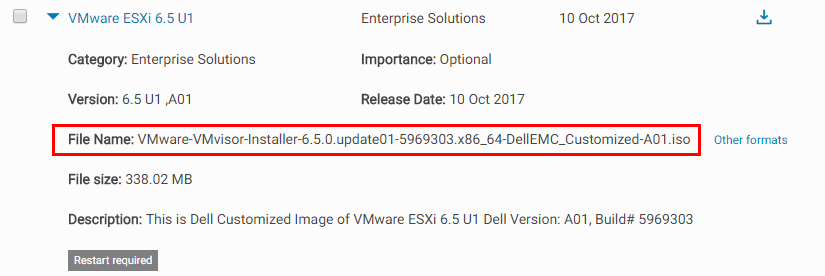
Most of the hardware vendors common in today’s enterprise datacenters produce a “customized ISO” of VMware ESXi that contains all the hardware specific device drivers needed to make sure there are no problems with the installation of the update. Dell is no exception to this as they produce customized ISOs for VMware ESXi. The latest version of the Dell Customized ESXi ISO can be found by searching for drivers and downloads for the service tag of your Dell PowerEdge server.
It is extremely important to use the customized version of the ISO from your vendor as this can drastically alleviate problems with the ESXi 6.5 upgrade. Check out support.dell.com.
Upgrade Dell Firmware for all devices
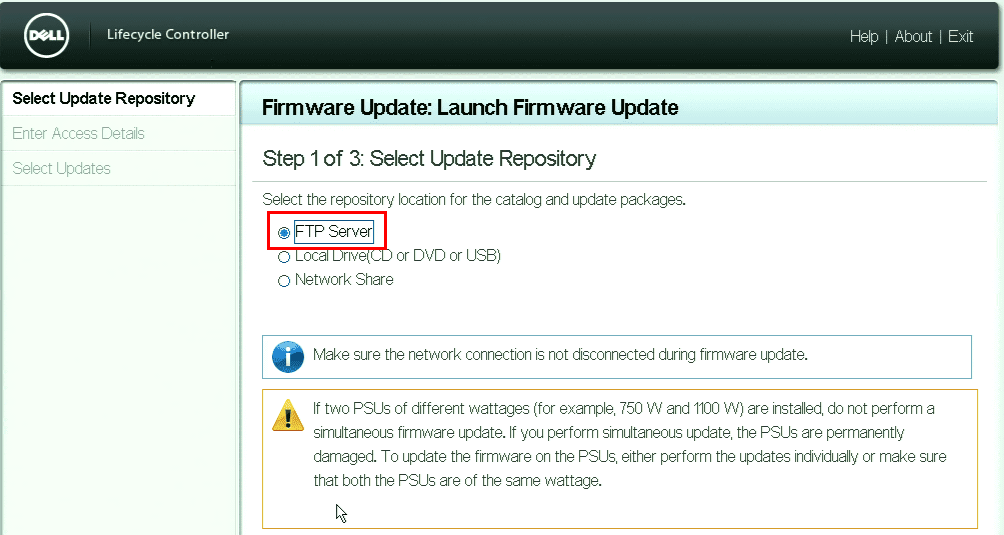
It is always best practice to upgrade your device firmware to the latest levels to make sure you have the latest bug fixes, etc. Additionally, the latest firmware ensures that you are in a supported condition if you call Dell up with an issue as most know the first question you are asked in a support situation is “have you upgraded the firmware?”.
Do yourself a favor and boot into the Lifecycle controller and run the available firmware updates for your system. The nice thing about the Lifecycle controller is you can pull the firmware updates directly down through the Dell FTP server, so no booting from a disk. The Lifecycle controller is intuitive and the upgrade process is fairly automated once you select and kick off the available updates.
Create a Dell Customized ESXi 6.5 Upgrade Baseline in VUM
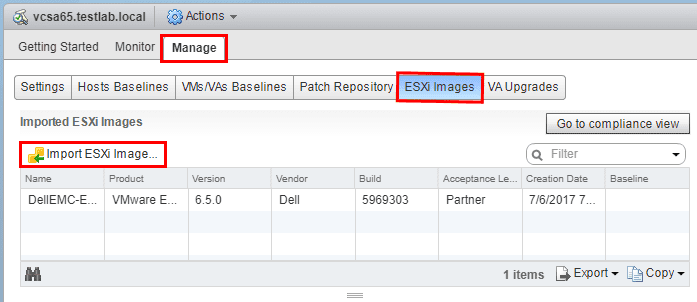
In Update Manager, when we Upgrade Dell VMware ESXi 6.0 Cluster to 6.5 U1 with VUM, we need to import our Dell Customized ISO into VUM and then create a baseline to apply against our host(s) in the cluster. This allows us to scan our hosts and remediate them based on the custom upgrade baseline. In Admin view go to the ESXi Images tab and then select the Import ESXi Image option.
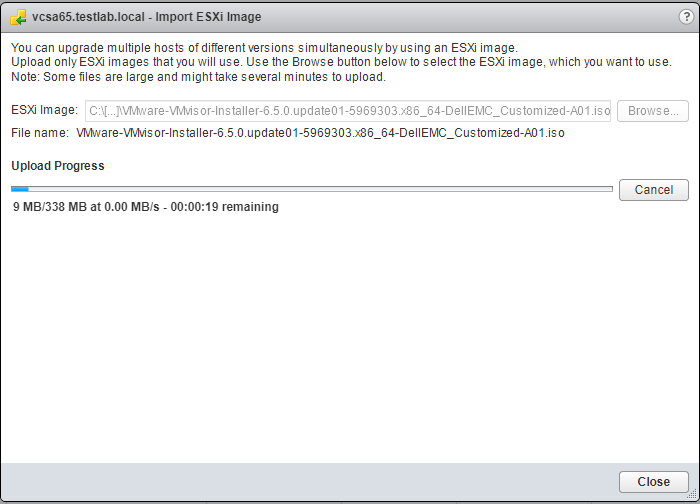
Browse to the image you want to import and begin the upload.
Create a Host Baseline to apply the new custom ISO
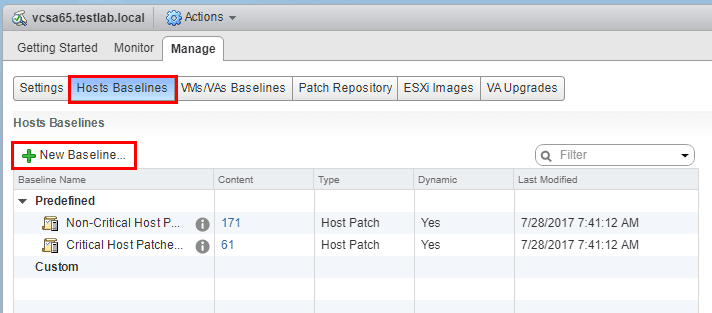
Click on the Hosts Baselines tab and select the New Baseline button.
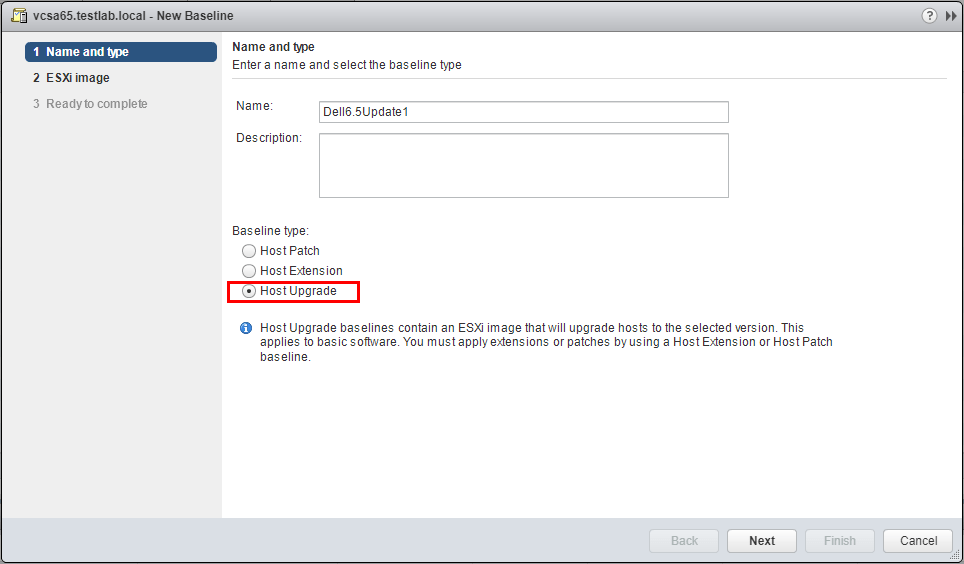
This begins the New Baseline wizard. Select the Host Upgrade radio button.
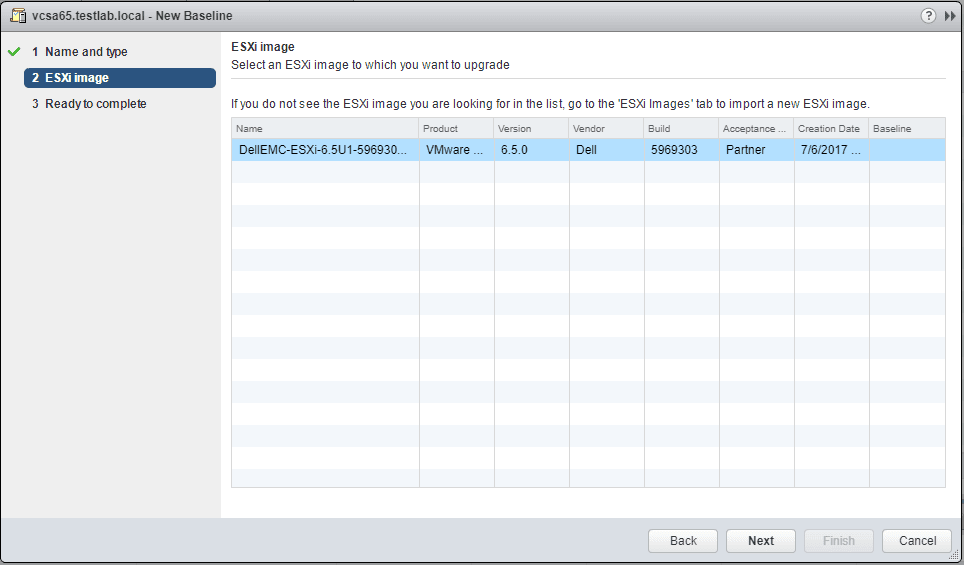
Next, we choose the ISO image that we just uploaded to VCSA VUM.
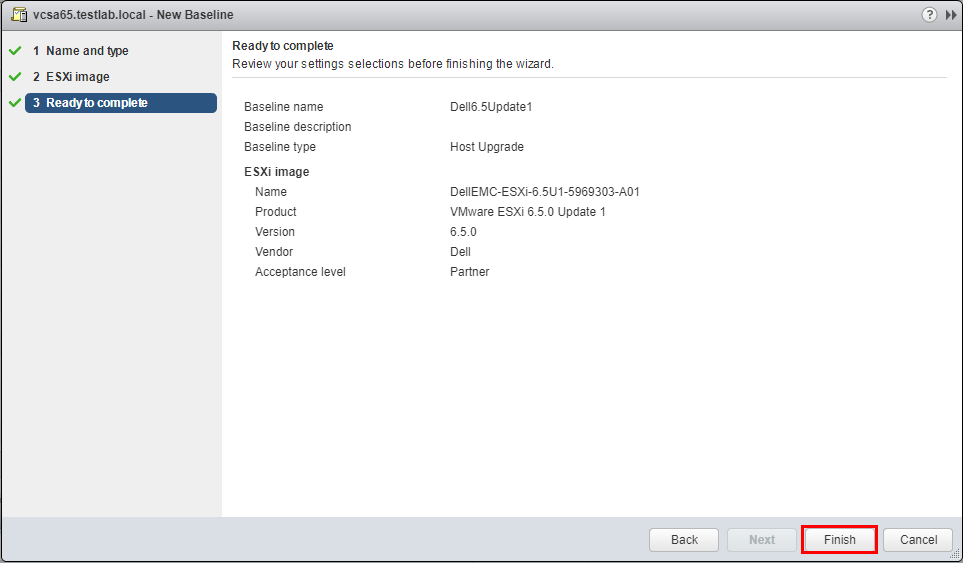
Finish out the new baseline.
Attach the Upgrade Baseline and Remediate the ESXi Host
We should see the newly created baseline available to us in the Hosts Baselines tab. When we Upgrade Dell VMware ESXi 6.0 Cluster to 6.5 U1 with VUM, we attach the baseline and remediate our hosts using the customized ISO.
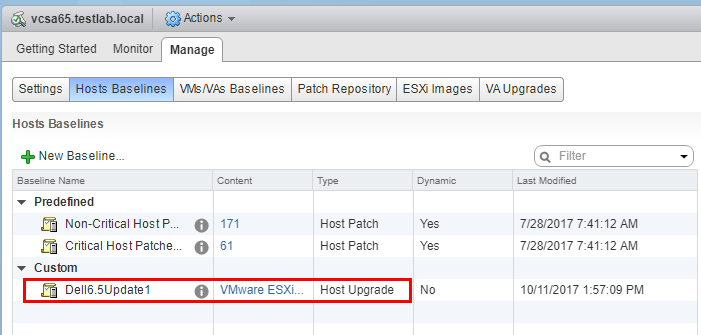
Now, we want to attach the baseline to our host. Click the Attach Baseline button.

Select the new Upgrade Baseline that was created.
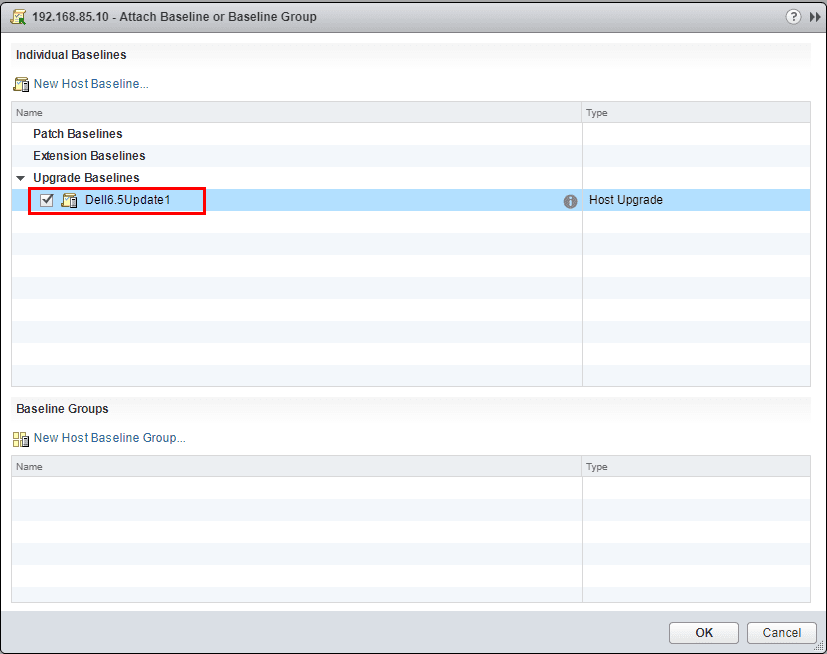
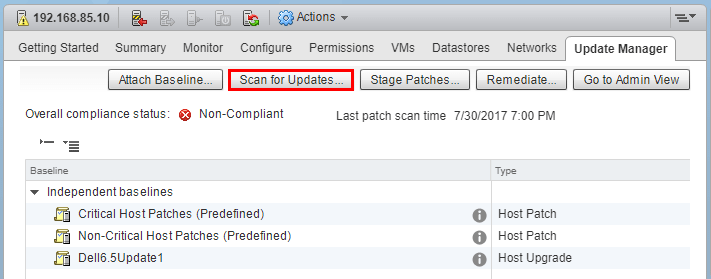
Now that we have attached the baseline, we need to scan the host. Click the Scan for Updates button.
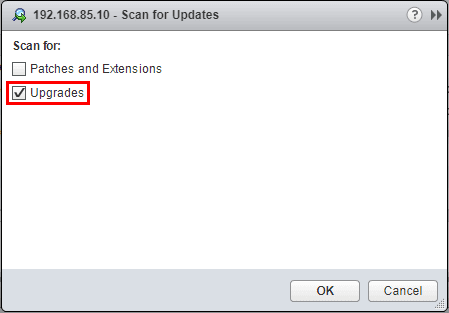
Select Upgrades.
As we scan the host now, we can see we are Non-Compliant on the new custom upgrade baseline, which is what we want. Select the Remediate button.
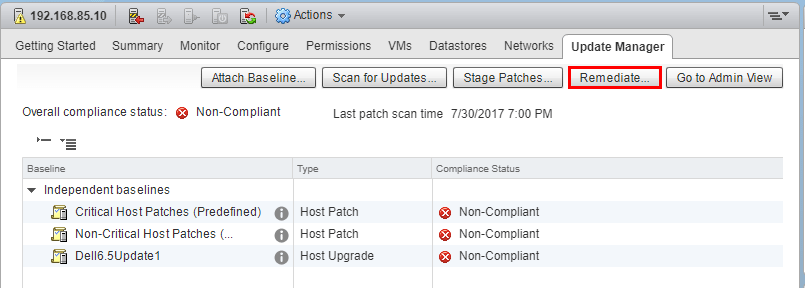
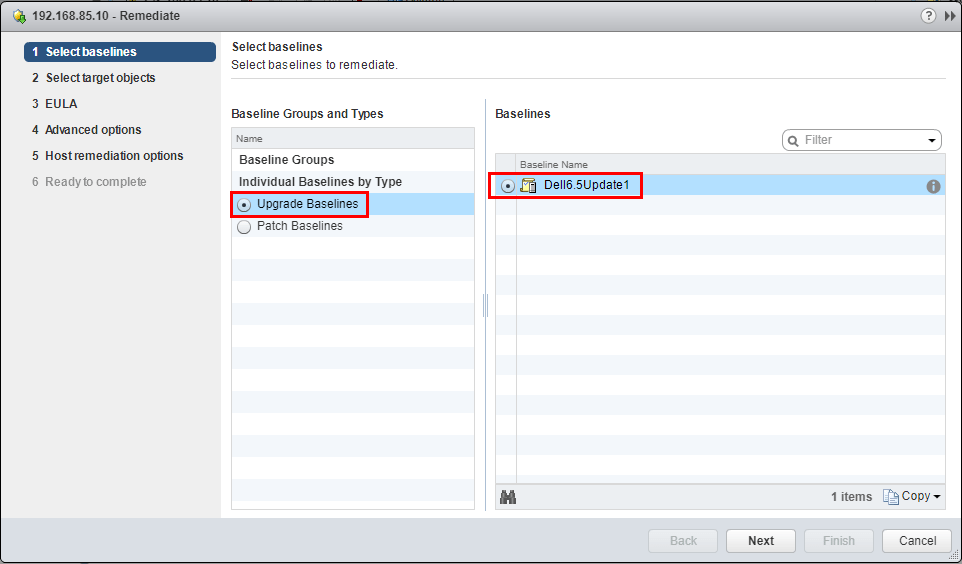
This launches the Remediate wizard. Select the Upgrade Baselines and select the custom upgrade baseline.
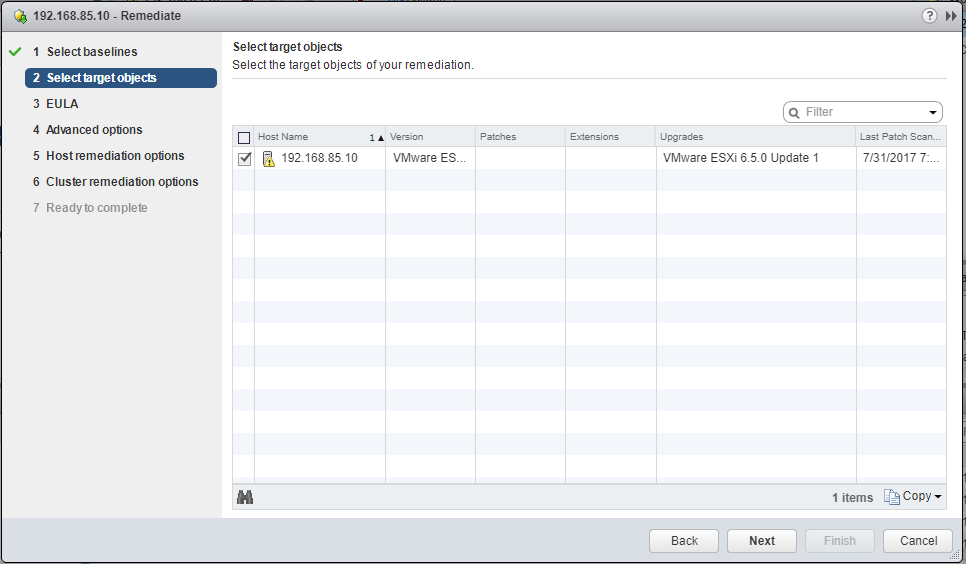
Select the host to remediate.
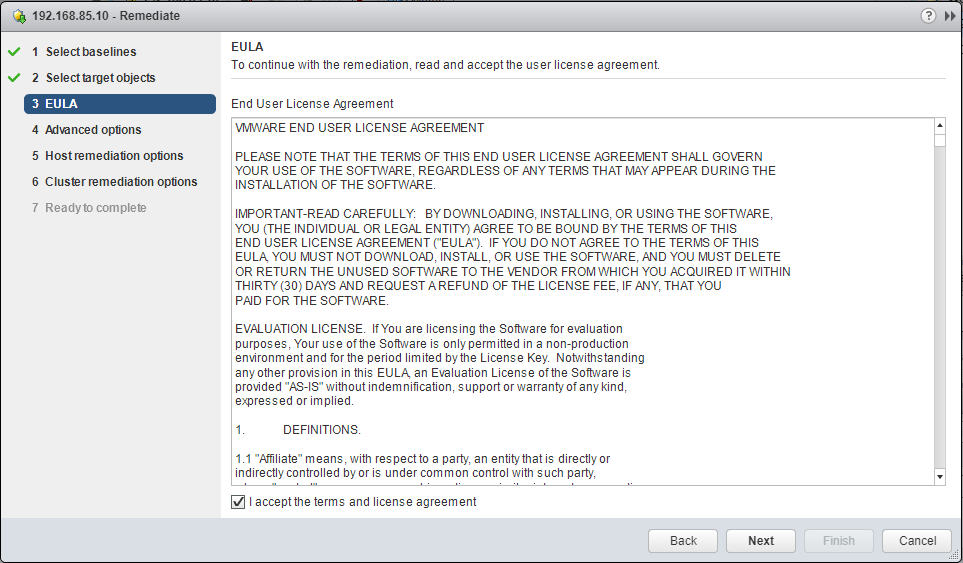
Accept the EULA agreement.
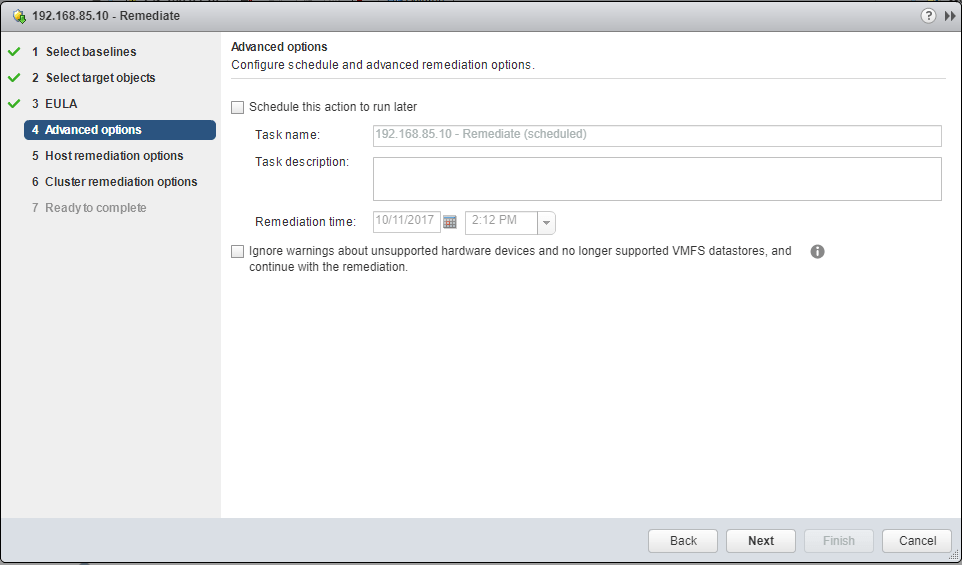
In the Advanced options we can choose to schedule the upgrade. So if we want to be hands off, we can schedule it and let it roll.
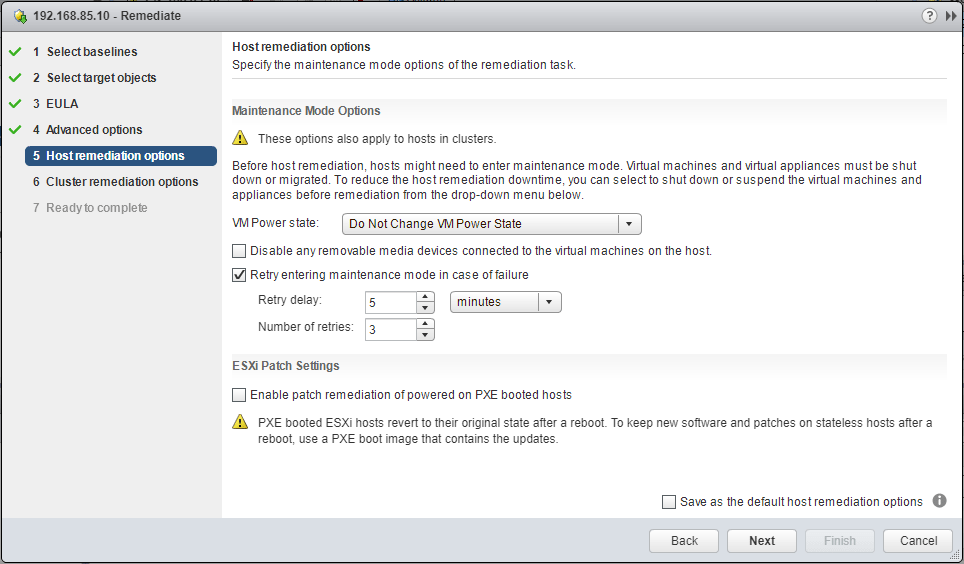
There are some great options in the Host remediation options. We can disable removable media, and select how we want to handle maintenance mode failures.
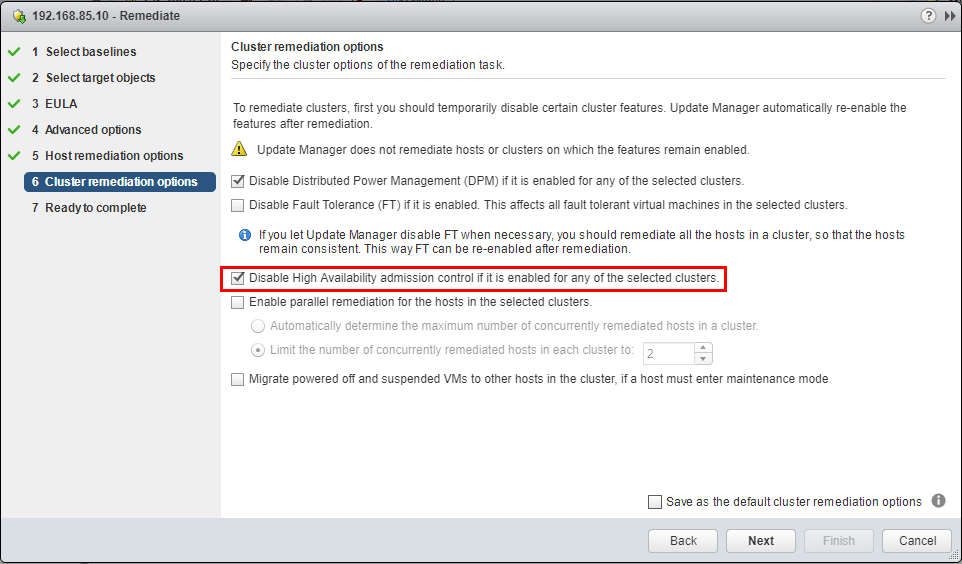
In a cluster configuration, you will want to Disable High Availability admission control if it is enabled for any of the selected clusters.
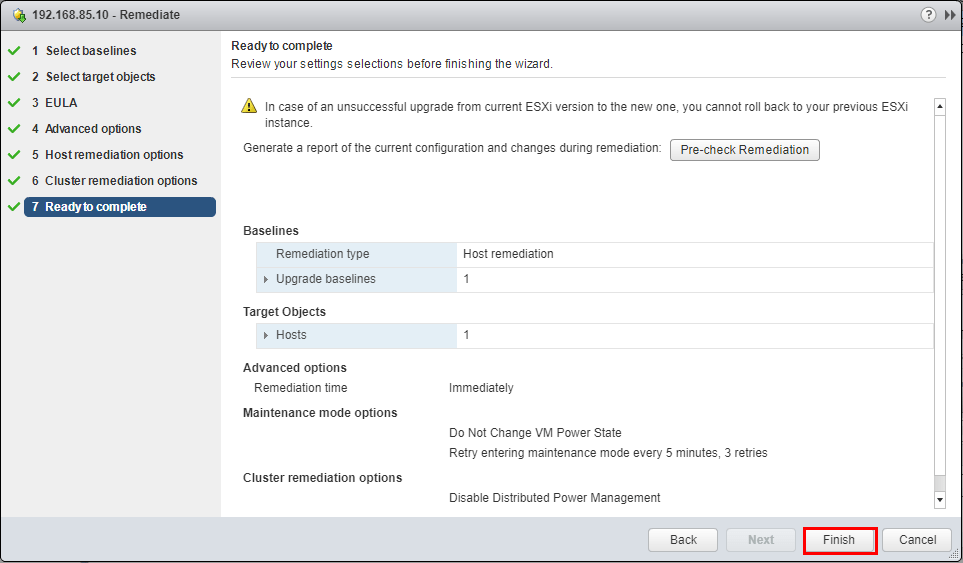
We are ready to complete the Remediate wizard.
Thoughts
Hopefully the concepts presented here will help anyone looking to Upgrade Dell VMware ESXi 6.0 Cluster to 6.5 U1 with VUM. The process is very straightforward and with a little preparation work such as backing up your configuration and upgrading all firmware, you can feel confident about the upgrade process. From my experience so far with the newly integrated VUM with 6.5 U1, it has been rock solid and I have not run into issues.
Google is updating how articles are shown. Don’t miss our leading home lab and tech content, written by humans, by setting Virtualization Howto as a preferred source.


