Change VMware NSX IP Pools after creating
In working with VMware NSX, one of the obscure little things you may run into after setting up IP Pools within the NSX configuration screens is changing a particular IP Pool. Static IP Pools are created if you want to use static IP address ranges to assign IP’s to controllers, VTEPs, etc. Alternatives are using DHCP or manually assigning addresses one by one. You may have noticed that if you create a static IP Pool there isn’t an obvious way to change that IP Pool. Maybe you want to add an IP to the range or make the range smaller. We can do this from the web client, but it is less than obvious where. Let’s take a look at how to change VMware NSX IP Pools after creating.
Change VMware NSX IP Pools after creating
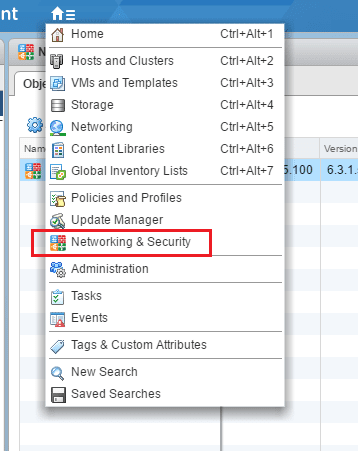
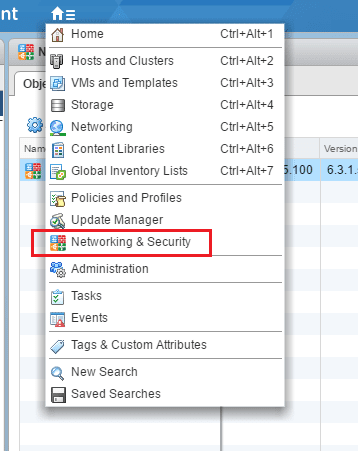
Navigate to the Networking & Security menu under your home menu.
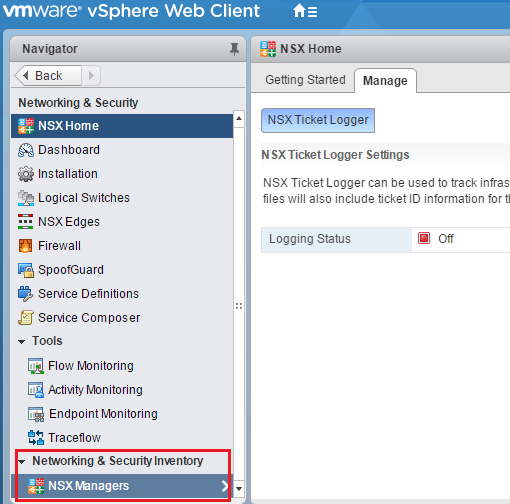
Notice at the bottom of the Networking and Security menu there is a menu item called Networking & Security Inventory. Click NSX Managers underneath.
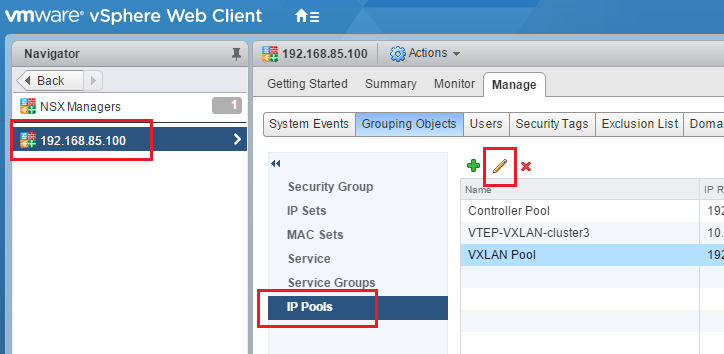
You should see under NSX Managers the IP address of your NSX manager. Click the IP of your manager and then click the IP Pools menu item. Once you click there, you will see all your IP Pools that have already been setup. Notice from this menu you can add, delete, or modify existing NSX IP Pools.
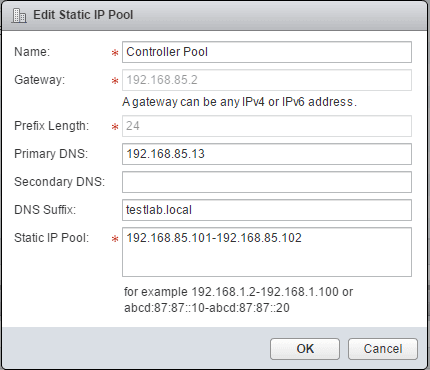
Clicking on the edit pen/icon, I can easily bring up an existing IP Pool created. Notice here I can rename, change DNS, add secondary DNS, DNS suffix, and then also change the start and end address for the Static IP Pool range.
Thoughts
Some of the menus in VMware NSX from the web client are a little non intuitive. The simple process of changing the address range in a static IP Pools is less than obvious as are other things in NSX. Hopefully this post on how to Change VMware NSX IP Pools after creating will help any who may be struggling to find where this is configured.


