In working on a DR project utilizing two Untangle virtual appliances, I had the need to setup a site to site VPN connection between the Untangle firewalls. The OpenVPN documentation is fairly decent on the Untangle site, however, the information regarding the site to site VPN is limited. I wanted to detail for you guys how to configure untangle site to site VPN. The process is fairly straight forward and you should be able to be up and running fairly quickly. I will detail some of my observations as well with the process and troubleshooting.
How to Configure Untangle site to site VPN
When we look at how to configure untangle site to site VPN, the site to site VPN is pretty straight forward to setup and requires you to setup one side as the “server” and one side as the “client”. Let’s take a look from the server side over to the client side and then back again to see the setup in action.
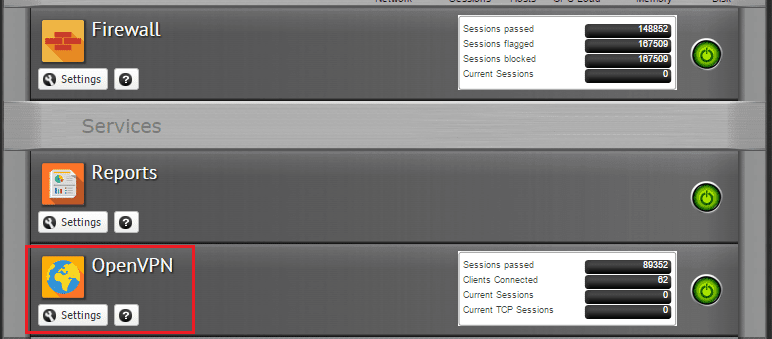
First things first, on both Untangle appliances, you need to add the OpenVPN app to your rack. Once you have it installed, you will see it in the appliance interface.
Server Side
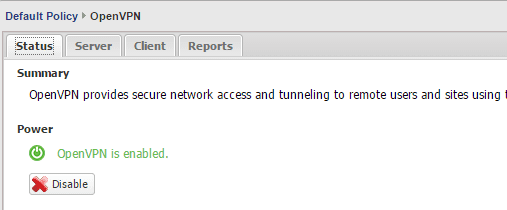
On the Untangle server, we will mainly concentrate on the status and server tabs. As you can see below, make sure OpenVPN is enabled.
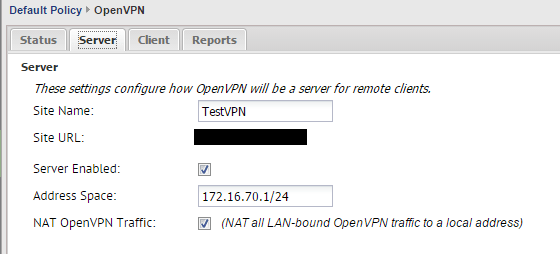
Next, on the server tab, we have several configurables.
- Site Name – Identifies your VPN server connection
- Site URL – This is not configurable and is taken from the Configuration >> Administration >> Public Address
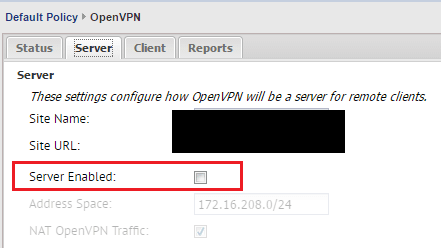
- Server Enabled – Make sure this is checked
- Address Space – Make sure this is a unique address space on your network on both sides.
- NAT OpenVPN Traffic – By default this is checked and NAT’s the LAN-bound VPN traffic to a local address
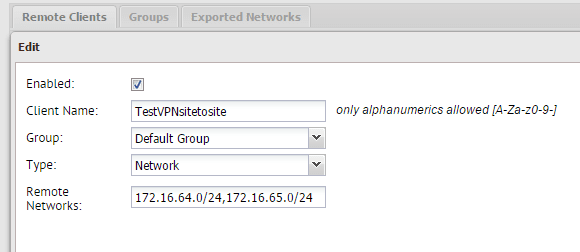
On the server tab underneath the section above, we have the Remote Clients tab on which we configure the “client” side of things. Click to Add a remote client.
On the Add screen, we can name our client, assign it to a group and specify the Type. On the Type, be sure to specify Network. In the remote networks field, you will want to list the networks on the client side that you want to be accessible from the server side of things.
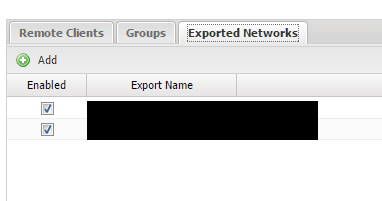
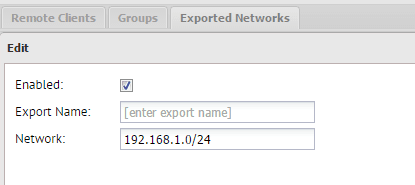
You can also set which networks get exported over to the client side with the Exported Networks tab.
If you click the Add button, you will be able to add subnets to export.
After you have everything set as you want it, you need to go back to the Remote Clients tab and download the client of the Client name you are setting up.
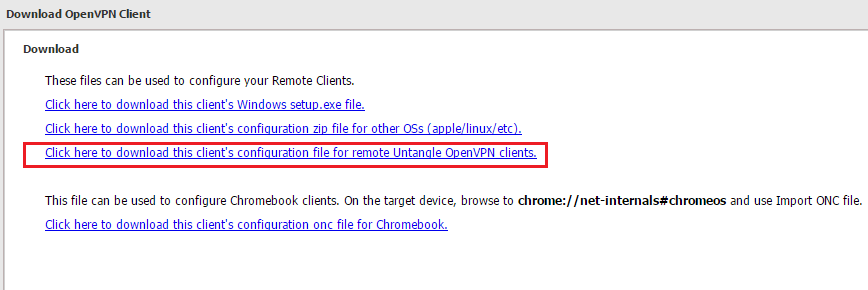
When you click to download the client, you need to select “Click here to download this client’s configuration file for remote Untangle OpenVPN Clients“. This will be a .zip file for configuring Untangle.
Client Side:
On the client side, you notice on the Server tab, we don’t have the Server Enabled checked.
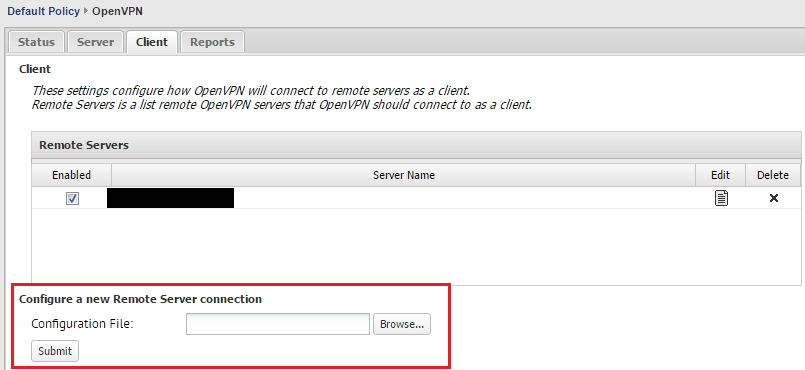
On client side, we are concerned with the Client tab intuitively. Notice at the bottom of the screen, we have a Configure a new Remote Server connection option to browse to a configuration file. You guessed it – this is the zip file that we downloaded above for the Untangle format. You don’t have to unzip the file, just upload it as is and the console will read it in. Make sure also, the box for Enabled is checked (which it is by default).
A note here – one of the frustrations I had in figuring out what was actually going on here is that I assumed there was some sort of connect action I needed to initiate to actually get the VPN to connect. This is not the case however. As long as the Enabled box is checked and the OpenVPN module is enabled, it will start trying to connect on its own.
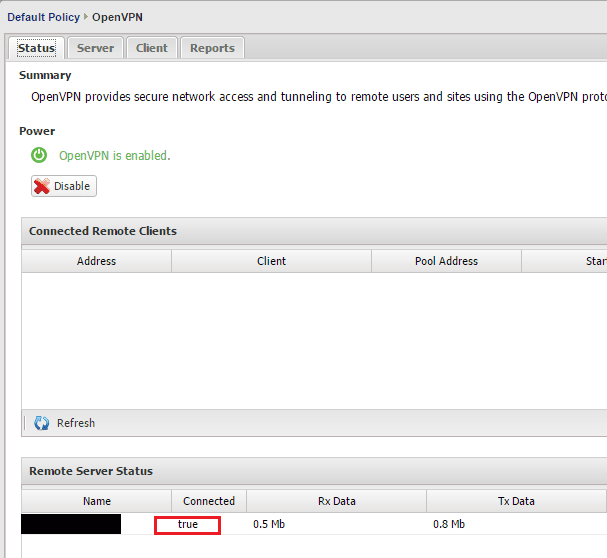
On the client side, once you check the Enabled box, go back to the Status tab and you should see the Remote Server Status change to true.
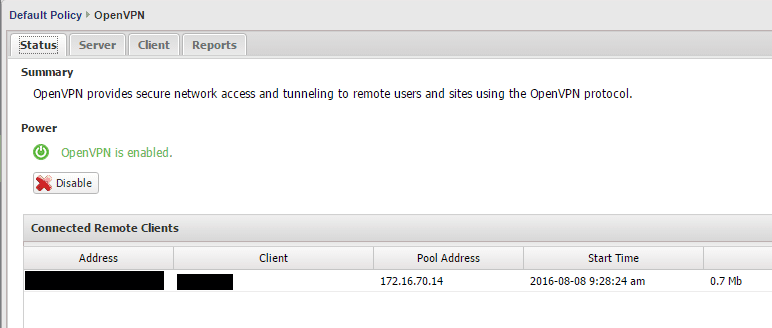
On the server side, you should see your client Untangle box show up in the Connected Remote Clients.
Troubleshooting:
The main issue I had with the OpenVPN server and client is that when you get to the point of establishing the connection, there are not any visible troubleshooting messages that are available to see what is actually going on. If you download the OpenVPN client for Windows, you will see what it is actually doing in the process. The Reports tab can be helpful, but only at a certain point in the process.
Also, make sure you have port 1194 open between your Untangle boxes as this is the OpenVPN port used. It is helpful to use iftop if you are wanting to see ports trying to establish connection on your various interfaces. I used this a lot to see if the Untangle client was communicating or trying to communicate with OpenVPN.
Another thing I noticed, in my environment, it took several moments for the VPN to actually link up. So it wasn’t instantaneous.
Final Thoughts:
The OpenVPN in Untangle is a great way to establish site to site VPN between Untangle boxes. It is also free as opposed to the IPSec VPN app which is one of the pay for modules. However, there are some frustrations with visibility in troubleshooting information. All in all, I found the VPN client worked once I figured out the idiosyncrasies of the module and GUI interface. Hopefully this how to configure untangle site to site VPN post will help others step their way through the process.
Google is updating how articles are shown. Don’t miss our leading home lab and tech content, written by humans, by setting Virtualization Howto as a preferred source.






Hi
Thank you for a great howto.
I am struggling with one issue.
The client untangle network can ping all the hosts on the serverside exported networks.
But if a host on the server side exported networks ping a host on the client side network it is unreachable.
Traceroute from exported networks also stop on the server side untangle and is not continueing to the cleint untangle.
Have you seen this before?
Allow pings is on on both untangles.
Regards