How to Transfer an ISO file to ESXi using Veeam
One of the tasks in administering or using VMware ESXi server is transferring an ISO file to the server for use in loading operating systems. This is not a difficult task when you have the right software to work with. Veeam Backup and FastSCP is the industry leader in transferring files to your ESX/ESXi boxes. Veeam FastSCP is now part of the Veeam One Backup software for both VMware and HyperV, however, you can also still download the standalone FastSCP software for your VMware environment if you simply want the SCP tool. The file copy performance with FastSCP is many times that of its competitors and it has always been rock solid for us here at Computer-howto.
After installing Veeam, you will need to add your ESX/ESXi or vSphere server to the Veeam management console.
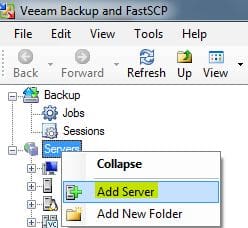
Right-click your “Servers” group and click “Add Server”
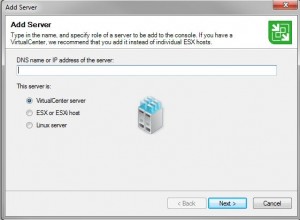
As you can see below, you can either enter VirtualCenter Server (vSphere now), ESX or ESXi host, or Linux Server
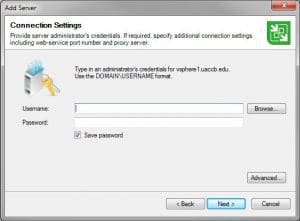
You will need to enter the username and password that will allow Veeam to connect to your host or vSphere environment
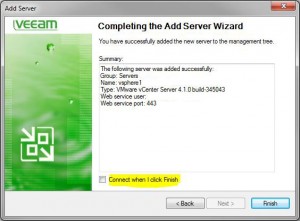
You can choose to connect when you finish the wizard below
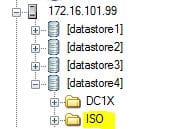
Once added, we can then copy files to our destination host, etc. We simply created a folder called ISO in one of our datastores that exists on our ESXi box. You can choose to place the file anywhere you would like here, but it needs to be somewhere that exists on a datastore that can be seen.
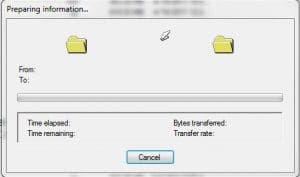
Then you can simply drag and drop to this folder from a local folder on your hard drive or network drive that is available from your Computer. Veeam will then start the copy process which won’t take that long for even several gigs worth of ISO on a gigabit network.


